It will be spring soon and with spring comes the annual AVAM Kinetic Sculpture Race.
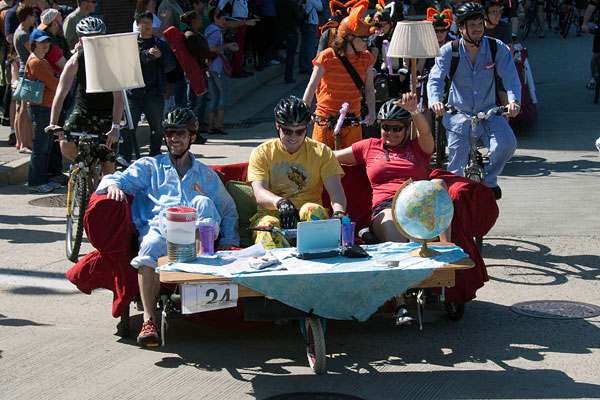
Waayyyyyy back in 2011 the DC Couchsurfing group got together to raise money, design and build an entry for AVAM’s Kinetic Sculpture Race (KSR). Friends used their skills to help with different aspects from fundraising, cad drawing to fabrication. We even had team members donating bikes for parts.
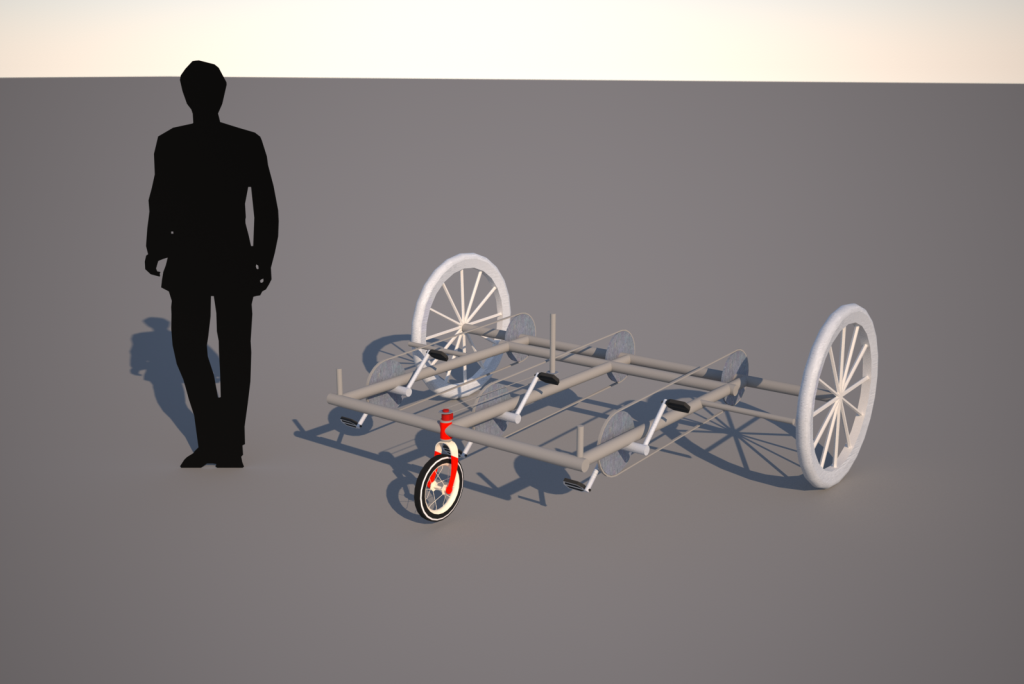
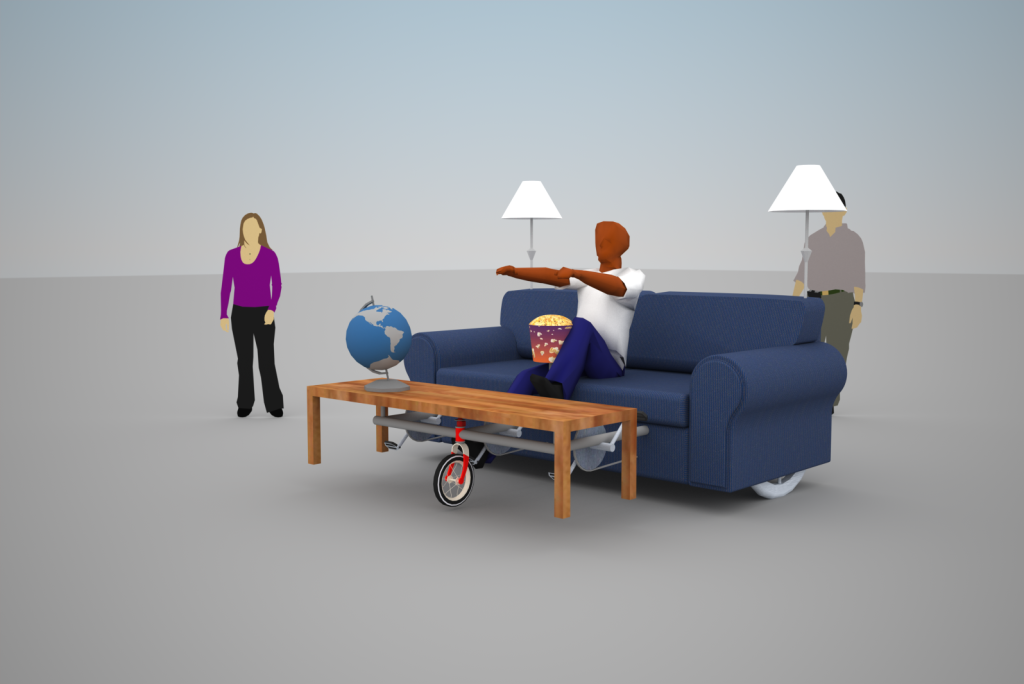
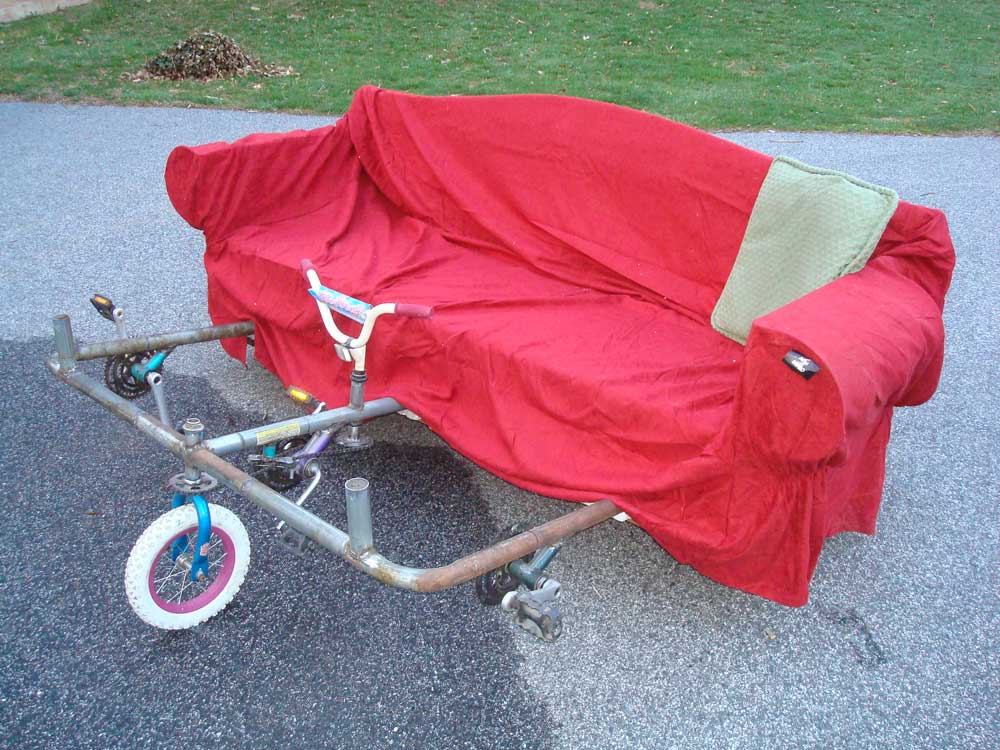
While pretty simple looking on the outside, the couch was pretty complex and took us a few months to build. This was a KSR race entry after all and it needed to be able to tackle the city by land and sea. It had to float. On top of the tubular steel frame (made from an old trampoline), we fitted a 12″ thick 3’x 6′ block of styrofoam.
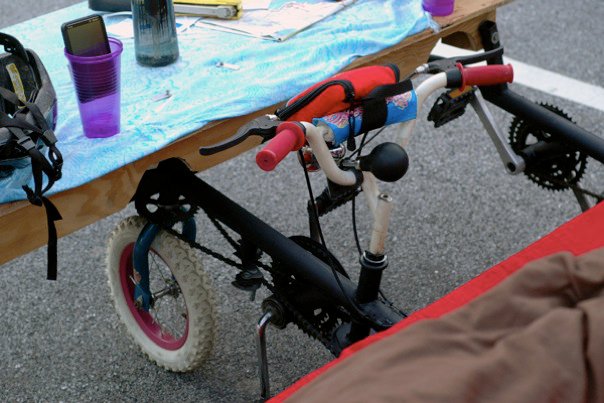
Steering is pretty neat as we were trying to hide the front wheel under the coffee table the best we could.
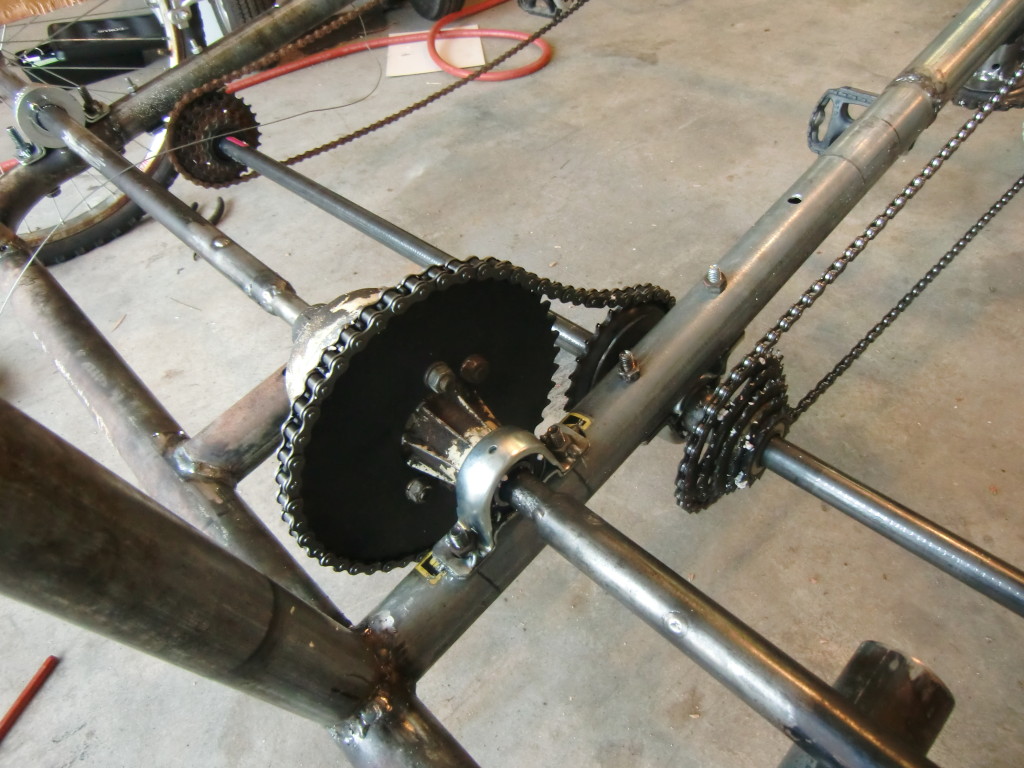
Three people can ride at once. Power goes from the three cranks to an idler with freewheeling gears. This makes it so riders can rest and take turns. Power is then transferred via a beefier farm chain to a lawnmower differential so we can get this thing to turn.
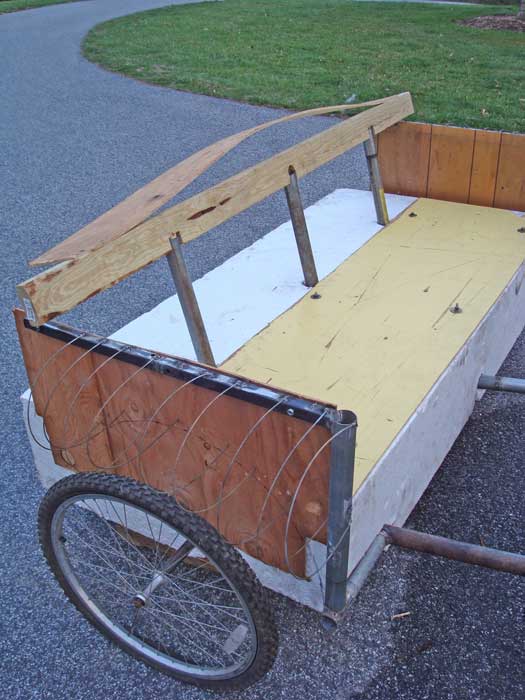
While we were off to a great start, our day ended early. We bent an axle, likely during the enthusiastic Le Man’s start, and that eventually led to a broken axle at the bearing. We packed up about a mile in and drank away our sorrows in the very neighborhood Siri and I would move to a year later.
It wasn’t all a waste though. Our breakdown was spectacular enough that we won the coveted Golden Dinosaur Award that evening. Those of us who were still upright had gone to the ceremony for the free beer and were pretty well sloshed when we went up to receive our statue.
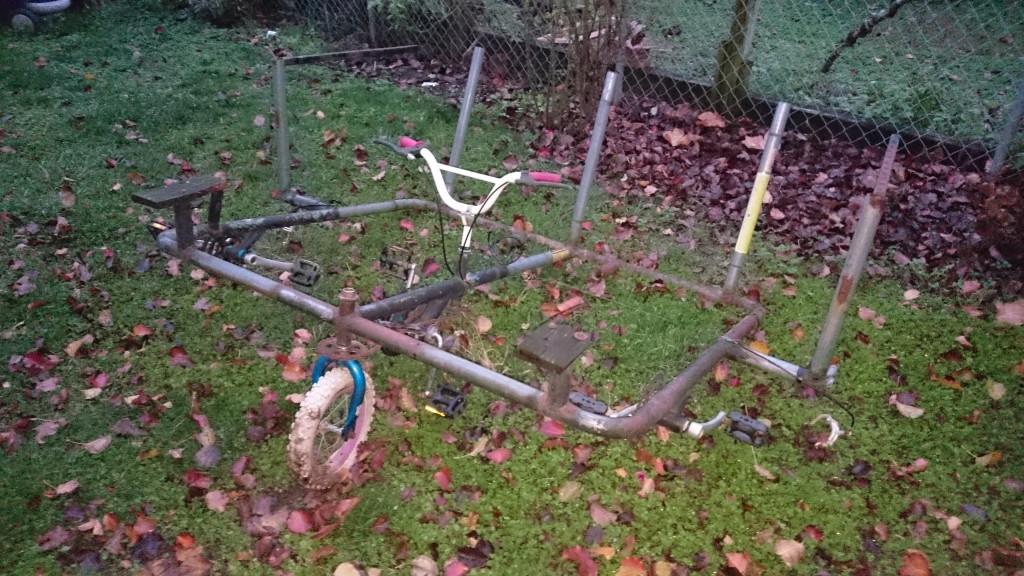
After a few years sitting in the bushes I finally have the space and tools in Baltimore to resurrect this machine. We can fix it.. we can make it better. I’ve brought it down and am announcing our 2016 entry. We’re hoping to find support from the local bike and couchsurfing communities.
Things we’d like to accomplish:
Move bearings outboard to be closer to the wheels.
Repair broken axle.
User stronger wheels with better brakes (moped wheels?)
Re-grease cranks as they’ve sat in the elements for 5 years.
Possibly add derailleurs so we can have multiple gears.
Siri and I met through Couchsurfing (happy hours) in DC. Hosting guests has been an important part of our lives before and since. When we bought a house, we knew we needed a guest room to host CSers as well as friends and family. We were its first guests moving into the 3rd floor outside of Iris’s room as we finished the 2nd and 1st floors below.
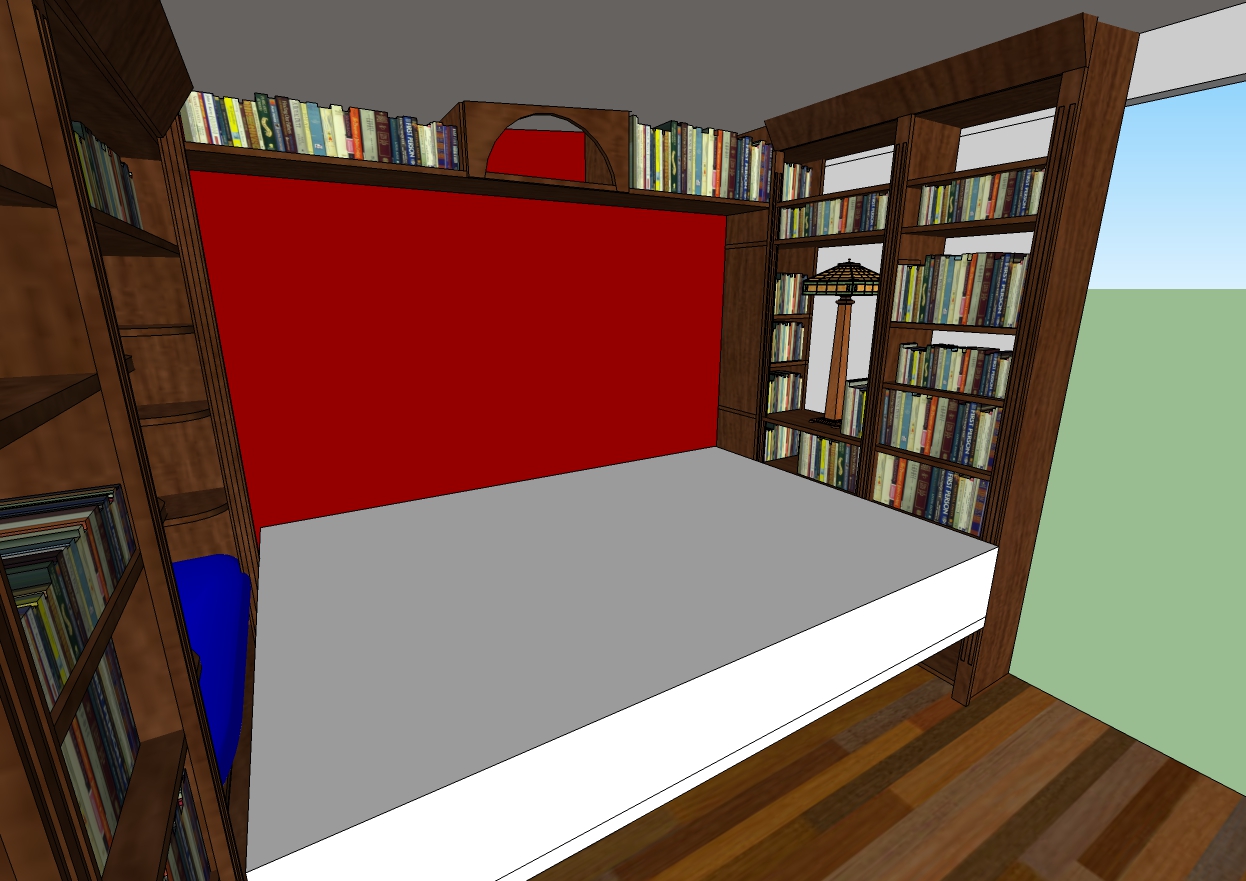
With so little square footage, we needed it to be a flexible space as well. The idea was and old style study / library. The shelves will store our books about travelling, oddities collected while travelling, and Baltimore history books for guests to learn about our city. There will also be a huge map of the world which will fold down, revealing a full size mattress for guests. Everything you need for your adventures.
We’ve been storing 4×8 sheets of furniture grade plywood in the shack for months. Part of spring cleaning was to put it to use and get this room built. It’s not cheap though. About $50 per sheet and I didn’t want to ruin any making up my mind. As usual, its time for Sketchup:
It looks like everything should be about 12″ deep in order to fit the mattress in between with a few inches to spare. This should also save on materials as well as a 4×8′ sheet cuts in to 12″ sheets very efficiently.
Not quite done in this photo, but this is the last of it. I’ve pointed or relaid every brick in this 10×5′ column from the roof to below and including the basement floor.
Finally I’m done bricks. I finished Sunday morning. I started repointing these bricks September 2013. Its been nearly 600 days…. not continuous, but it has been the dusty cloud looming over us for a long time. 19.5 months. Time for something else for a change. Luckily spring is here, the weather is great and we can do things outside. Last weekend I did these 2 small projects.
First up was our herb garden. Last year we started a few, but this year we want way more.
Second task was to put up the weather station Siri’s dad had gotten us for Christmas. What old man’s life is complete without a wireless weather station?
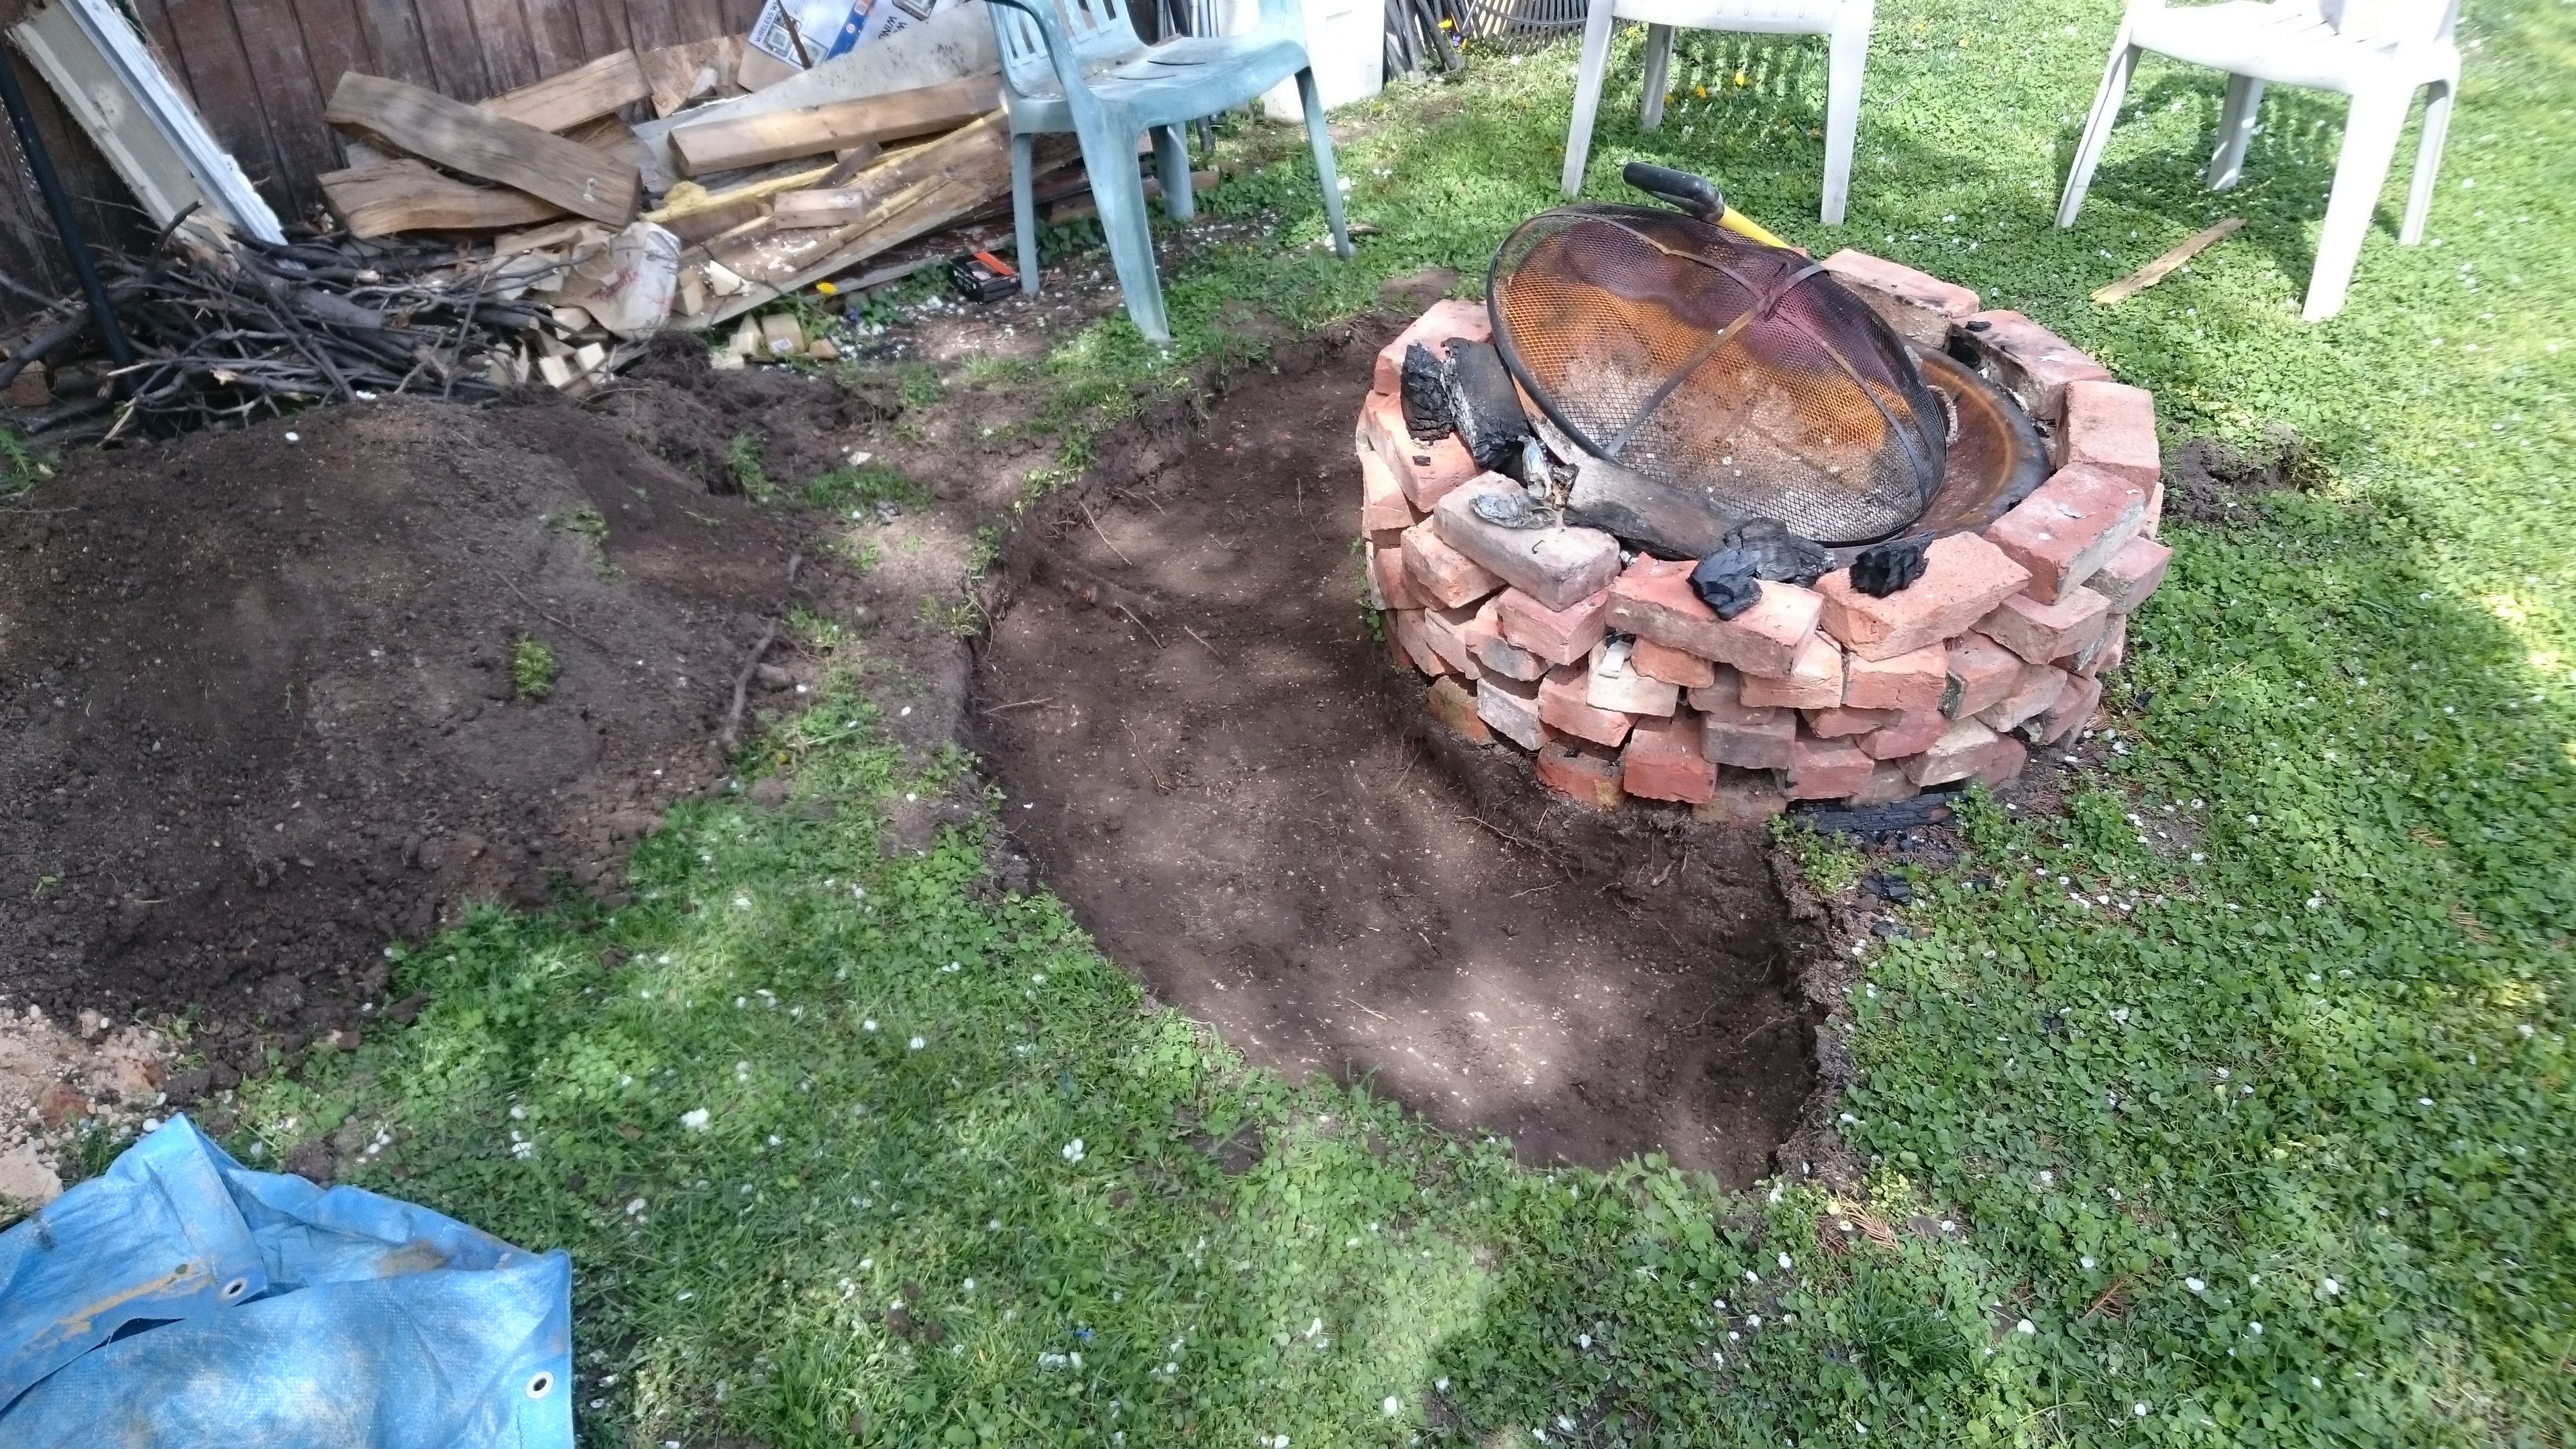
Now that we’re finished with the repointing, what are we going to do with all the leftover brick and sand? Last year it was pretty fun to have beers with friends around our fire pit. Why not make it better? We remembered killing a patch of grass under and around the fire that didn’t really grow back. That led to a muddy area around the fire and muddy feet going into the house. Also, our old fire pit had rusted through completely leaving only the outer ring. New fire pit was a lucky but easy find from Adam: a massive old wok set in our old rusted out fire pit and surrounded by bricks. Now how about the rest?
I’ll dig out a circle around the fire pit…
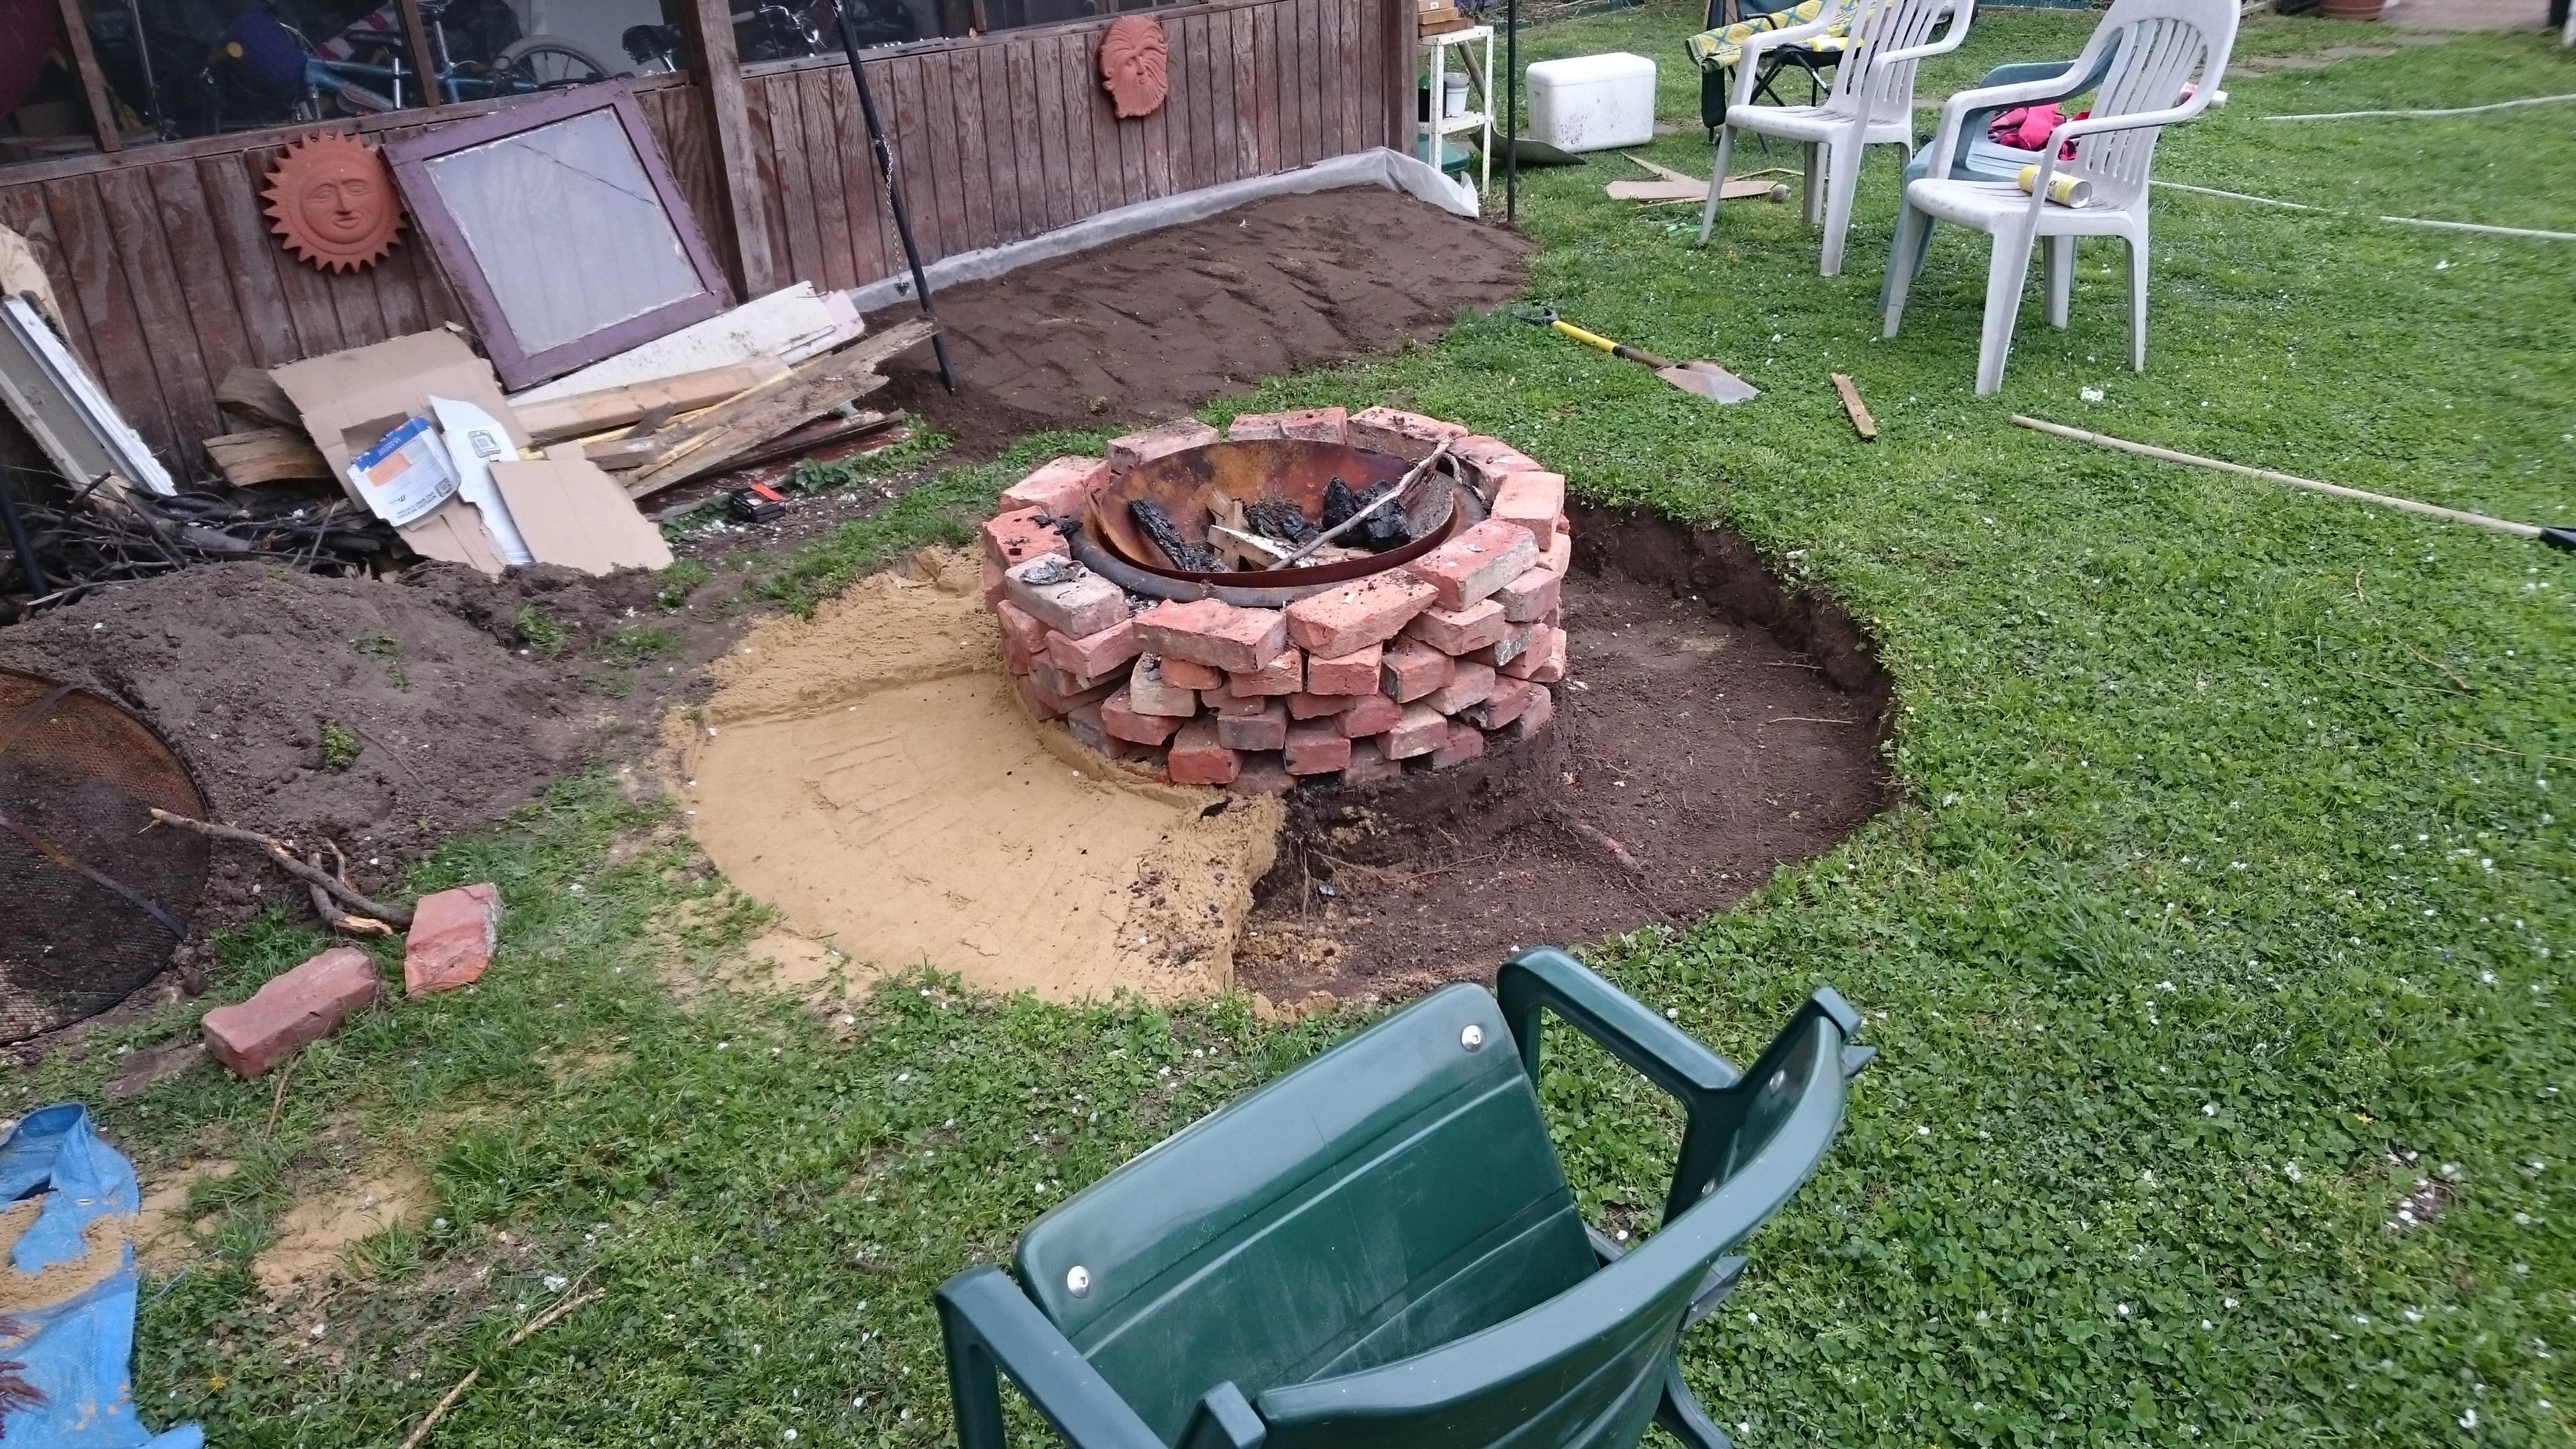
I’ll fill it with the leftover sand…
and I’ll temp in bricks in concentric rings and fill in all the gaps with sand.
But now I have all this dirt! I think I’ll make more garden space next to the shack. I can also use it to grade in a little fall so water flows away from the shack when it rains. Should be pretty easy for the grass to grow back in too, but I’ll throw down some seeds to help it along.
It was all worth it though. Its better to sit around than ever.
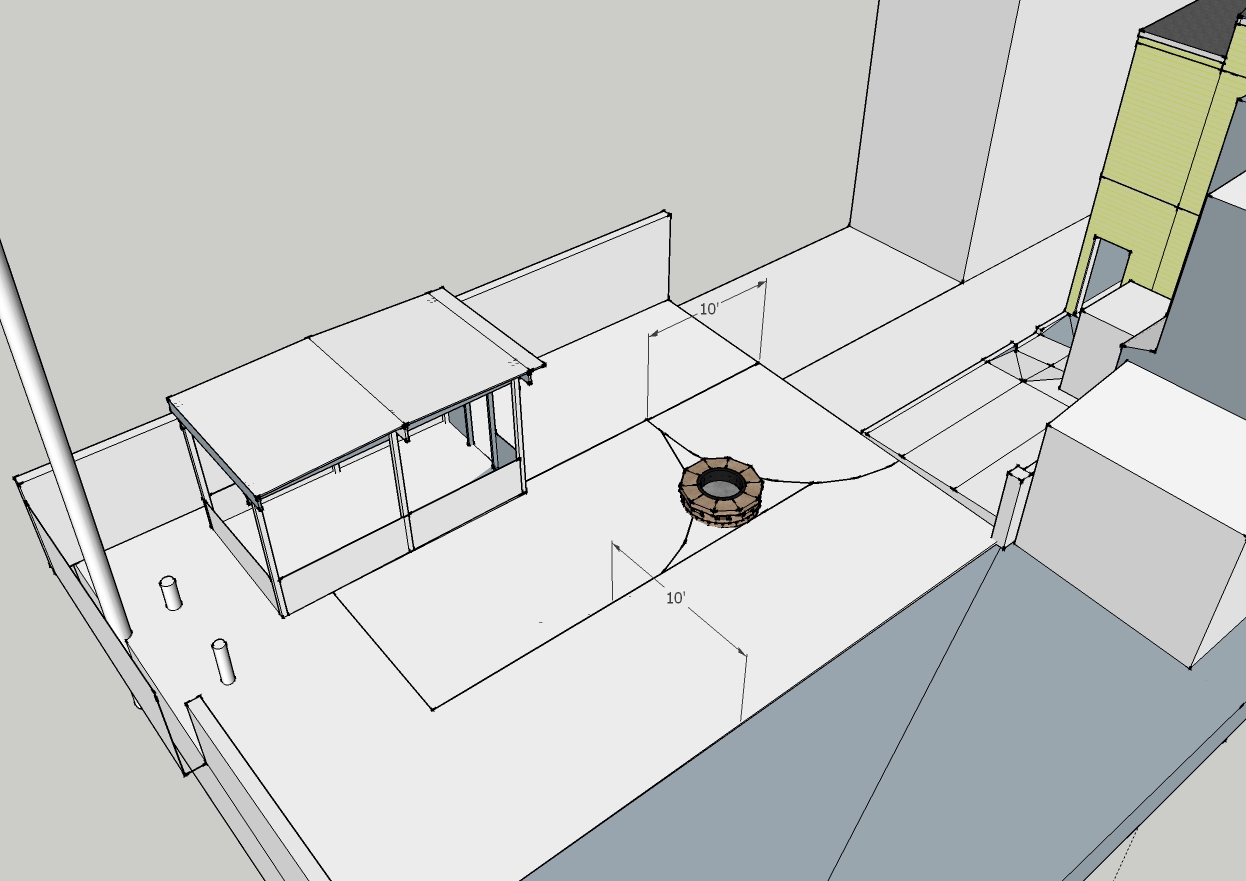
Baltimore code (308.1.4) says “Charcoal burners and other open-flame cooking devices shall not be operated on combustible balconies or within 10 feet (3048 mm) of any combustible construction or property line.”
Luckily we’ve got this big yard and, as you can see in this Sketchup drawing, we can get away with it in one little spot. We also need to be cooking because the rules for decorative fires says 15 feet. So while we have it in a different spot now, to keep the fire and noise further from the houses, we could move it if need be if someone raises a stink.
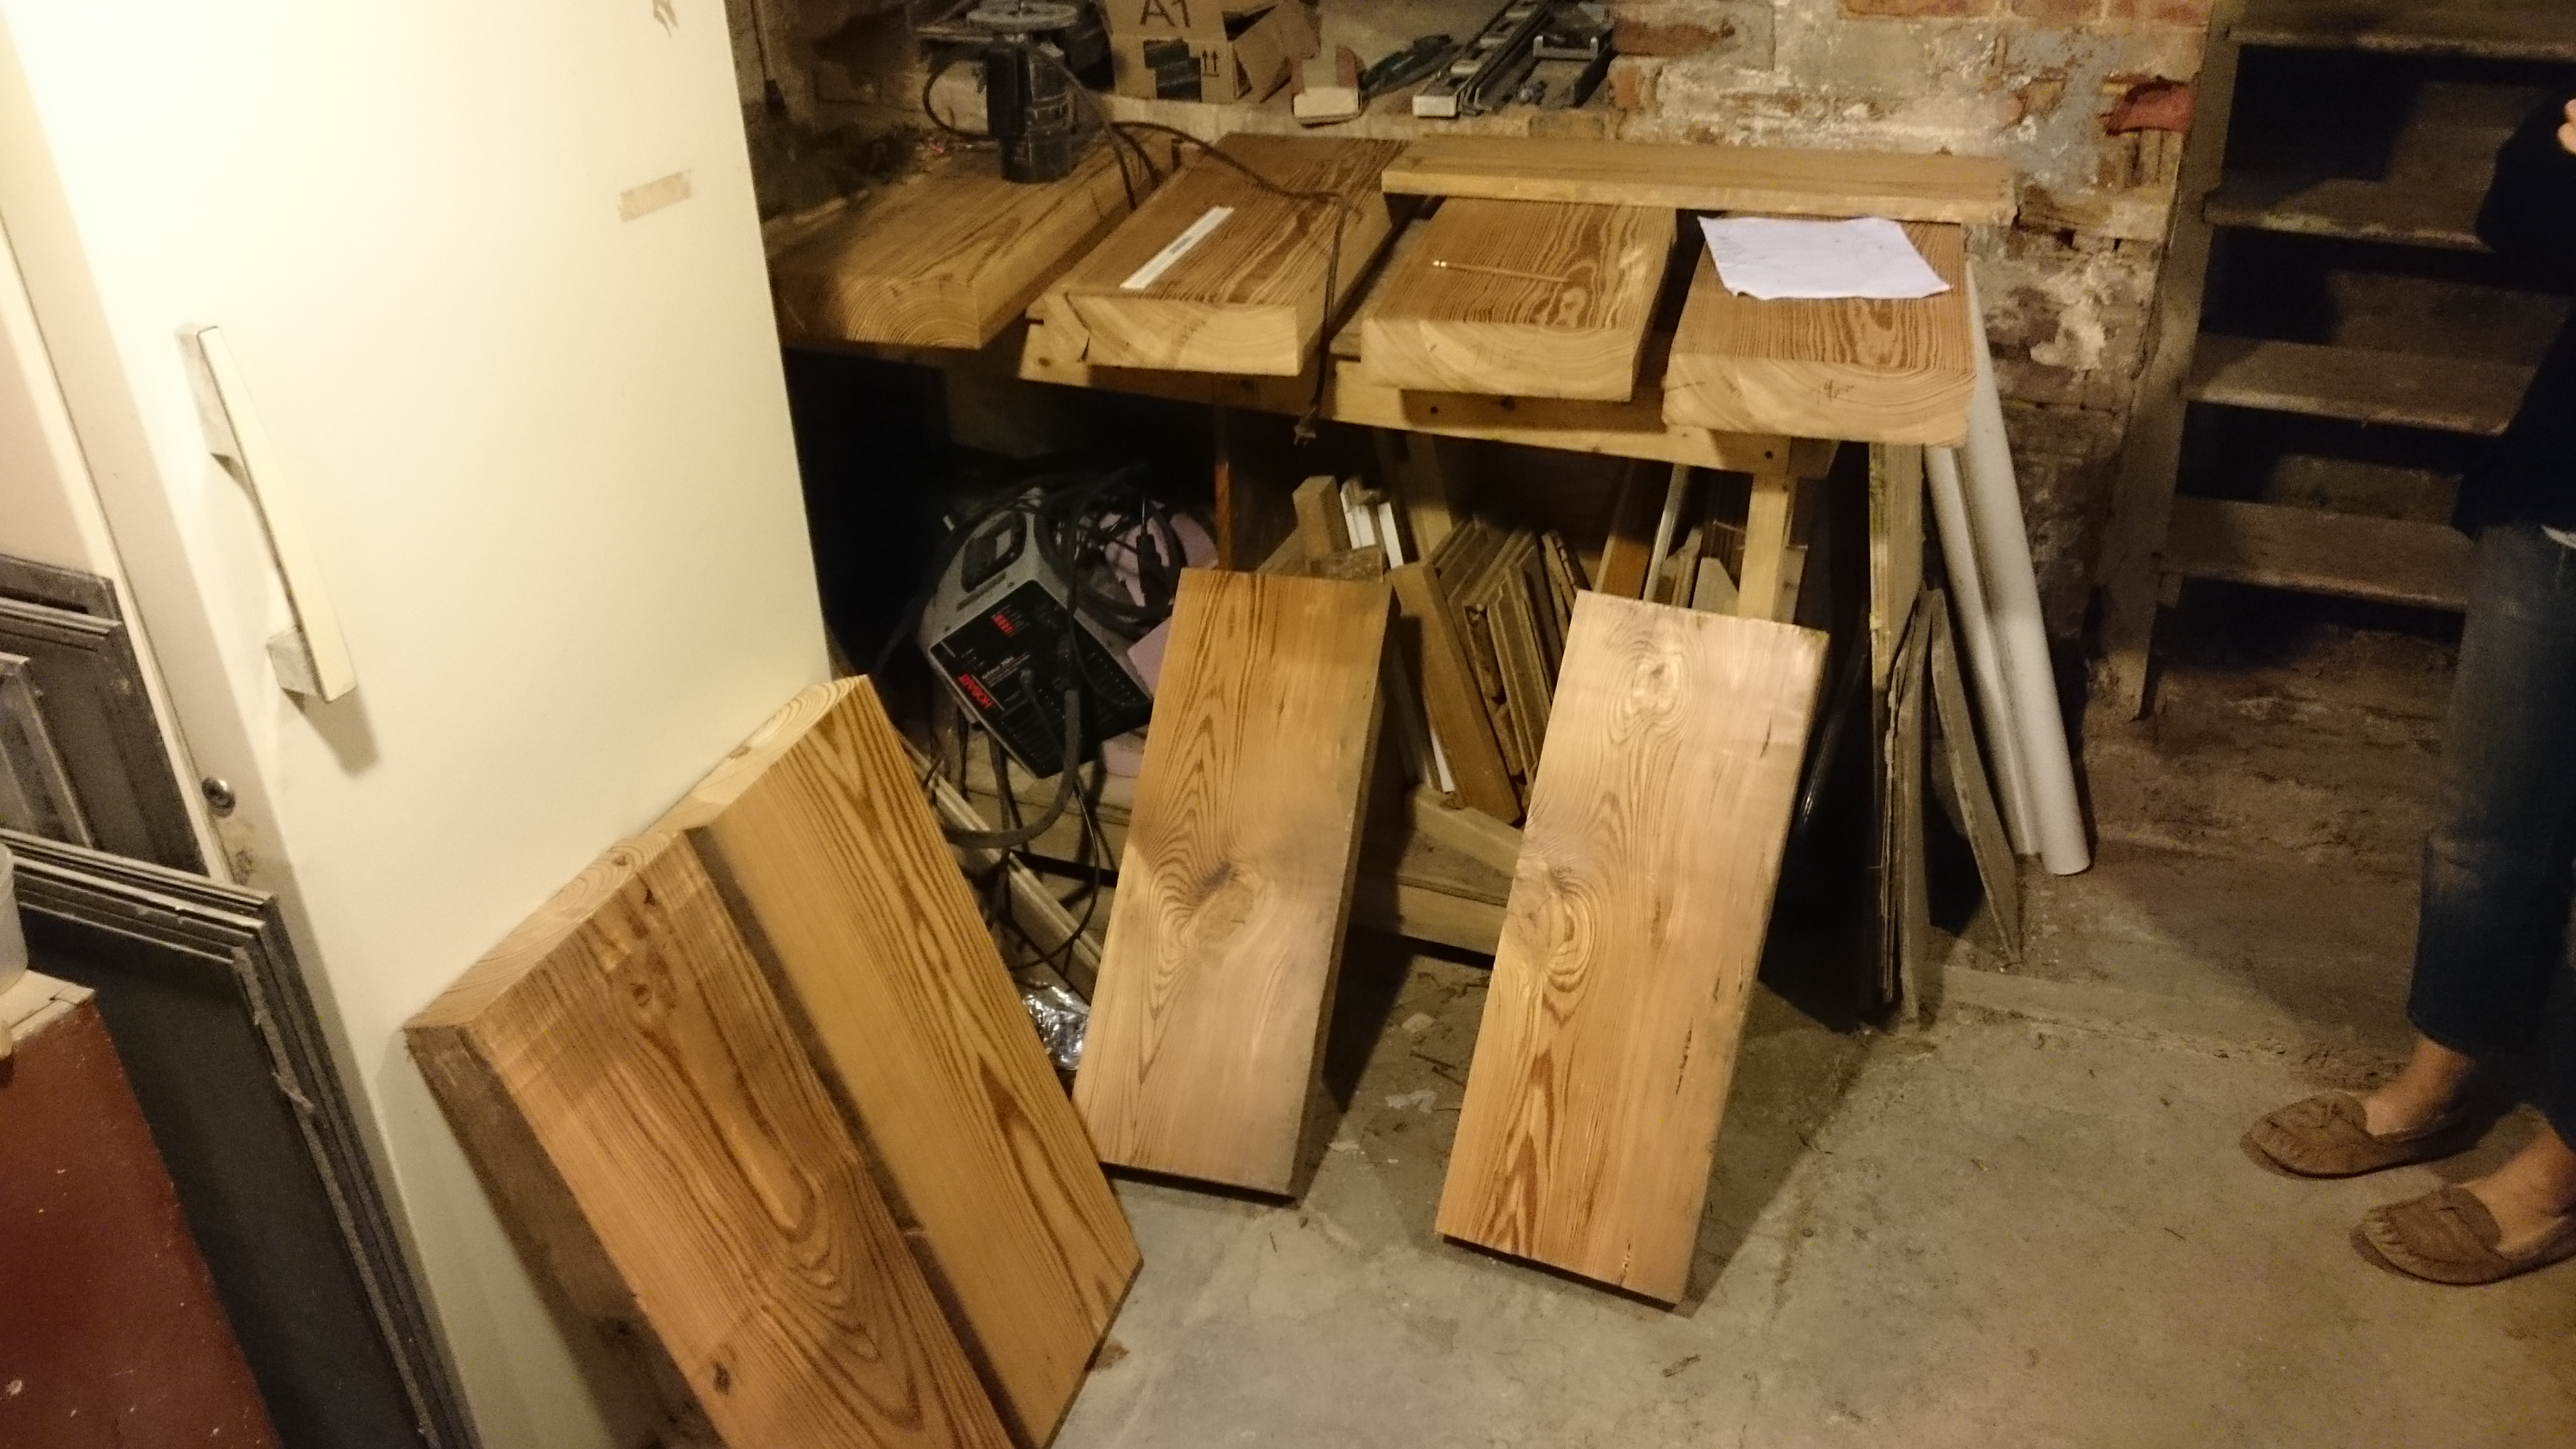
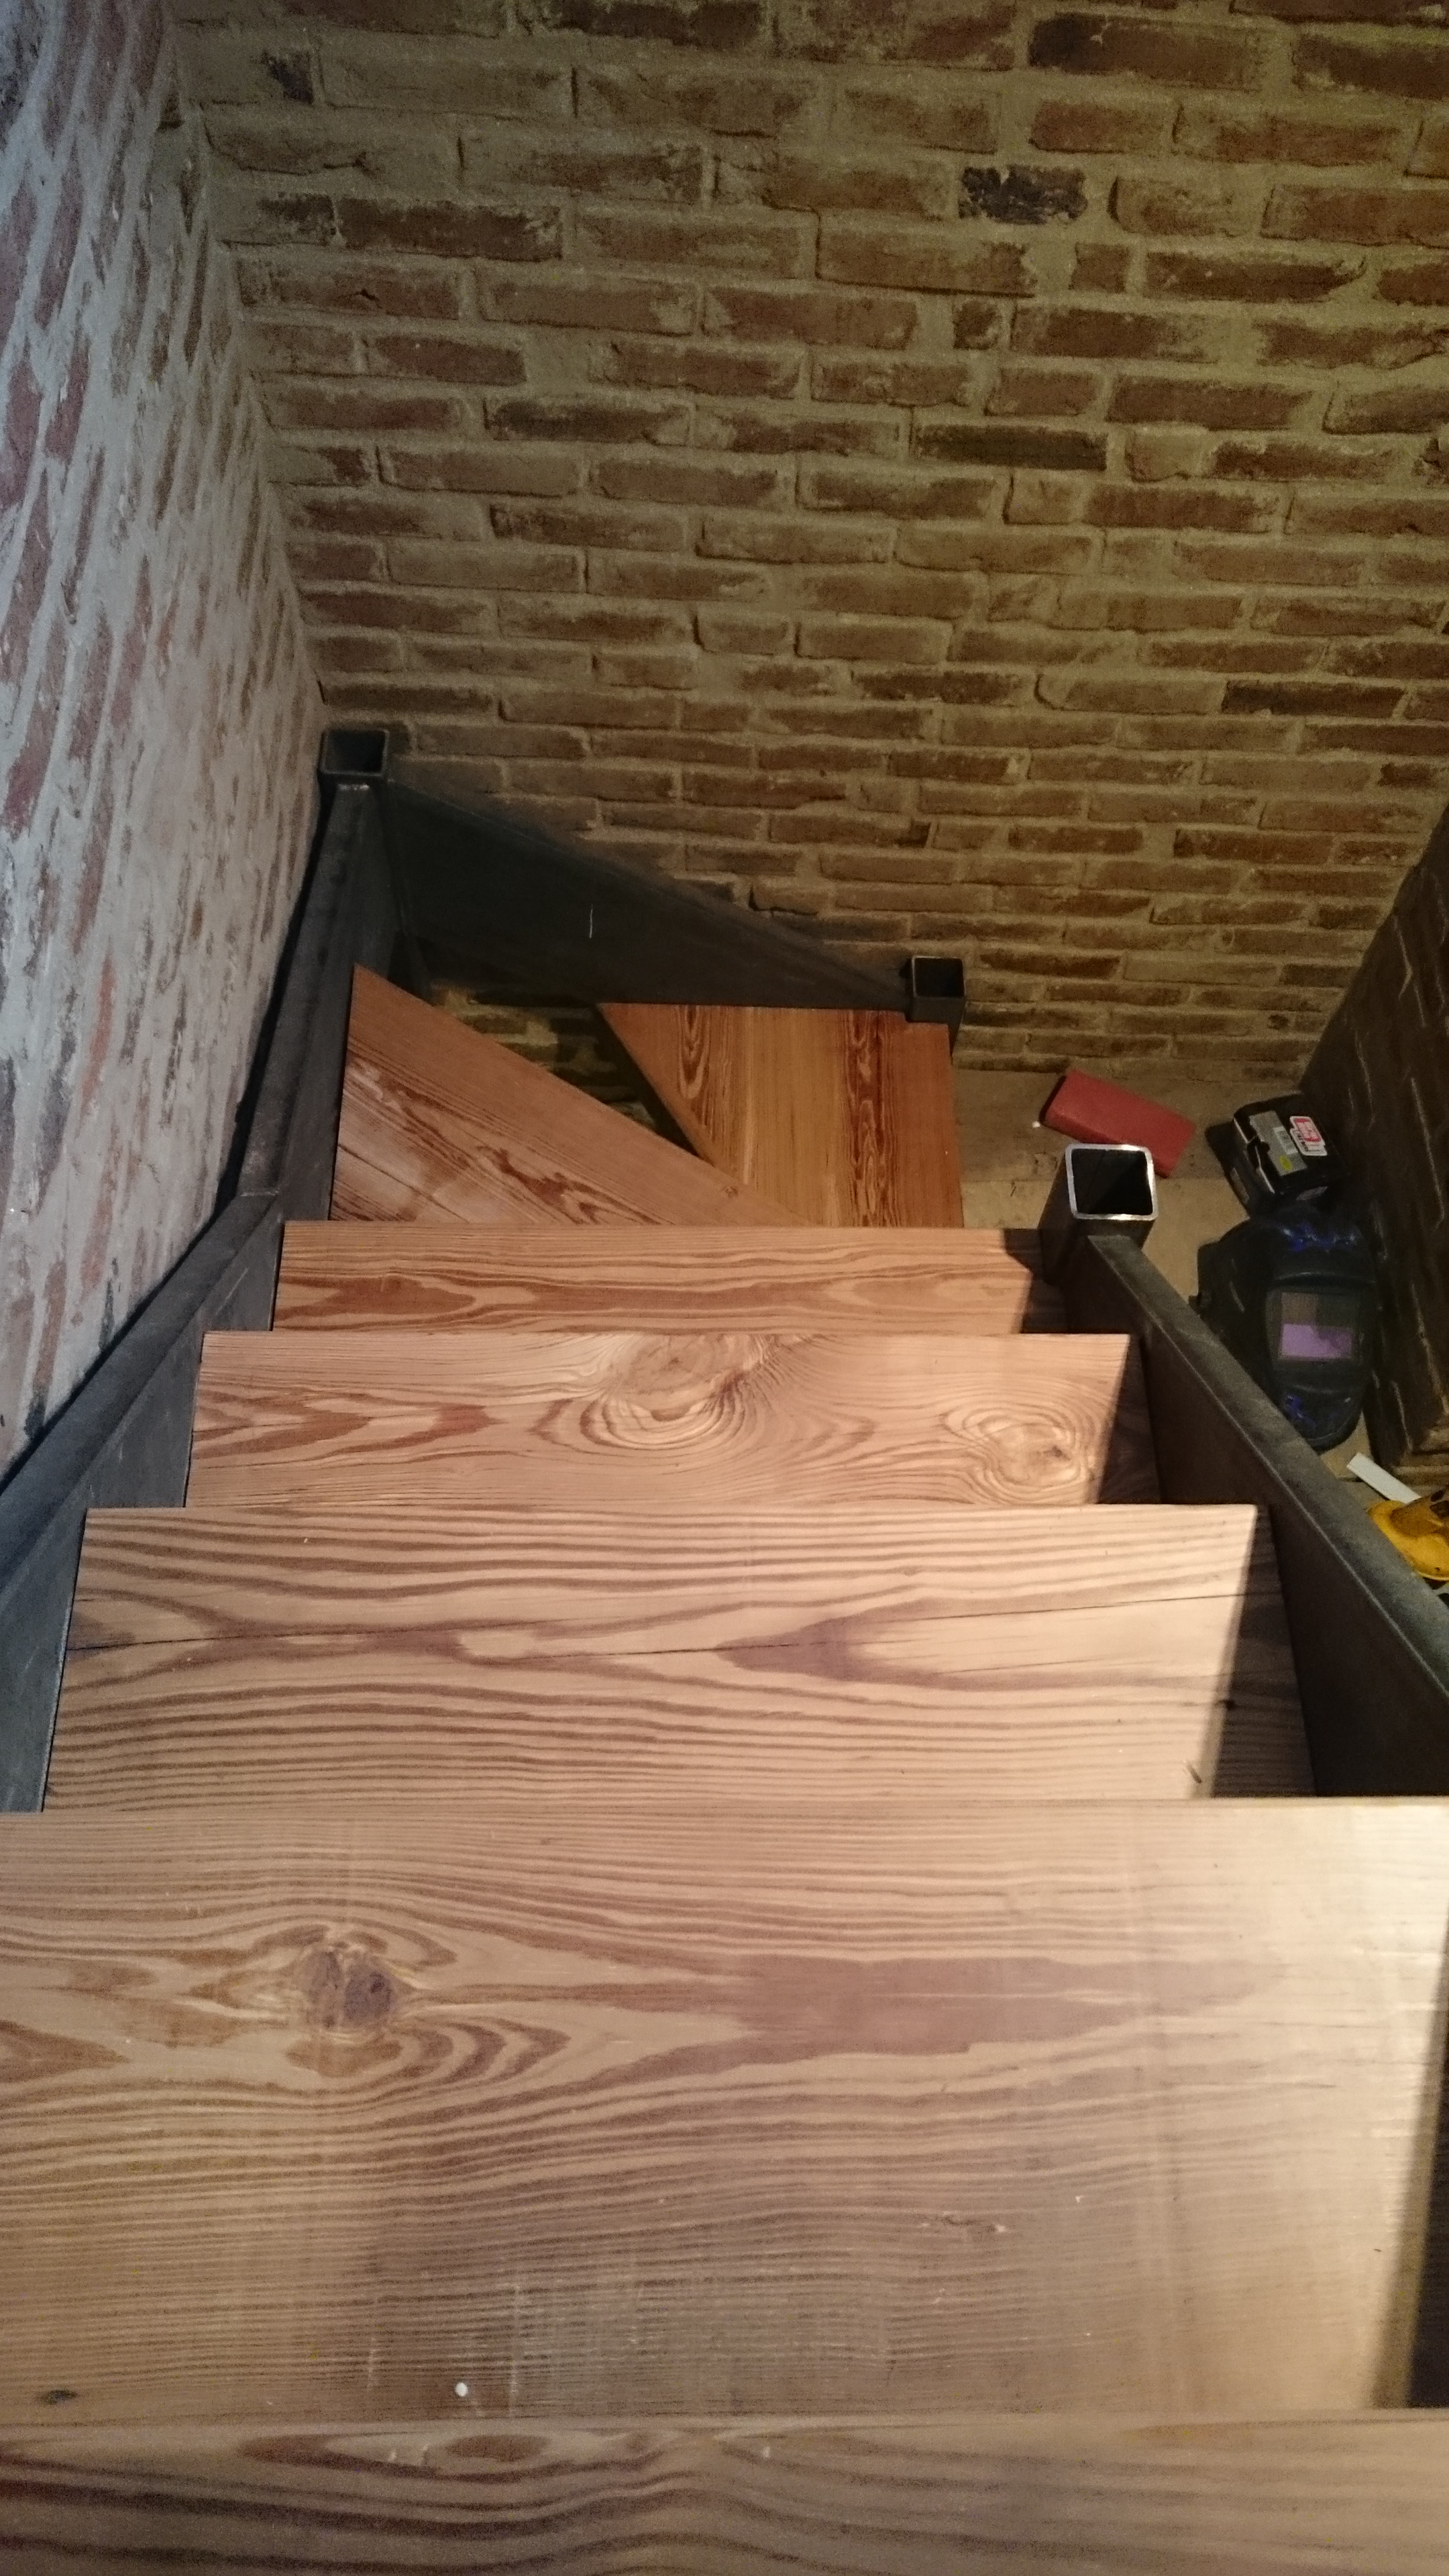
Once the steel was up, the focus shifted to the stair treads. For these we tracked down some giant joists that a friend was removing from an old warehouse. These things were precious (and cost a lot too). You can’t just buy 3×16″ old growth pine new, it needs to be salvaged from somewhere. We estimated we’d need about 60′ so we rounded up and got 70′ to be safe. We would need a total of 13 straight stairs (3″ x 10.5″ x 28″) as well as 11 corner stairs of varying sizes. I clean, measured and cataloged the wood. The wood was ripped down to <12″ to fit though the planer and then planed down (on one side) to 2 7/8″
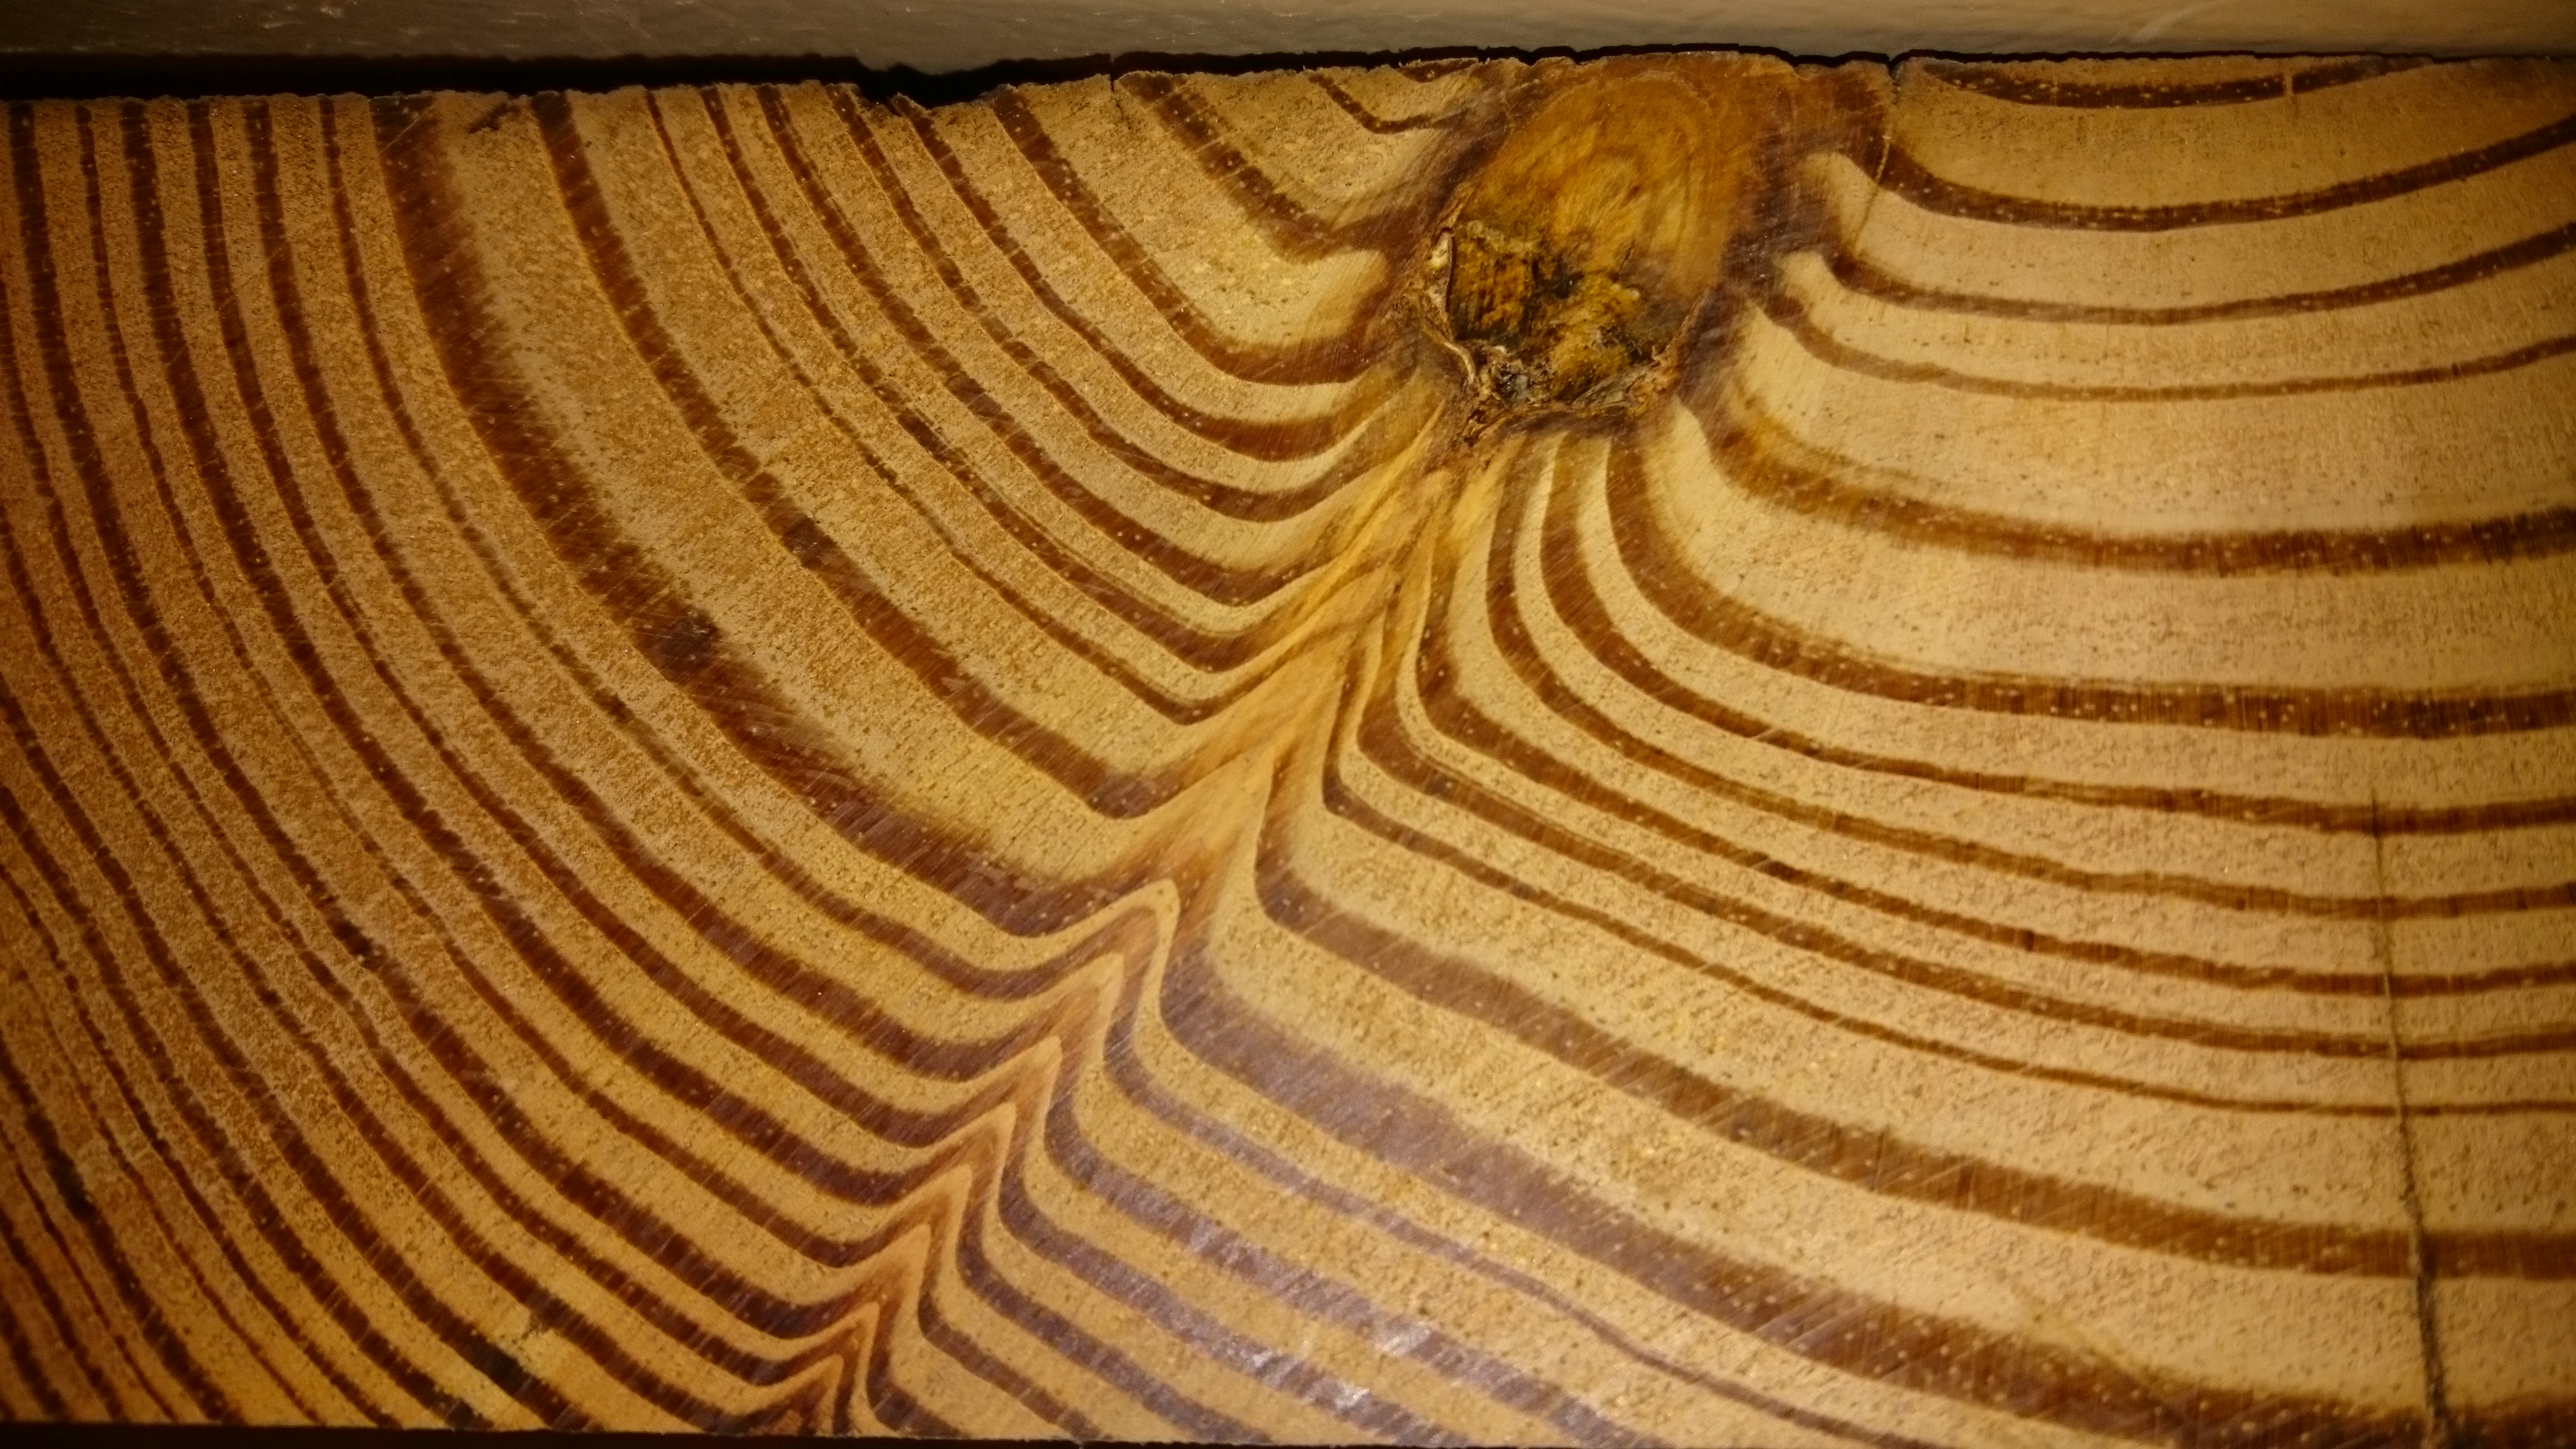
The wood grain of the treads is hypnotizing.
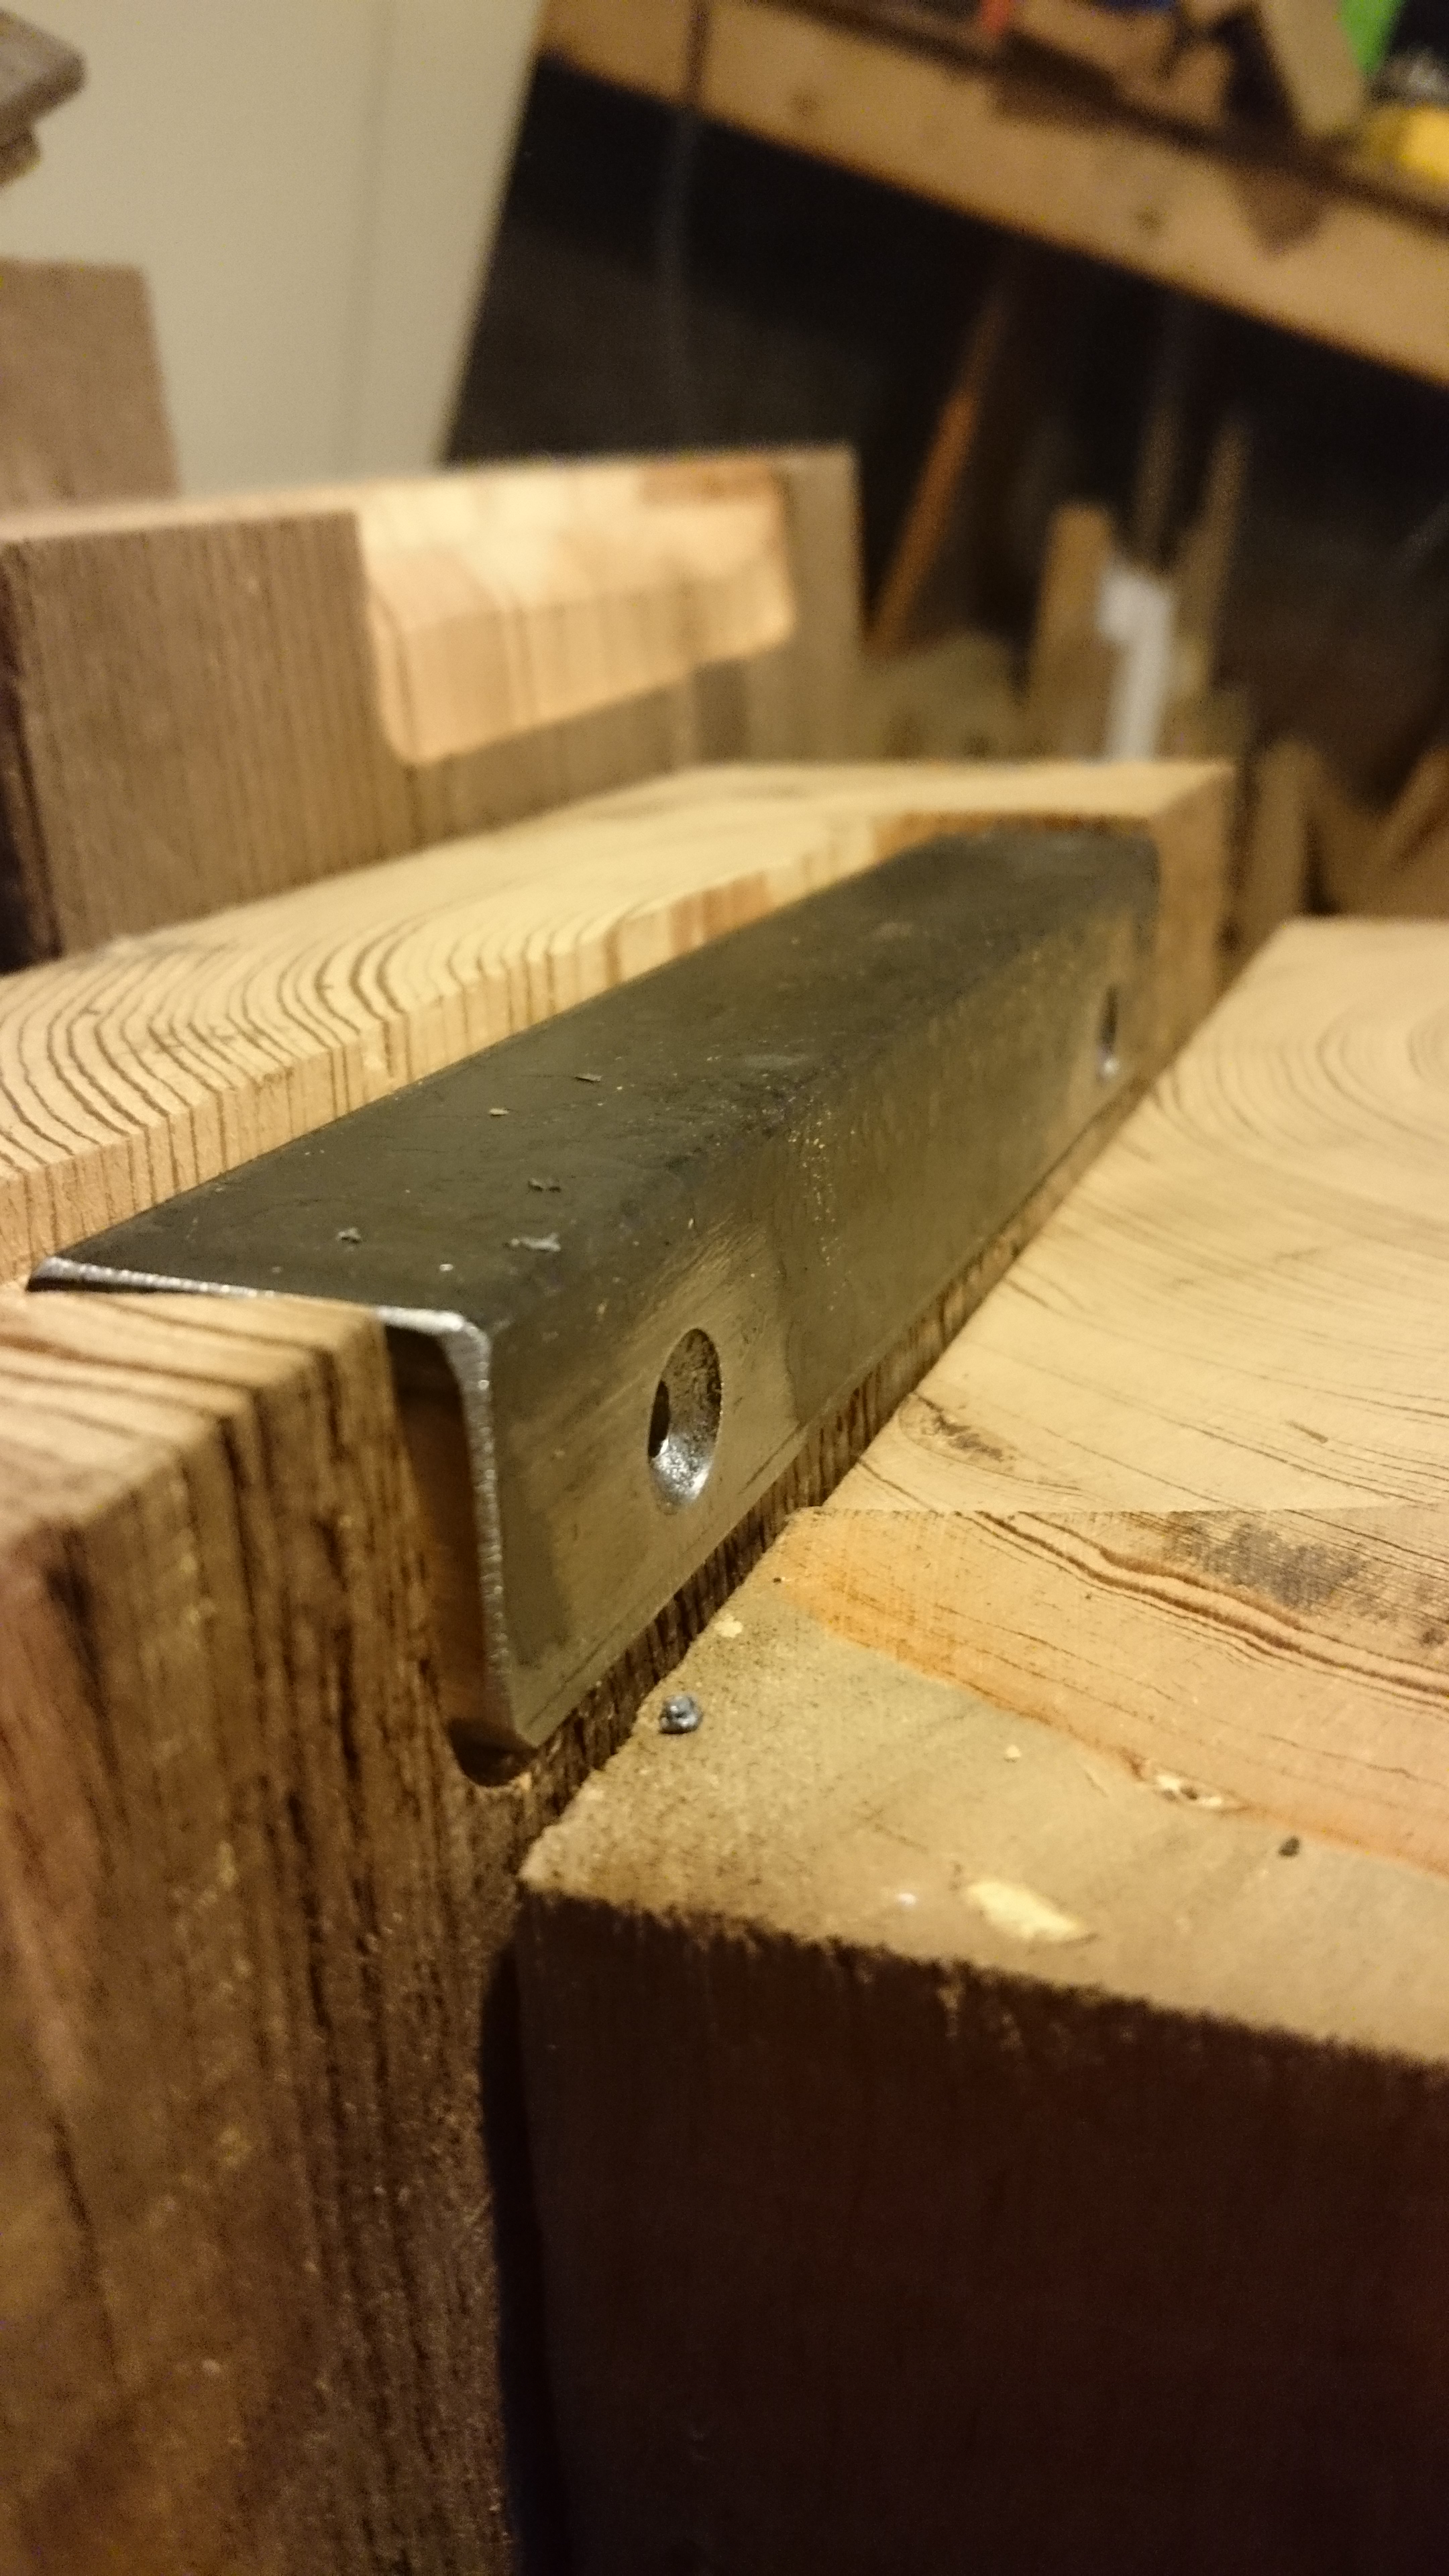
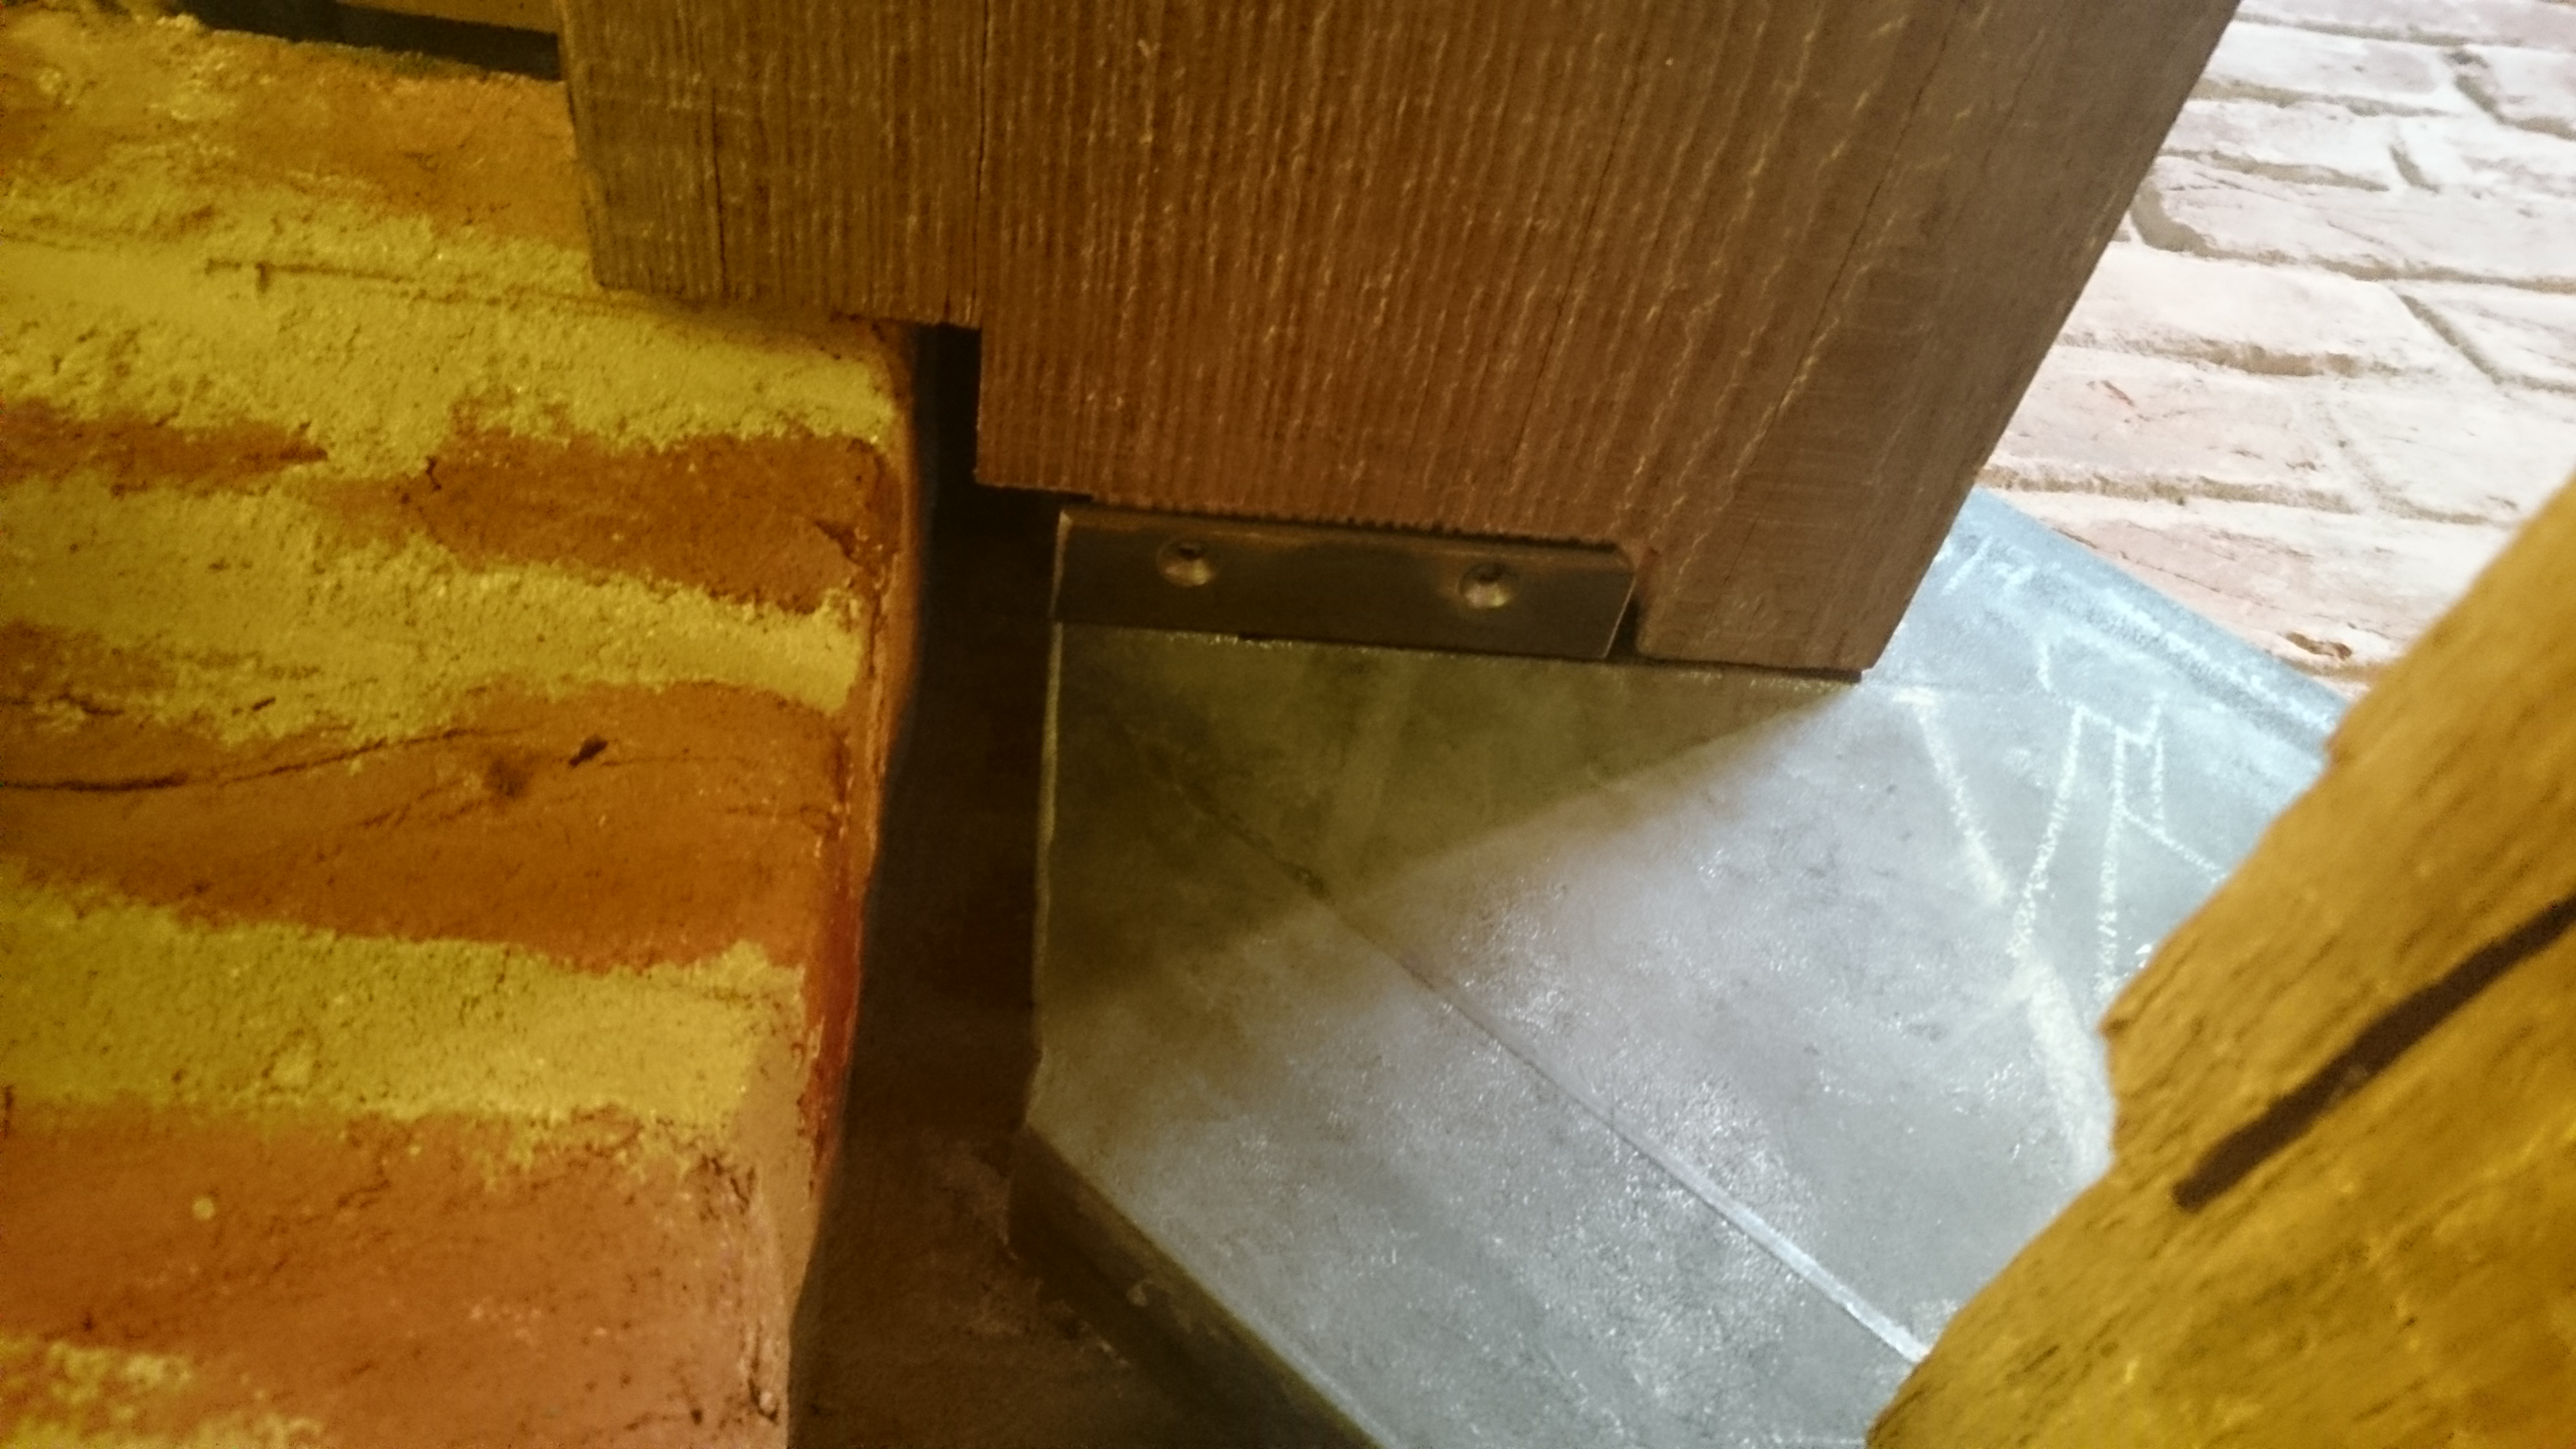
Somewhere in here we decided that it would be worth the extra effort to flush mount the brackets in the wood. We would weld on the angle so that it and any ugly welds were hidden by the board. This took a whole lot of routing, but I made a jig to set up guides and it went pretty smoothly. I also got a pretty good system down for churning out brackets in 8 easy steps including countersinking the hole so the screw too was flush.
One bracket was a lot of work.
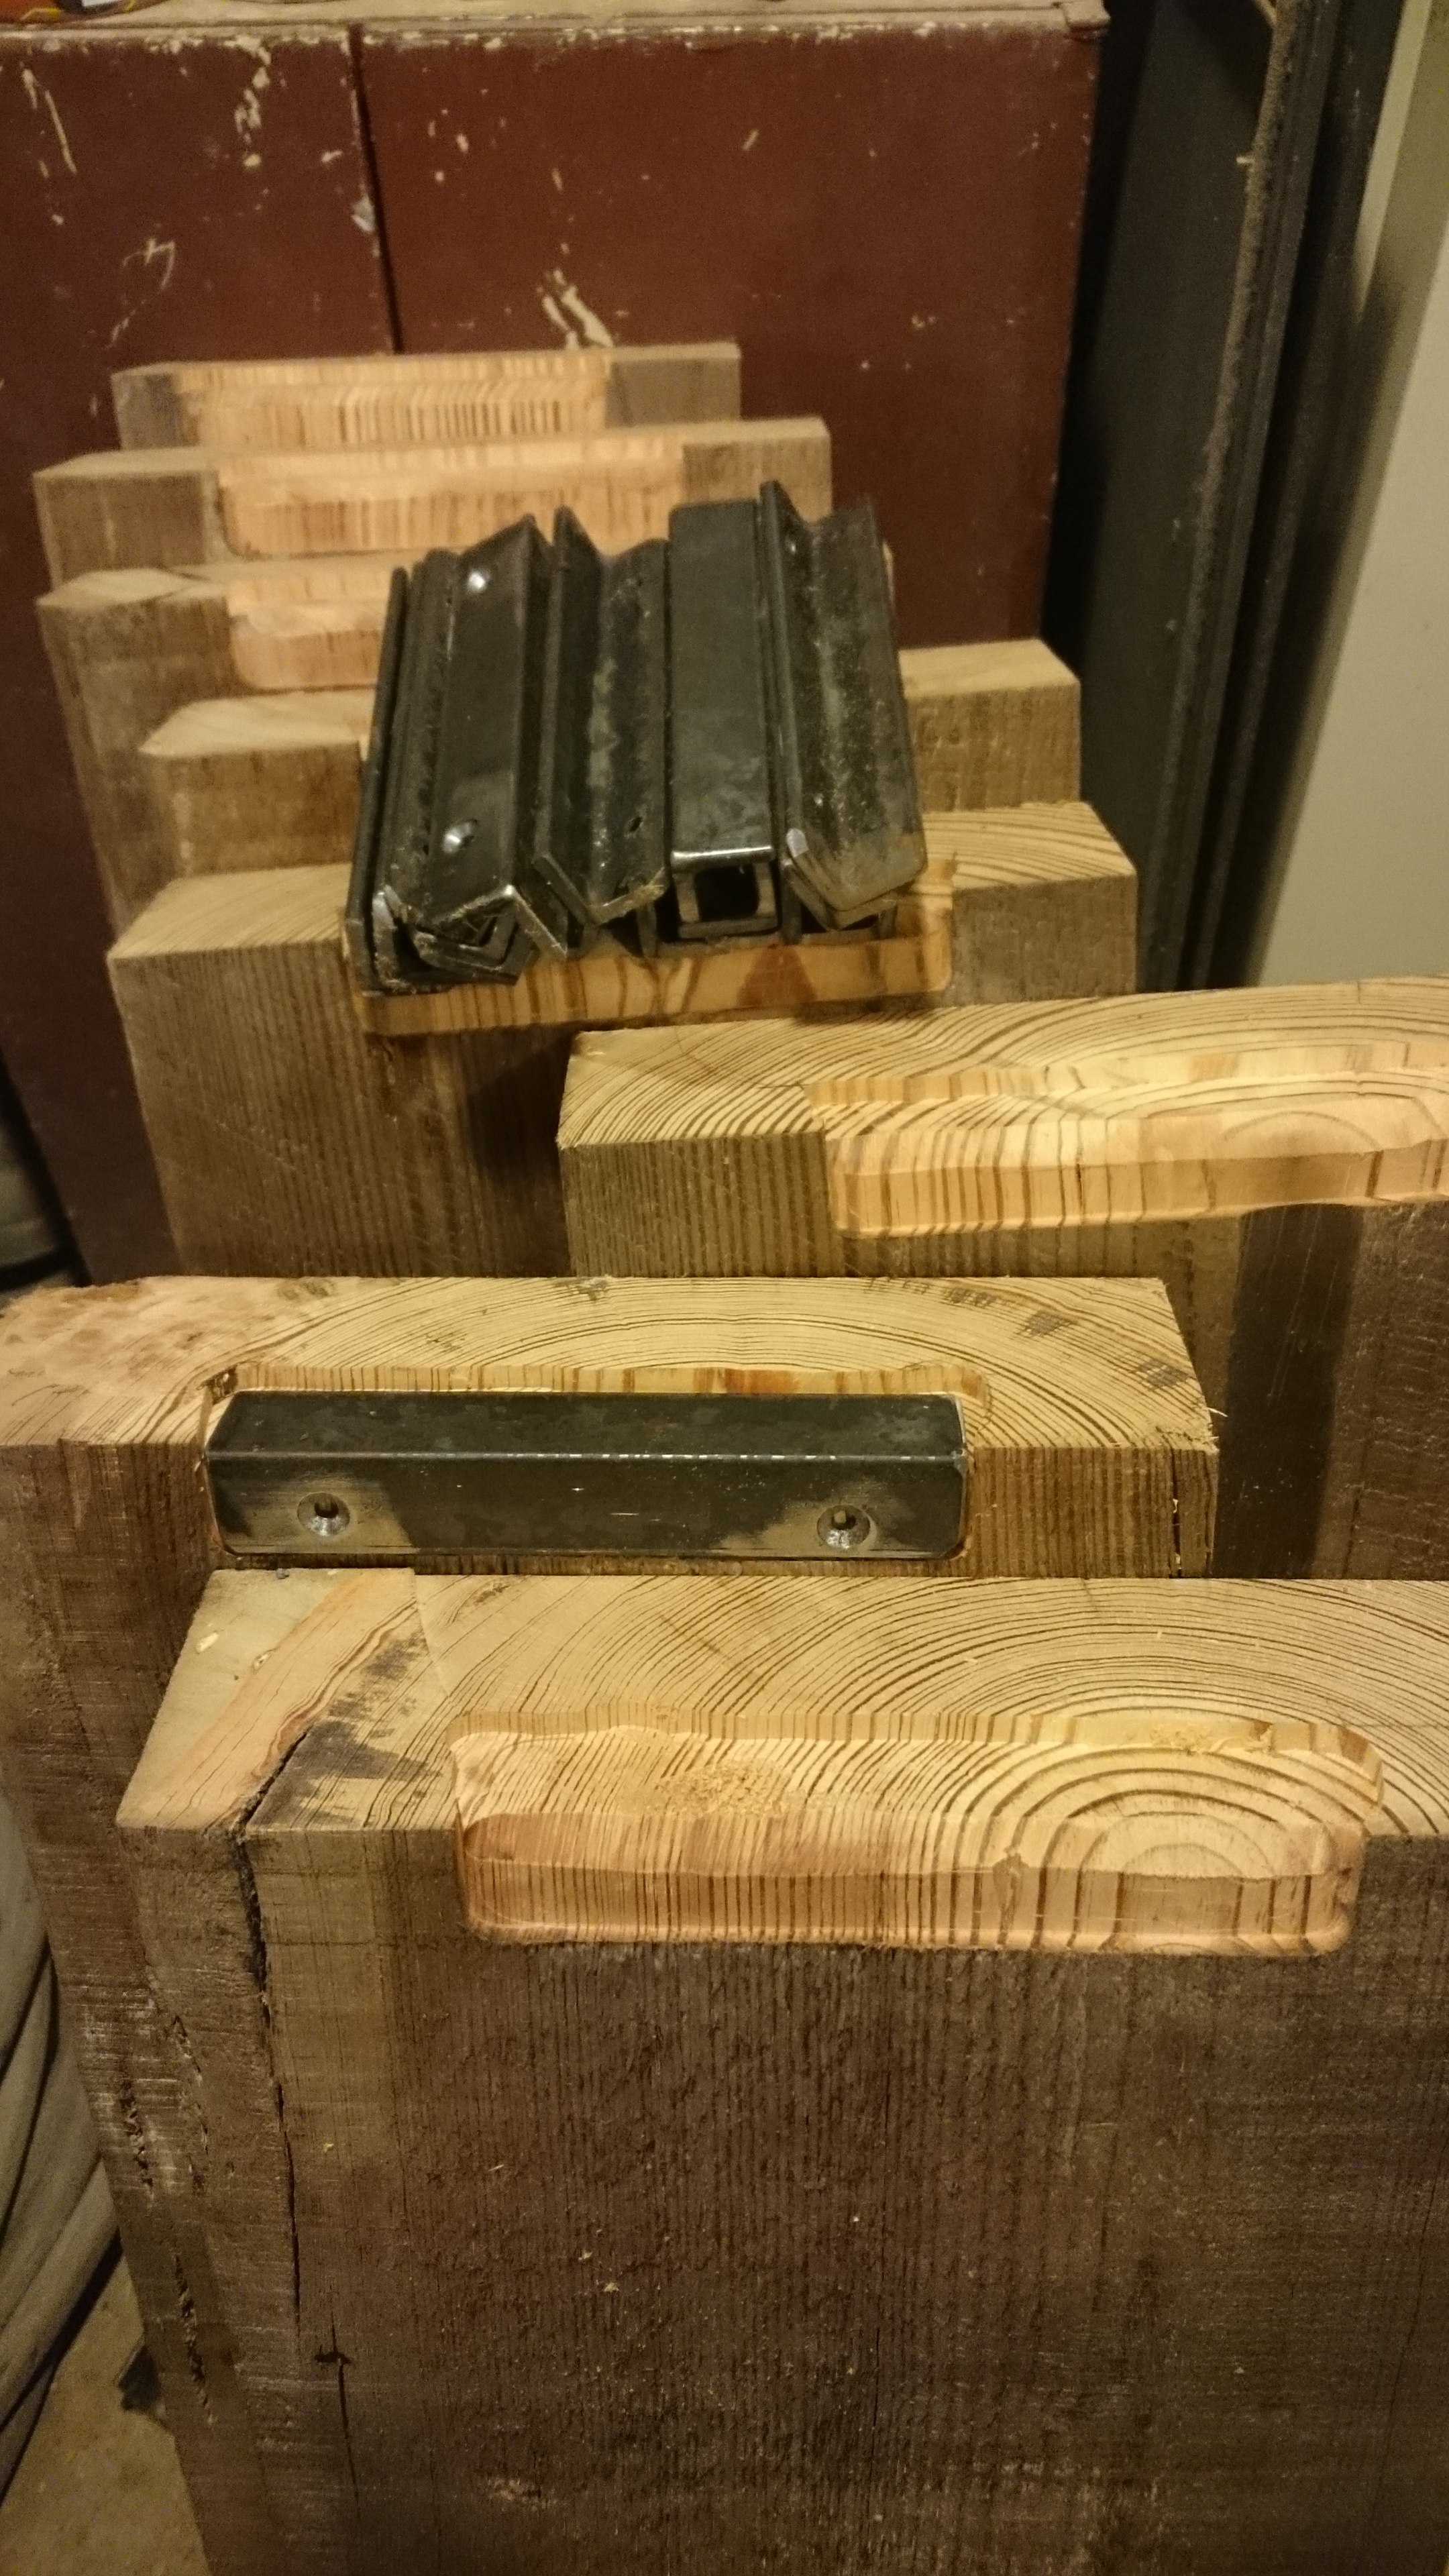
A lot of brackets were a WHOLE LOT OF WORK.
The problem with 100 year old joists is that they’re never perfect. Even once planed, most boards still had flaws and bad edges that needed to be removed. In the end we just barely had enough that can be used as 10.5″ straight treads and a whole bunch < 10″ wide. TO SKETCHUP!
Visualizing the 3 corner stairs was hard so I drew it up in Sketchup.
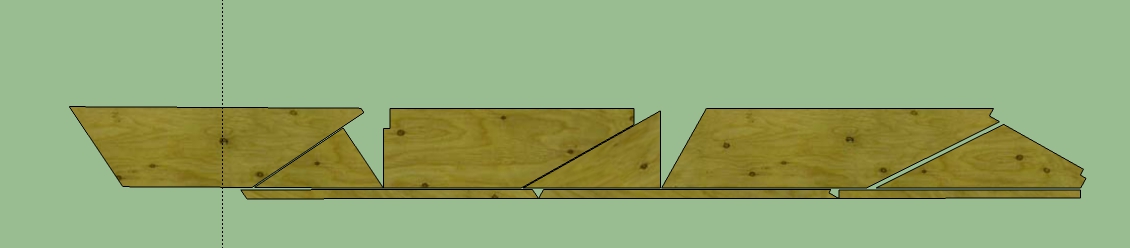
Since the steel was already in place, we could get some really accurate measurements in order to draw up this in Sketchup. Once digital, I started playing around with stair designs. One of the challenges was my requirement that both the back and the bottom needed to be rough cut and the top and the front had to be immaculate when planed and sanded AND the grain had to run parallel to the front edge of the stair. In the end I decided to do a 3 piece design. I would cut 1″ off the rough cut side for the back and then build the tread out of the 8″(or so) board and then glue it all back together. To save material I arranged this in Sketchup to waste as little board length as possible.
Drawing this helped me to figure out how to use our narrowest boards to make our widest treads most efficiently.
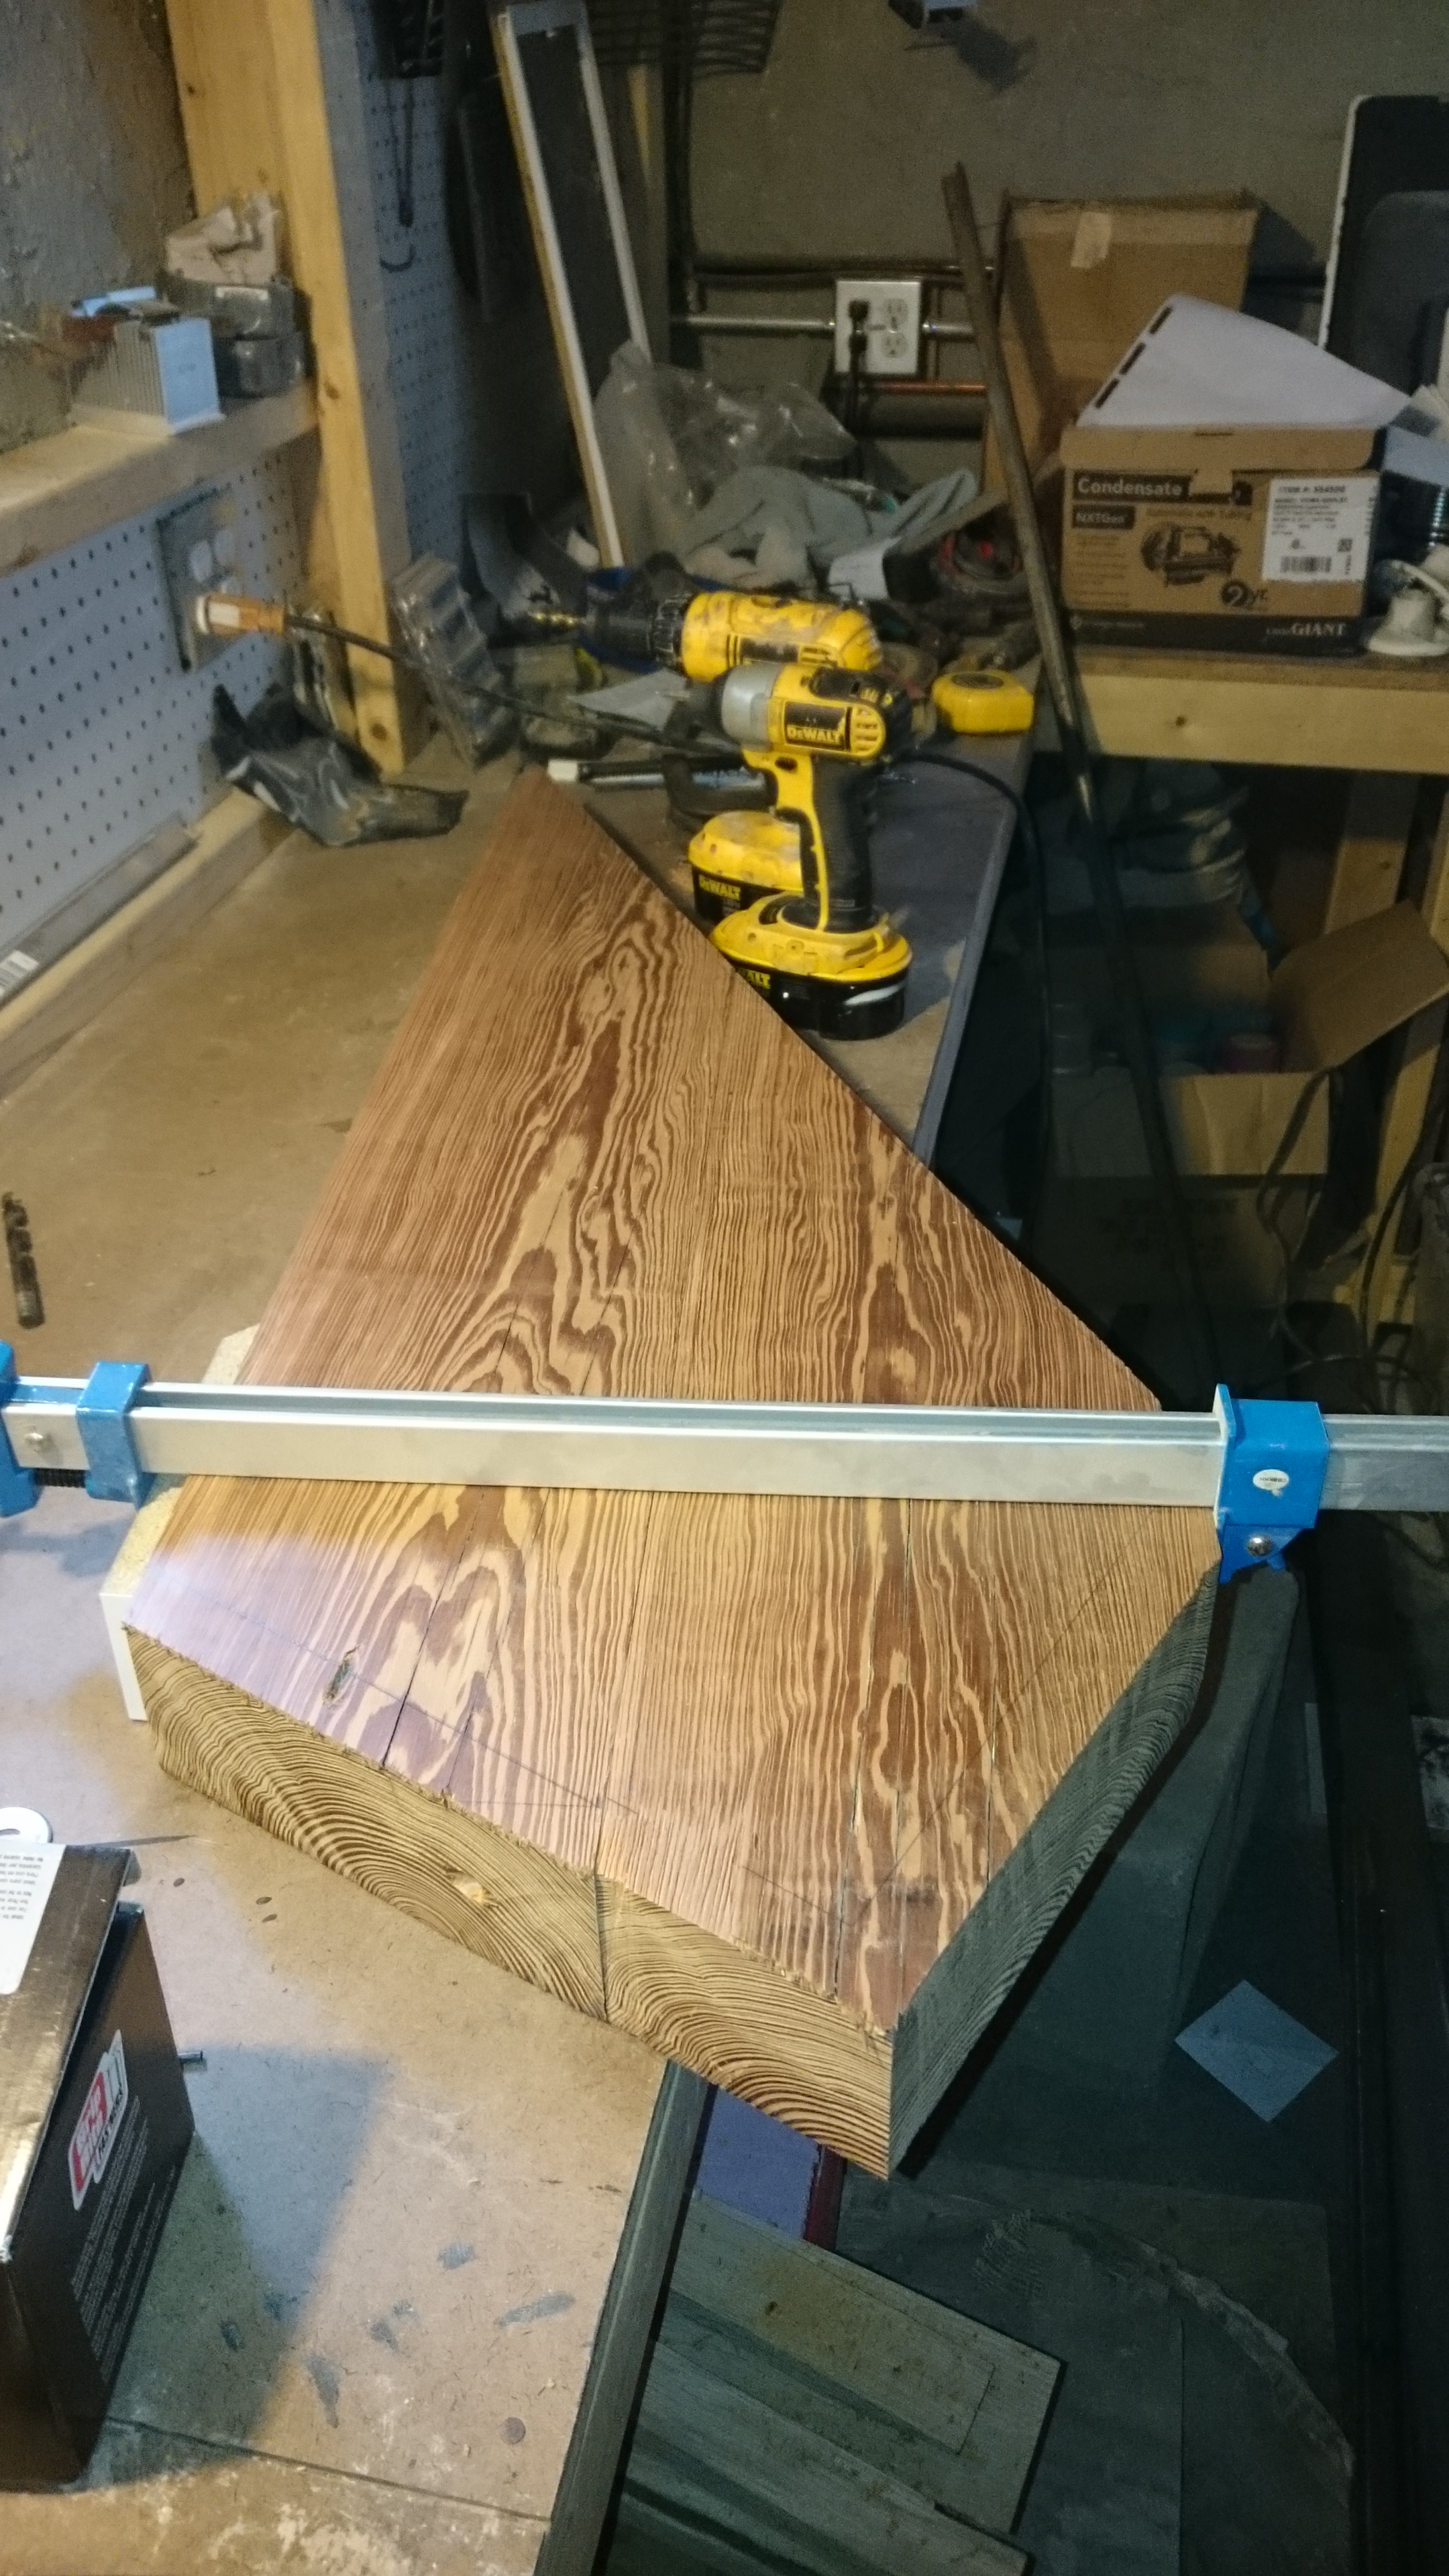
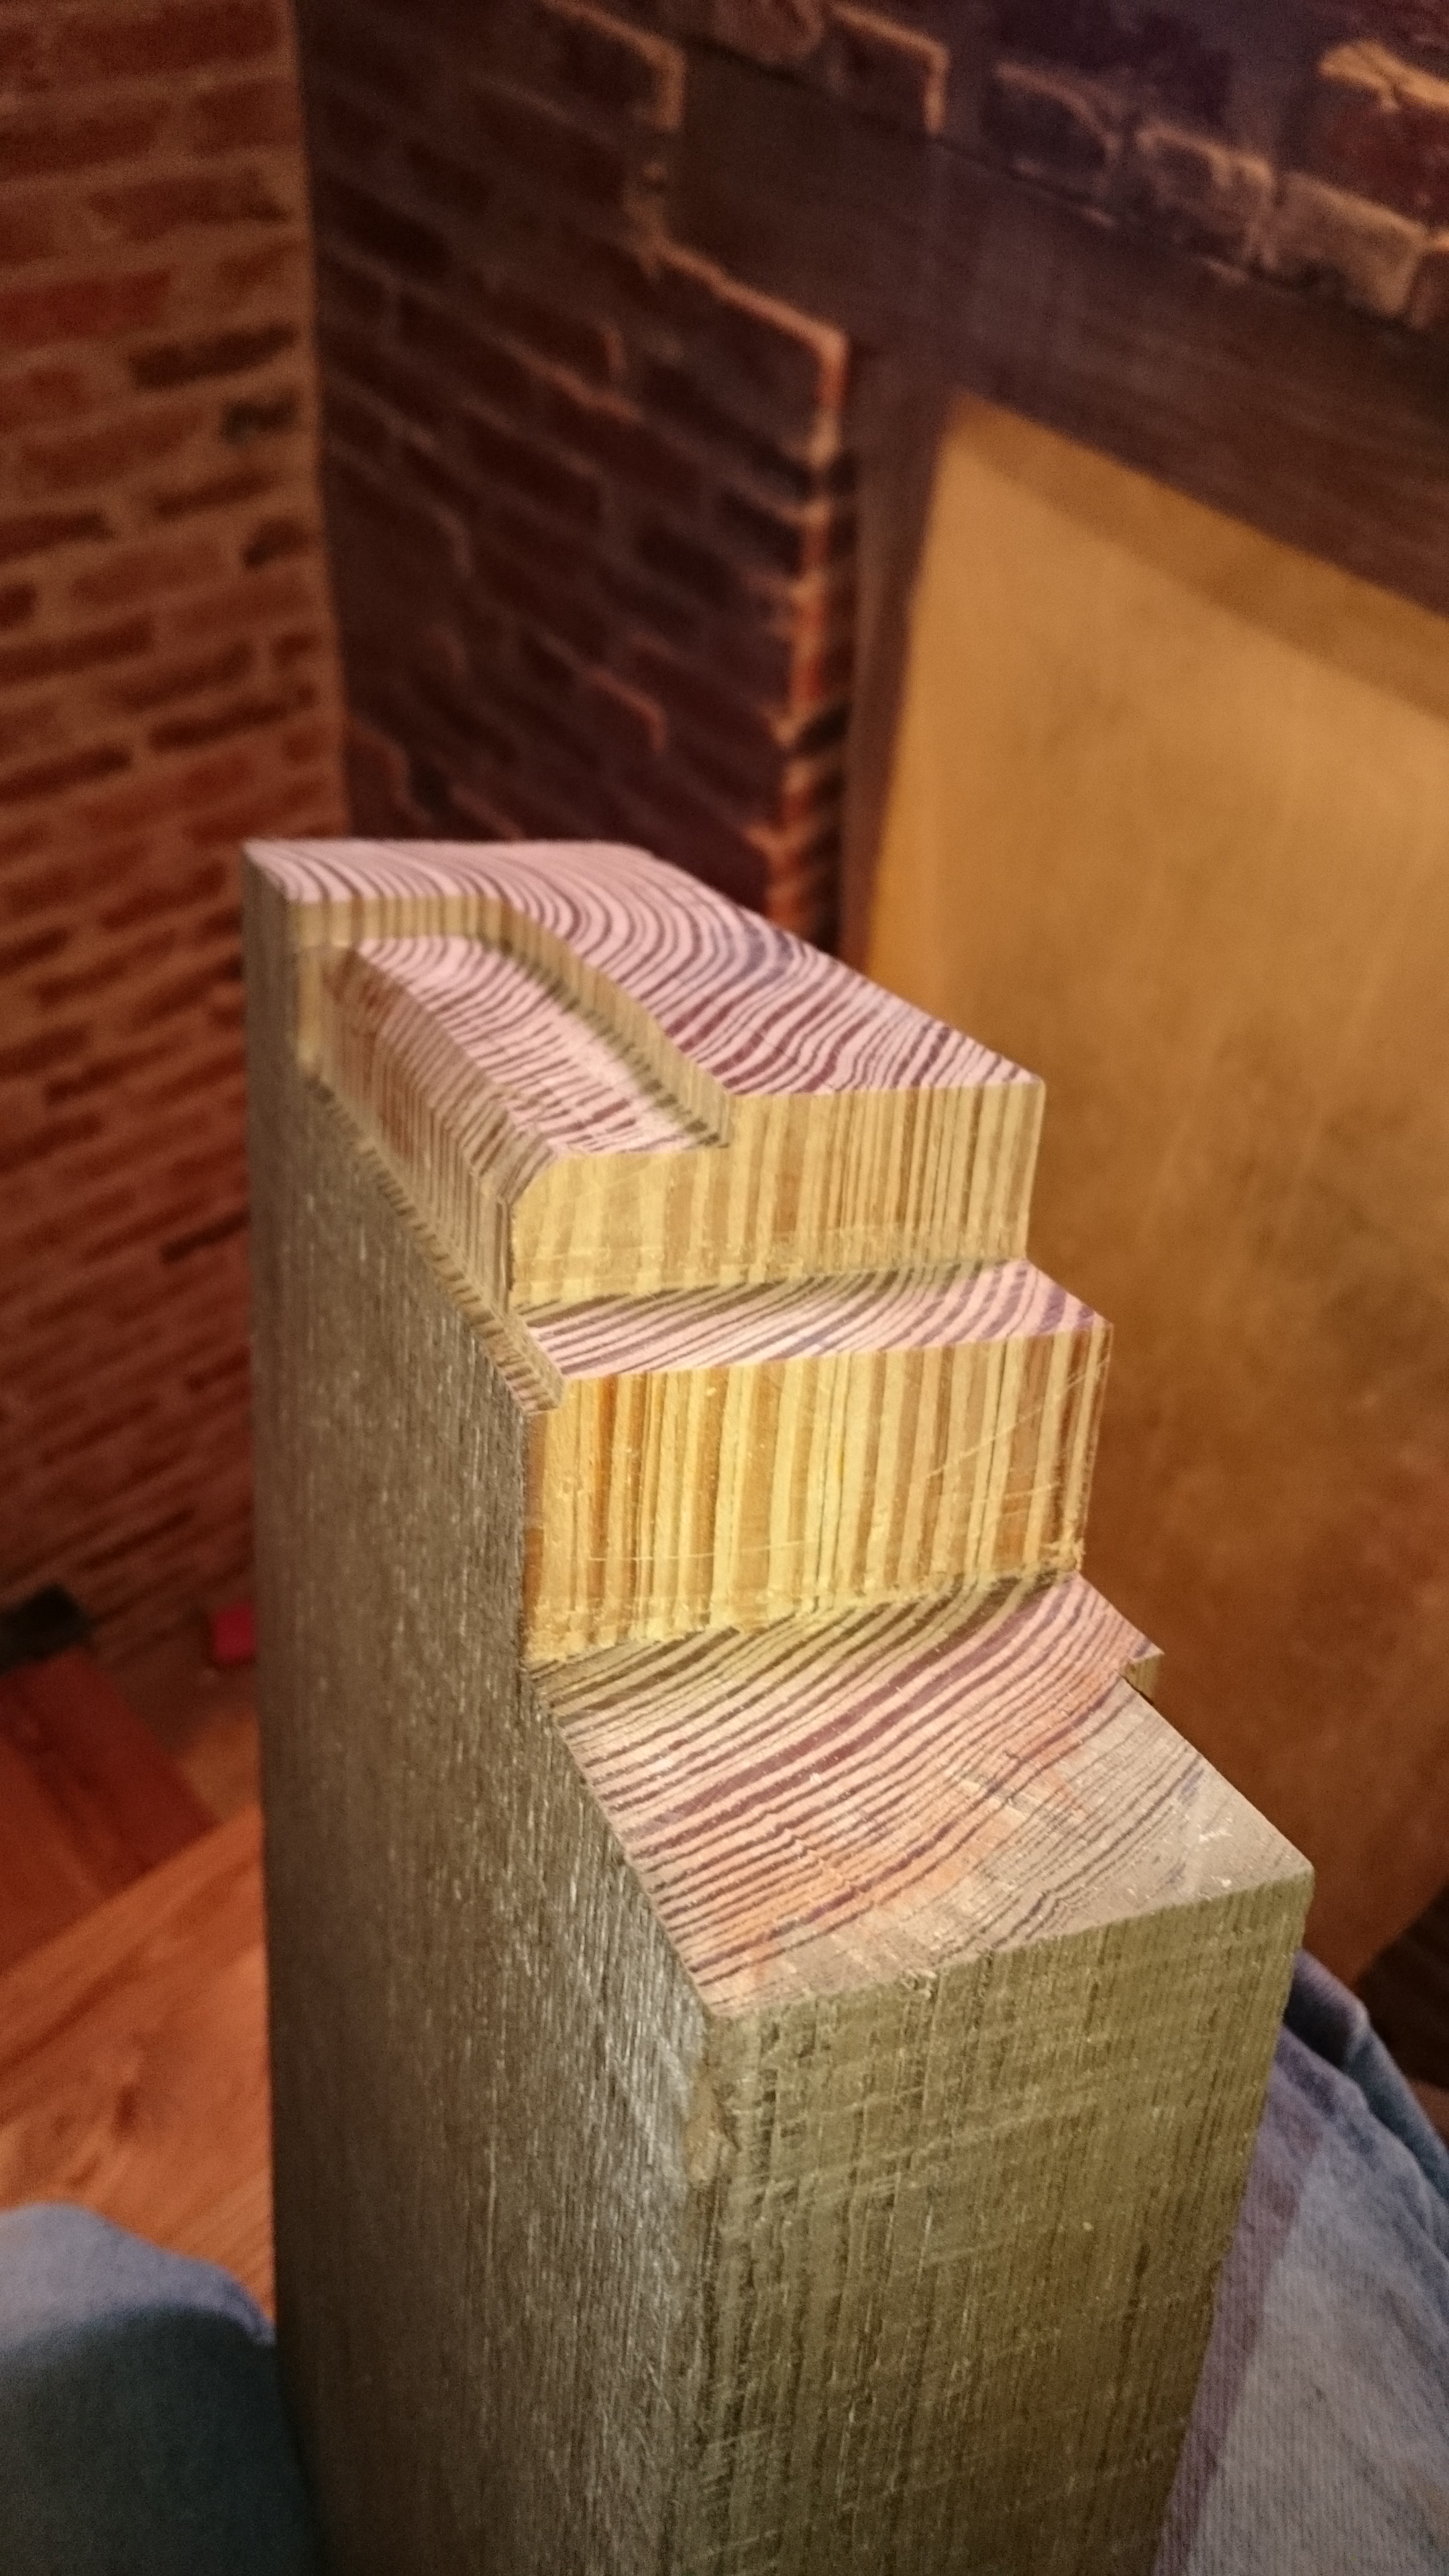
I put a lot of faith in my drawings. I printed out a layout with measurements of all the edges and diagonals so I could draw this out on the boards and check my work. Second step was to cut off the rough edge. Next was to rip the board down to the correct width. Then a very technical free hand (eyeballing it) cut of the diagonal to be cut straight. This angled cut off would rotate around to be glued with several 4″ long 1/2 lag bolts thrown in for some serious clamping and pining duties.
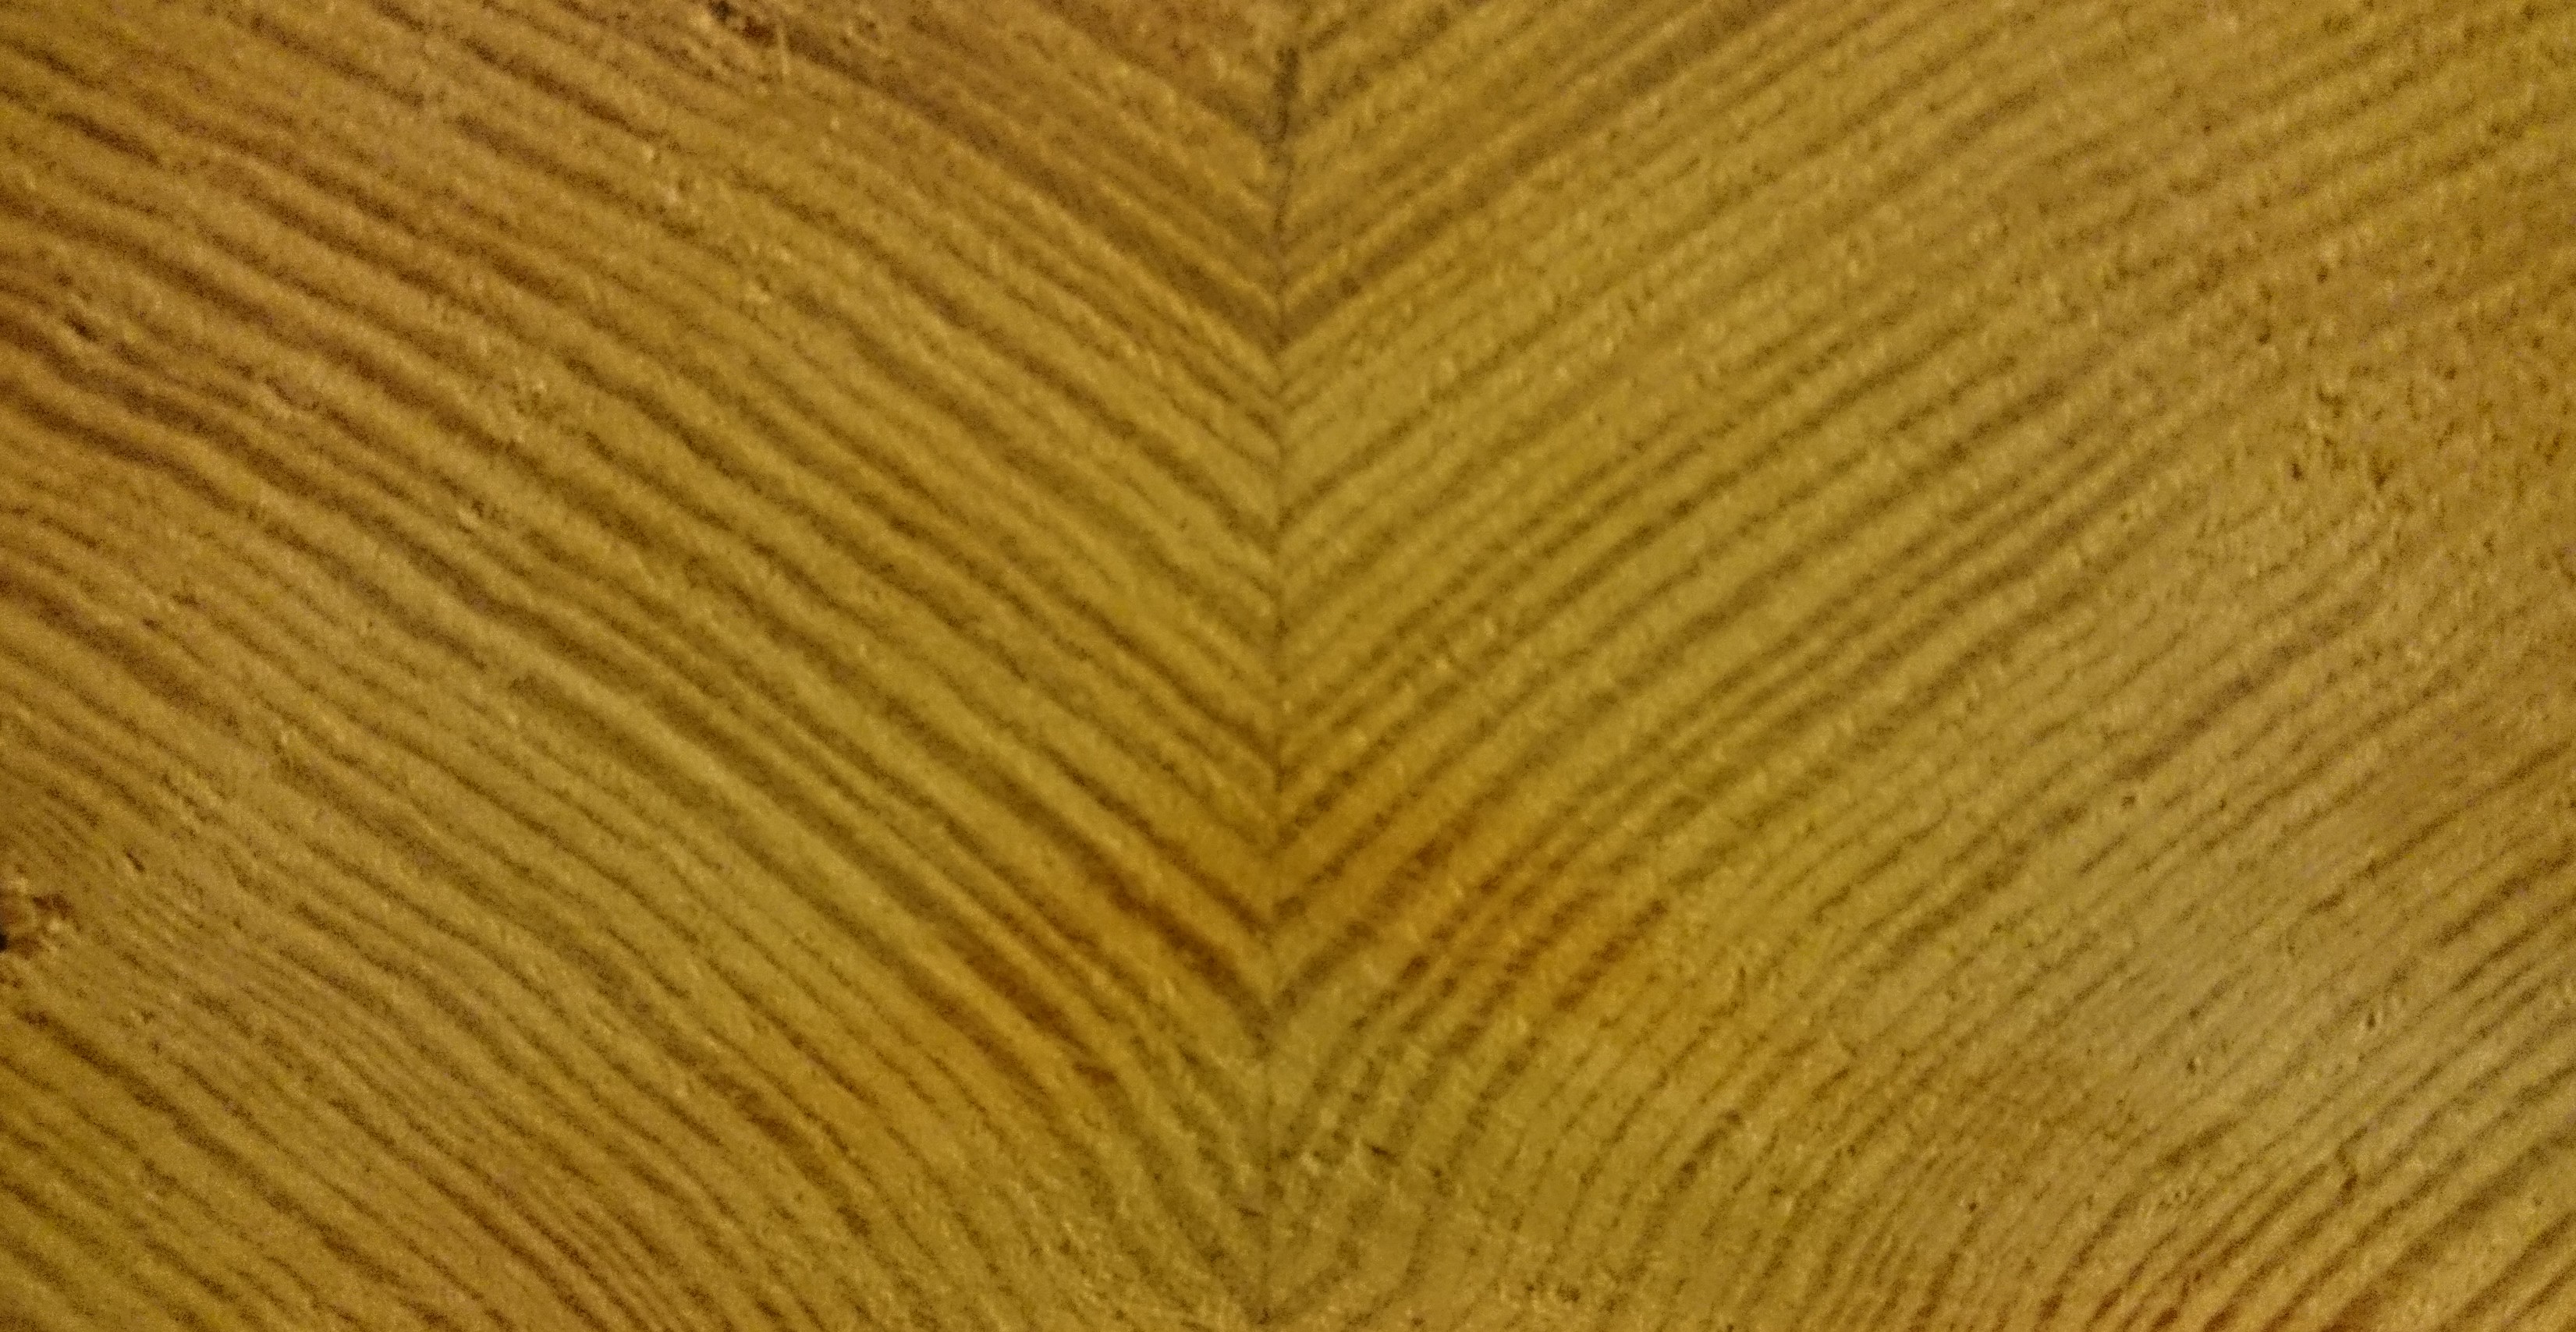
Rotating had some cool benefits. Since it was basically the same grain pattern, only further down the board, the resulting assembly has the grain mirrored along the nearly invisible glue line. Upon cutting, this is what we would see:
Beautiful symmetry when I assembled the pieces.
The last cuts were made to straighten out the back edge so I could glue back on the 1″ rough edge. Once this was all together I sanded just like we did the floors. On the finished boards its hard to tell they’re not once piece.
Almost there. One to go. All but the very bottom step still need sanding.
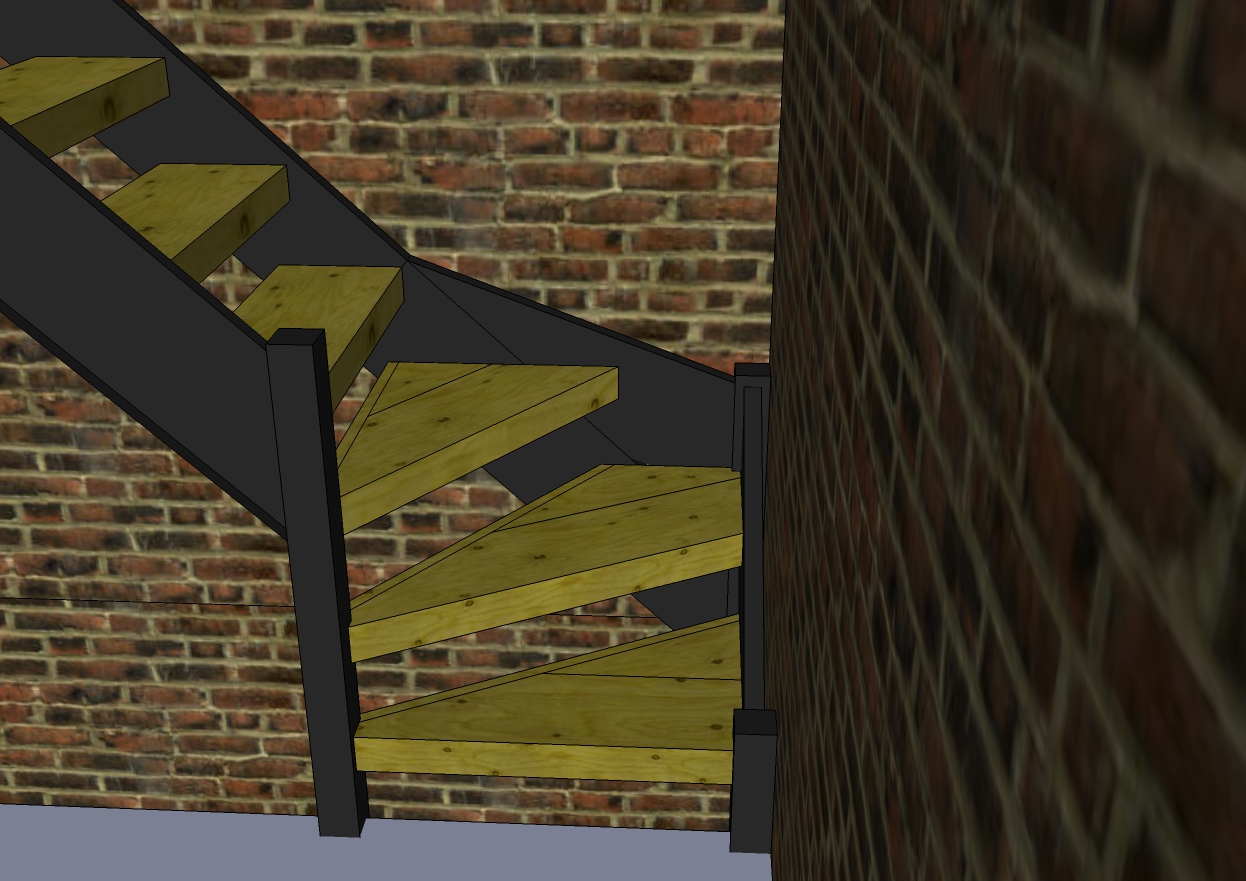
Final fitting of the boards was a challenge even with the help of Sketchup, particularly in the corner. That particular “kite” stair had to line up on both the not perfectly 90* corner and two sides of the post and have no more than a 1/8″ gap on any edge. For this we made a template out of an end-of-life dry erase board.
Straight stairs needed some final touches as well. Here is a photo of the finished top stair which had to tie in the the hidden brackets, the 3″ post stubs, the C-channel and the bricks.
Some pieces seem so complicated. I began referring to the stairs as my wooden spaceship.
There are a whole lot of cuts in there, but in the end it makes for a very clean and simple step.
Not so complicated when it is snapped into place.
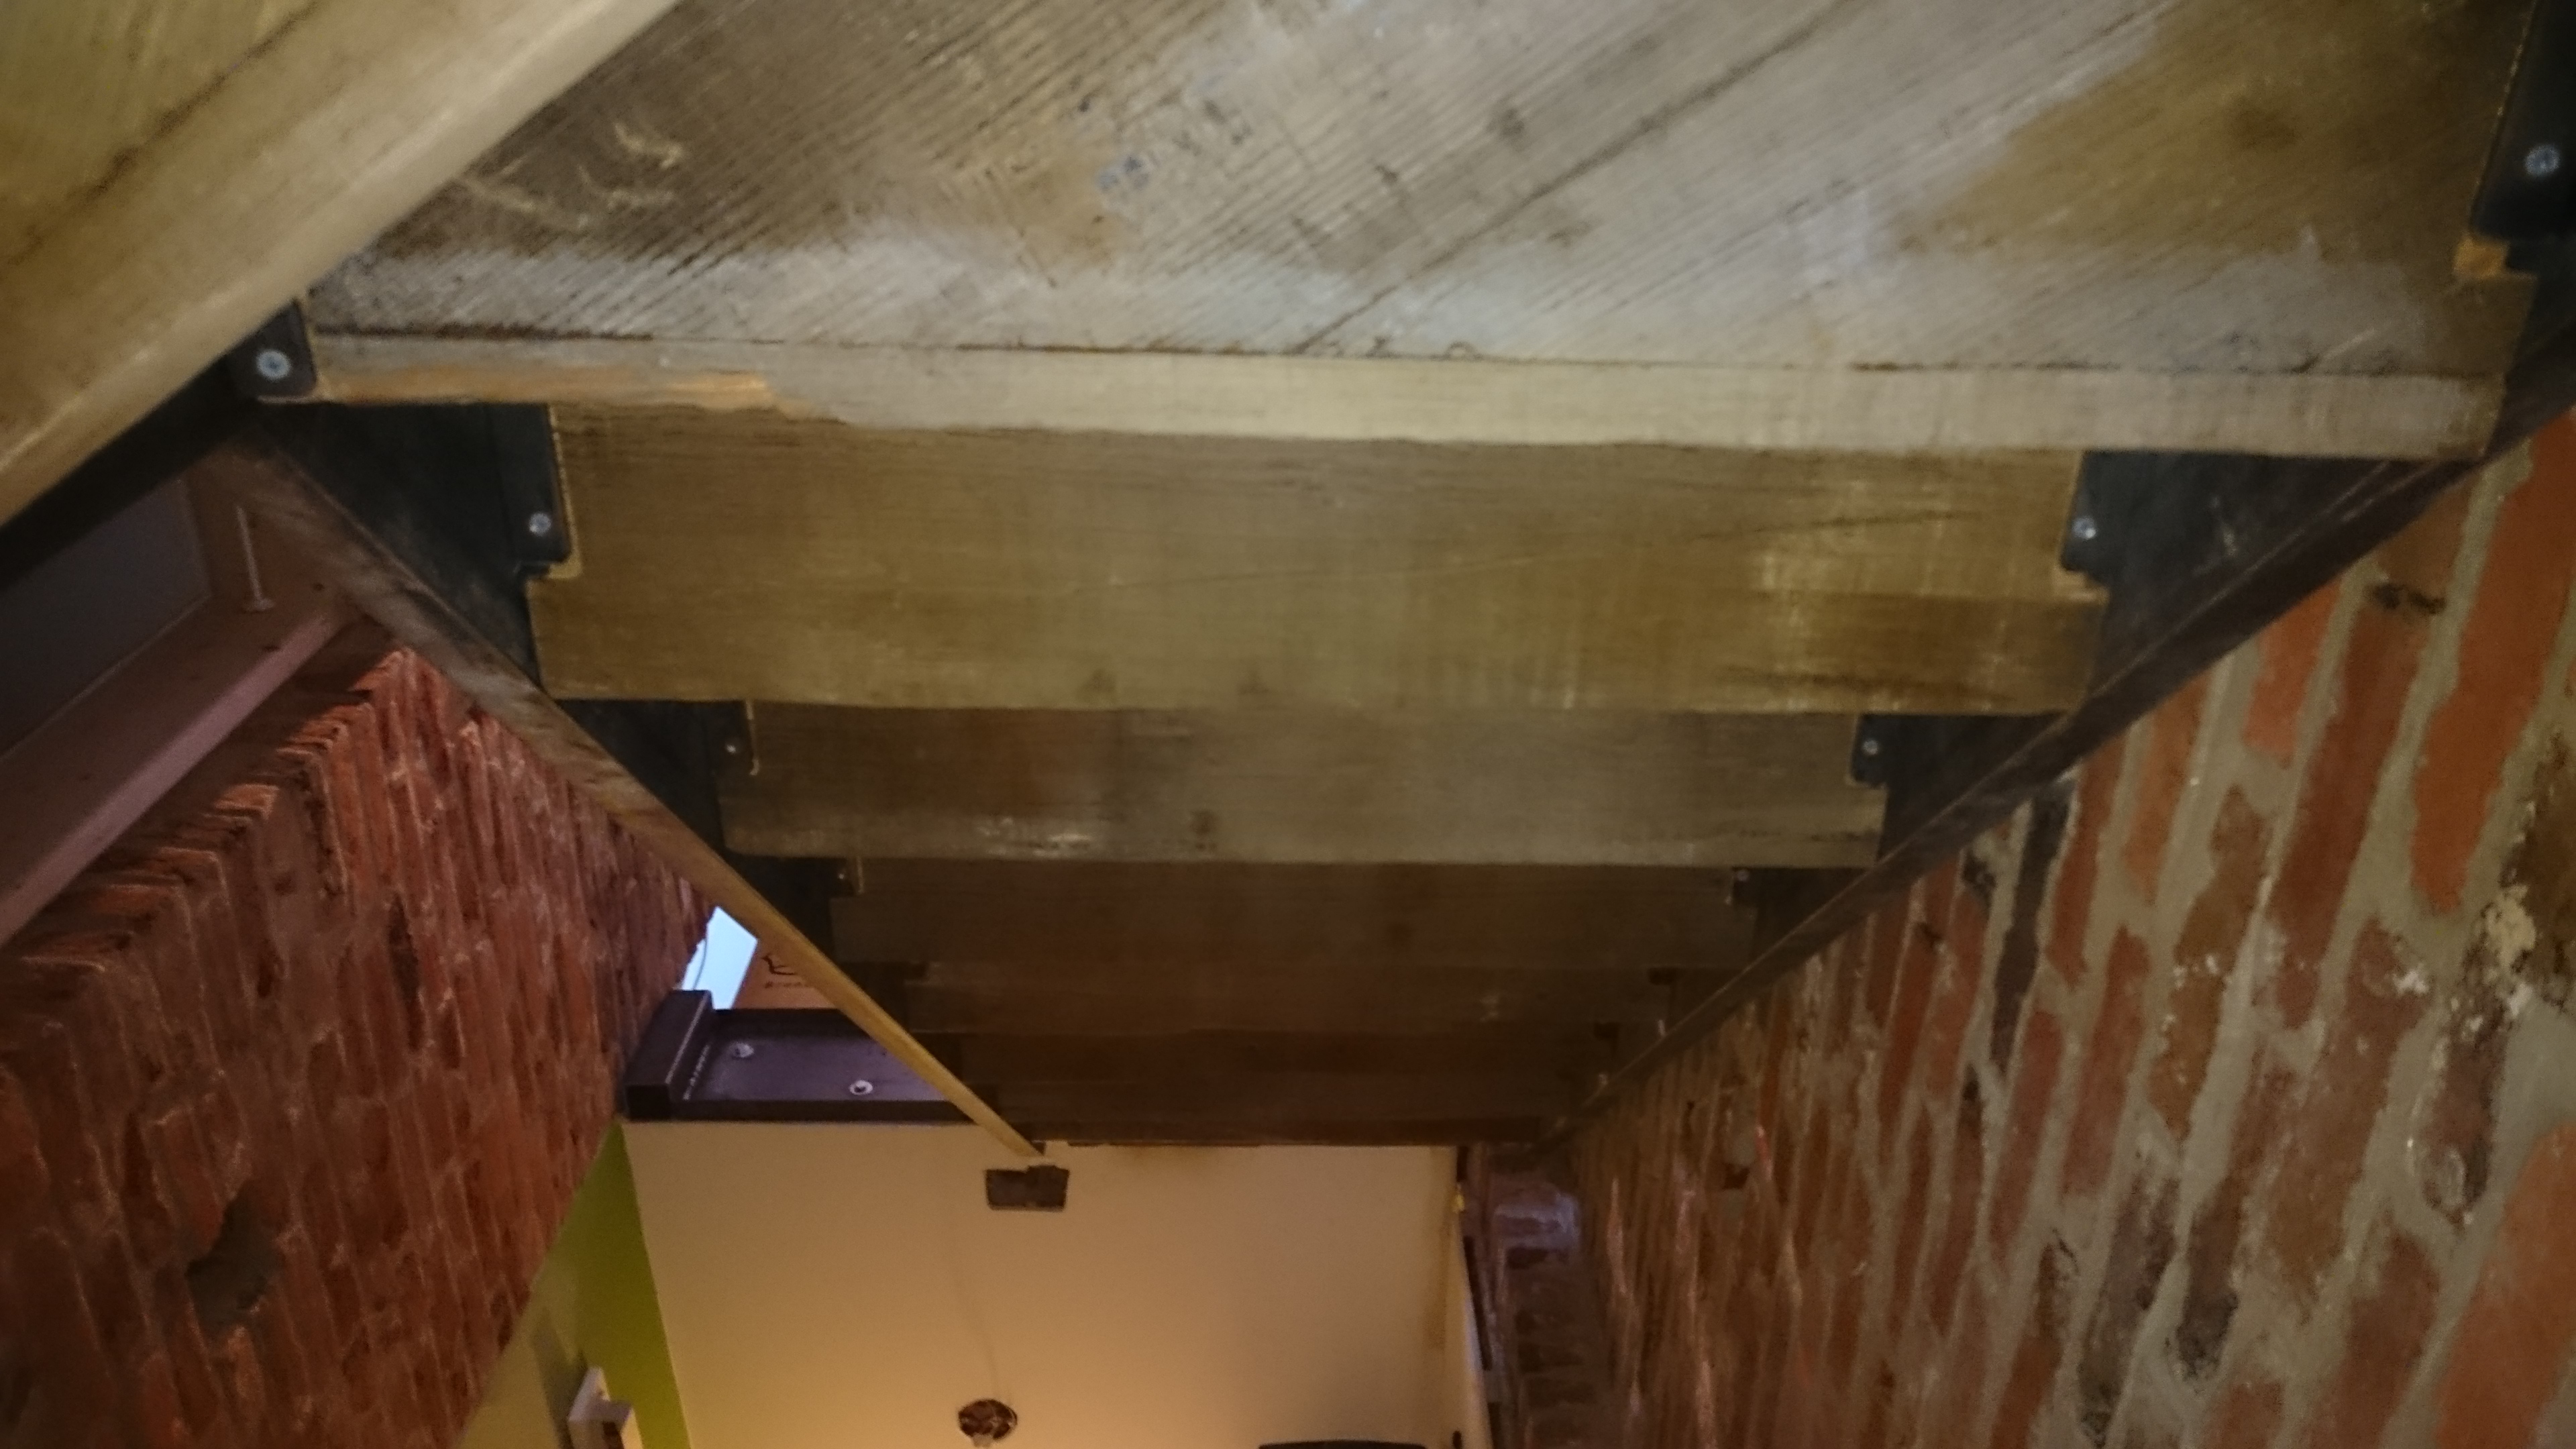
Not that complicated from below
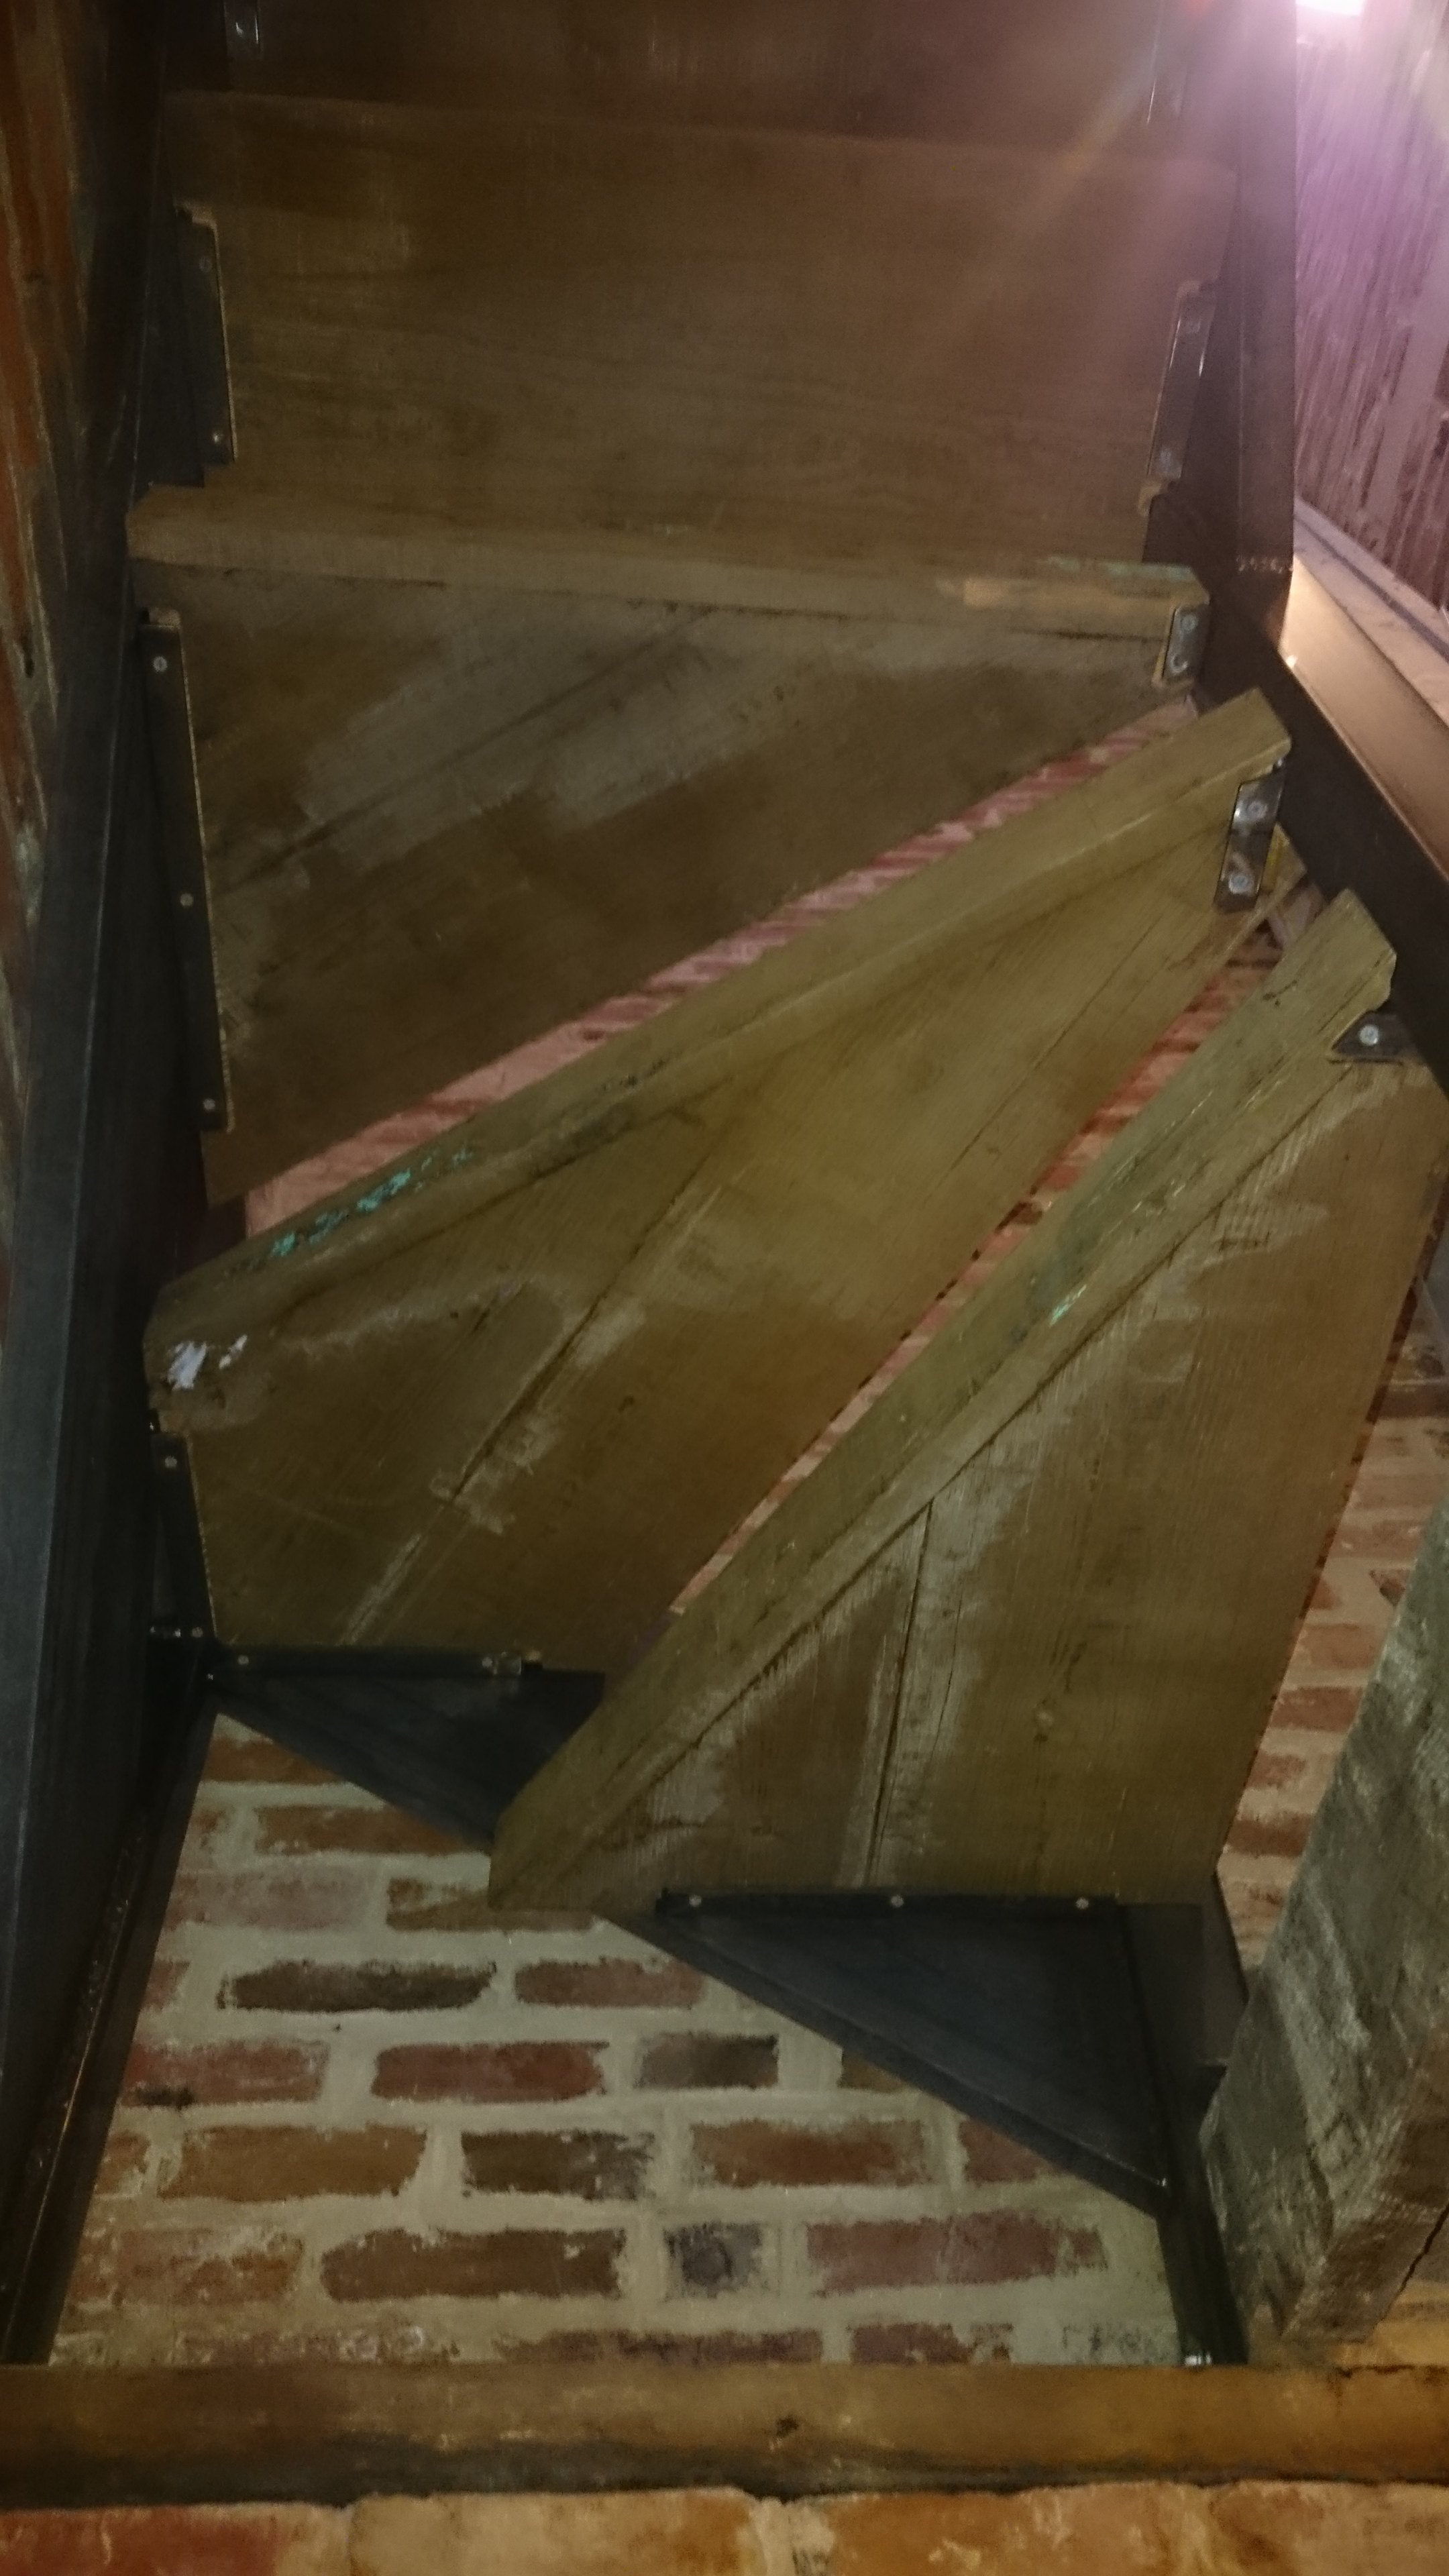
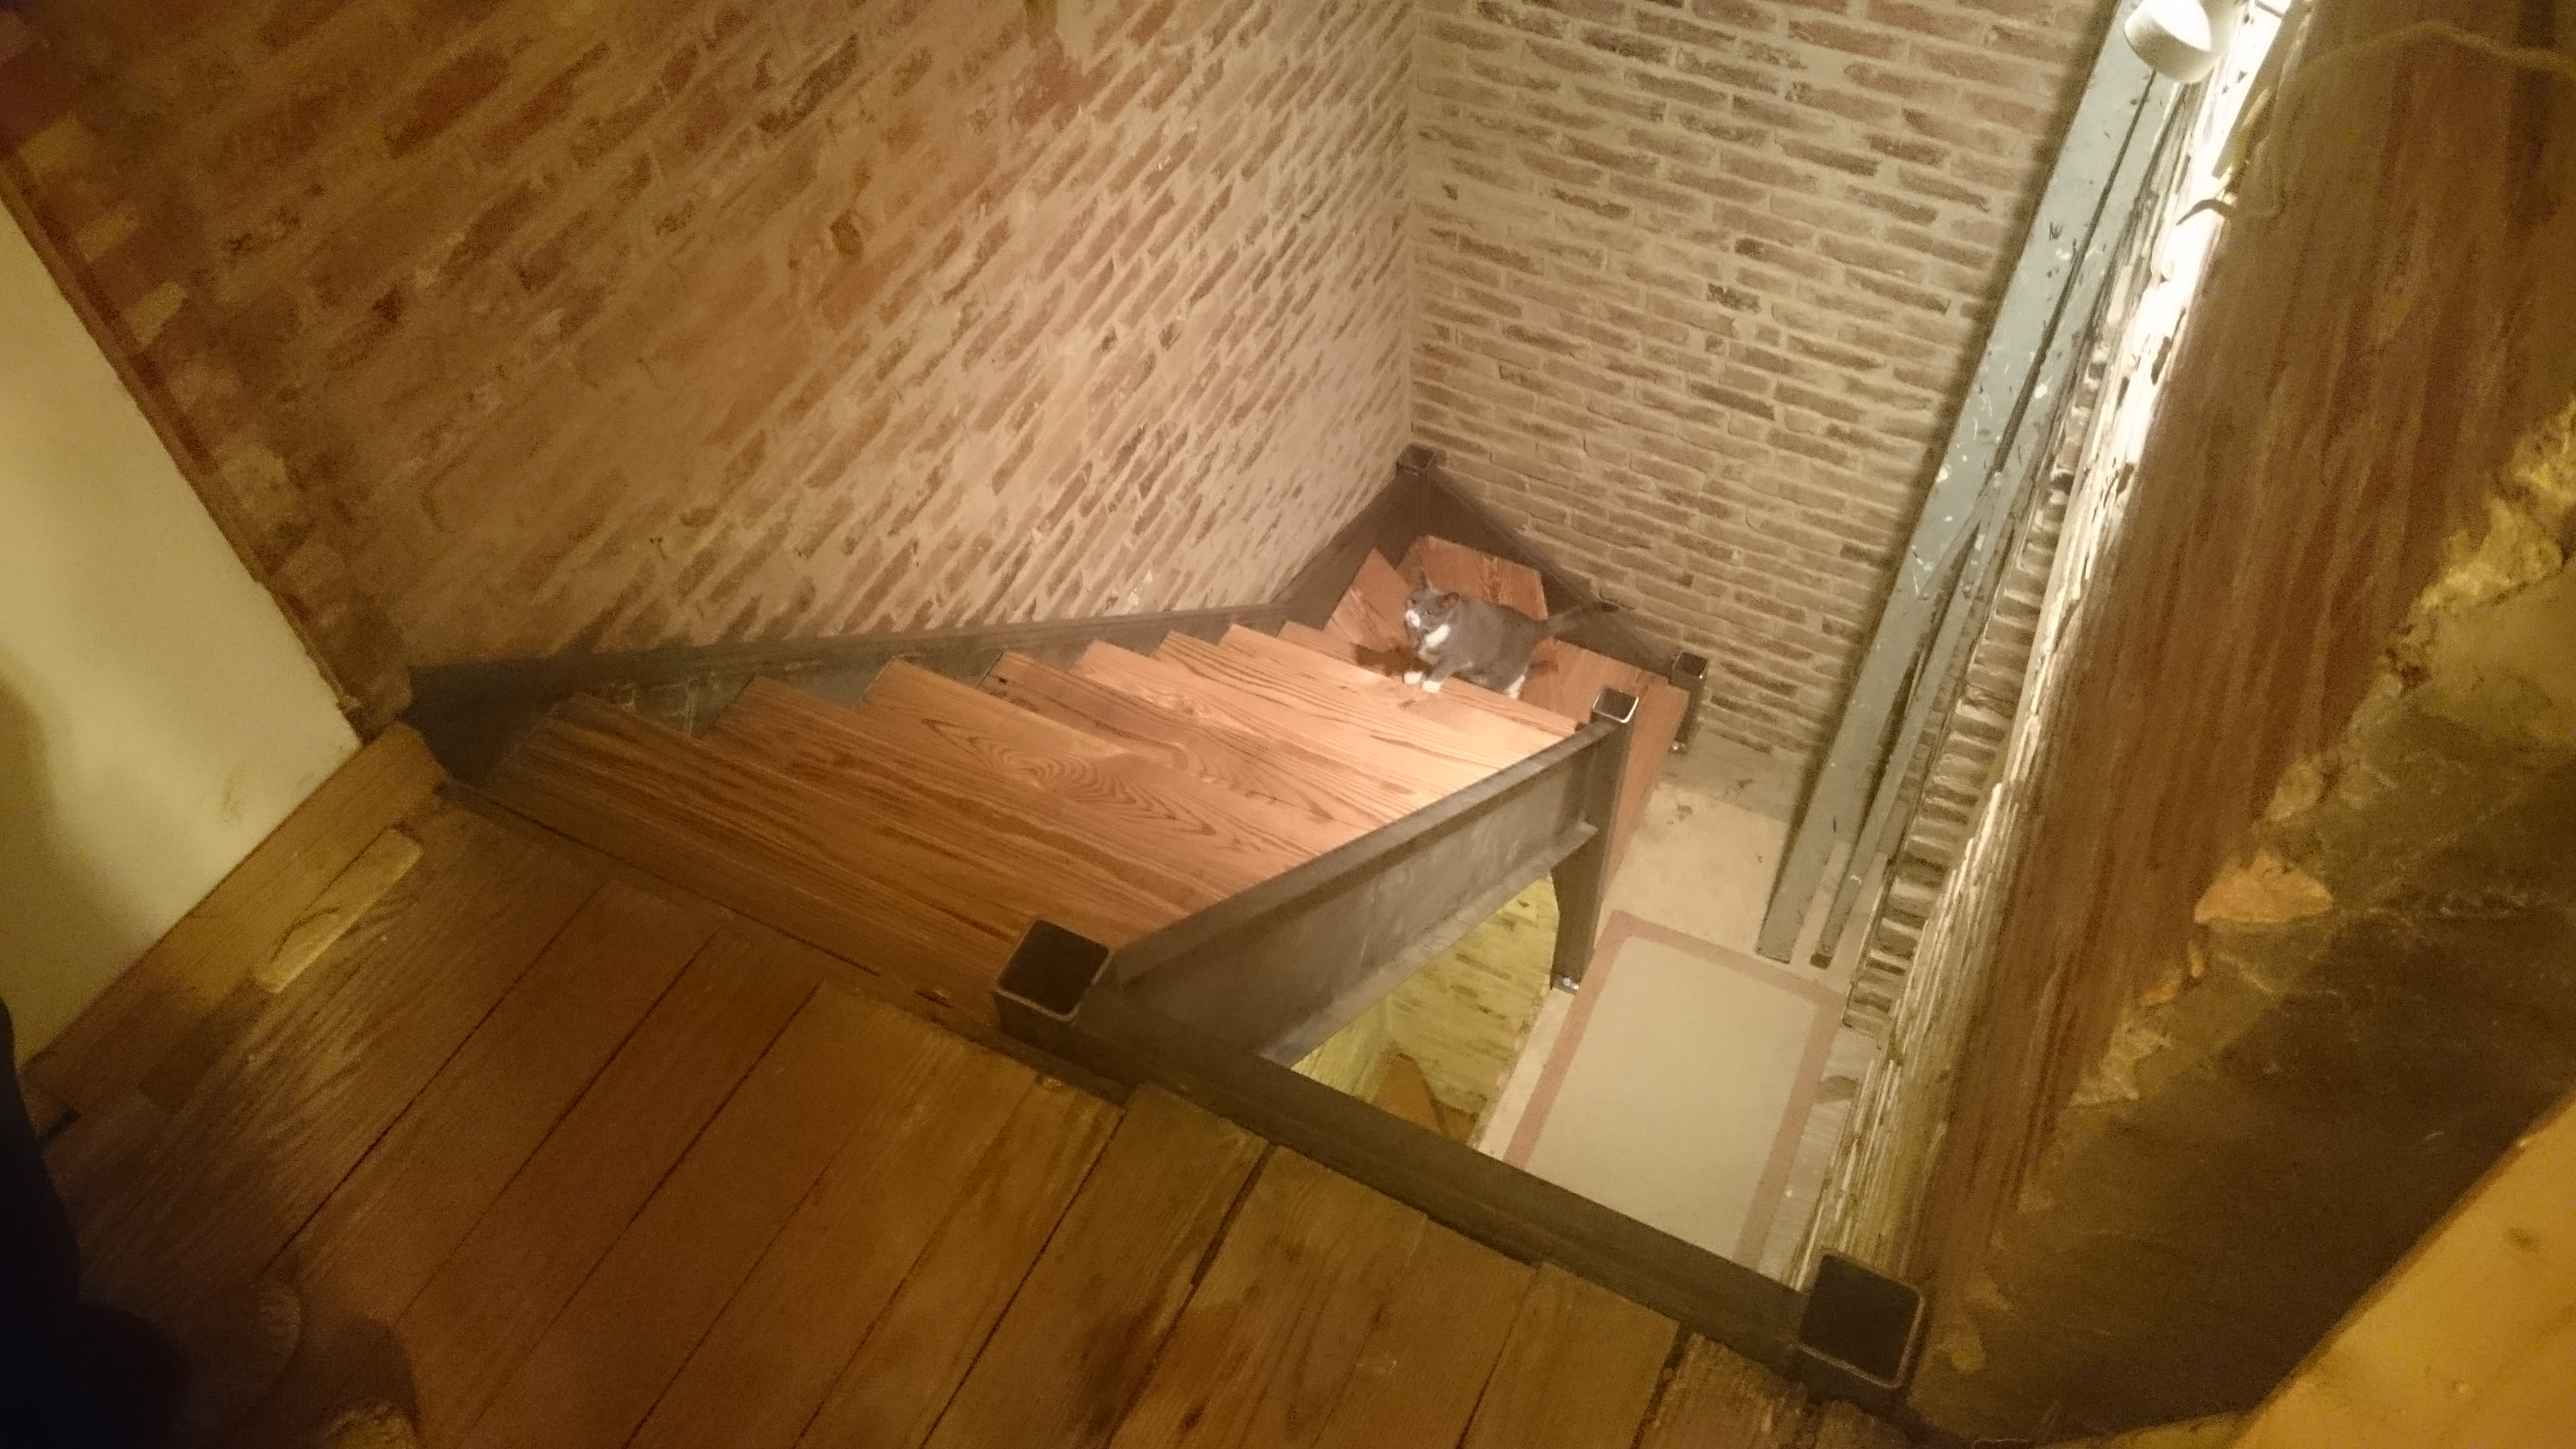
Finally this flight is coming together. Here is a view looking up.
Looking up at the rough cut bottoms from below. The glue haze only shows up in photos :-/
Note that the stairs progress around the post just like in the Sketchup drawing. Also see the steel brackets I made in order to get as much surface area as possible on the smallest part of the stairs.
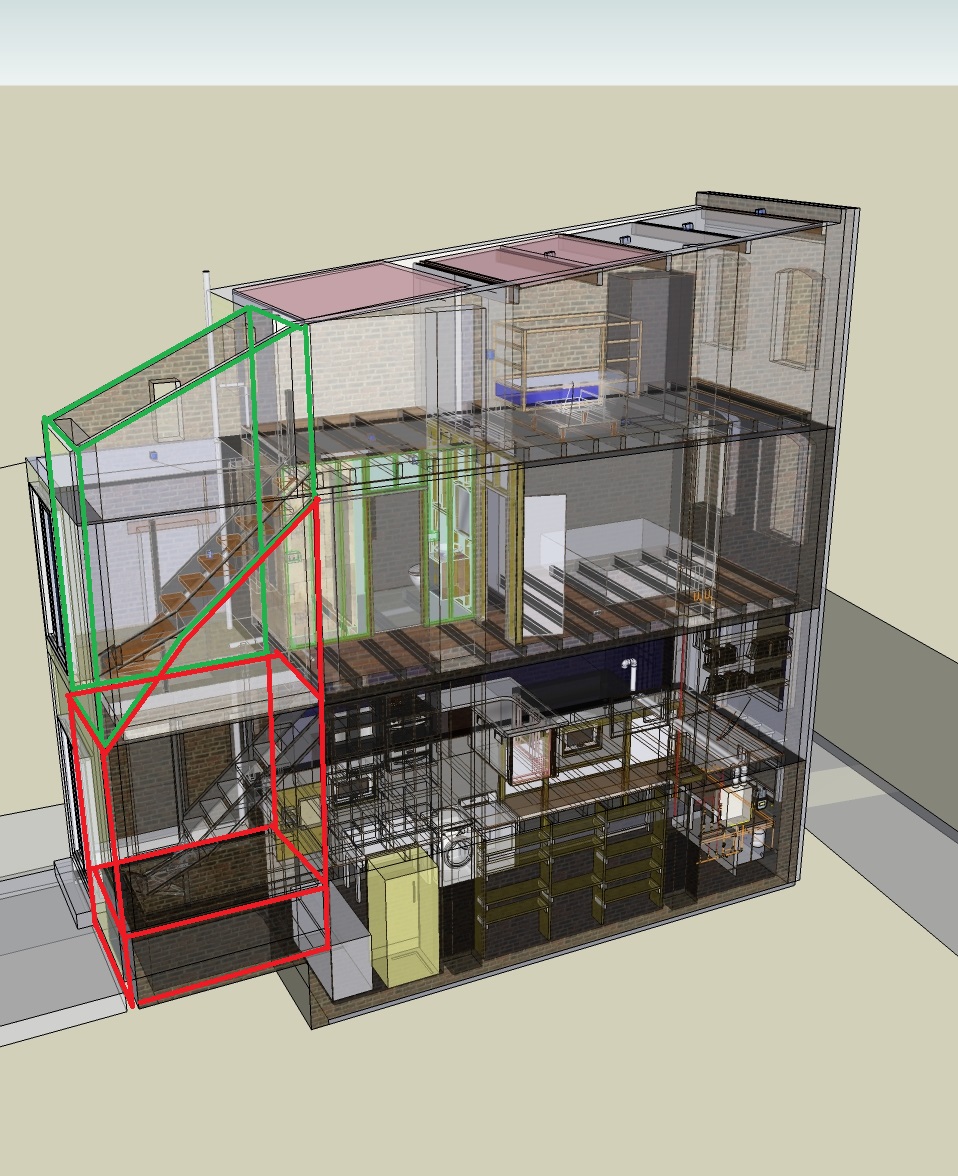
Green is what is done… Red still needs to be done.
I’m finishing up the first half of our brick pointing project this week. I’m ready for this pointing to be over. Unfortunately, I’m only halfway there. Pointing really isn’t that bad other than it being hard on my body. As long as I’ve got my tunes on, I pretty much forget I’m doing it. I’m just ready to move onto other things like trim. Also it makes a mess throughout the house.
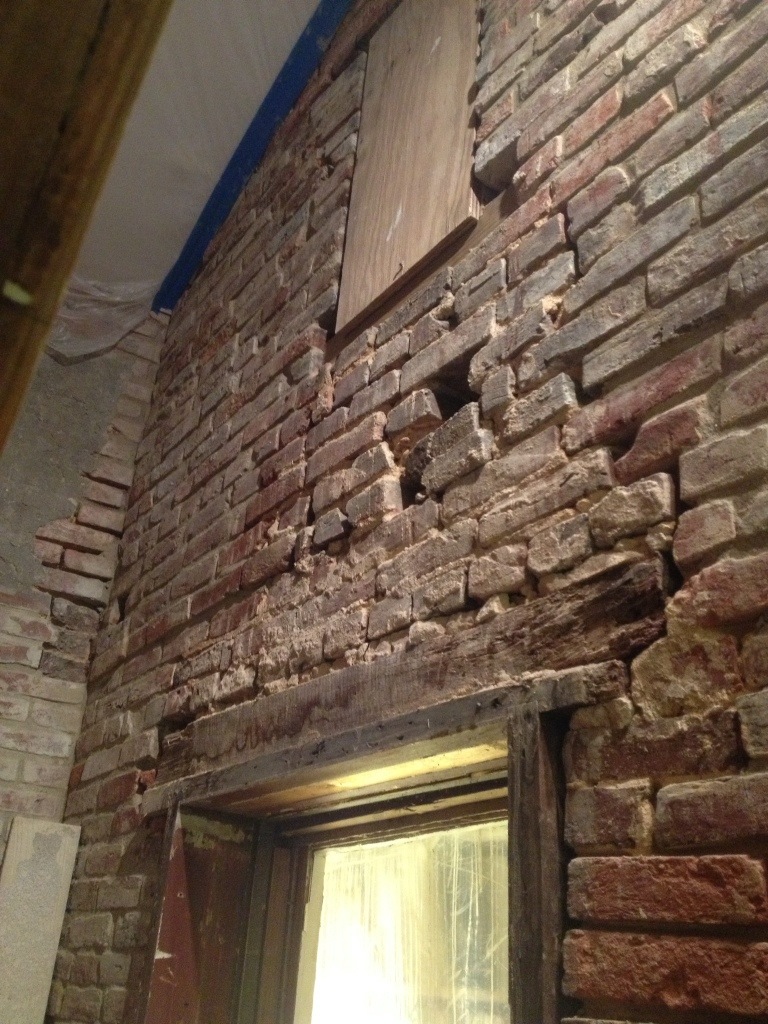
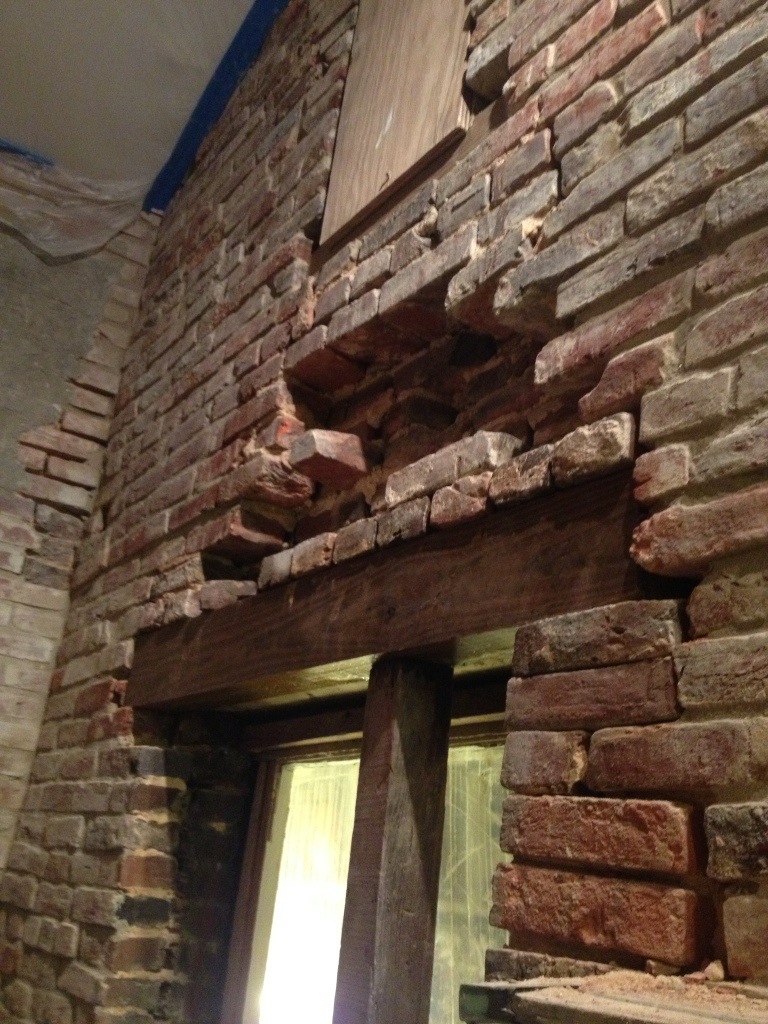
I’ve saved the best for last. I needed the surrounding bricks to be strong enough to hold themselves up when I took out nearly everything from the floor to the ceiling. I’ve been careful to leave a pyramid un-pointed from the door lintel up to the window frame.
The bricks here are basically falling out of the wall. The lower bonding bricks on top of the lintel are actually sitting on 2″ of crumbling mortar.
In the end I removed all bricks not in a bonding course from the door lintel to the window frame. I used a jack to lift up the treated 4×6. Now the bricks sit right on it rather than on 2″ of crumbling mortar.
Here is the same area finished. Bricks sit directly on the lintel and it all looks WAY stronger.
To finish the 2nd + 3rd floor stairway, all I need to finish up is the doorway. After that we’ll use some acid to take off the mortar haze and then seal it up… then on to the 1st + 2nd floor stairway. So tired of pointing bricks.
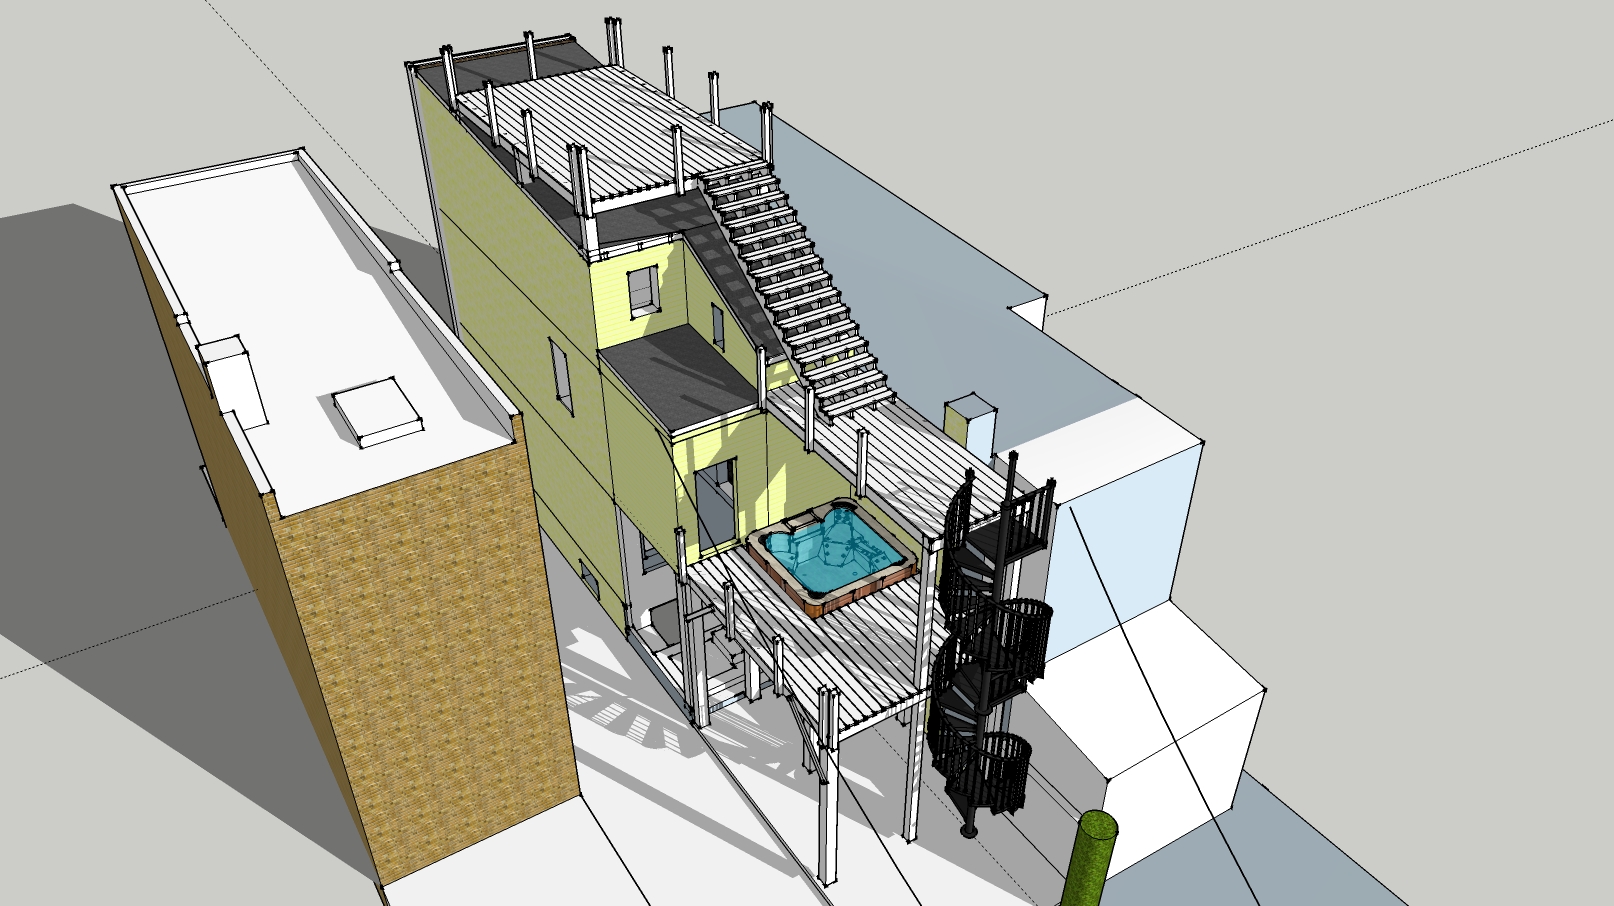
We’ve been busy getting the house ready for my big birthday party this weekend. While I’m stuck at work I’ve been drawing up some deck ideas on Sketchup for an awesome roof deck. The decks are easy; code compliant stairs that don’t cost more than the deck are the hard part. Also I have a sunken hot tub on the lower level. This is supported by its own mini/super strong deck. Railings coming soon. Who wants to party on this next May?
This is Version 20… but I think I started the numbering over previously.
I mentioned the Sketchup model a few times, but admittedly haven’t played with recently. I figured it has come a long way since I last posted it and I should share the latest version. I’ll likely make more revisions (or start over) once I move in and take better measurements. Most measurements were done before we know how everything was built so its not perfectly accurate. Also, we’ve discovered new windows, pipes, walls since then.
Having it made the whole renovation easier. Could work through ideas many times before we even had parts in hand, made it easier to estimate materials, even helped the days go smoother. Could plan out the whole night while at work and then just power through it that evening with fewer surprises. Explore the basement and check out the plumbing. This is a spot where it really helped.
Now that we’re putting up drywall, its almost amazing to us that its been only 4 months since we bought the place. Working every evening and weekend with few exceptions for 4 months feels like years. Its good to take a moment and think back to the first tour of the house, through the inspections and the purchase just to see how far we came.
I cant remember exactly when Siri first saw this house for sale online. No sooner than we had looked at the photos online, someone else had a contract in on it. We were just starting to look, but we knew we’d probably never find a house with a yard in this neighborhood. It must have been too much work for them to take on. Months later Siri saw it come up again and we scheduled with Aldo to check it out. It was the first of two houses we looked at during the whole hunt. We had an offer in pretty quickly and then there was the waiting. We must have waited 4 months to hear back from the bank. Apparently, while we had an offer in, someone had made a higher offer and we were told our only options were to sign the release or wait for the contract to expire. We were upset, but Aldo worked some magic and finally we were able to put in our counter offer which was approved.
I remember those first excited days after we closed. We took the day to measure everything for a Sketchup drawing and around a week later we started to tear things out.
Page 12 of the Inspection Report – Bad Wiring, F’d ducting, Horrible Ceilings.
There were the obvious problems like the drop ceiling and then there were things on the inspection report. More things we uncovered while renovating such as the 3rd floor bricks, whole house wiring, whole house plumbing… Other things we simply decided to do now rather than after we moved in (the bathroom). Somehow even with all the problems, we didn’t feel anything was too bad for us to handle (with help of course).
So 5 months in, it looks like we’ve got about a month until we can move in. We need to finish up some wiring, plumbing, drywall, floors and bathroom. Once we’re moved in, we’ll take it a little easier while we finish up. We’ve come a long way. It helps to look back at how far we’ve come to give us energy to get us to the end.
Is drawing this easier or harder than actually installing it?
This week my primary goal is to get our water working again. Currently we have removed all plumbing back to the main valve on the wall so we have a blank canvas with which to work. I’m packaging all the mechanical items in one compact 13″ deep corner between our front wall and a chimney. This tiny space will contain our gas meter, water heater (acting as both a boiler and a water heater), pumps, distribution manifolds, and all the associated plumbing.
In the Sketchup image above you can see our Noritz tankless water heater (white) at the top with its 3″ PVC intake and exhaust pipes and 3/4″ gas line (yellow). On the right, our three zone supply (top) and return (bottom) manifolds. These will have 3/4″ PEX running to smaller manifolds (very top) on under each floor which will make 2x 3/8″ PEX circuits through the floors. If you were wondering: missing from this sketch are all the valves, water pumps and PEX tubing. One day.
After the planning, the next step, and my job for the night, is to get the 3/4″ pressure treated plywood mounted to struts hung from the joists. This is the same technique we used for the electrical panels last weekend.