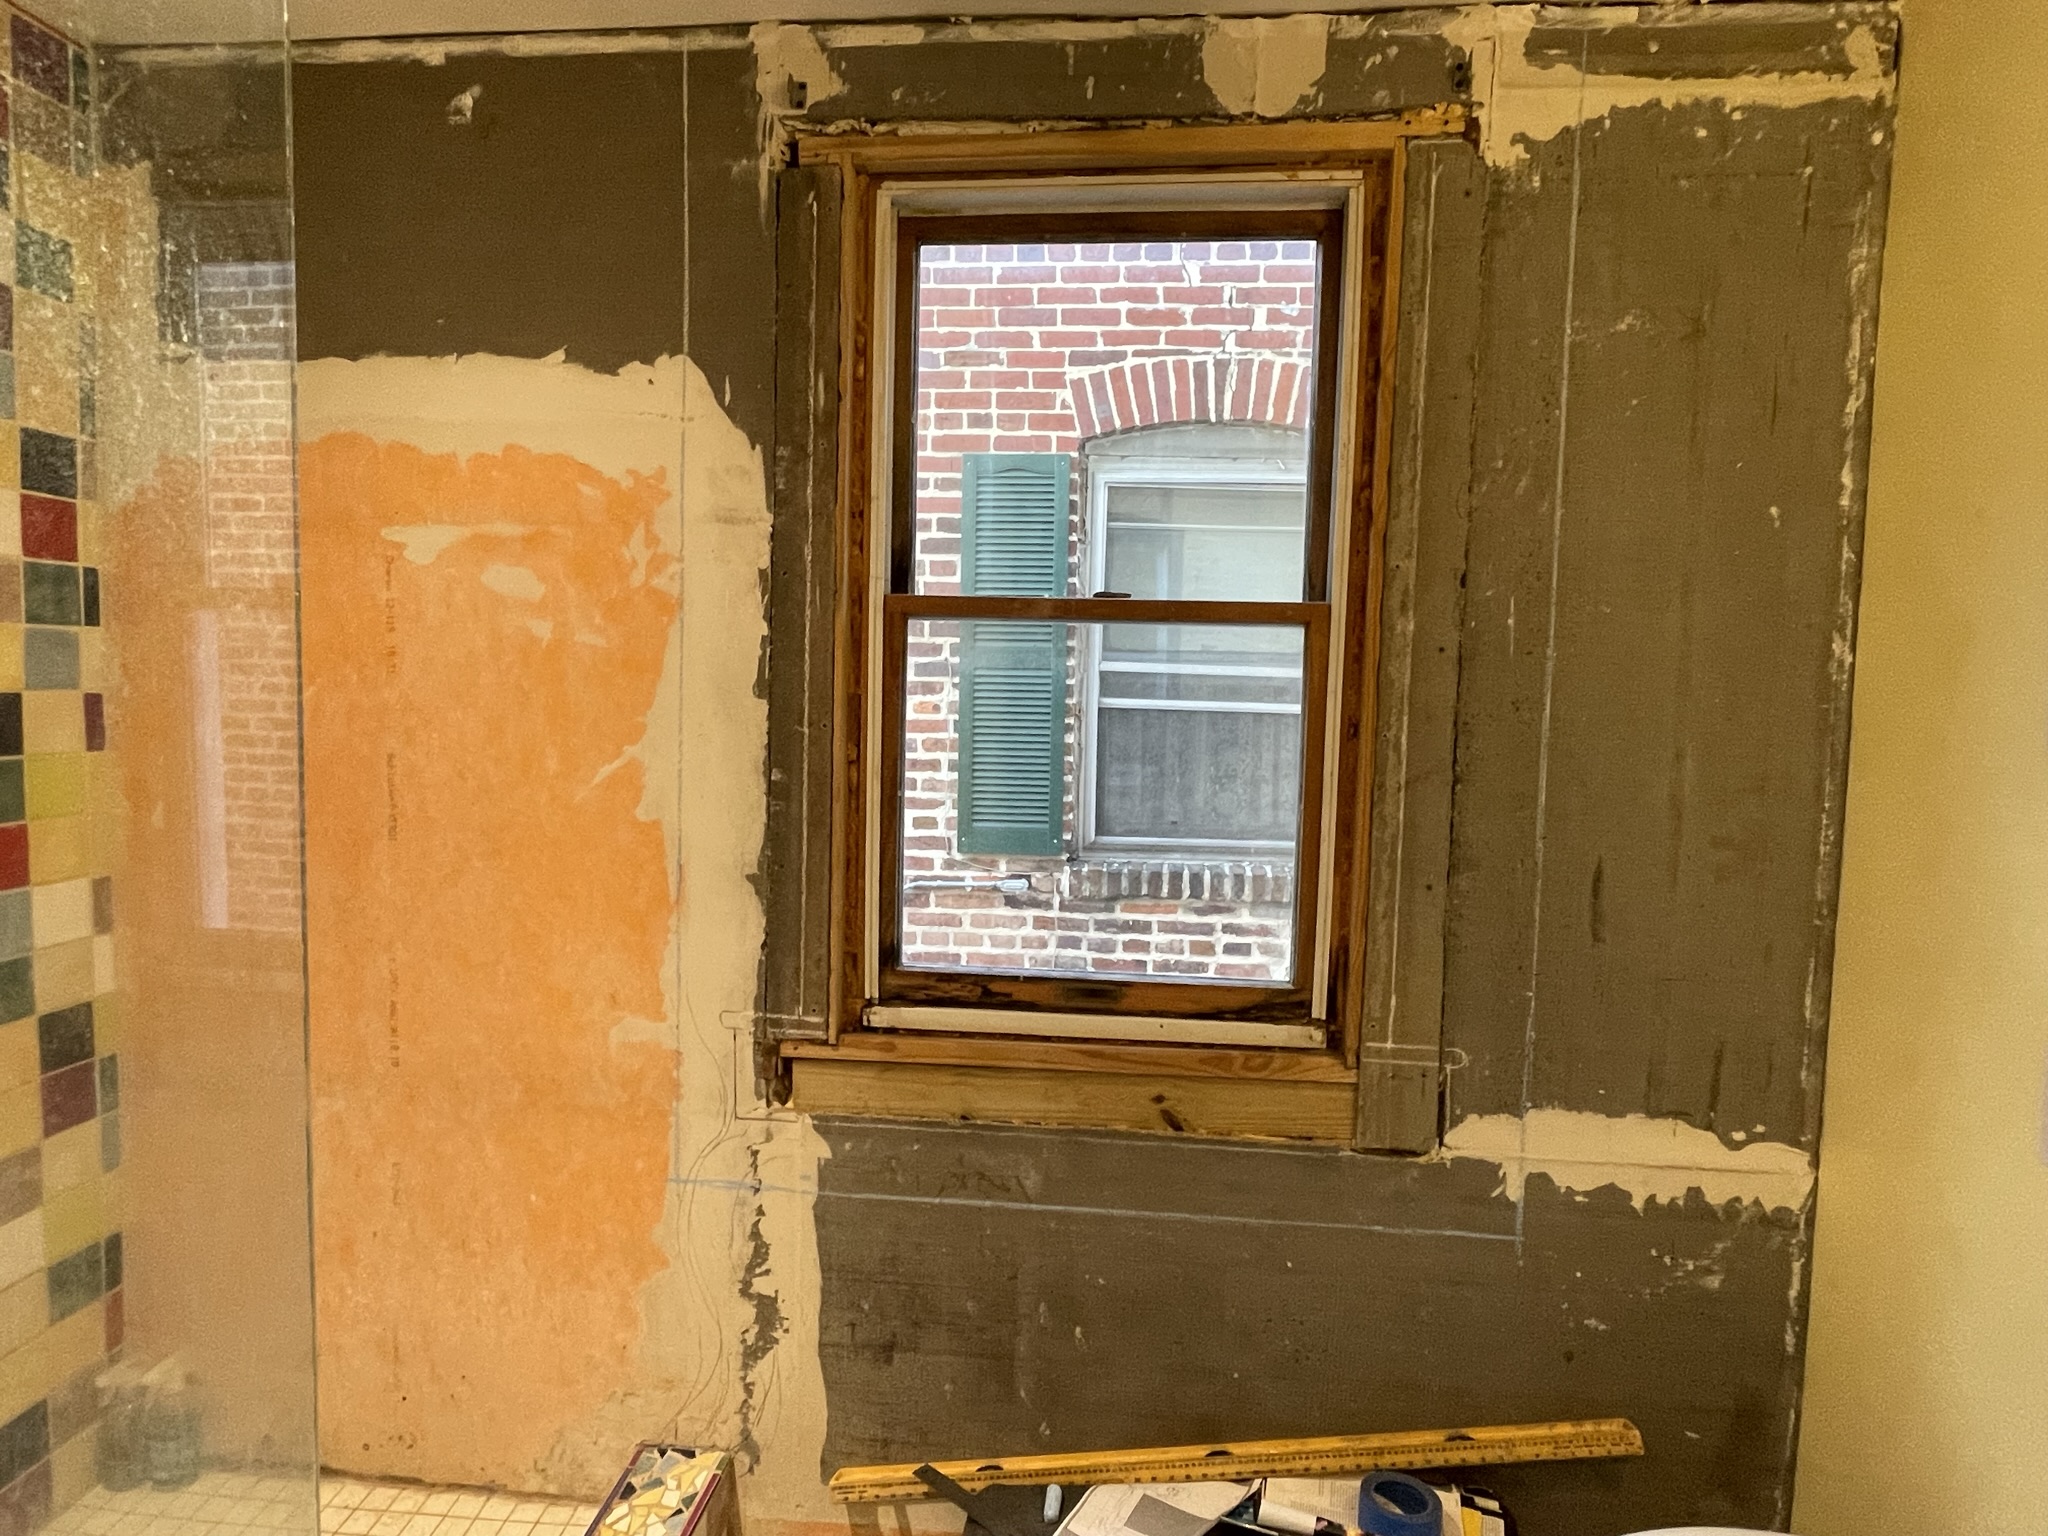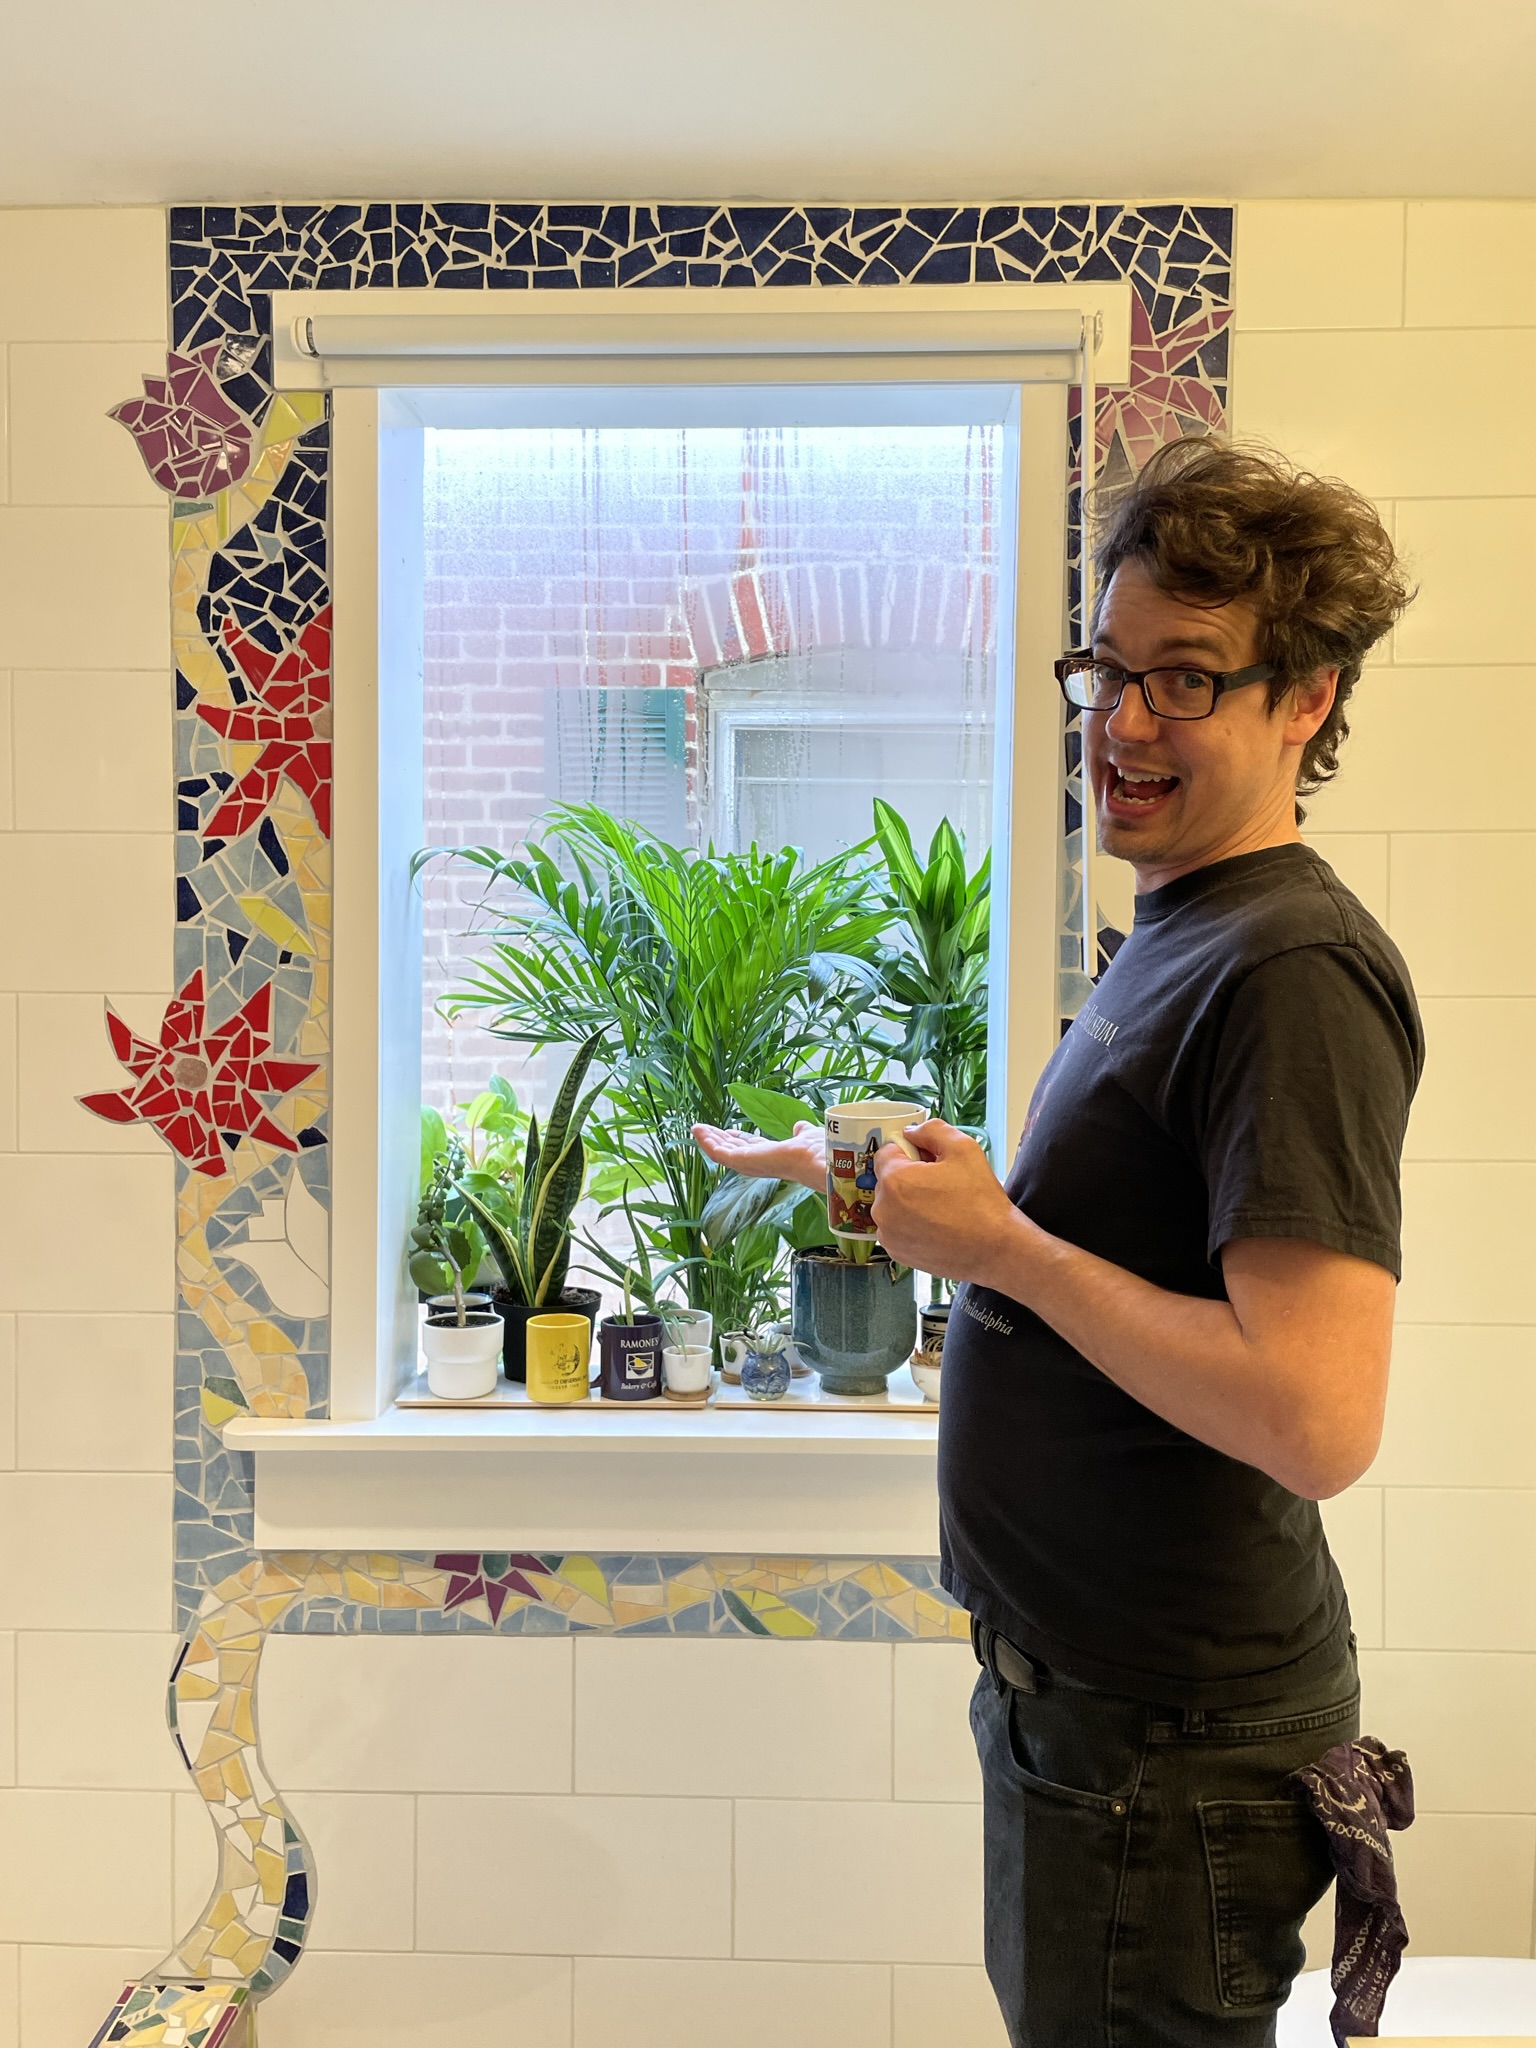
It’s hard to imagine how we lived with our grey and orange unfinished bathroom wall for a decade. It wasn’t pretty, but it worked. The task of doing a whole-wall mosaic seemed too daunting and permanent to commit to a design. Finally, with the kid off to college, it needed to get finished.
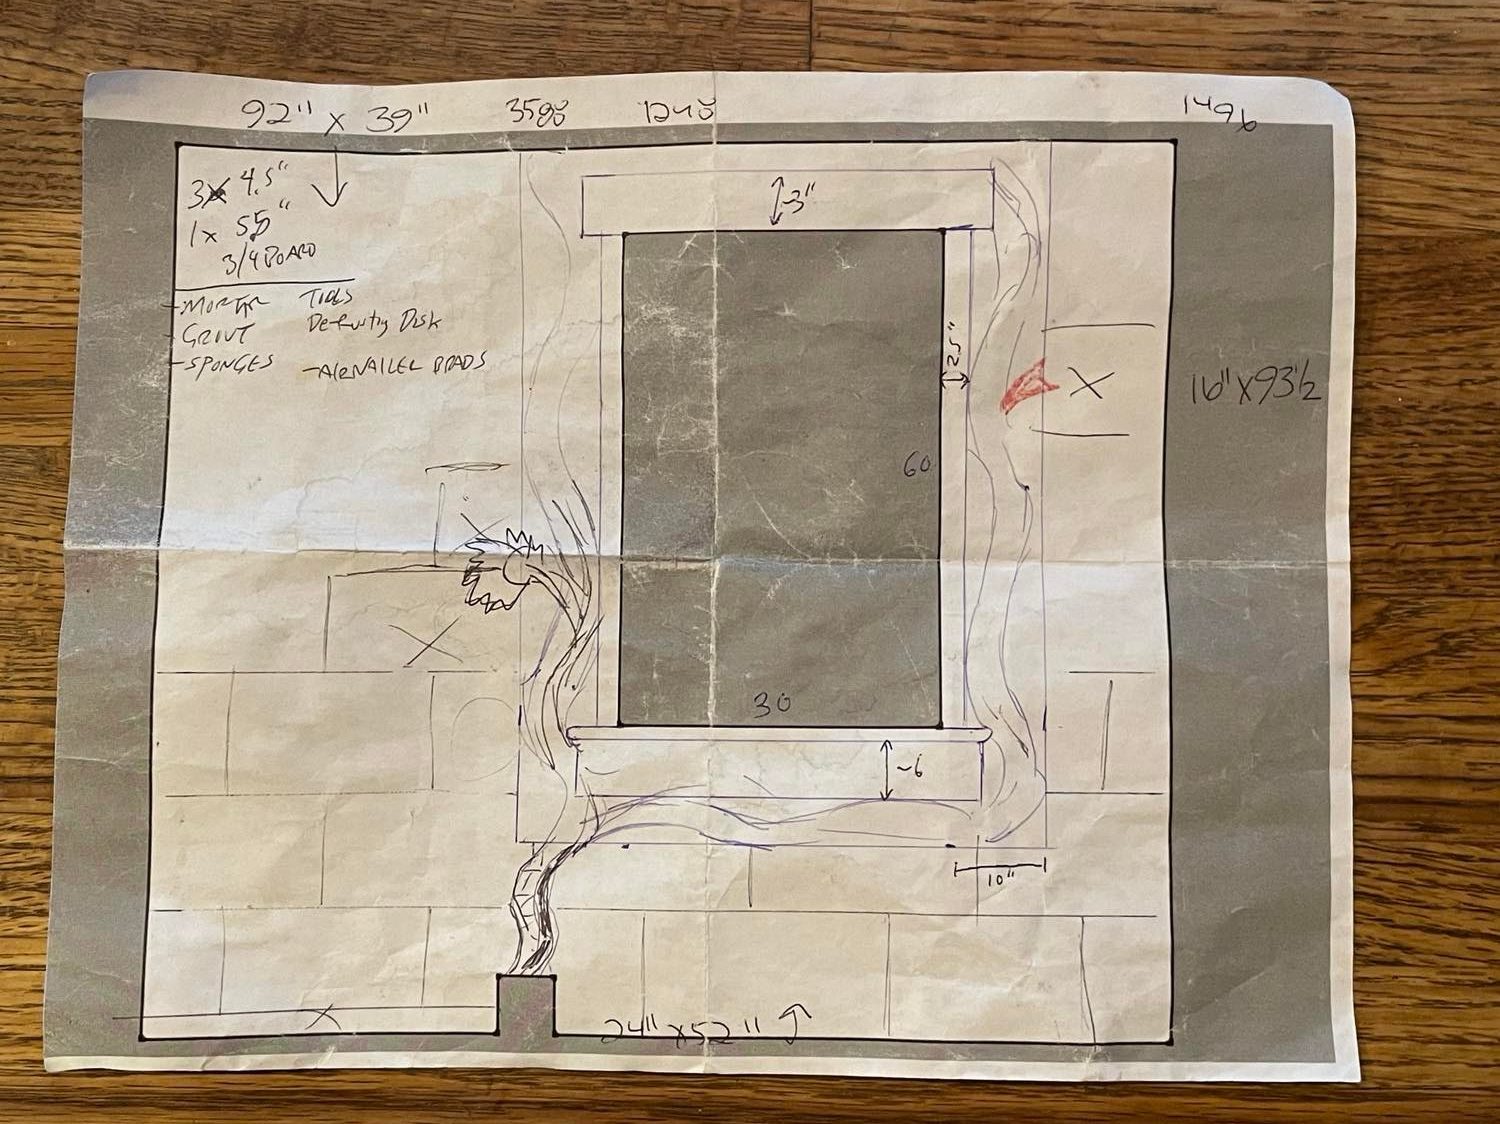
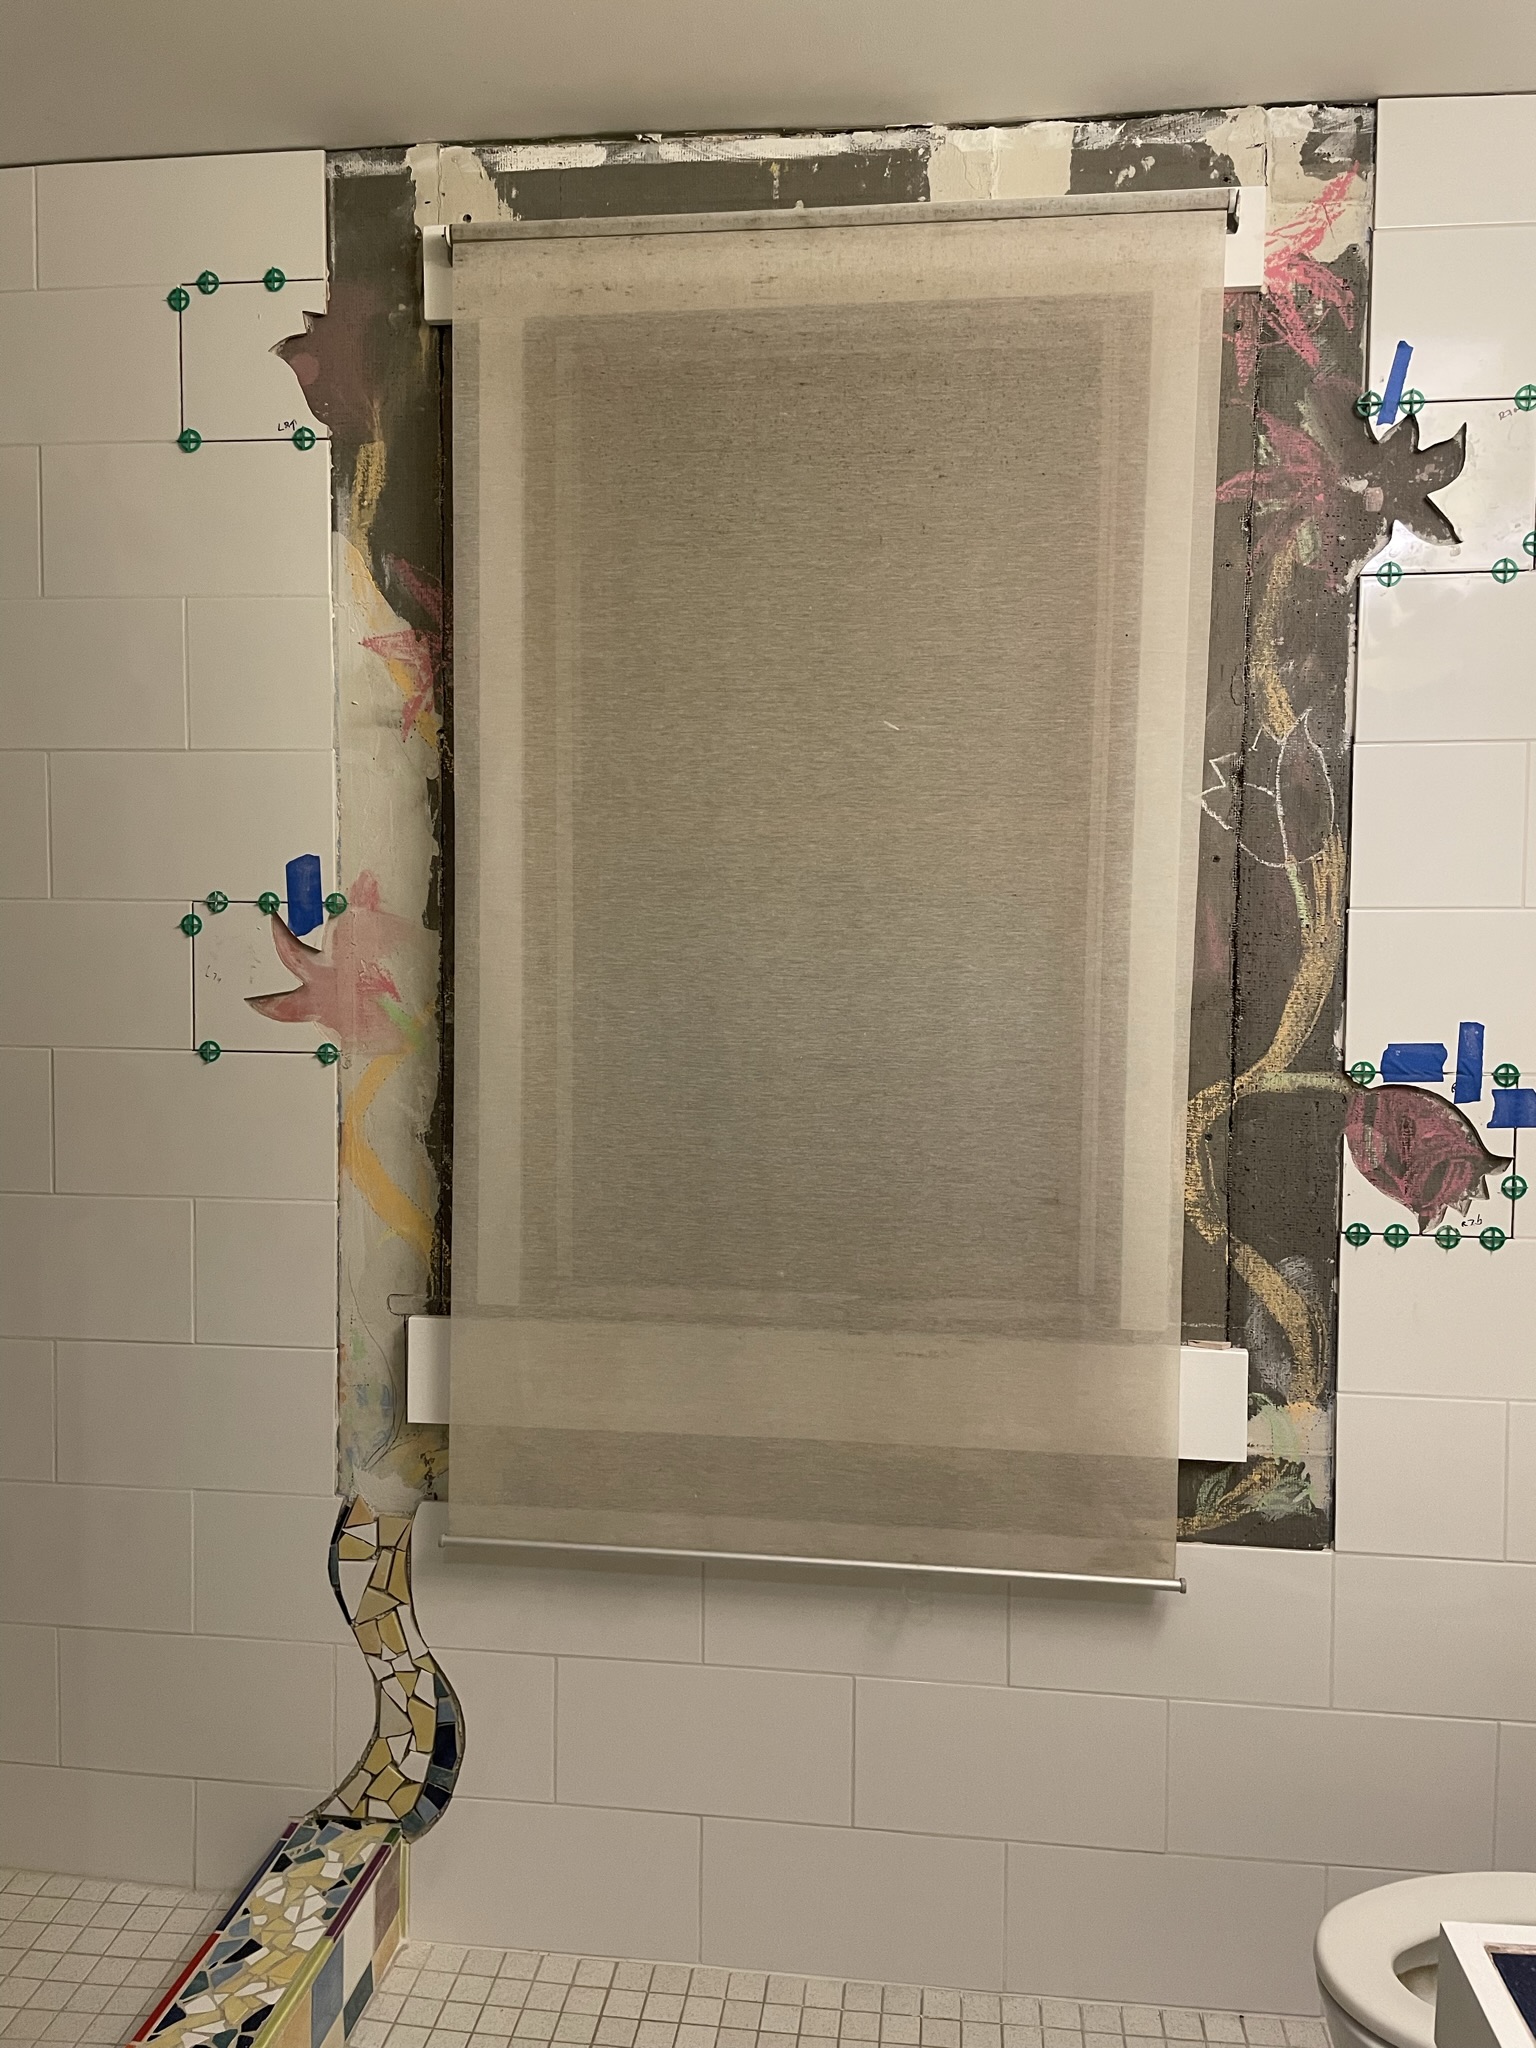
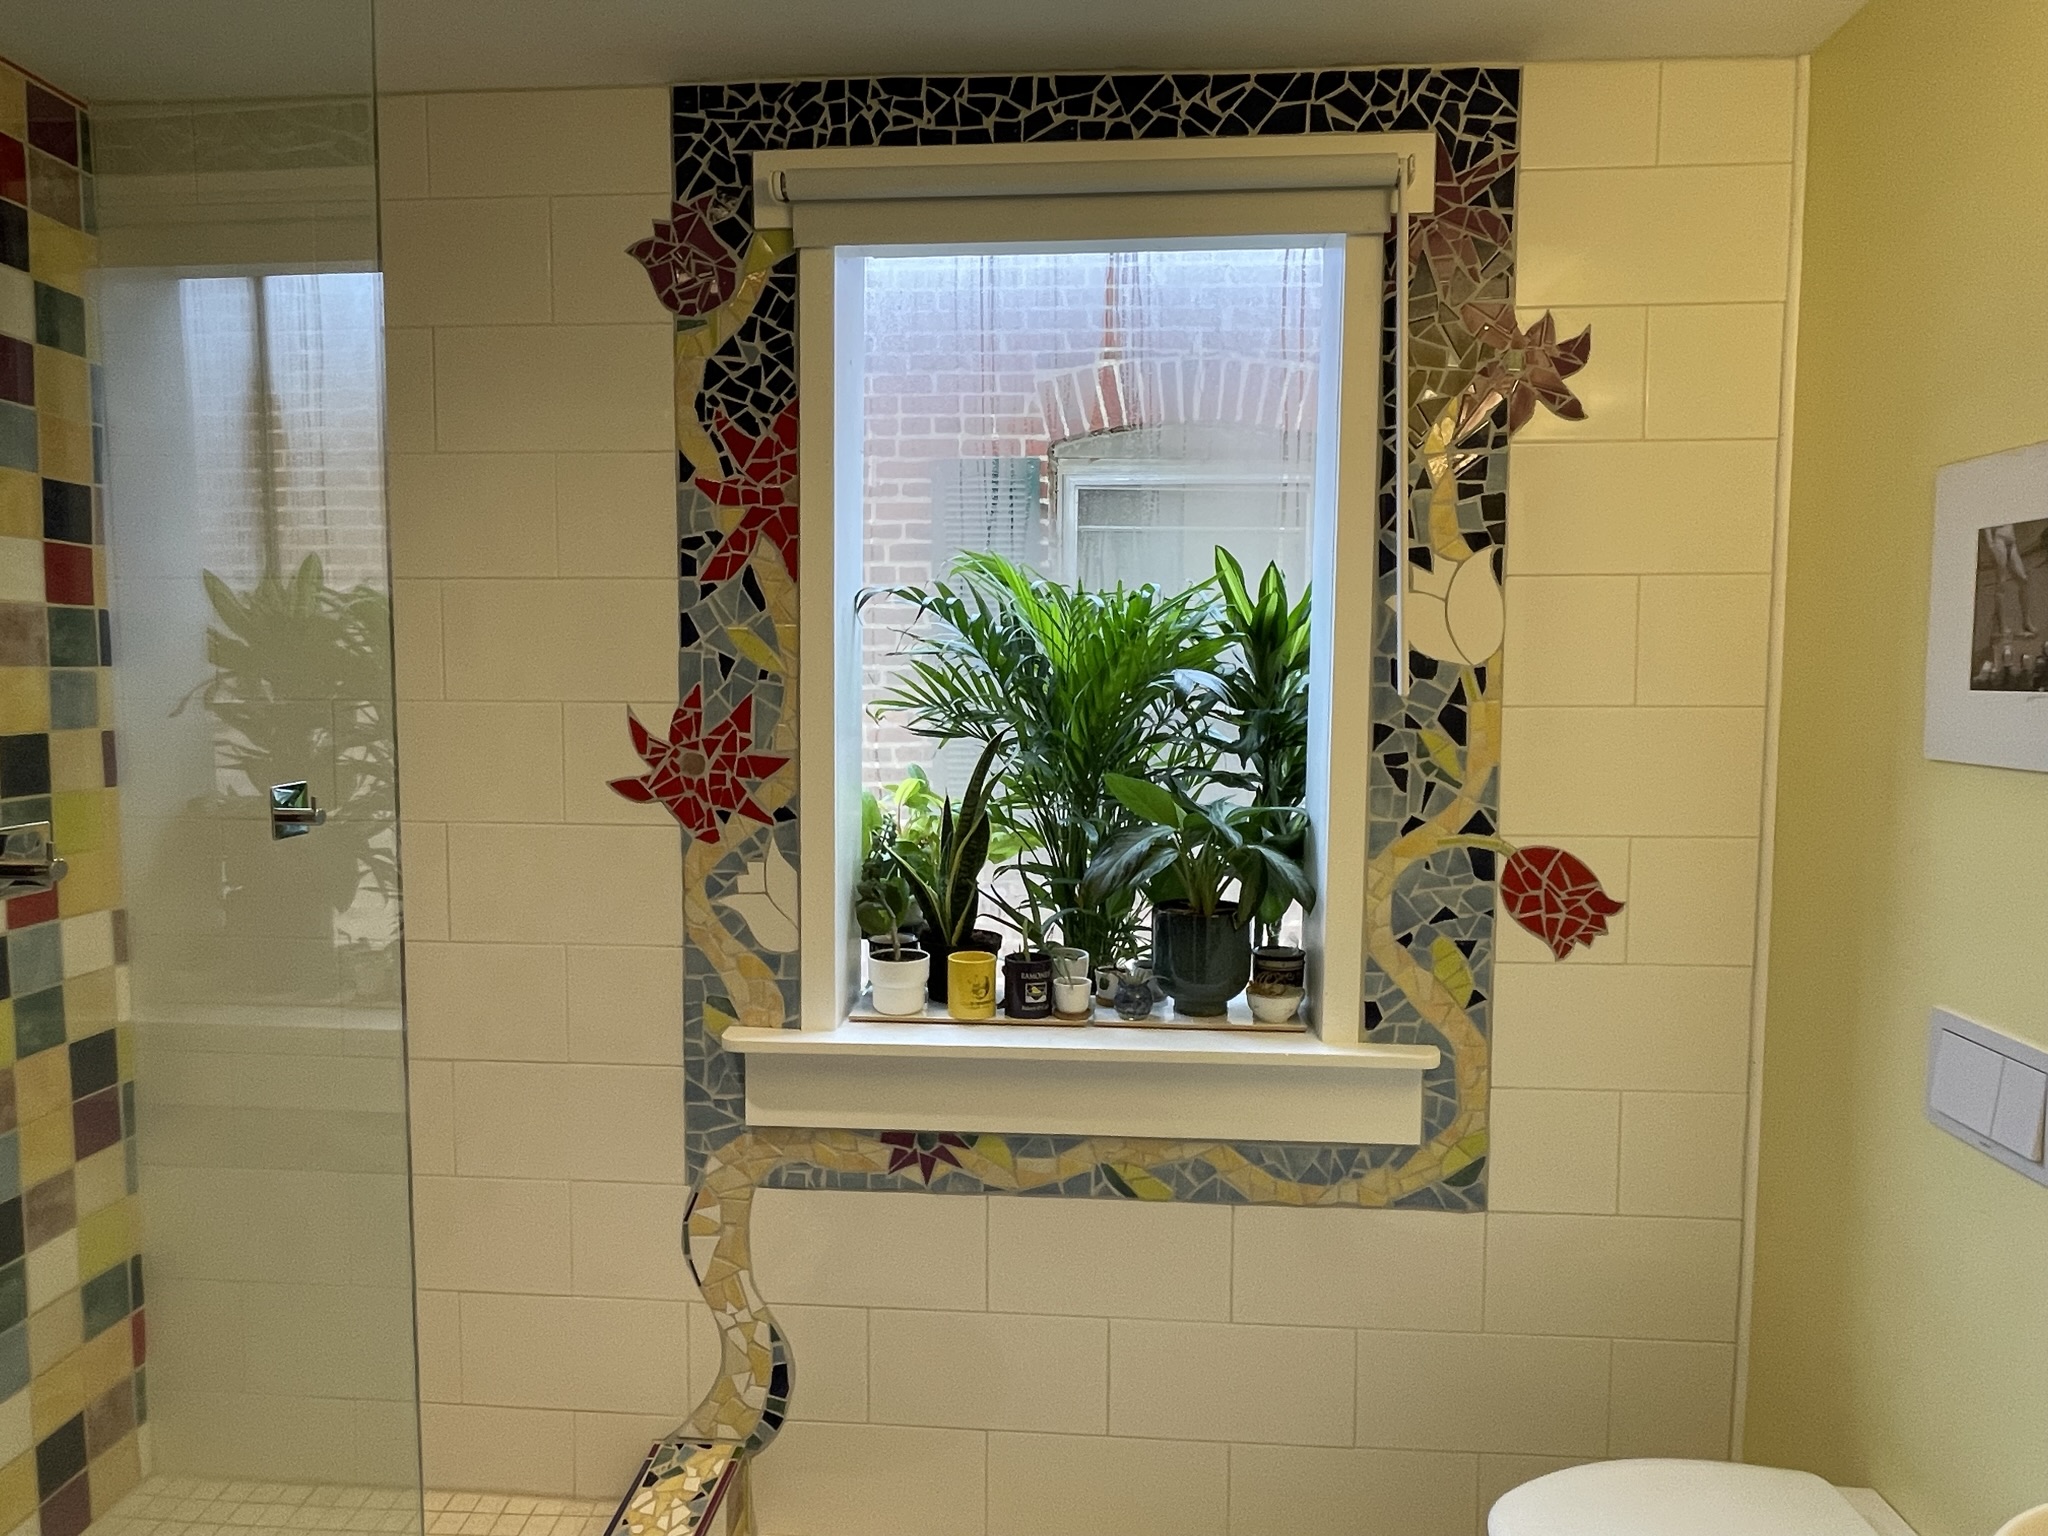
Using the templates we printed a decade ago to lay this wall out, we decided to shrink the mosaic to just a border around the window with the rest being large white tiles. It seemed more digestible now with only 10 inches of mosaic on the sides and 4 on the top and bottom. It should also be easier to clean and less overwhelmingly busy to look at.
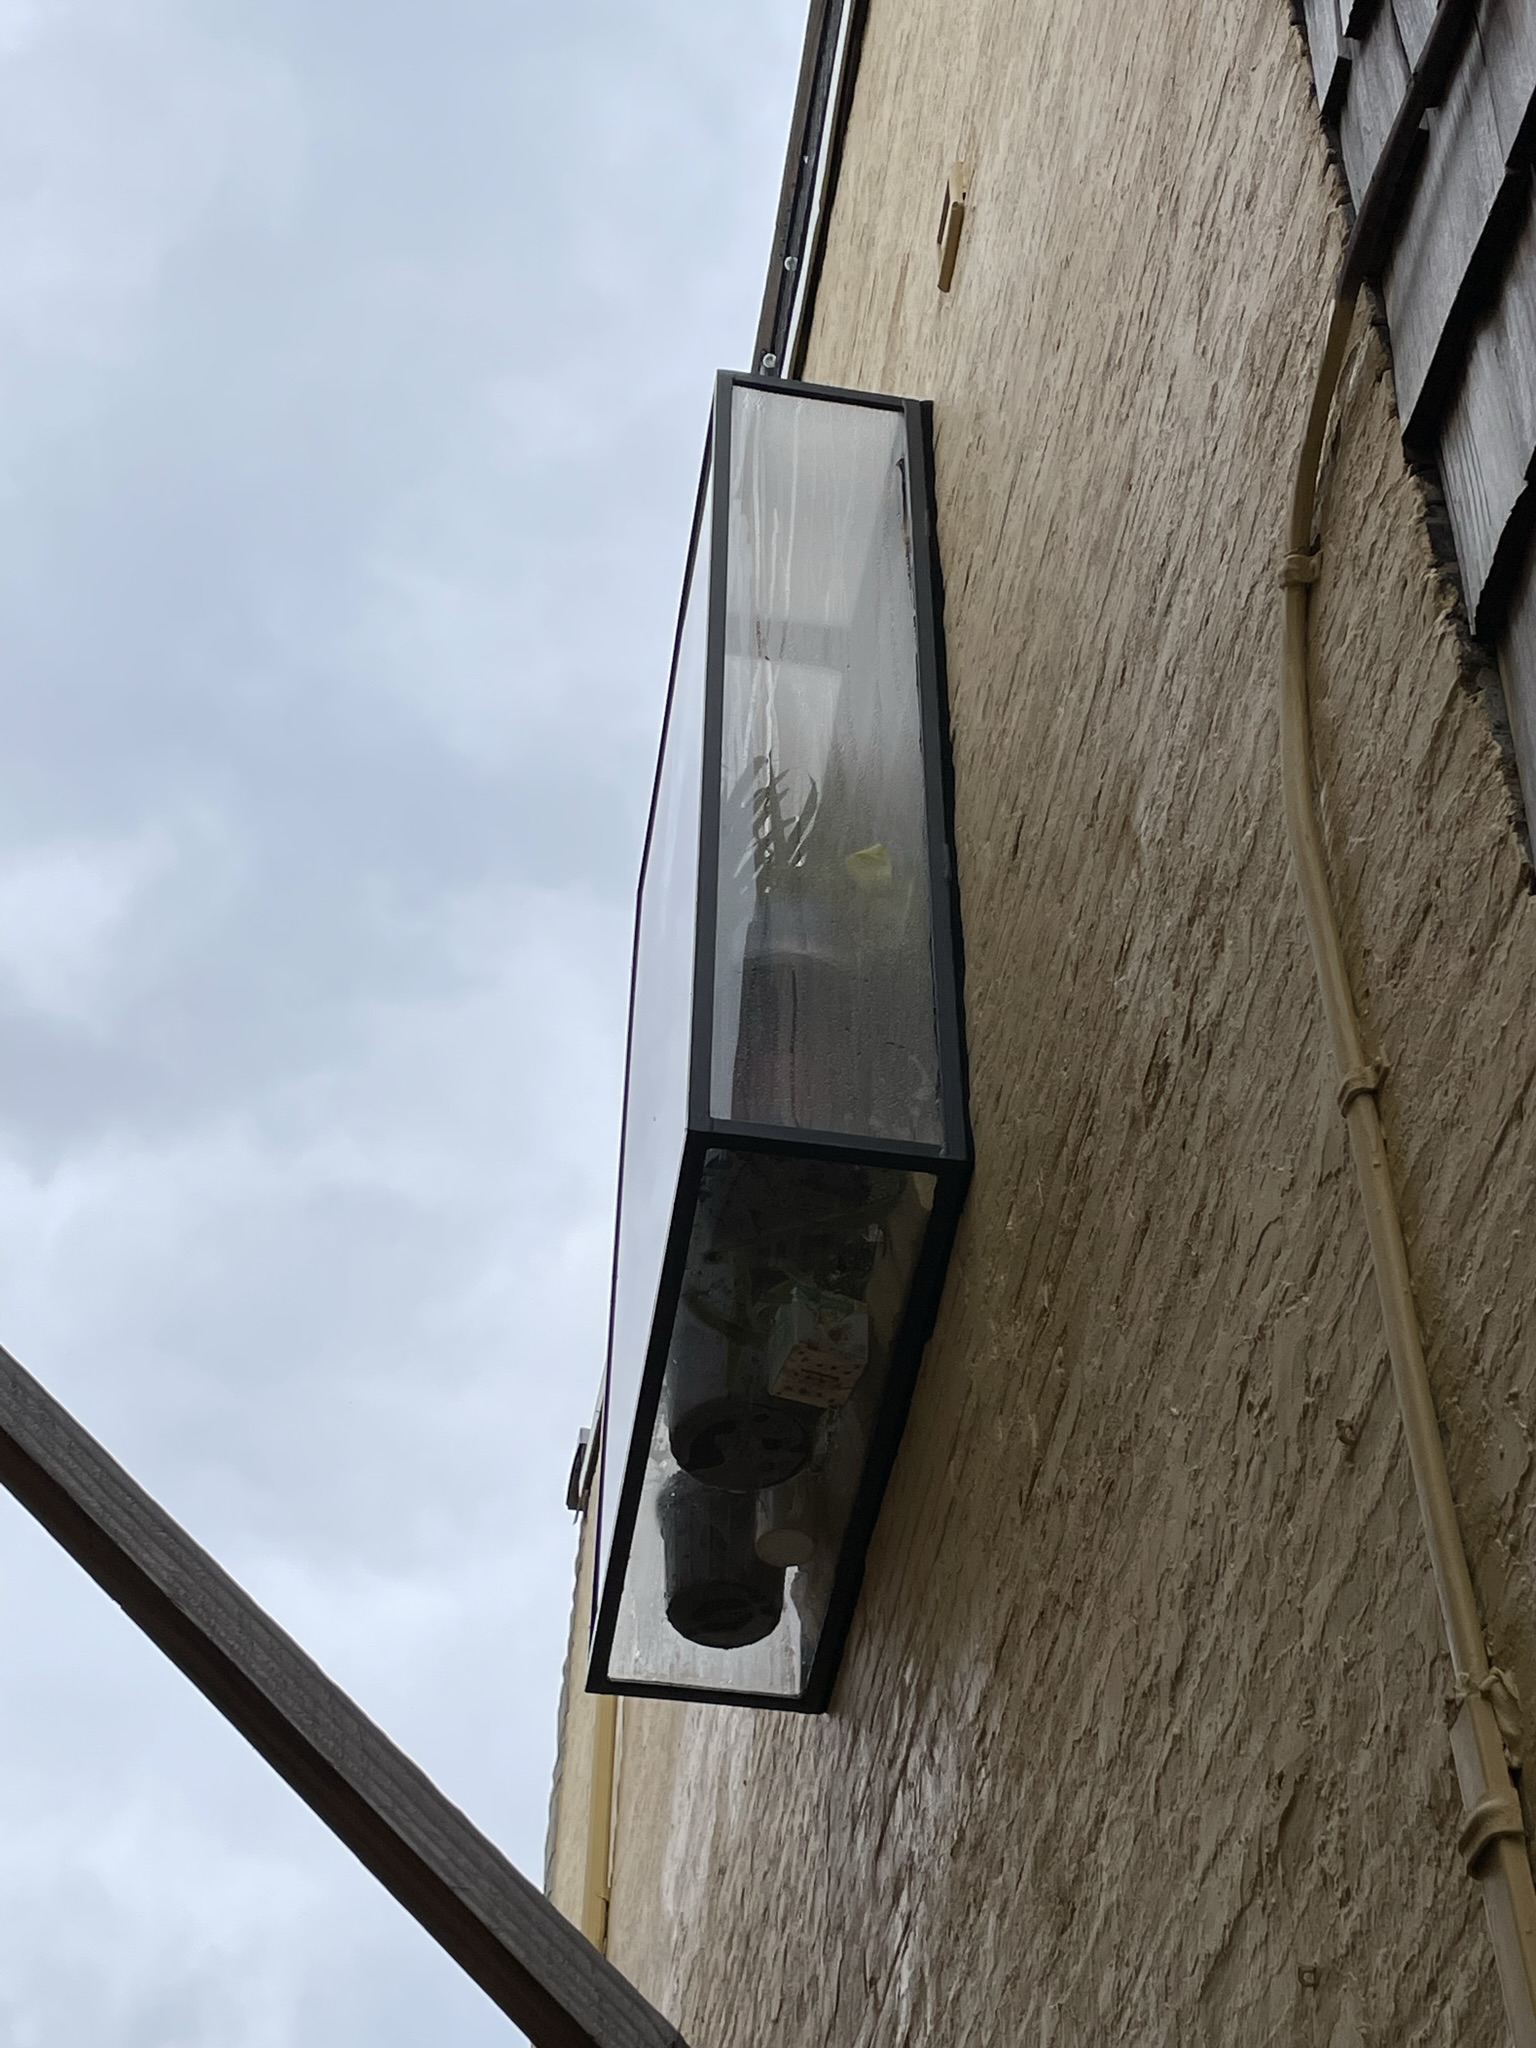
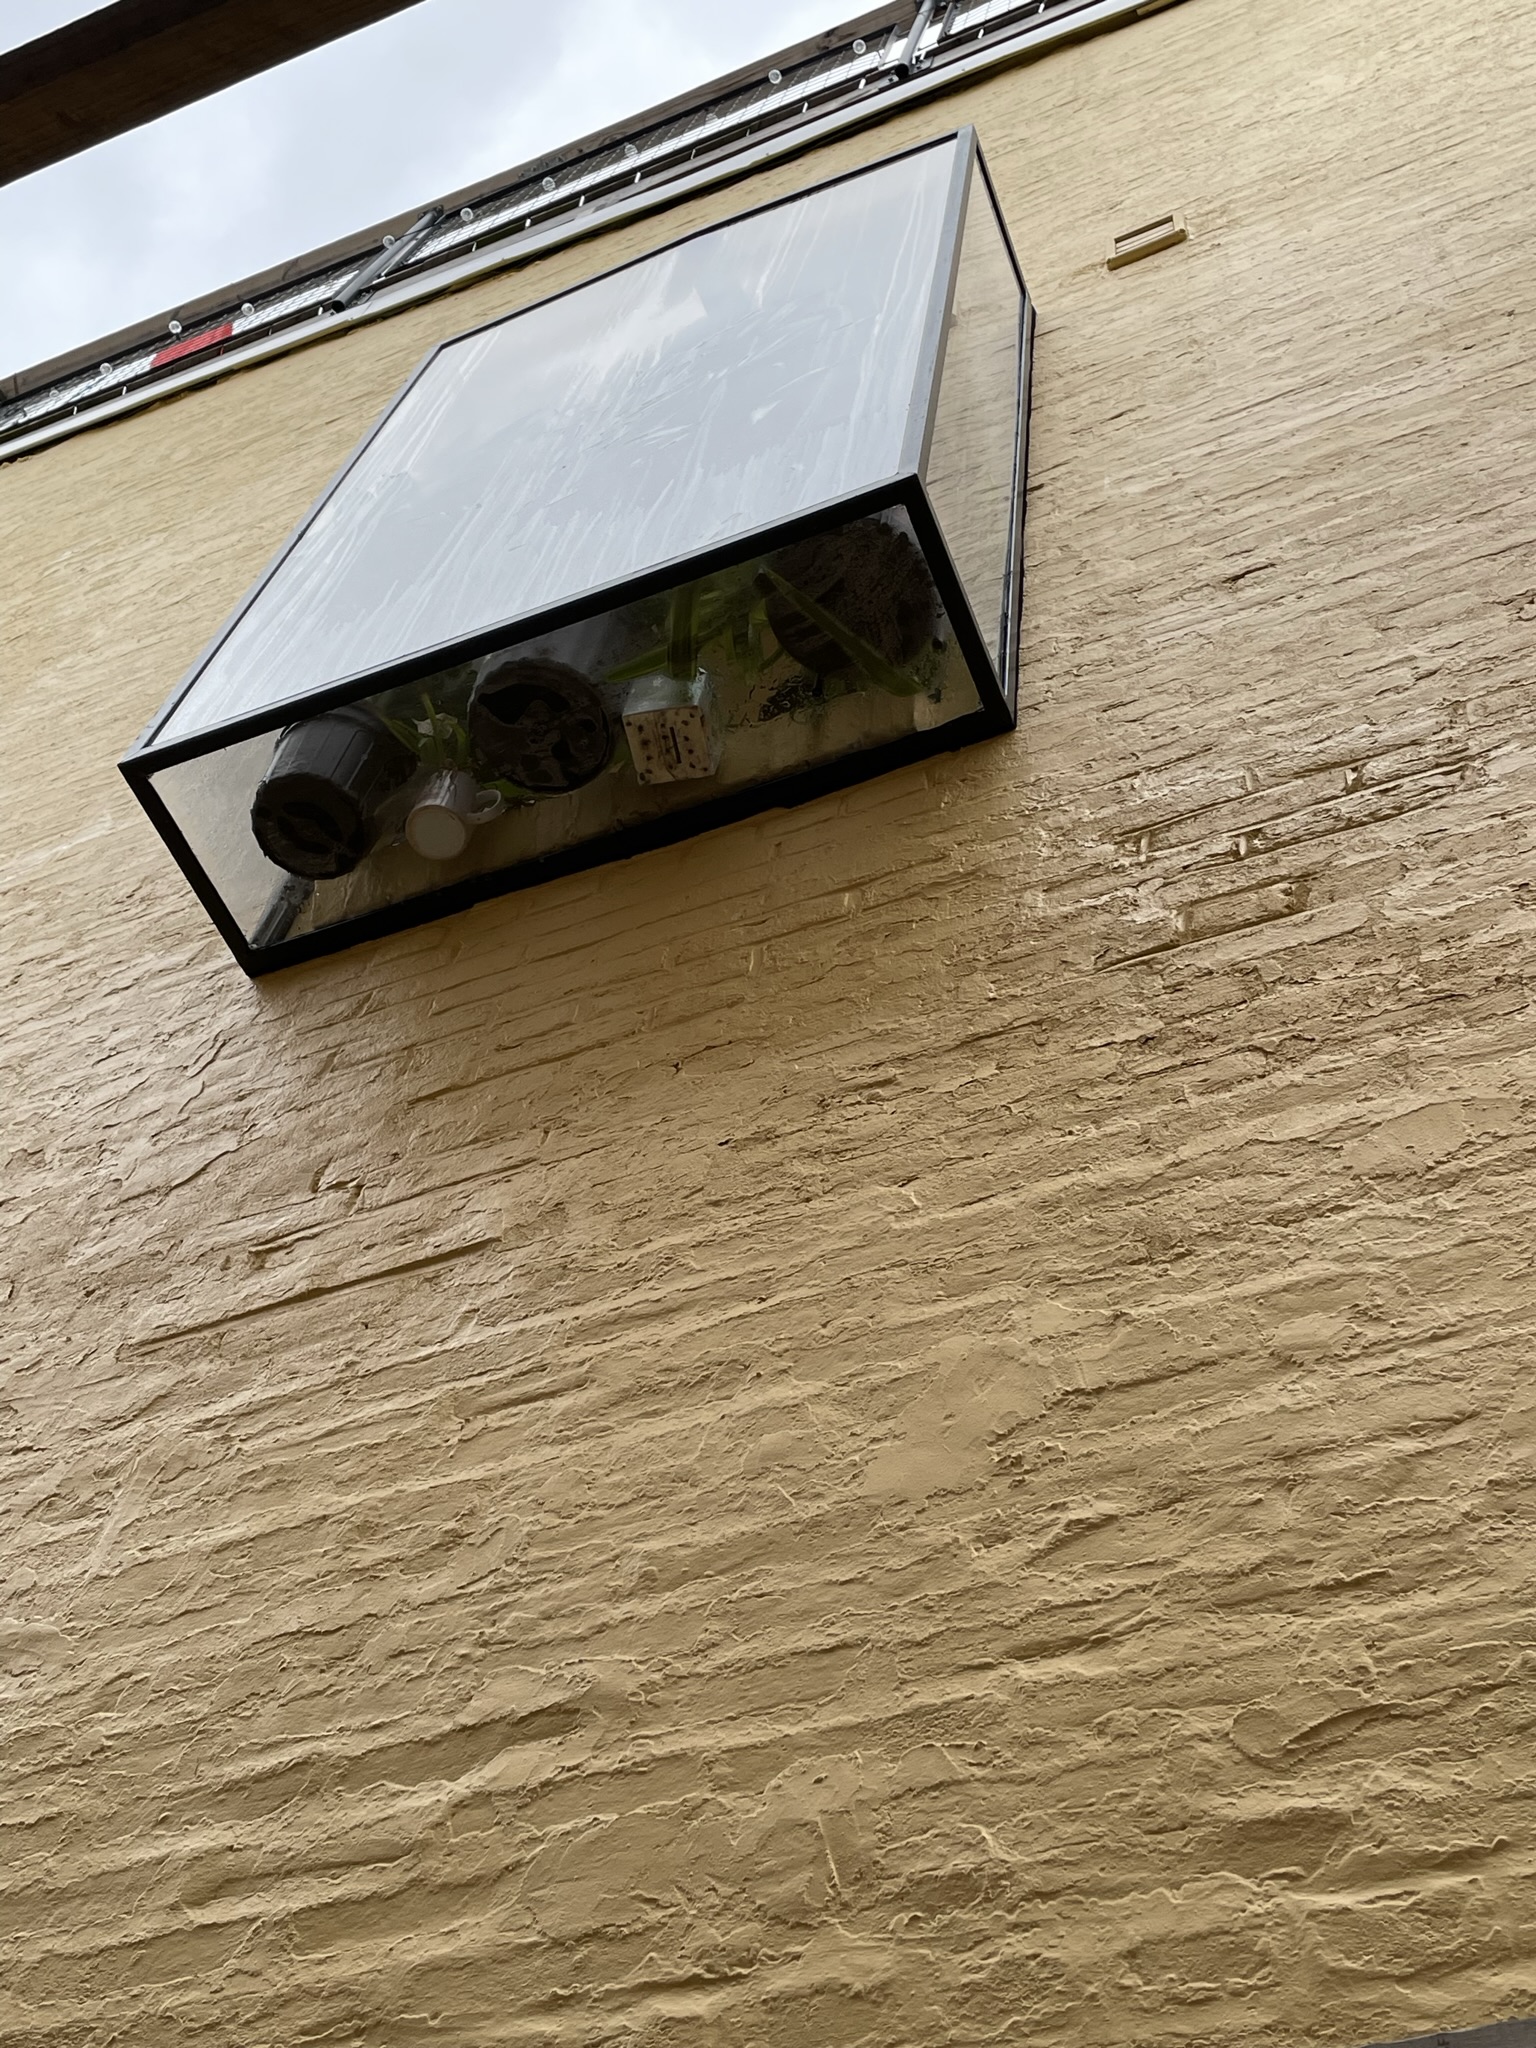
Outside the bathroom window would be a long planned greenhouse window. I set to working on the frame in the studio using old steel bought for this purpose years ago and 1/2″ acrylic gifted to me early in the pandemic. Grind, chop, weld, grind, paint. I added a sturdy lifting point on the top guessing at where the center of gravity would end up once the acrylic was in. It was pretty hard to choose a sealant that would work with painted steel and acrylic and allow for some movement as the temperature swings from season to season. I took some chances using an EPDM sealant to affix the acrylic into the frame. I scuffed up the acrylic edge to improve my chances of it bonding. Only a few seasonal cycles will prove if it works. Between the frame and the uneven brick surface we used adhesive backed 1×1 inch weather stripping foam. On a night in December, we gathered some neighbors and a block and tackle and got to lifting all 200lbs of it into place careful not to damage the weather stripping. With the extra hands of neighbors it went quickly; the greenhouse window box was bolted in place within about 10 minutes without any panels falling out, although one does have a leaky gap from the flexing experienced it during the lift; I’ll reseal in the spring.
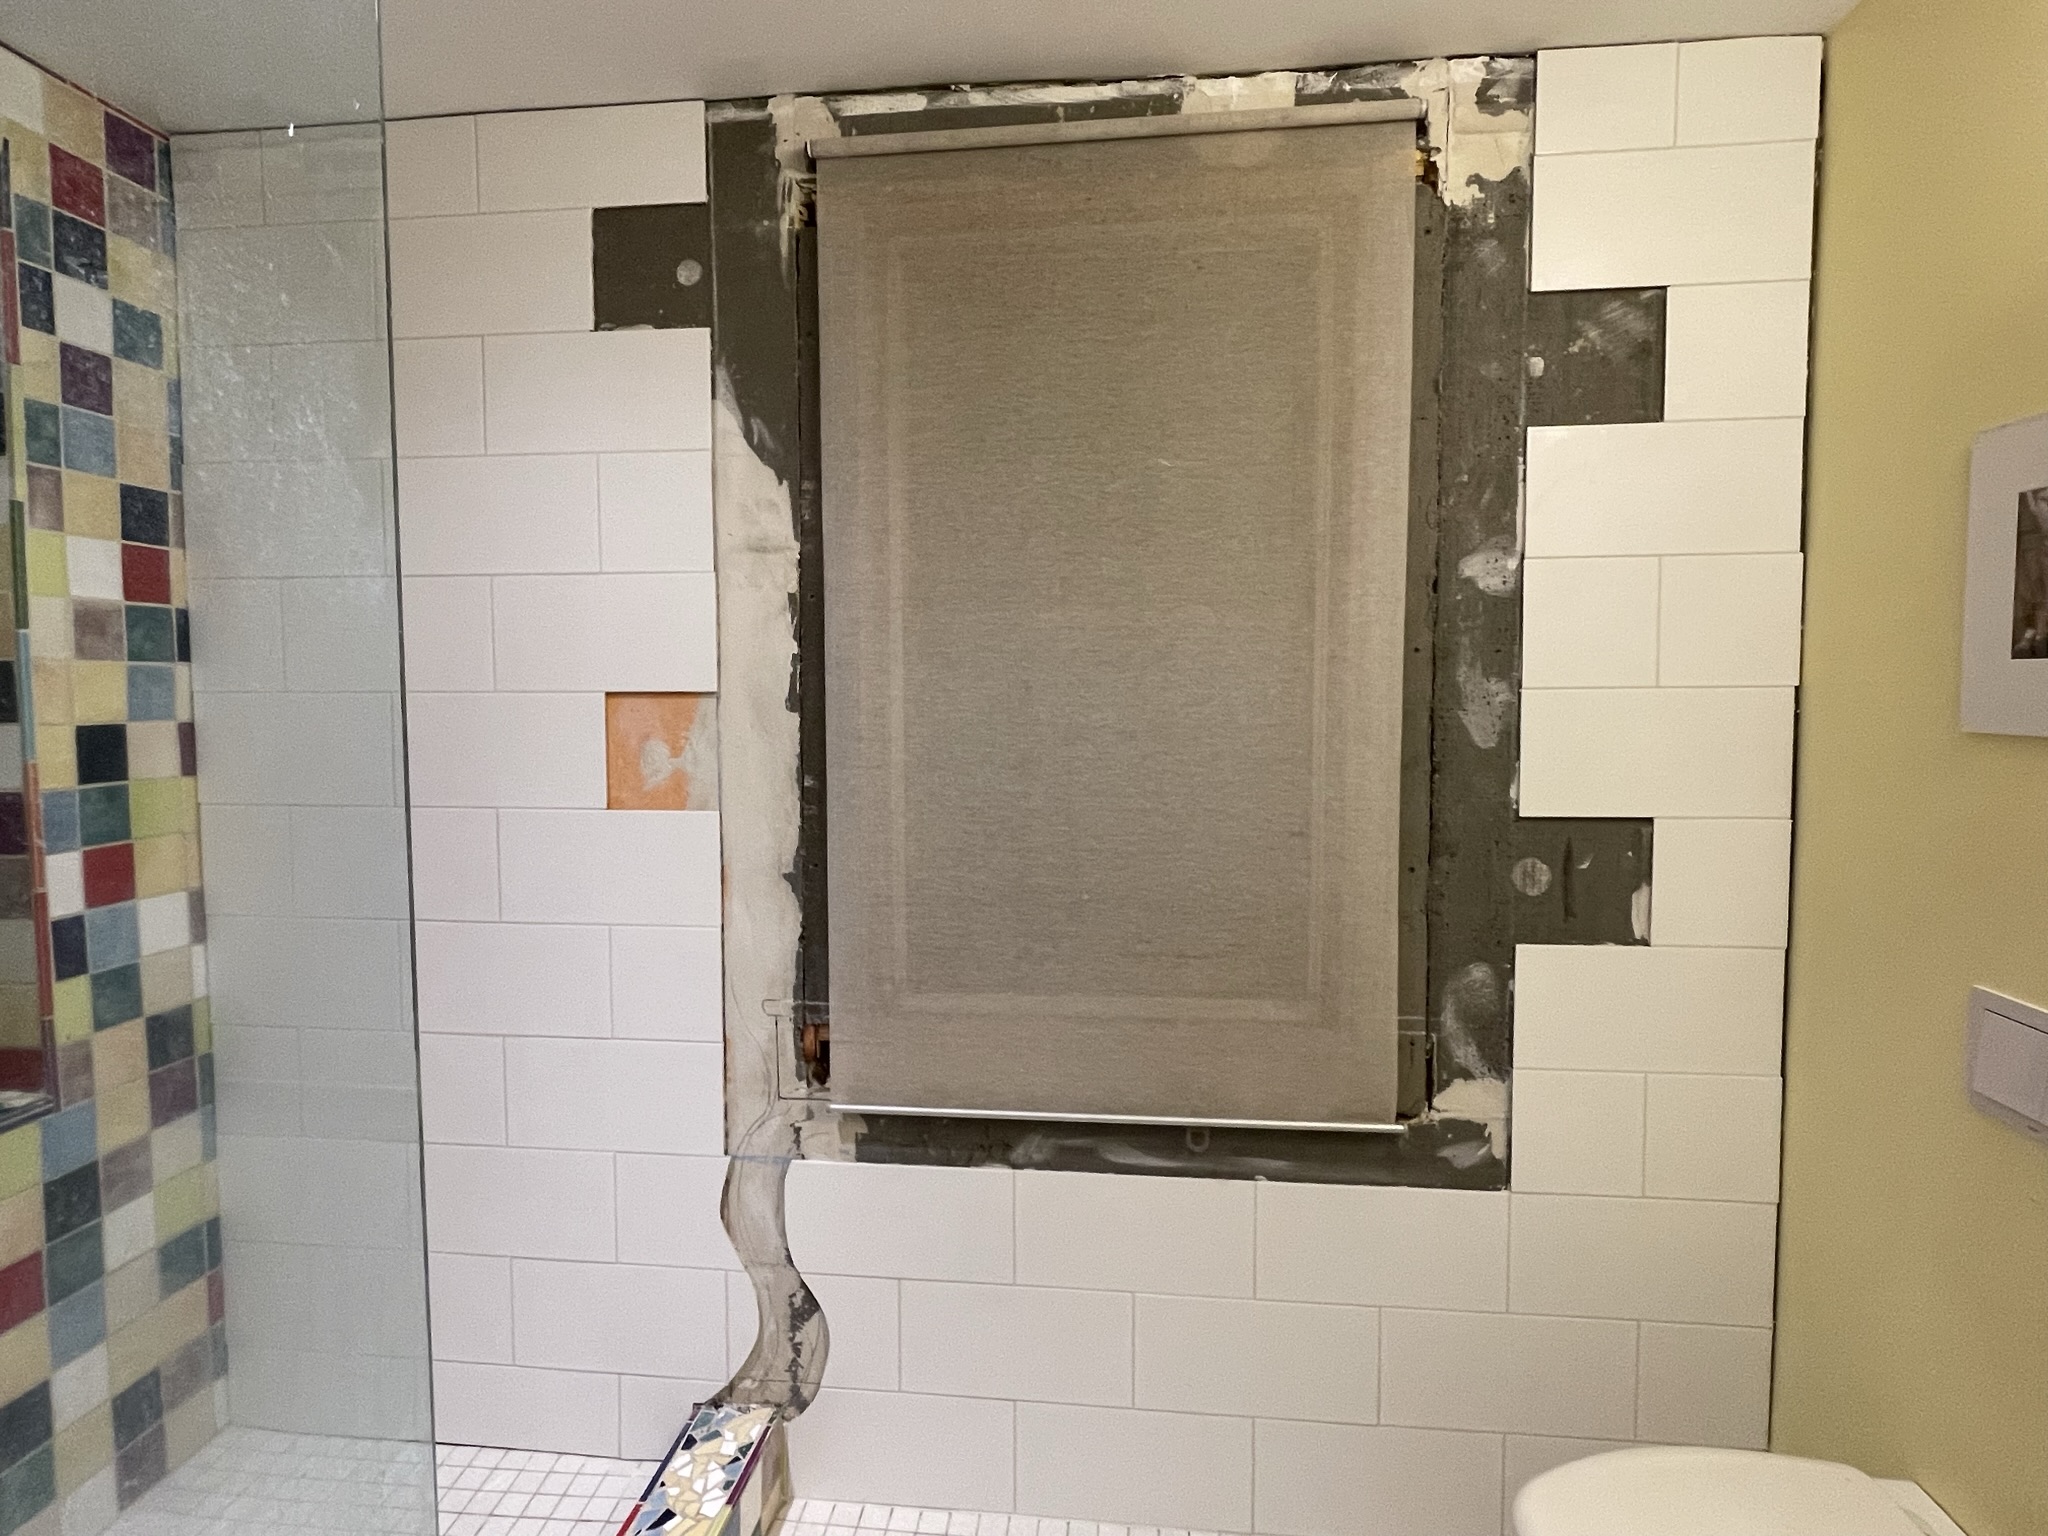
Since the greenhouse window is keeping the elements [mostly] out, we removed the old, pest eaten double hung wooden window. I made some simple window trim to match the rest of the bathroom and nailed it to the treated frame I replaced years before. The end result is a MUCH larger opening in the wall that lets in tons of light. You can stick your head into the box to look down the alley which is important now that you can’t open the window.
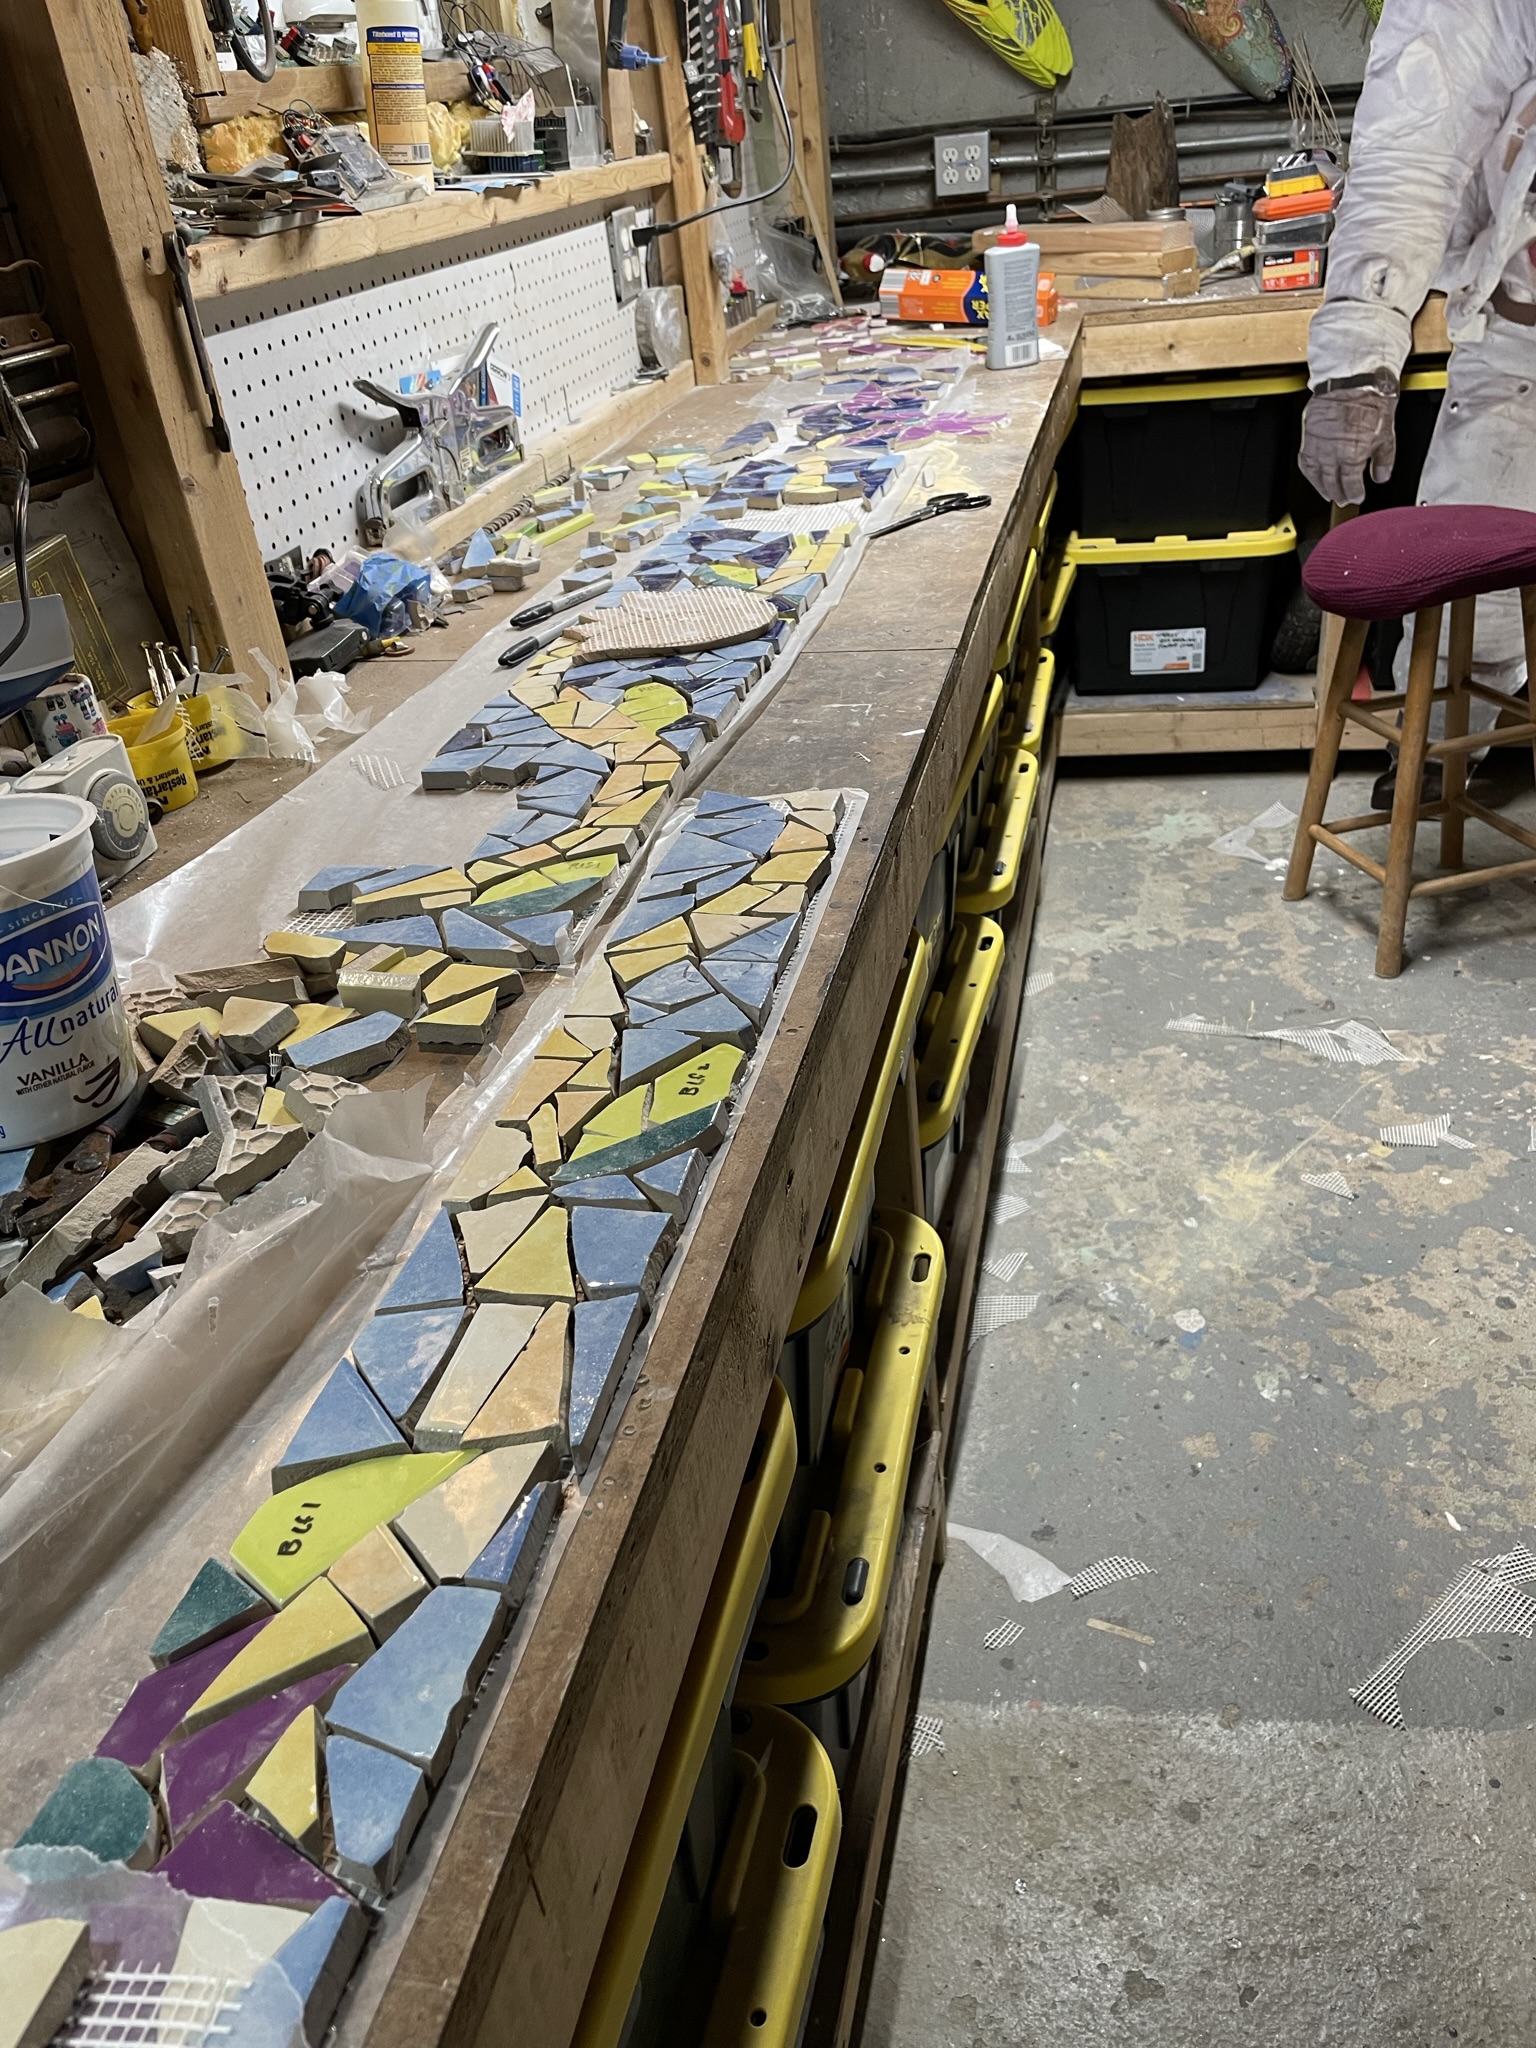
We started with the big 16×8 inch white tiles being extra careful to nail the spacing and flatness. We left some squares out on the sides to work in some elements that to extend out of the square. A pattern was drawn on with chalk, transferred to a mesh backer and we laid everything out in the basement over the next few weeks. We glued down the tiles which allowed us to carry them up, test fit, fix and eventually mortar into place. Sure beats placing them one at a time like Siri did with the shower curbing 10 years ago.
With the holidays, it took a few weeks to get back to it, but eventually we were done laying things out. There is a mix of 1/2 inch and 1/4 tiles here making it even more of a pain. Getting small enough chunks of 1/2 inch tile was hard and there was a lot of use of a tile saw to get everything to fit together without having to spend hours searching for the perfect piece each time.
We carried up a section at a time on the mesh. Everything was mortared into place in a pretty fast paced 4 hour evening. Next up was grout. We gave it a few days to harden the mortar first and then went to it.
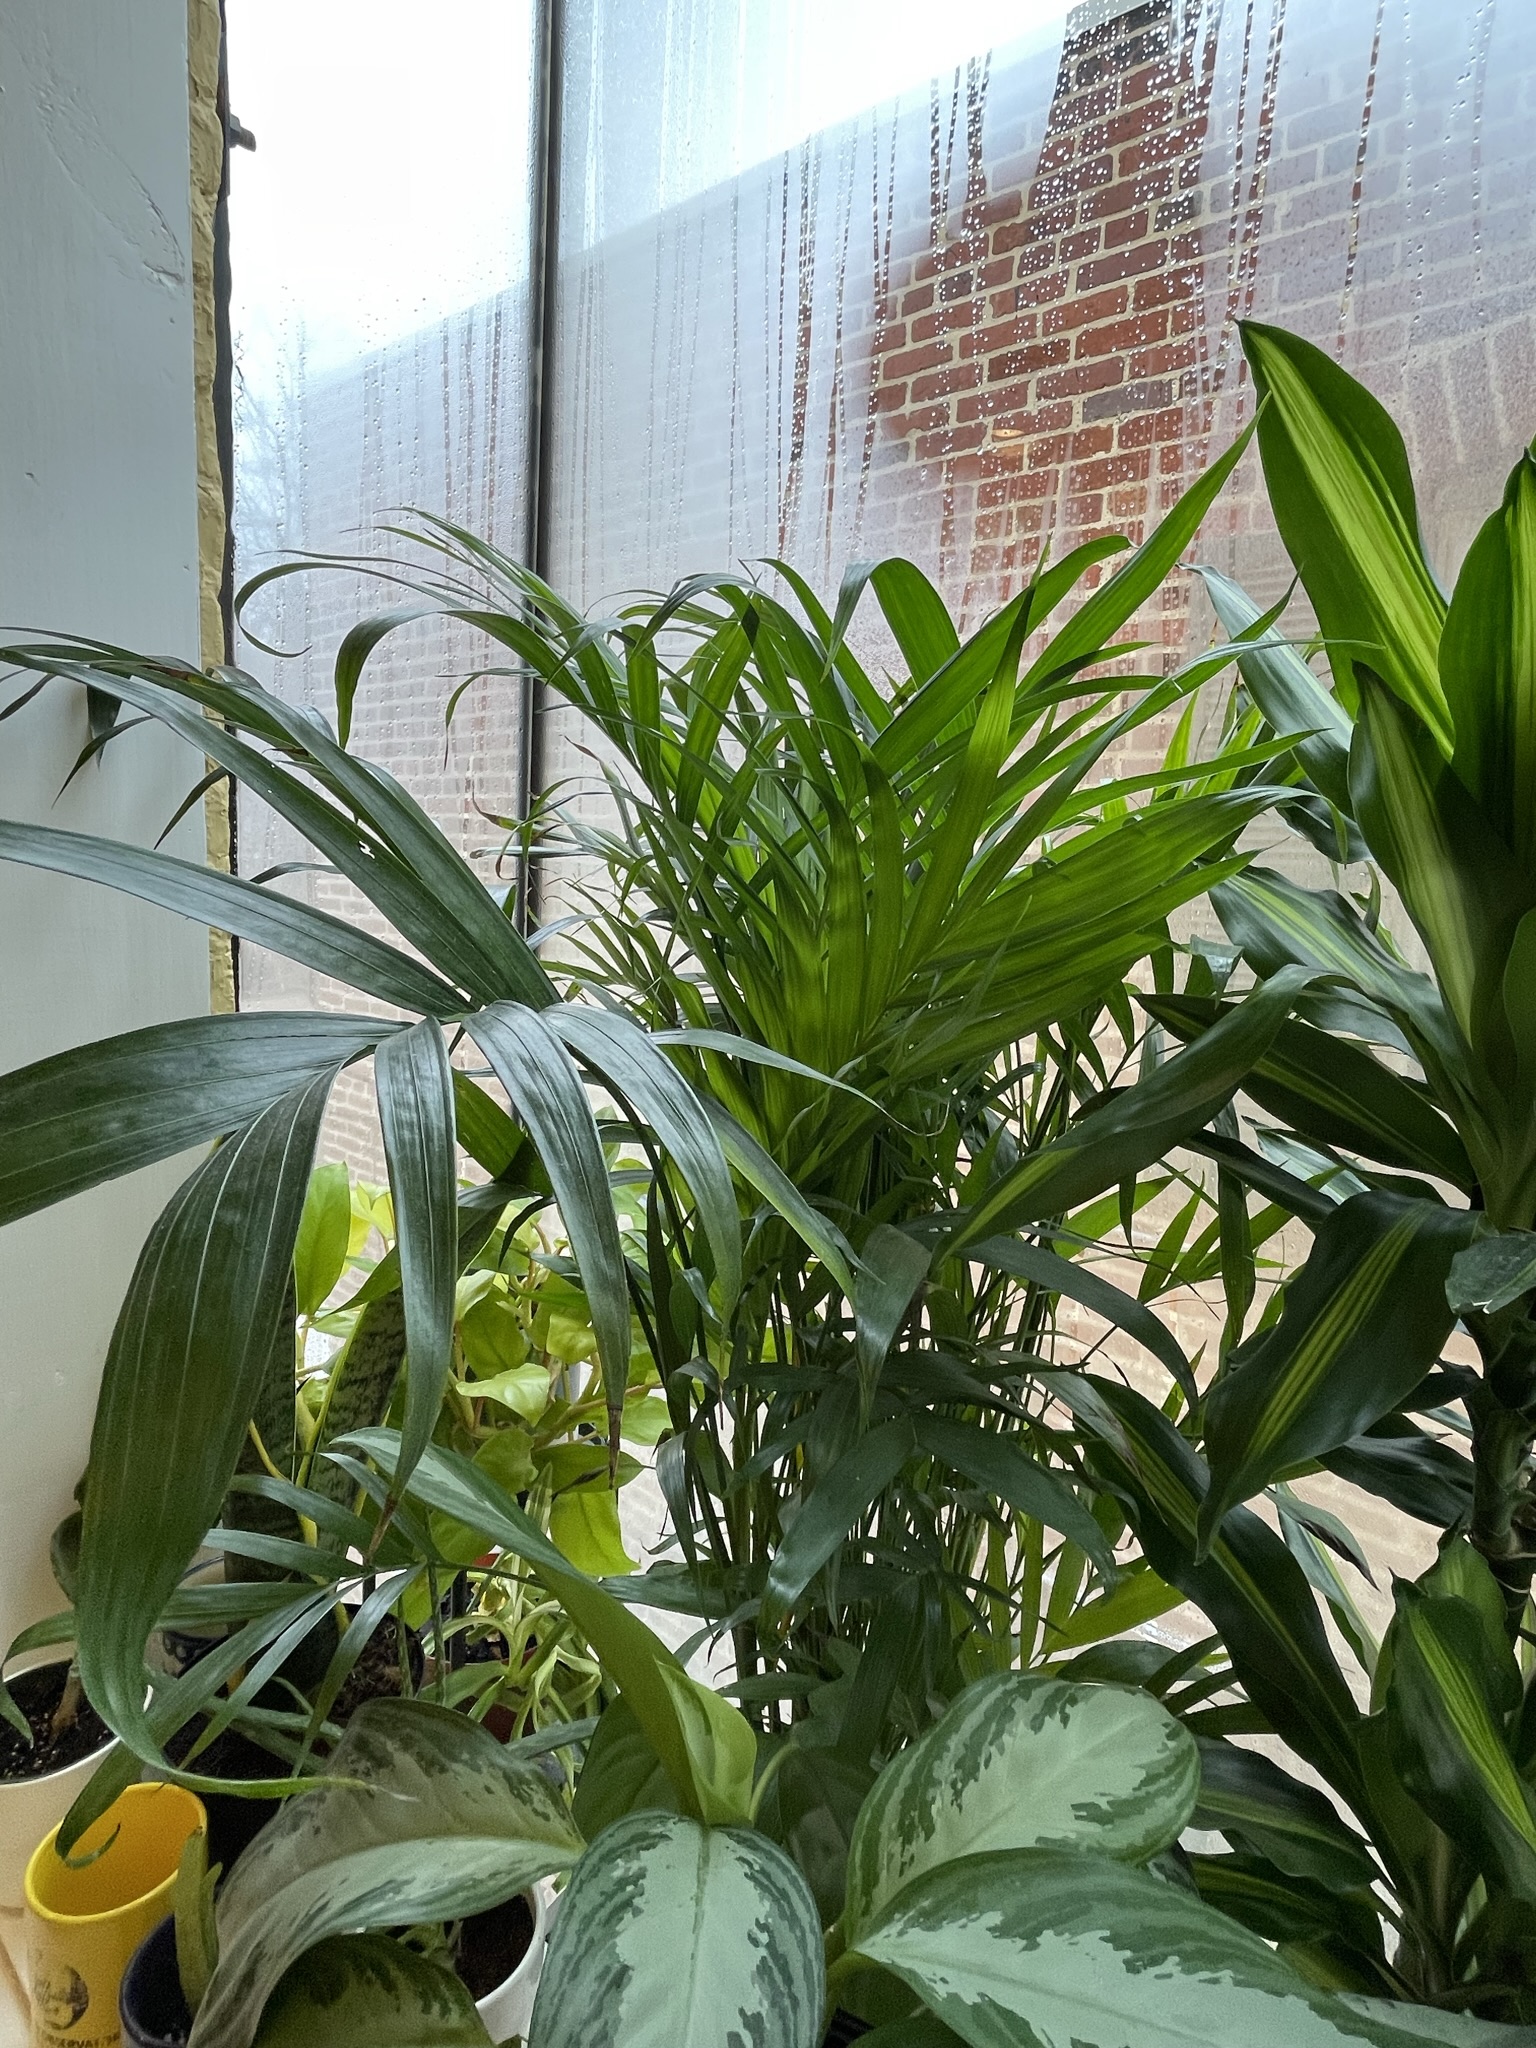
To finish things off, we gathered some plants from friends and even IKEA. There will be more to add over time, but this is a good step toward privacy. If the plants are not enough a blackout curtain can be rolled down. Finally some real privacy in the bathroom after a decade. As for the mosaic, the end result is pretty great. The design is a vine with some very abstract flowers and a few leaves with a background that fades from light to dark blue as you go up. It’s been cleaned and sealed with our big reveal being today at our Chinese New Year party. It’s good to be done.