
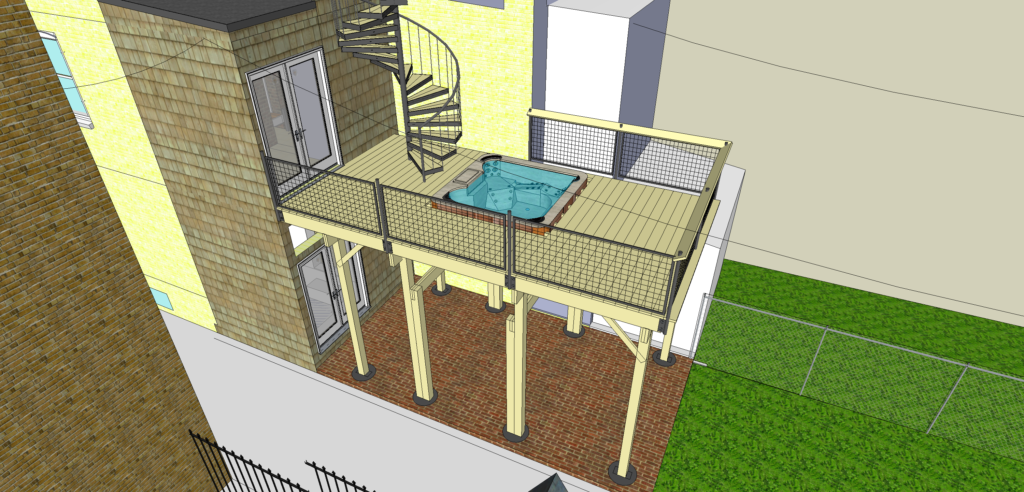
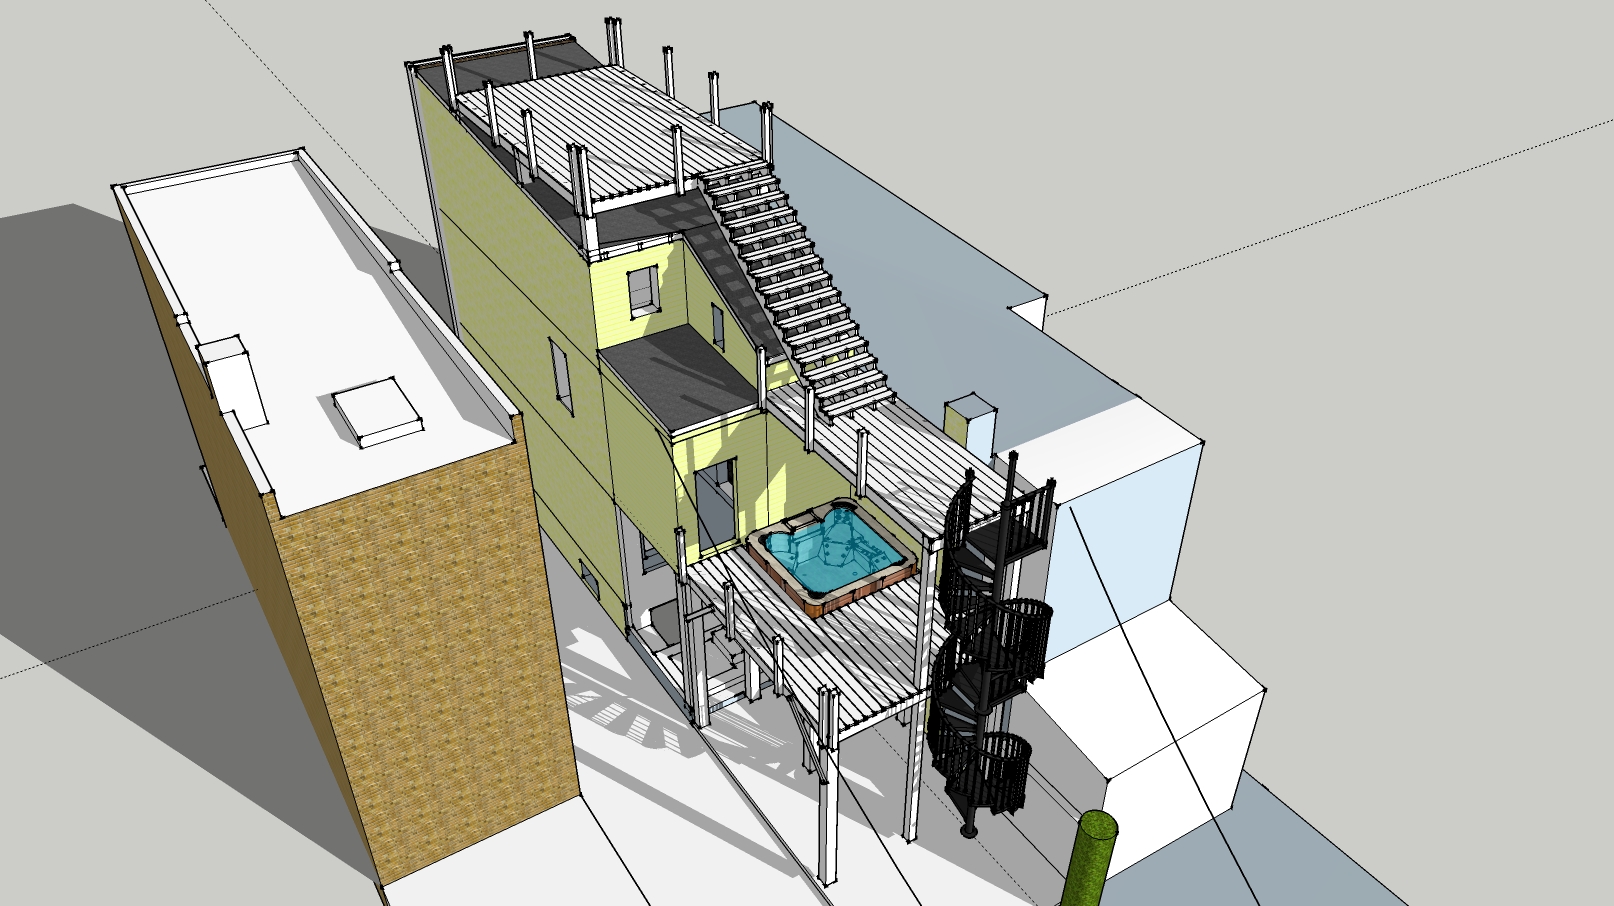
The deck was something we first drew up right after we bought the house. We’ve pretty much stuck with the original idea since then: A deck on the roof, a deck off the 2nd floor and a sunken in hot tub. It was the icing on the cake once we finished everything else. Finally we were ready to make it happen.
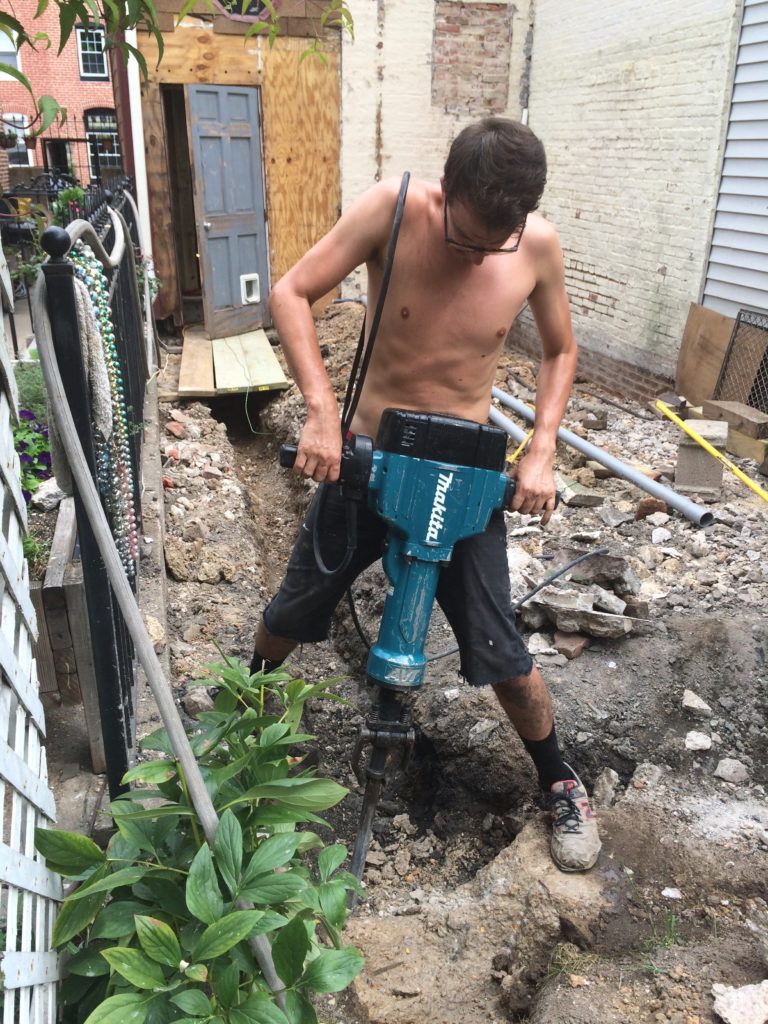
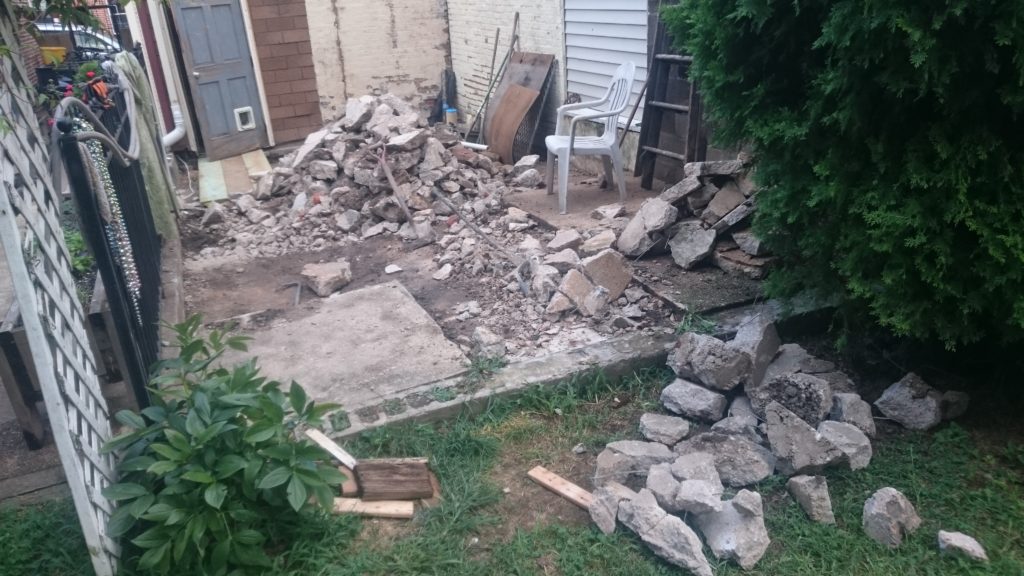

I clear my schedule starting in July 2016 by quitting my job of 4 years. That really helped free up some time! We pulled a demolition permit and I got to take out some end-of-career rage with a sledge hammer and prybar. The first squares went well prying up as one piece and then breaking to pieces by dropping them. Then we found the 2nd layer. Just like the rest of the house, when things started to fall apart, they just covered them up with another layer. This took weeks and I managed to lose a finger nail in the process, but it was good work and enjoyed being outside getting a workout.
Drawings and Permits (Aug 2016)
While this was happening we started the next step of getting an official architect to put his name on some drawings so we could pull the permits. We were dreading this step as it was the first time we really had to get the city and a third party involved. In the end it cost us $900 for the drawings and another hundred or so dollars for the permits. Including a demolition permit to take out the old patio.
“Prep work”
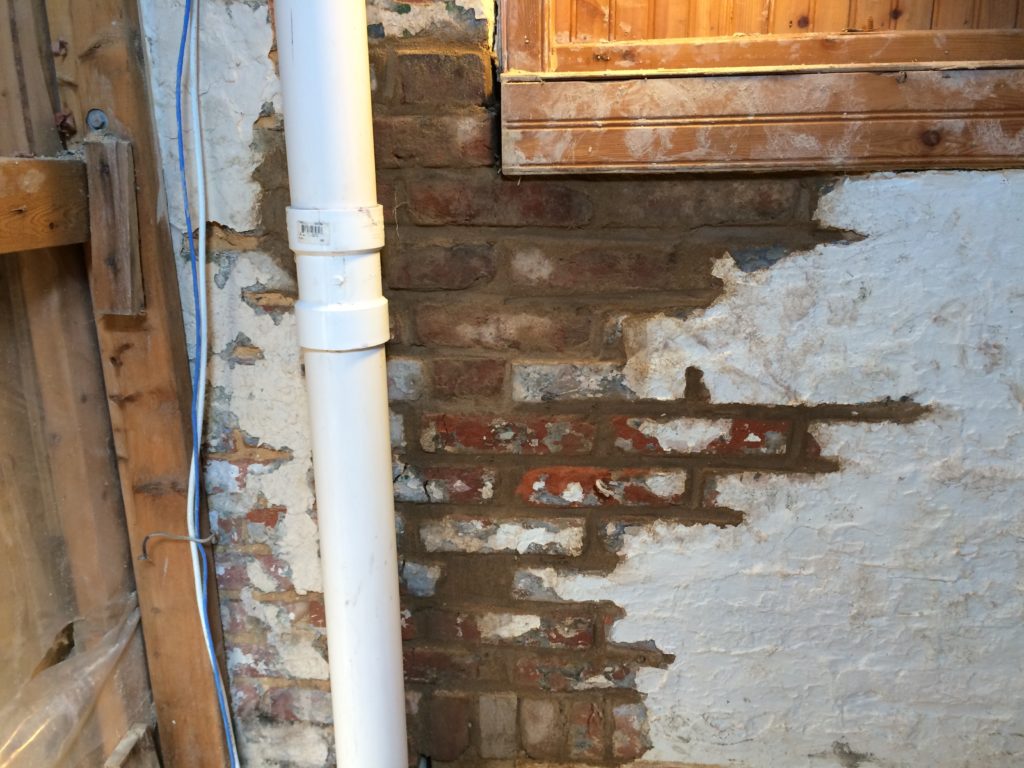
The next few months can only be described as “prep work”. Unfortunately, prep work gets a little complicated when I’m involved. I don’t like things to build onto things that are wrong. Still enjoying the weather, I dug a trench to the shack and buried two conduit pipes just in case I needed them one day. Then came fixing the drainage at the back of the house. From early on the concrete sloped towards the back door and during heavy rains would actually back up into the house, rotting away the boards under the rear entryway. Also, below grade the mortar wasn’t looking too good so I repointed that. While I was added, I fixed up some problem spots near the kitchen window / sink drain.
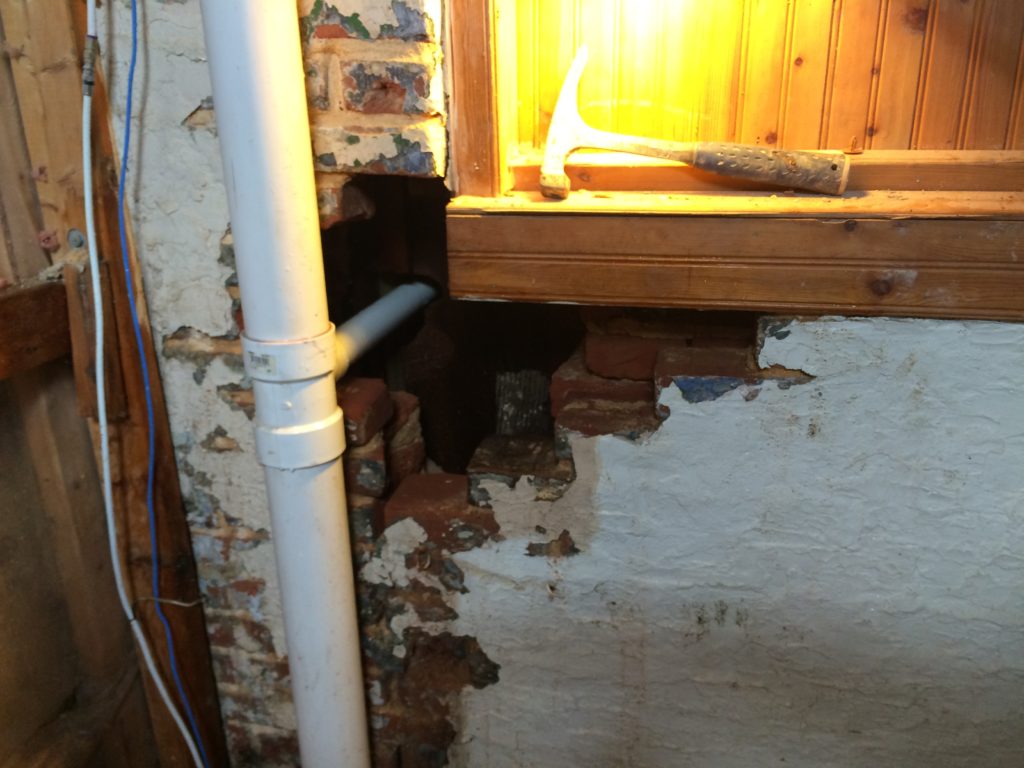
At this point things are starting to get a little crazy. We’ve got to jack up the corner up the house so that we can dig a proper footer and build it back up in order to put the house back down on it. We also take off the back corner of the house and have to button it up in a day.
Redoing the Back Entry (Sept 2016)
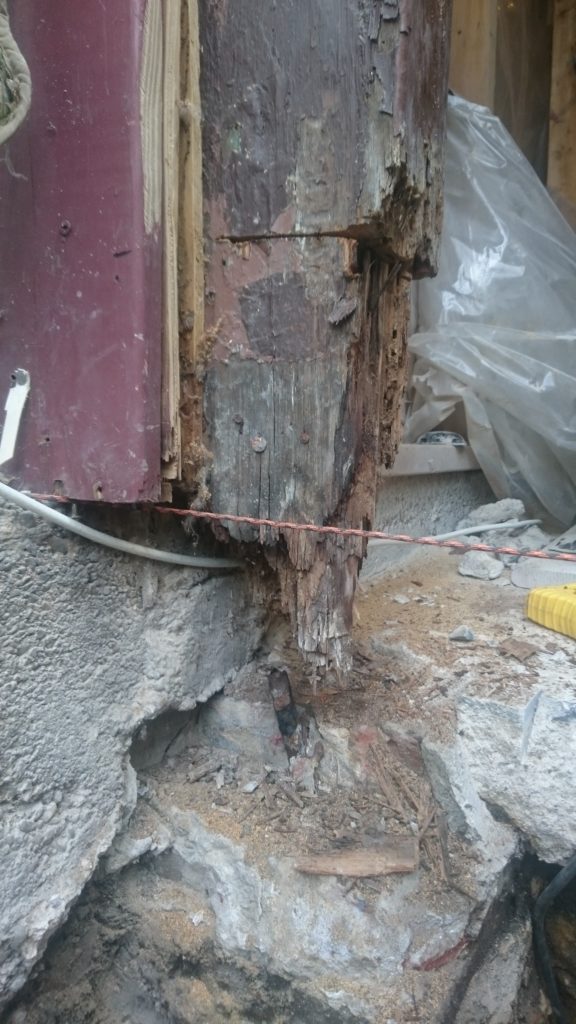
This one post was holding up the corner of Siri’s Office 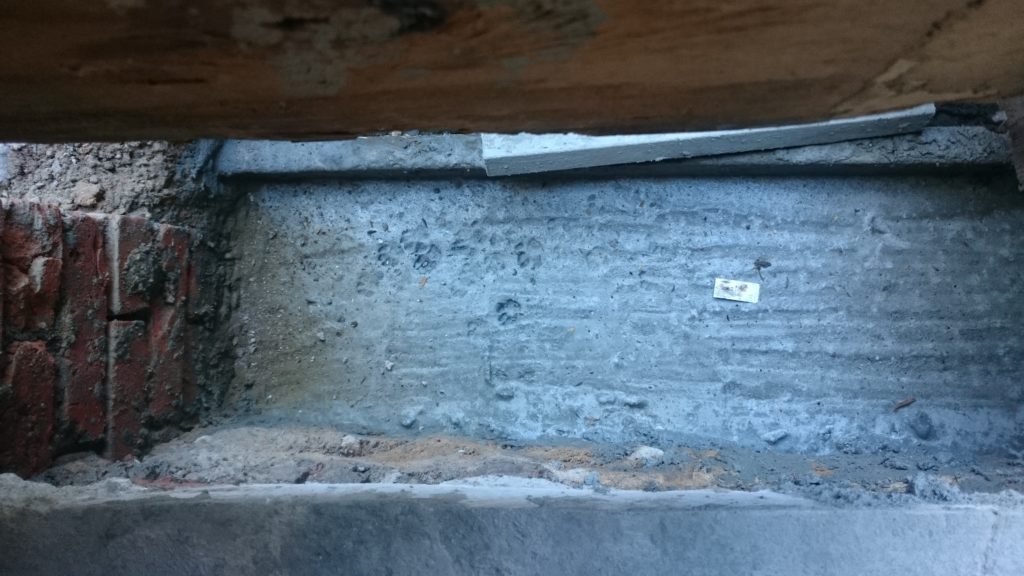
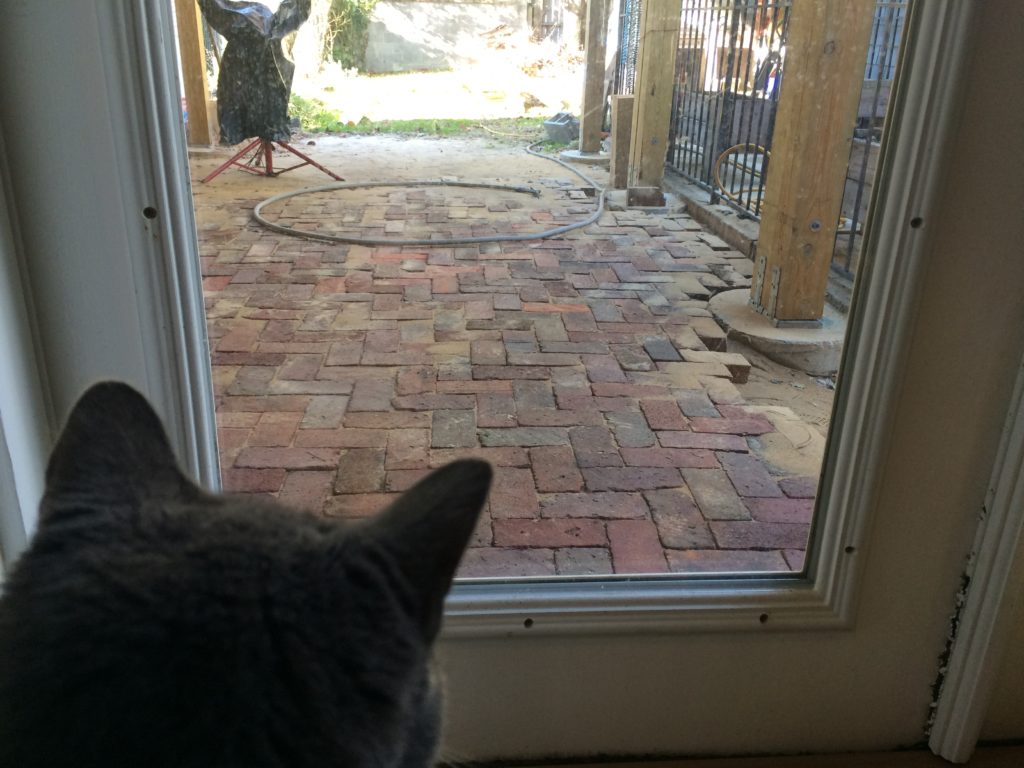
Kitty was here
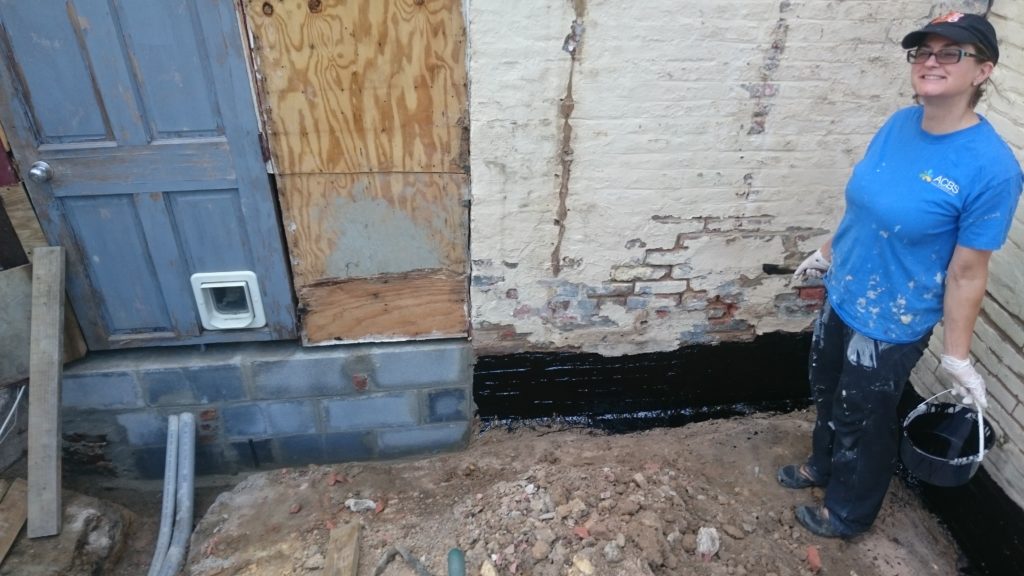
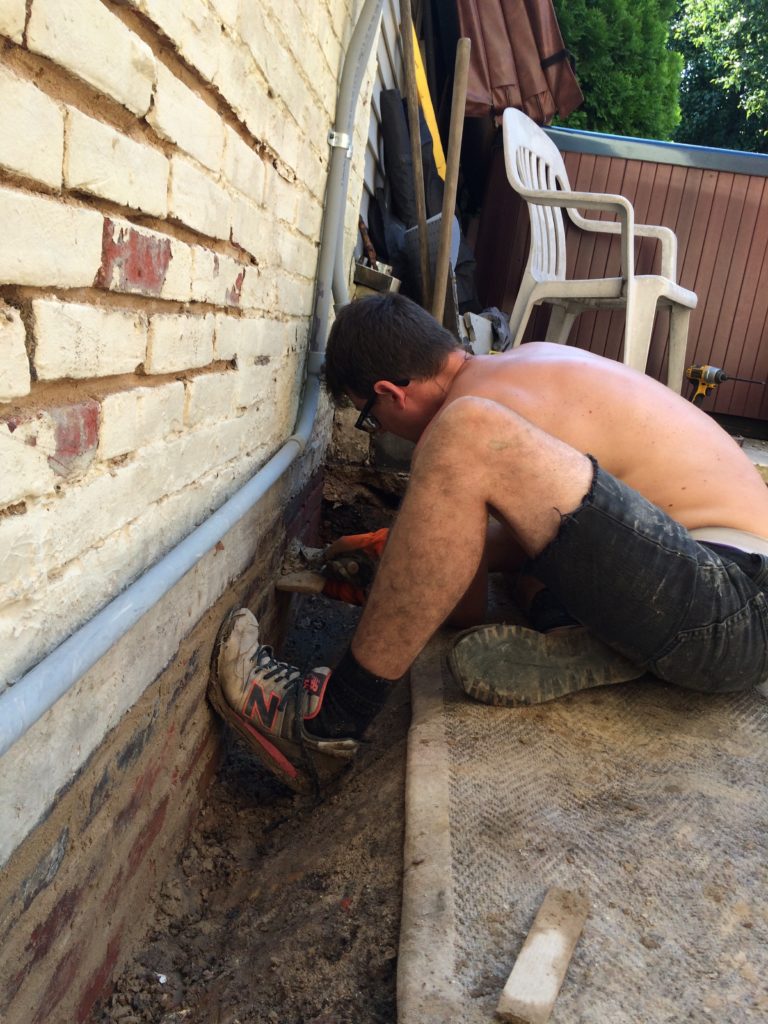
There also was a really awkward stair setup with a terribly built set of 3 steps that came halfway out into the 6′ wide room. To fix this we decided to raise the floor 12 inches, adding one step down to the basement, one to the outside and reduce the 3 up into the house down to one stair.
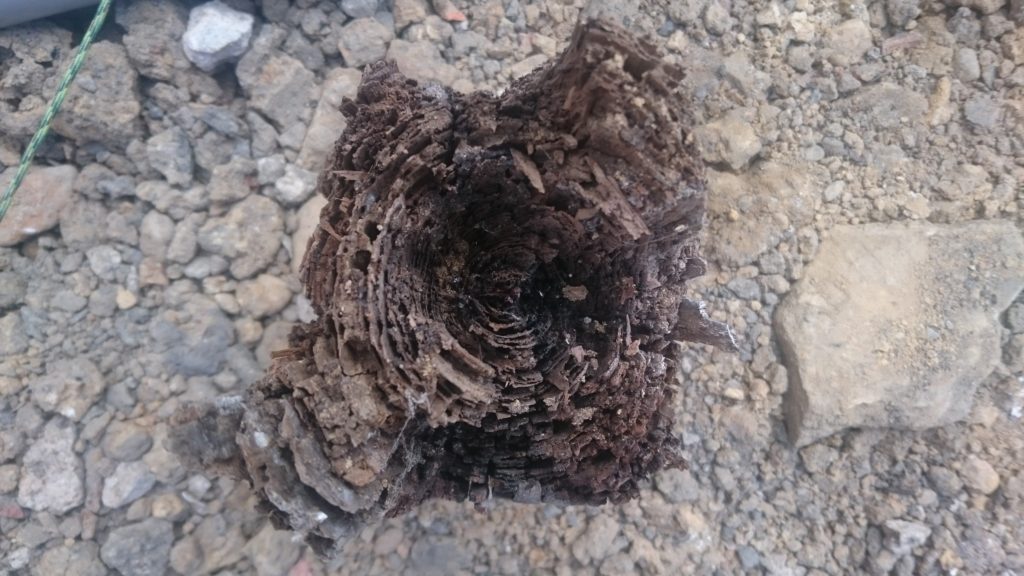
We couldn’t just lay down a new floor though. For this we had to dig down 30 inches and pour a new footer and build up a short 5′ cinderblock foundation back up to where we could put down a treated sill board and then lay down some joists. It was all quite an undertaking. The walls had to come off the back of the corner of the 1st floor. A little at a time so we wouldn’t be wide open for too long. I jacked up the 6×6 post in the corner that held up Siri’s office above and cut off it’s completely rotted away nub so that I could rest it on a treated 6×6 carrying that load back down to the new footer.
The Roof (Oct 2016)
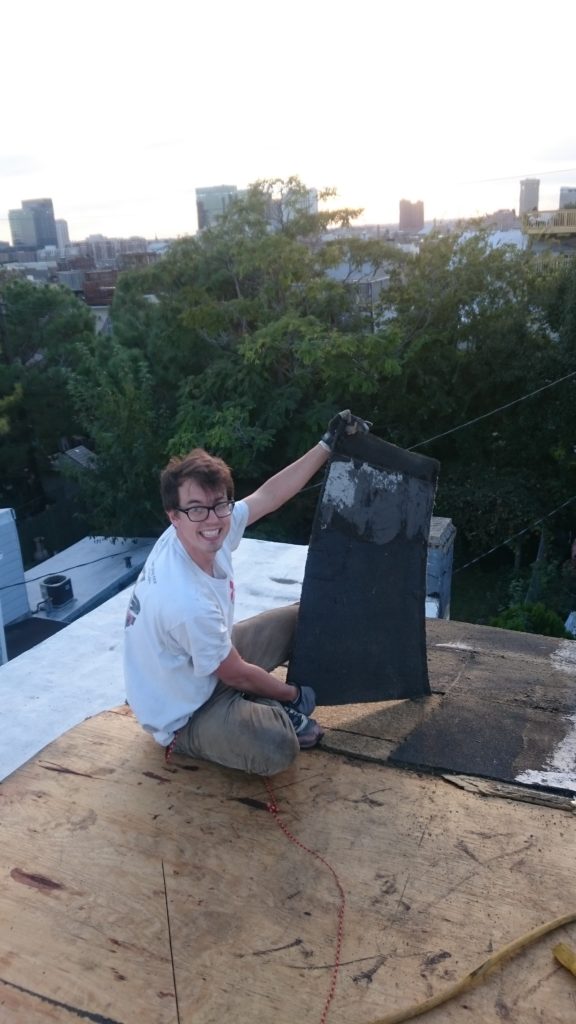
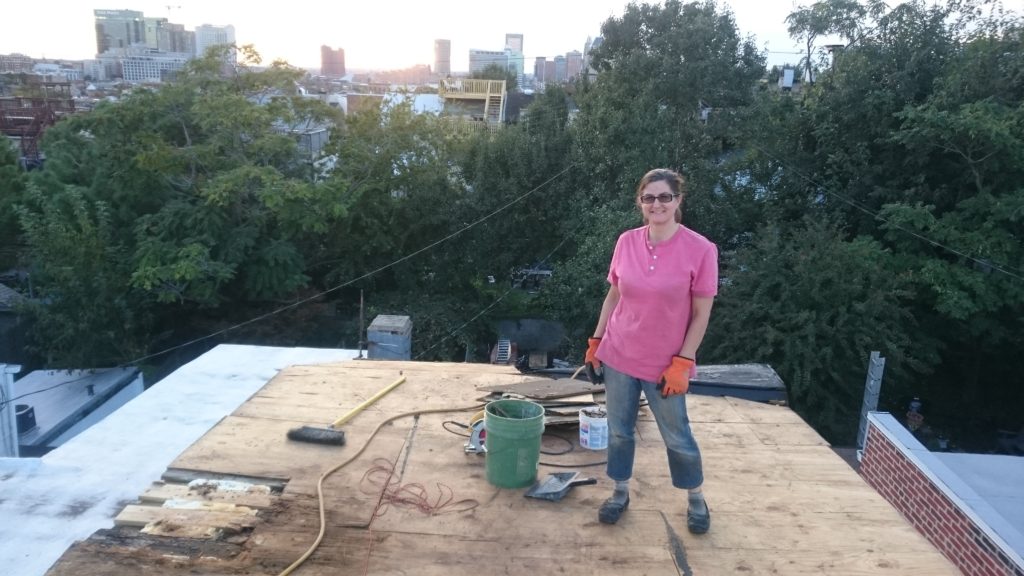
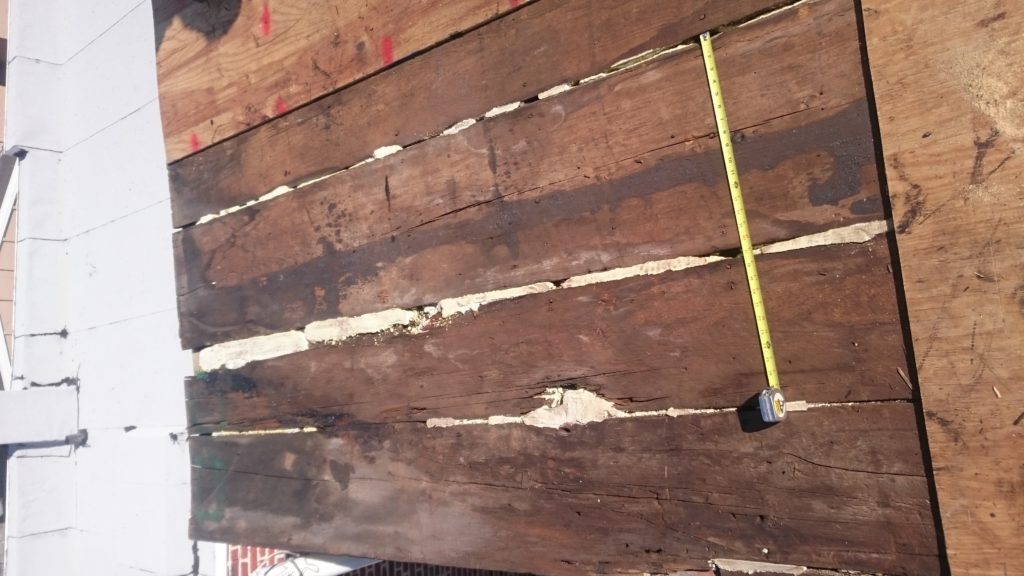
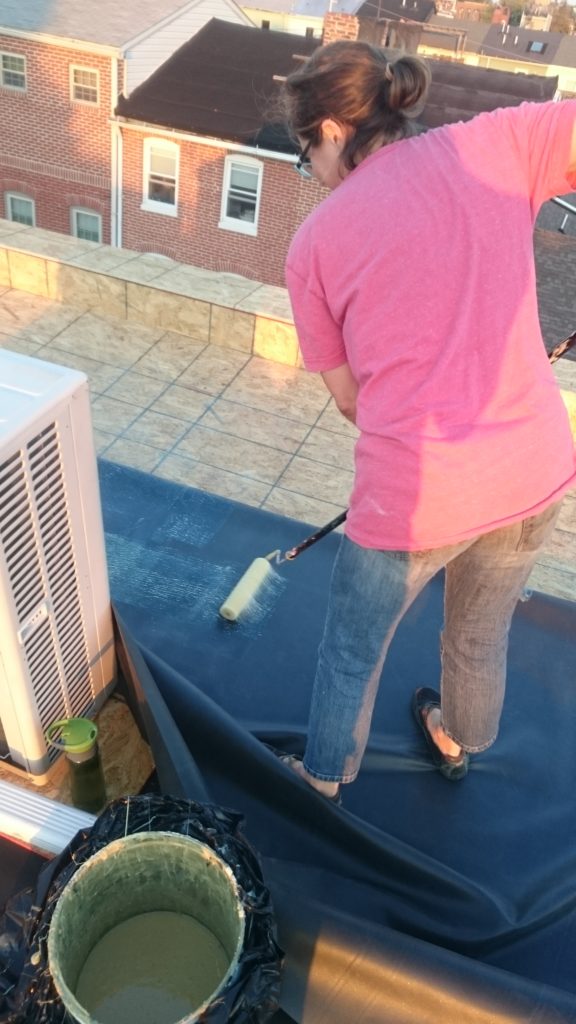
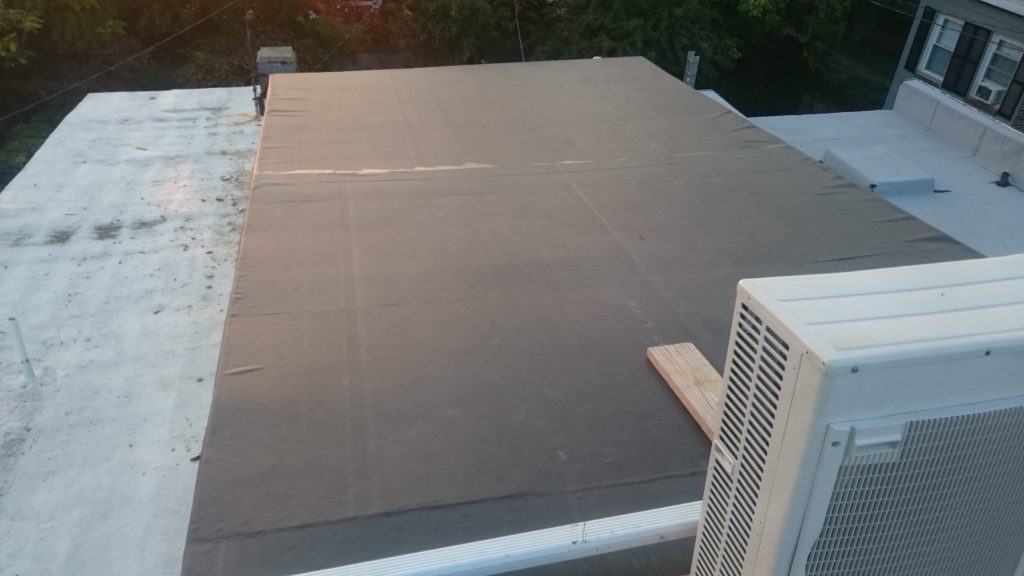
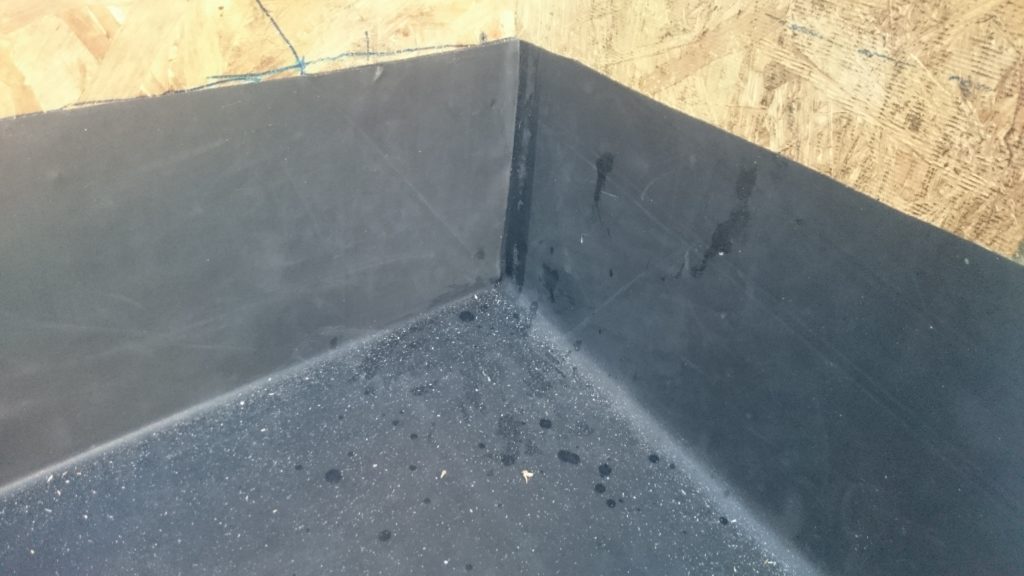
Now the next part of “prep work” was what most people consider a major project by itself: a new roof. We knew the old roof needed to be replaced soon and it was better done before rather than after the deck and we didn’t want to be throwing all the old roof material debris down onto the new deck below. The new deck was an EPDM rubber roof. These systems are all made by car tire companies and its essentially a giant sheet of inner tube rubber and a big bucket of rubber cement. Out of the other roofing options this one lasts a pretty long time (50ish years) and is generally the most expensive option around Baltimore. Strangely it seems to also be one of the easiest for a DIY job. No major tool investments as it’s not something you need to torch down or heat weld together. It’s just like a bike tire: glue down on both surfaces, wait until it gets tacky, carefully make contact (one chance to get it right!) and go over it with a broom or a roller to apply pressure. All the factory training videos on on youtube. It does need a fresh surface to be glued to so tearing off all the old and adding a fresh layer of OSB was needed. It was easy work. We cut the old roof with an end-of-life circular saw blade into manageable 3’x3′ squares.

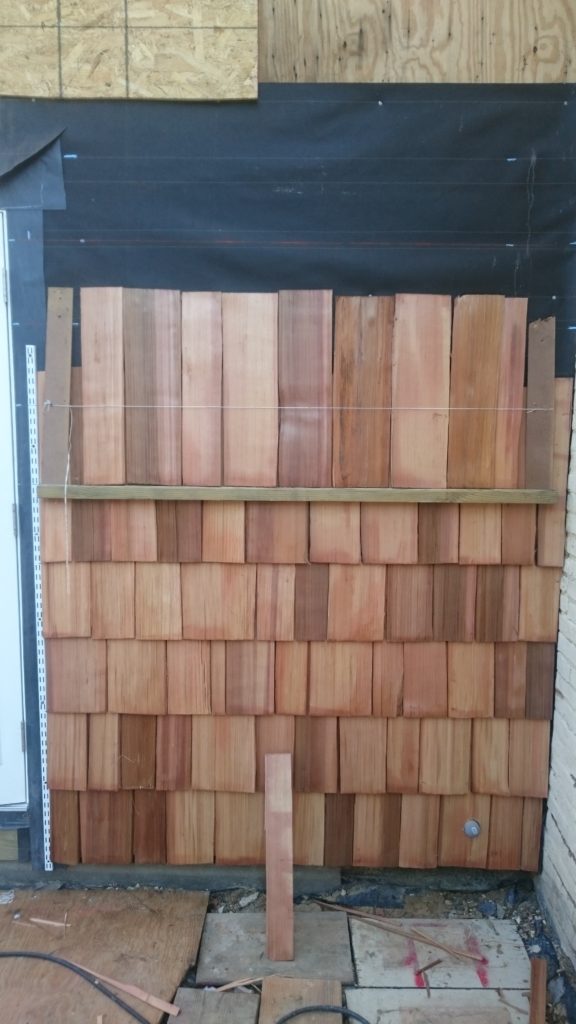
Cedar Shakes (Nov 2016)
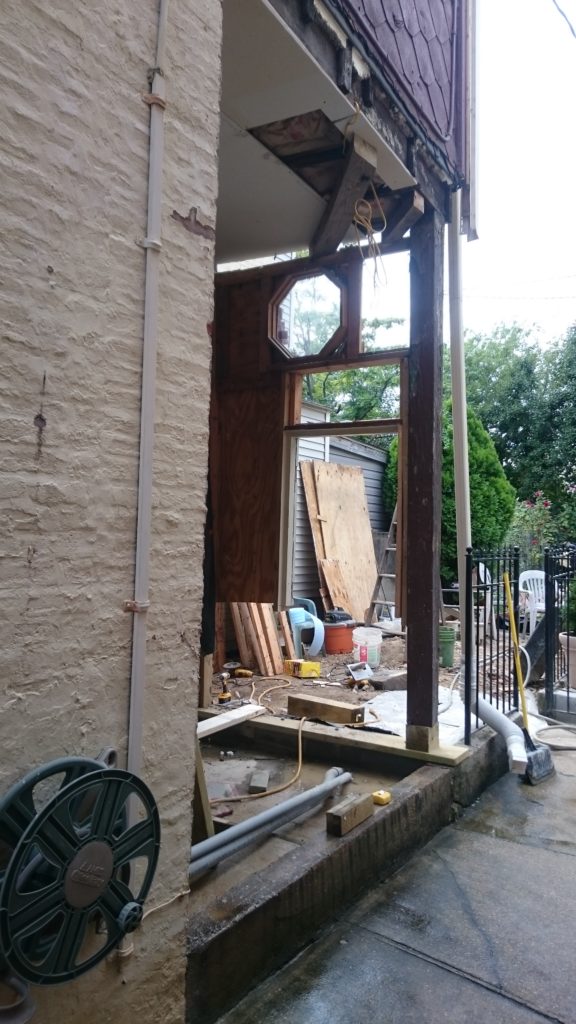
Now that we had the new walls and that damn yellow siding was gone I could cover it all up again. This is another thing that was in my plans from that first Sketchup drawing; I wanted ceder shakes. We ordered a few squares of shakes.

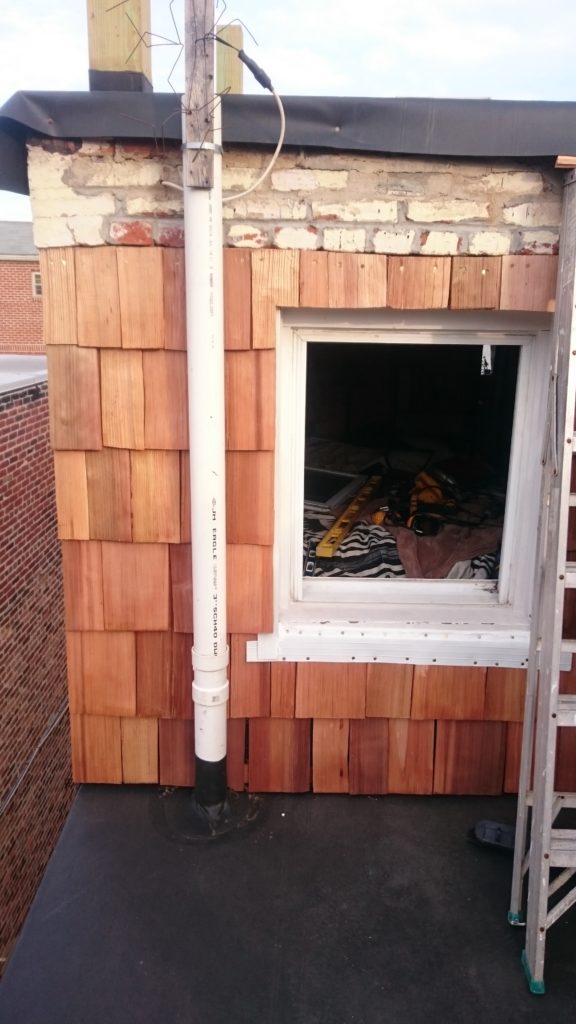
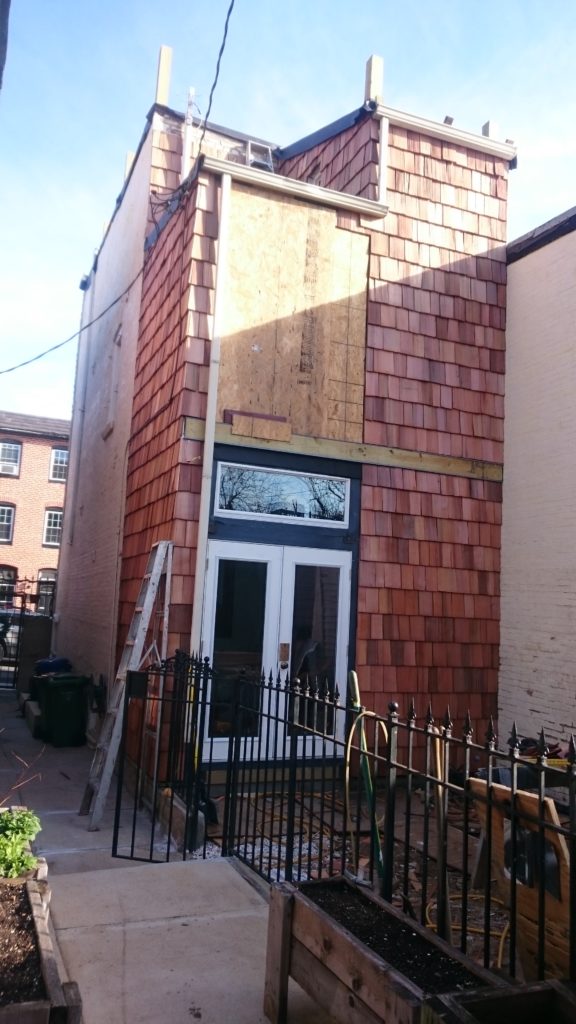
We also added doors and a window
Figuring the next steps would go ahead smoothly we went ahead and ordered our lumber. We jumped the gun though. I think the order was delivered in October and we didn’t get beyond posts until the following June.

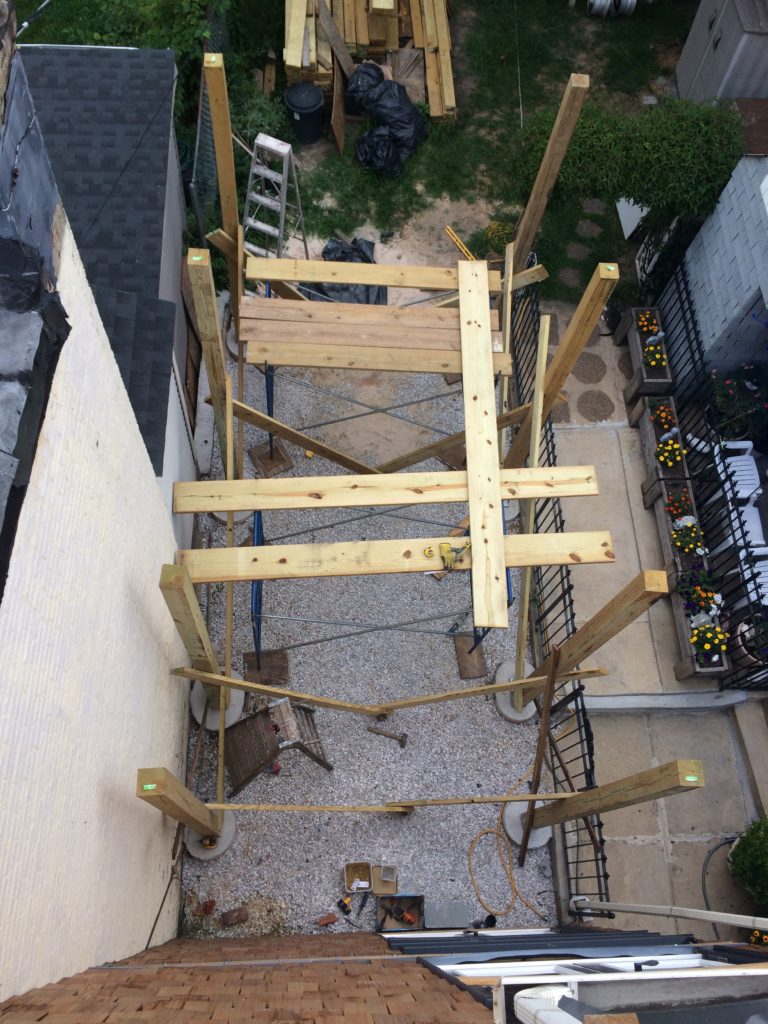
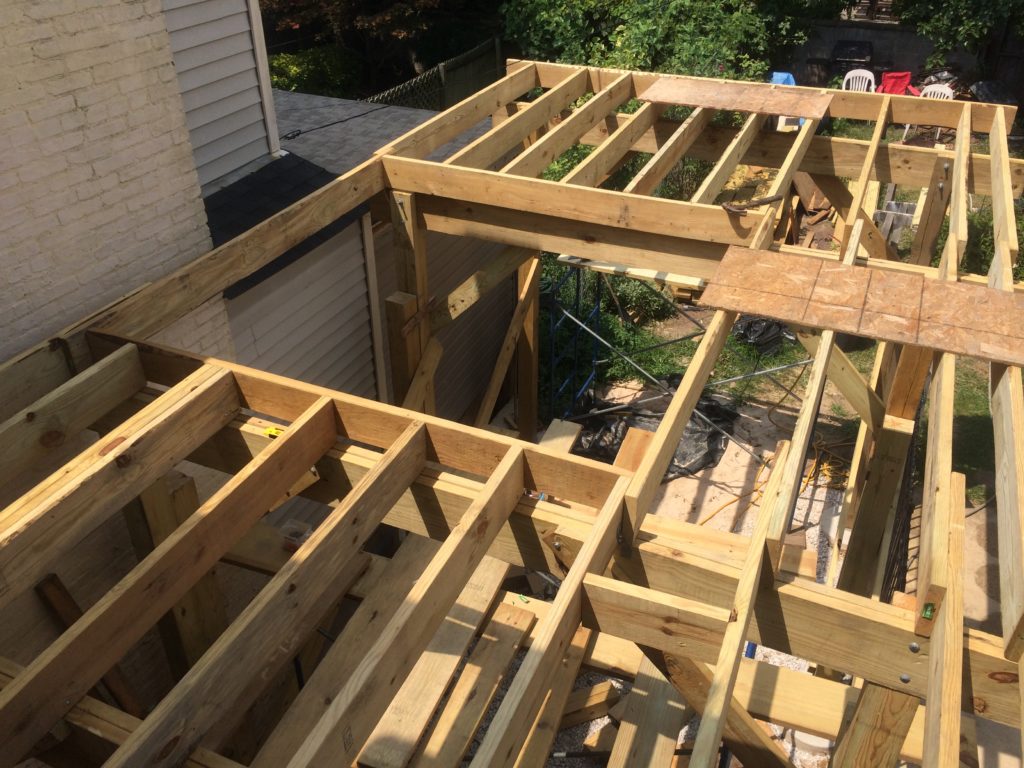
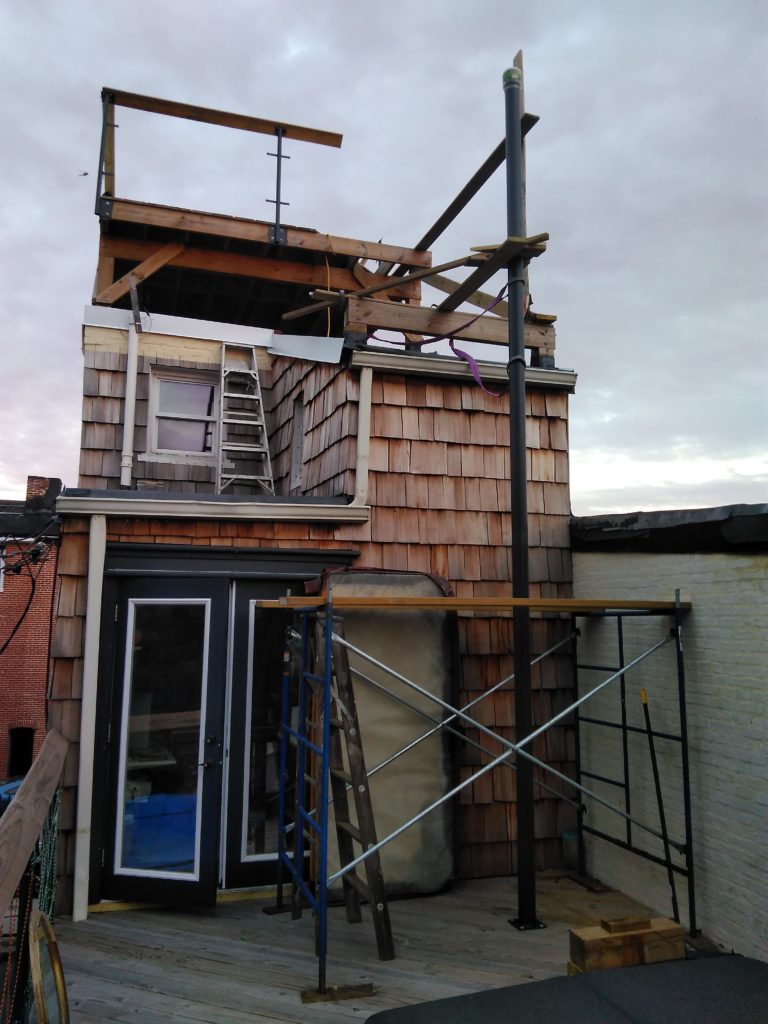
The first deck to go up was on the roof. I had already added in posts back in October when we did the roofing. Framing of the deck took about 2 days and I can’t for the life of me find a photo of that process.
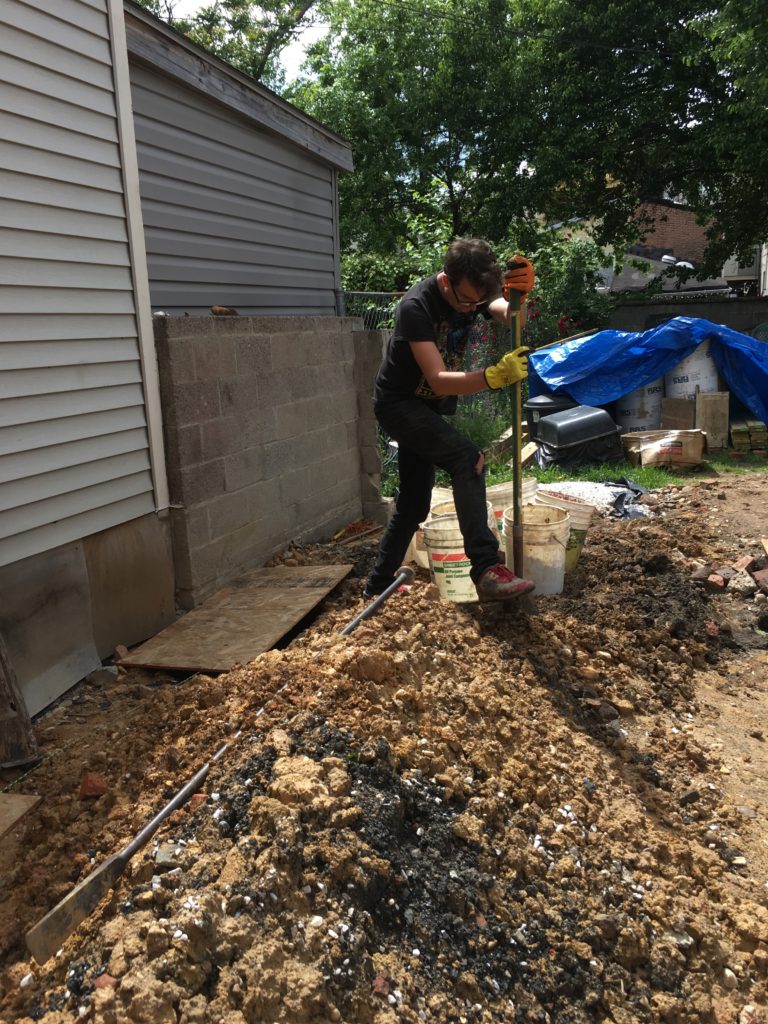
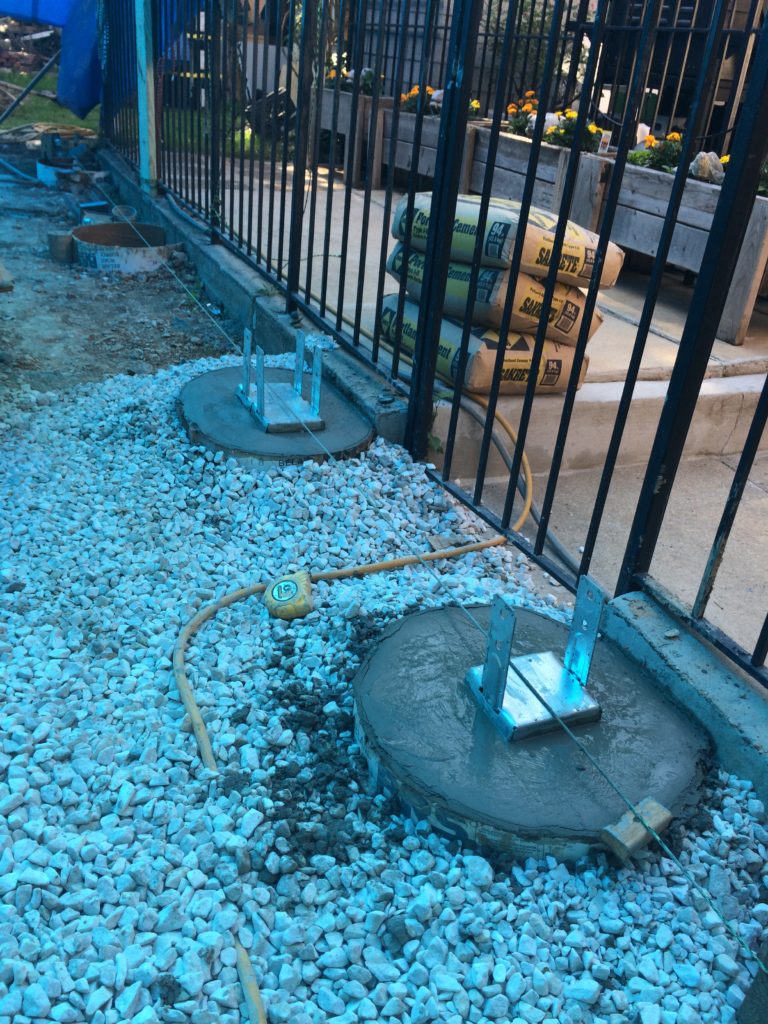
Footers (July 2017)
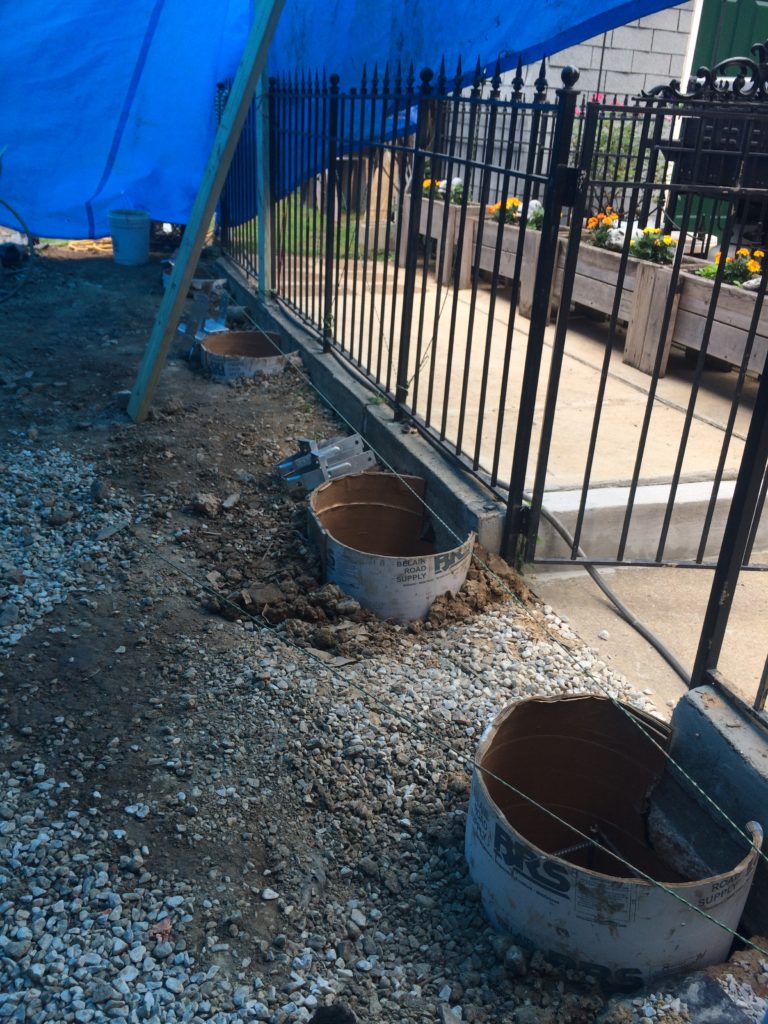
Finally we can start a deck… or can we? Footers! Our architect drew in some pretty serious footers for our tub supporting deck. 18″ x 24″.. oval. I got some 18″ forms and for the oval ones, cut them in half, added 6″ of plywood and made my own ovals. It was a challenge because things got really busy with Light City starting in 2017.
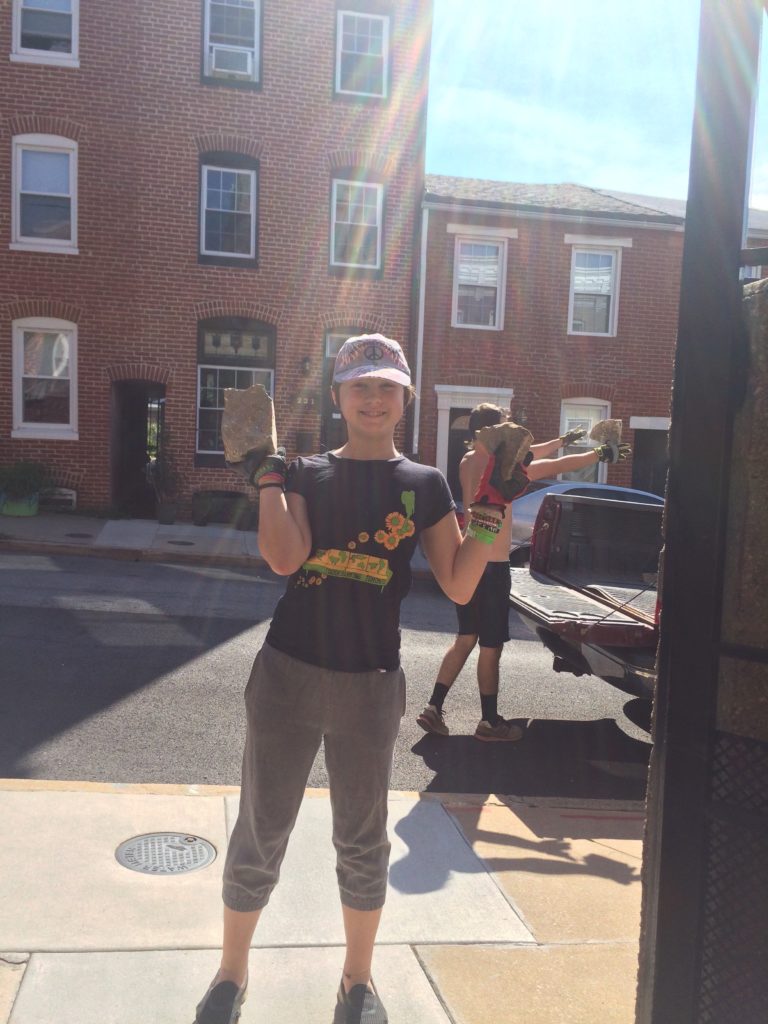
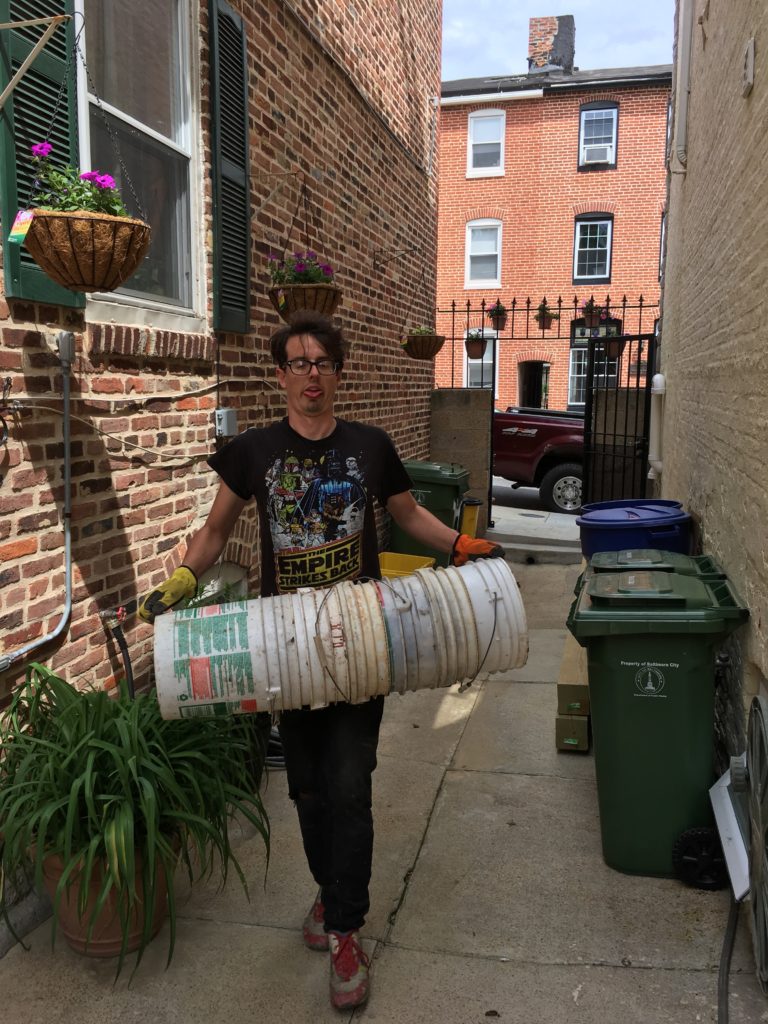
After freezing, filling with water, collapsing, being dug out again, I finally got around to footers done in July 2017, nearly a year after demolition started. In addition to being 18″ x 24″ ovals, the party wall footers had go go behind the 36″ deep (code is 30″ here) holes down to 48″. Turns out that is a LOT of dirt. We had to move out so much dirt and then move back in all the sand, gravel, and cement. All in buckets from the street.

The drawing also called for rebar reinforcements, so I fabbed some up with the welder. There were several different sized for all the different shapes and depths.
Finally it was time for concrete. Our amazing and magical friend Becca ran the cement mixer the first day. It was 100+ degrees under a tarp that mostly just made it more still, humid and converted the sun that hit the top if it to heat underneath. It took a 2nd day with Siri running the cement mixer to get the last ones done.

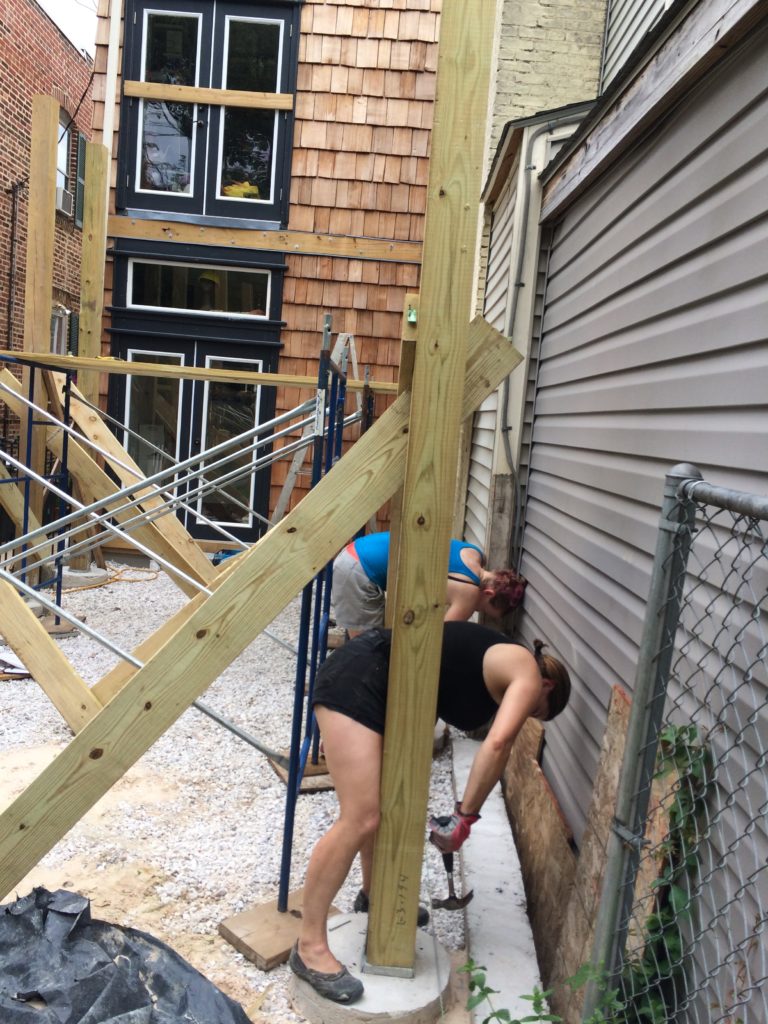
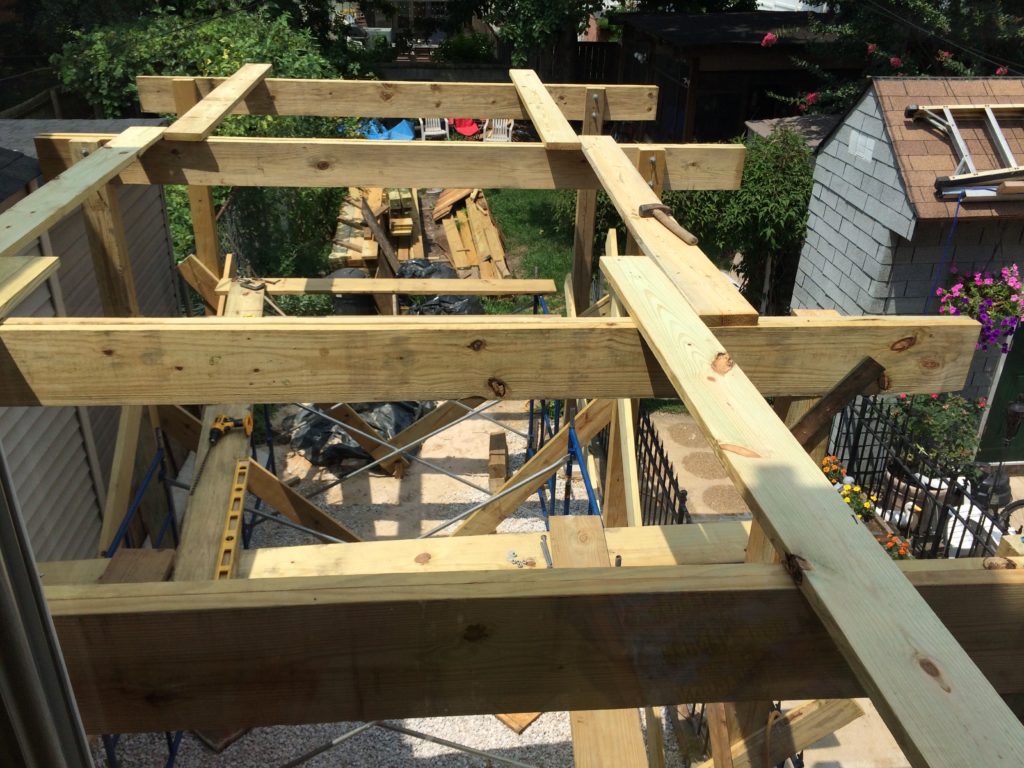
Going up! After a little break to let the concrete cure… I think a few weeks? We erected the posts. Lots of posts. Our drawings called for twelve 6×6 posts. Four of those form a small, lower structure that exists only to hold the hot tub. Again with the Becca’s help, Siri and I flew through this step.
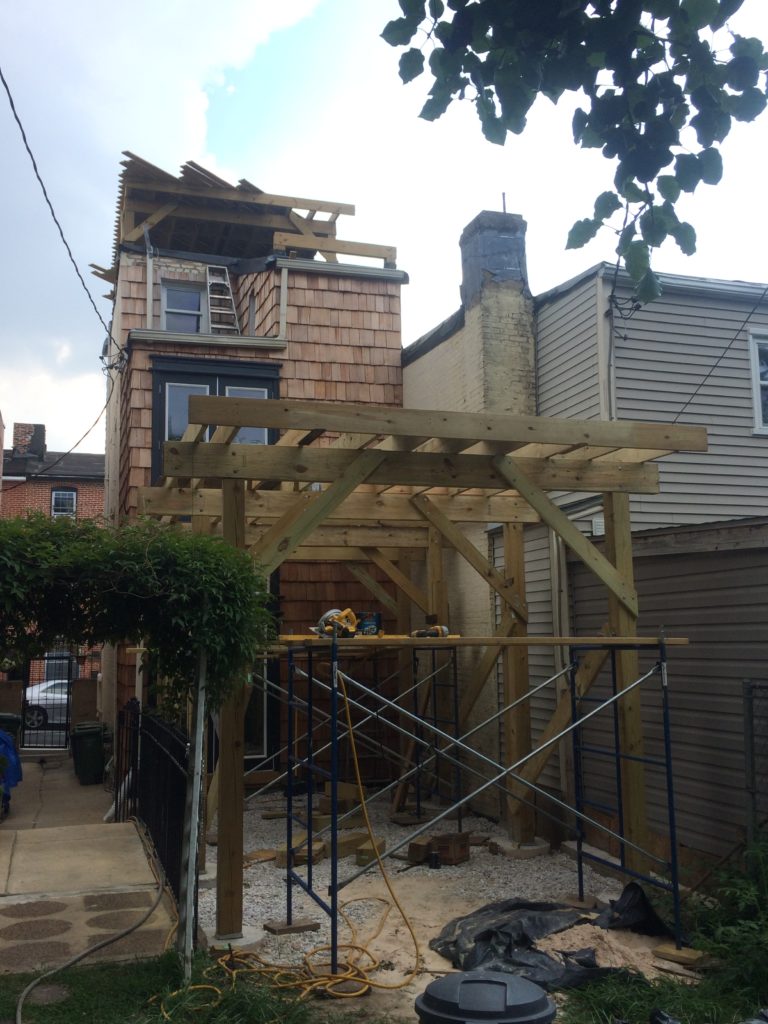
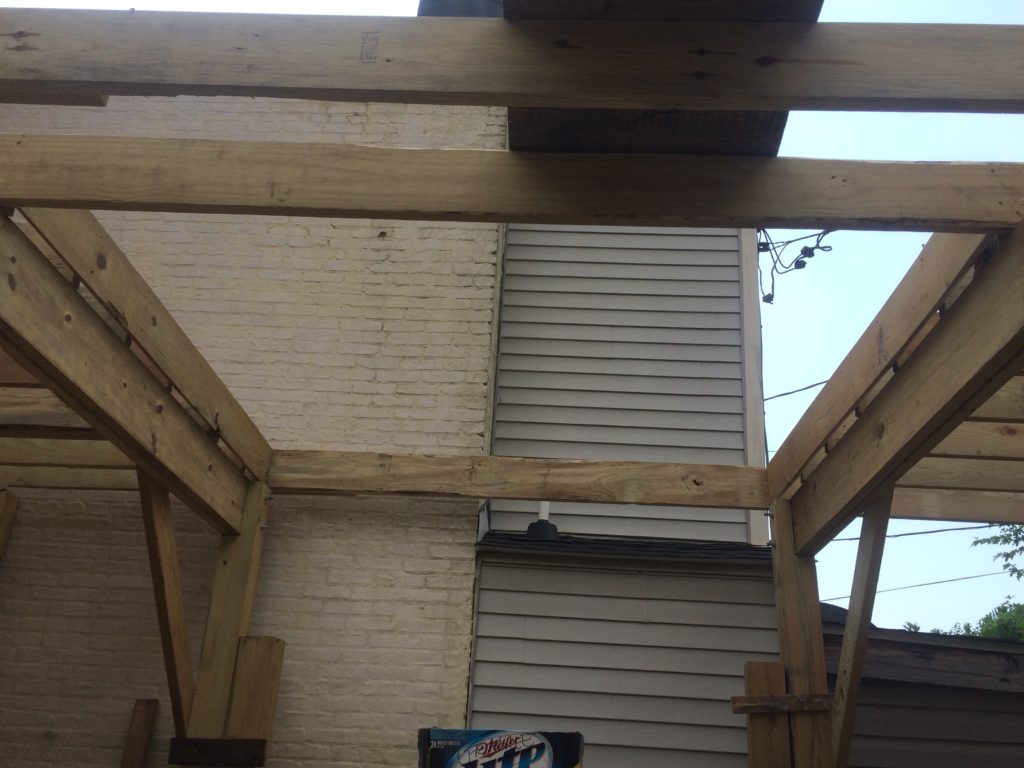
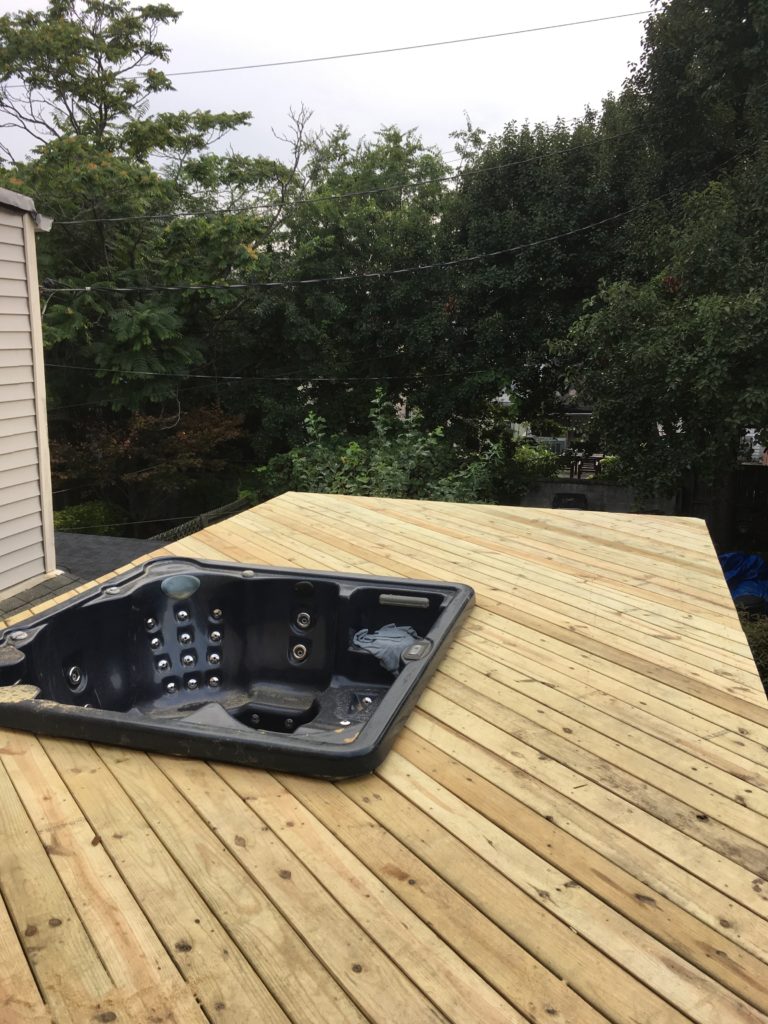
Because of the hot tub, and wanting to keep the party going underneath on the patio, we chose to add our rubber roofing material to direct water to gutters.
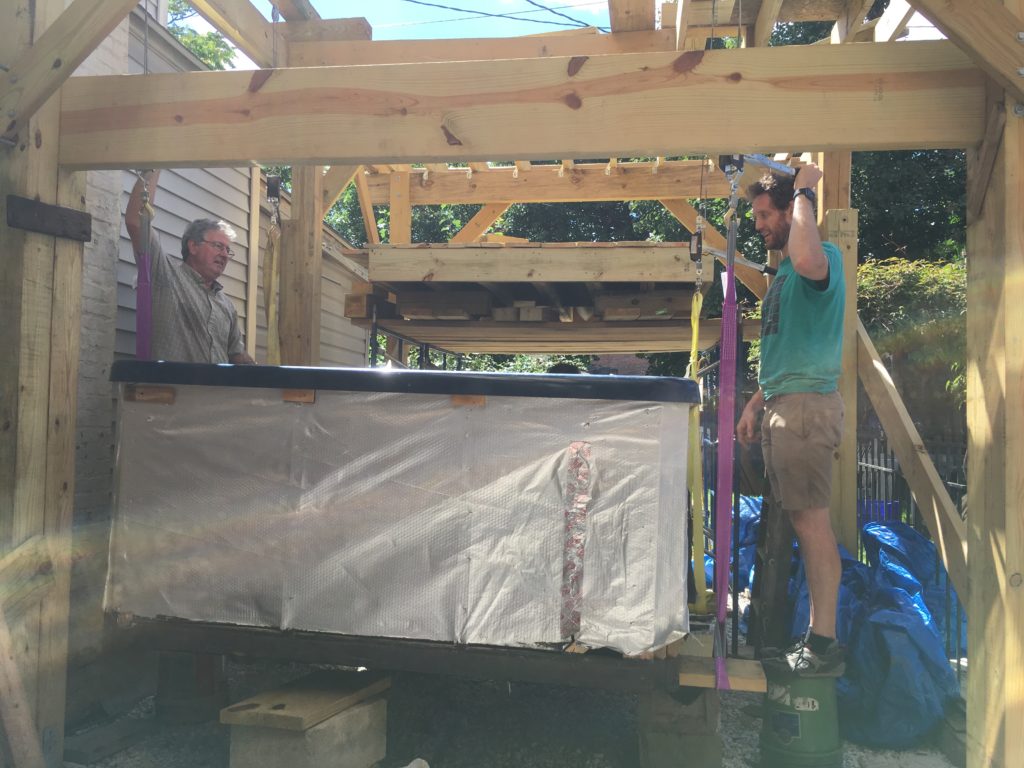
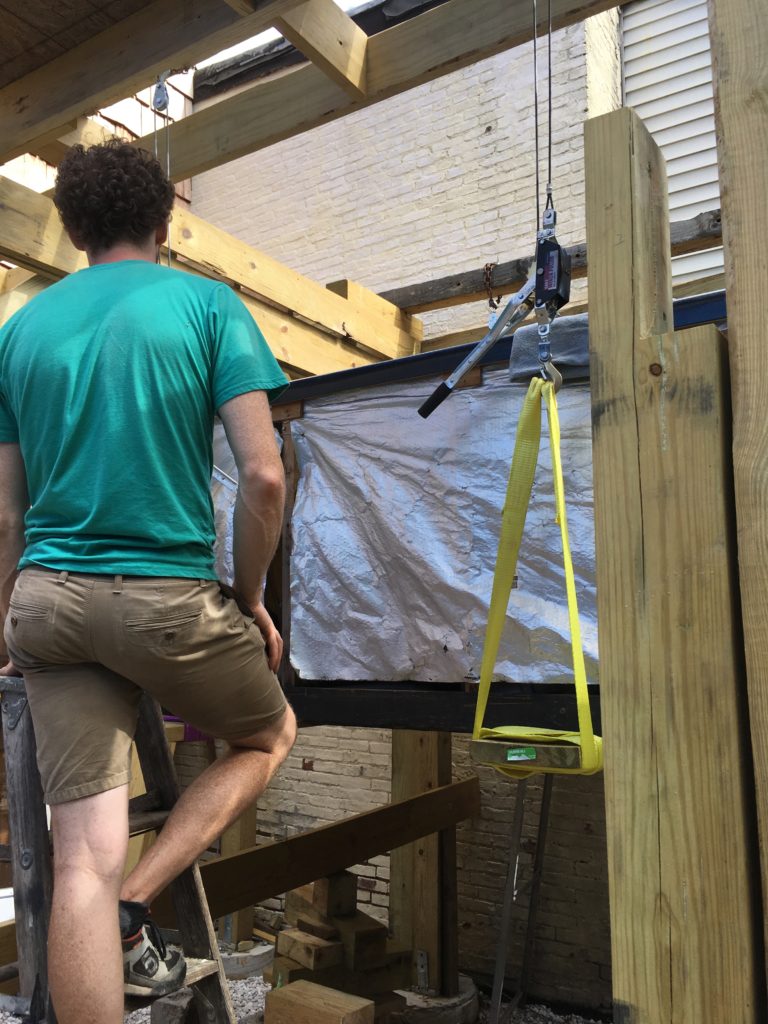
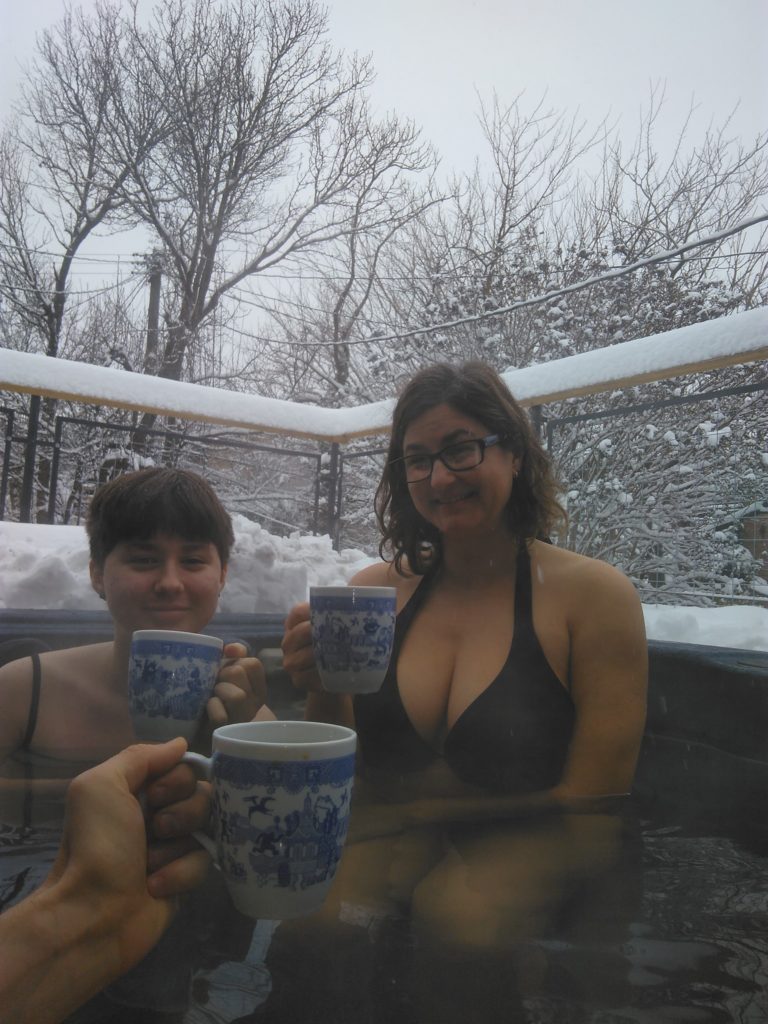
Hot Tub Lift (Aug 2017)
Since the start of this plan, we’ve been asked pretty much the same question over and over: how are you getting the hot tub up there? Our architect recommended getting a crane, but at $5000, it went well beyond our budget, plus I don’t think a crane could put outriggers far enough out on Castle Street to clear the 35′ house. Luckily I had lots of time to day dream about this solution. Here is how I did it.
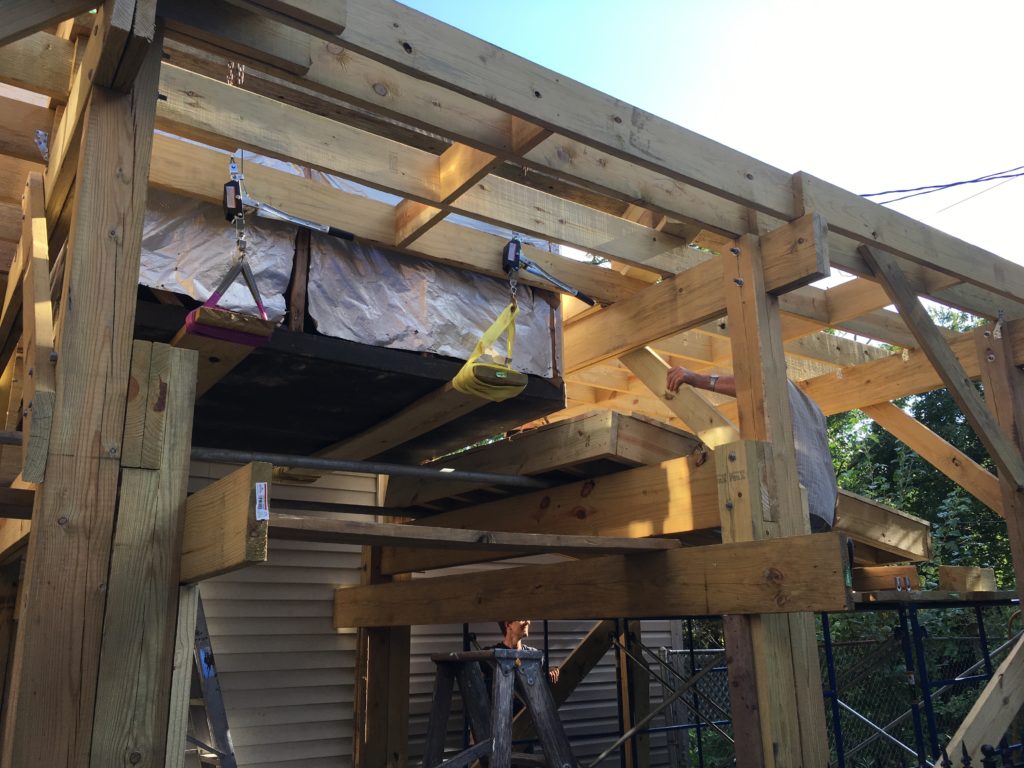
Prefabricate the tub deck platform on the ground. Using the main deck, I could lift the platform up and stage it off to the side on top of the scaffolding. Lift the tub straight up and slide the deck under it.
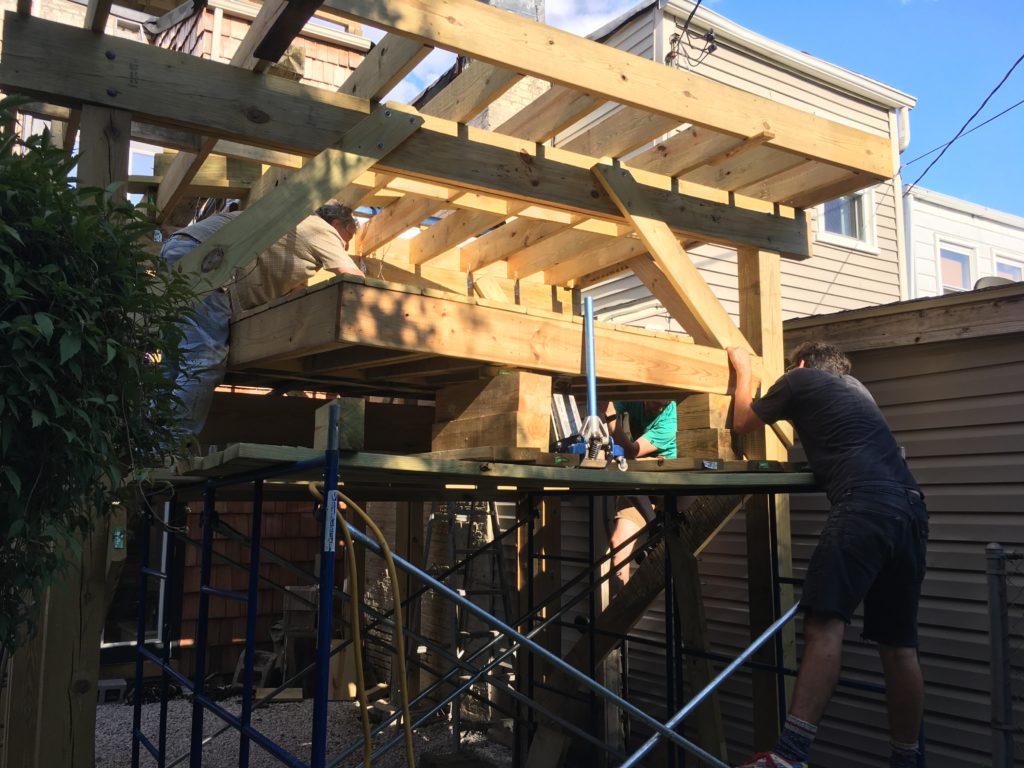
The lift! With the help of dad and our friend Logan, we used (against the manufacturer’s recommendation) four comealongs with straps slung around boards run underneath the tub. It was a slow process, but eventually we got the tub about 3″ above where it needed to end up. Careful to not get underneath too much, we installed the doubled 2×12 beams onto the posts, put down two pieces of rigid conduit as rails, and slid the platform into place. Once it was settled into place and a few missing pieces added, we lowered the tub onto the platform.


Safety 3rd 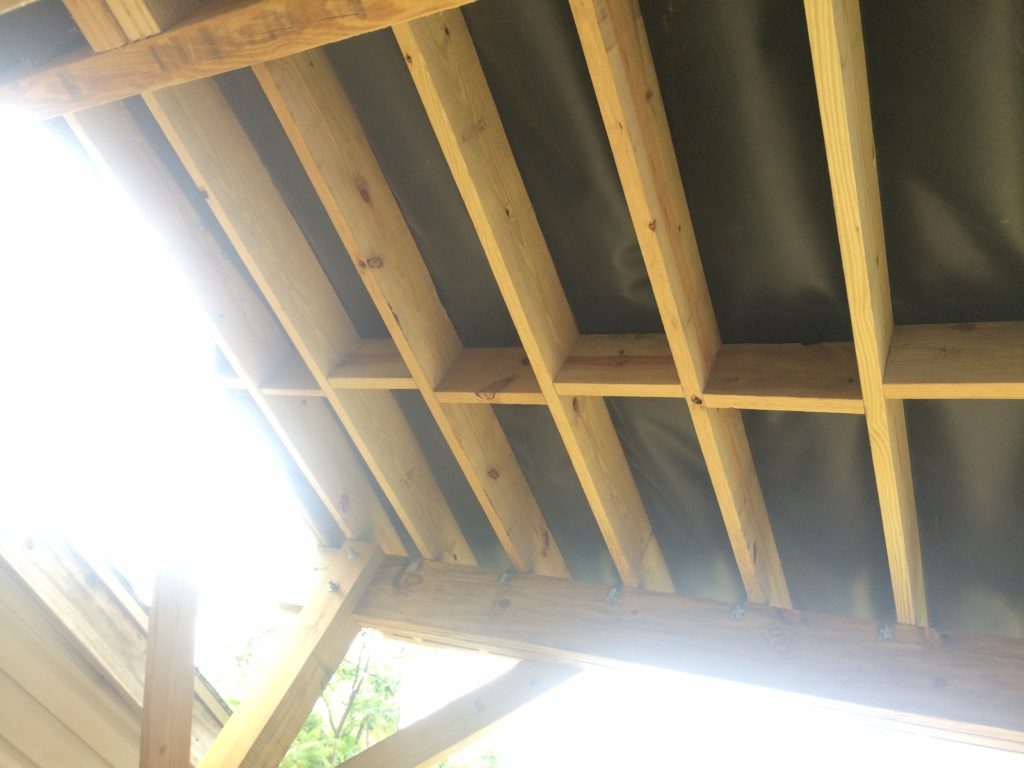
Rubber roof to keep people from getting splashed down below 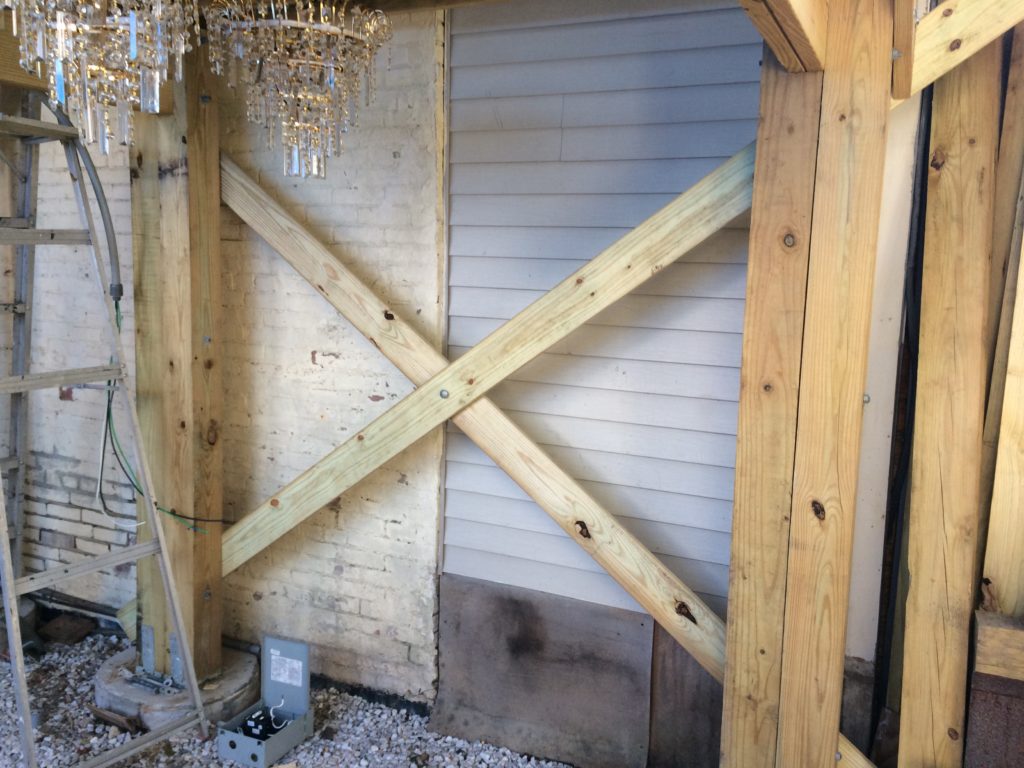
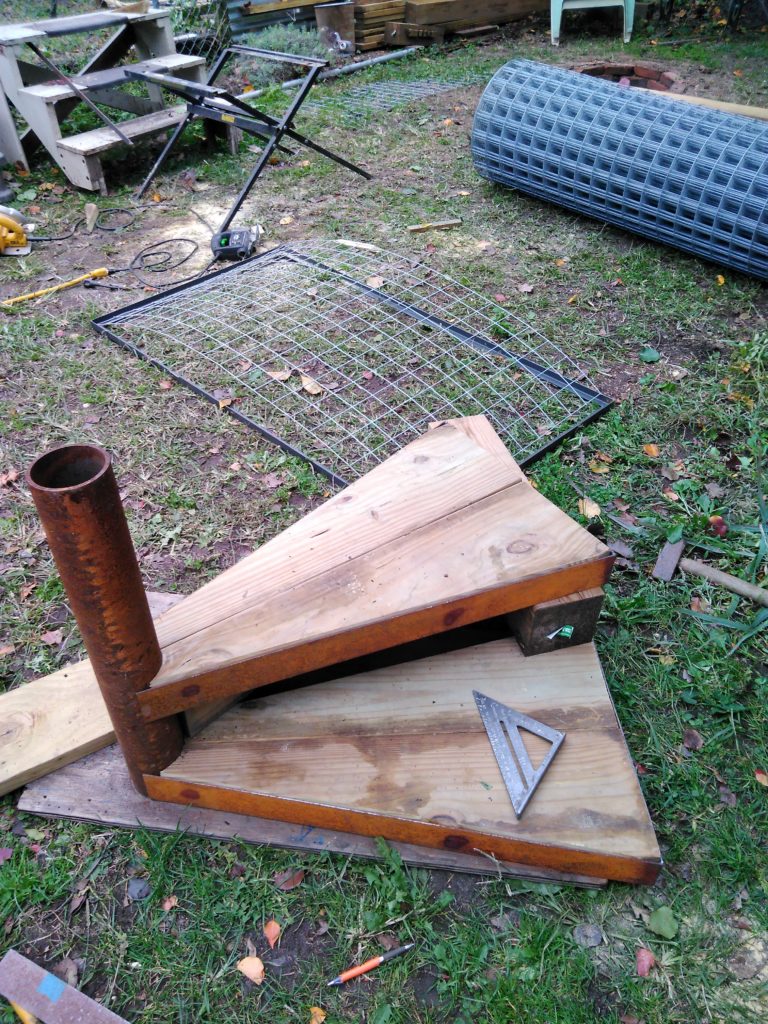
Add Triangles 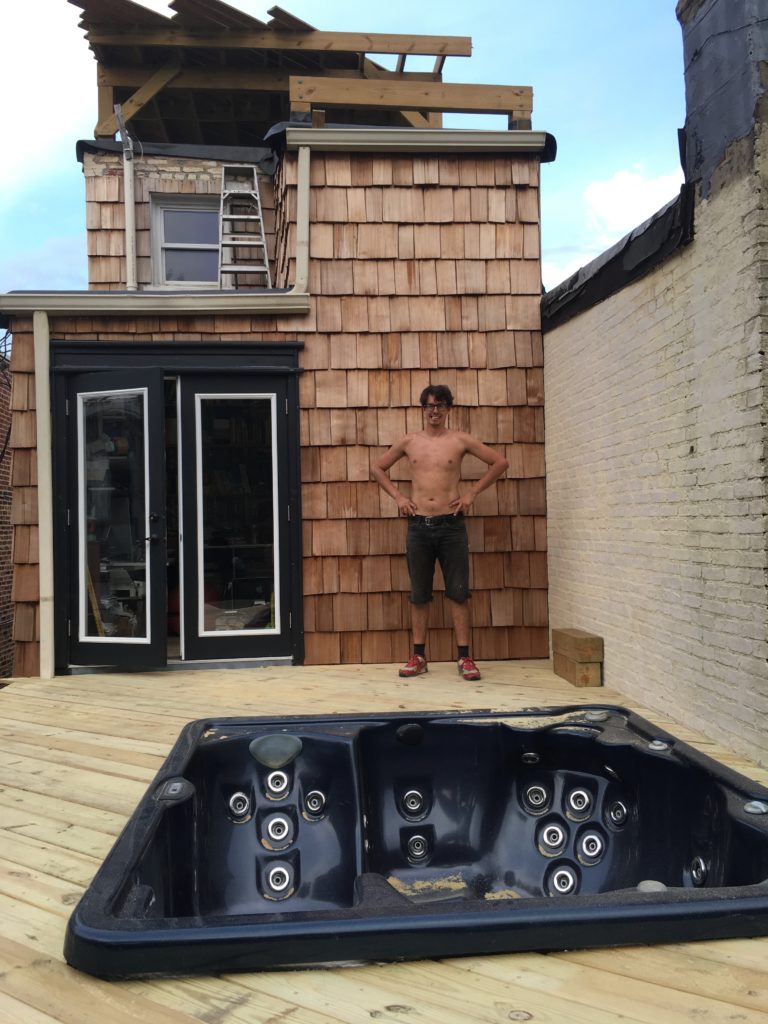
Proud hot tub papa
It was pretty quick after that to add the rubber and decking boards. Then it was off to Burning Man, but that’s a whole other story.
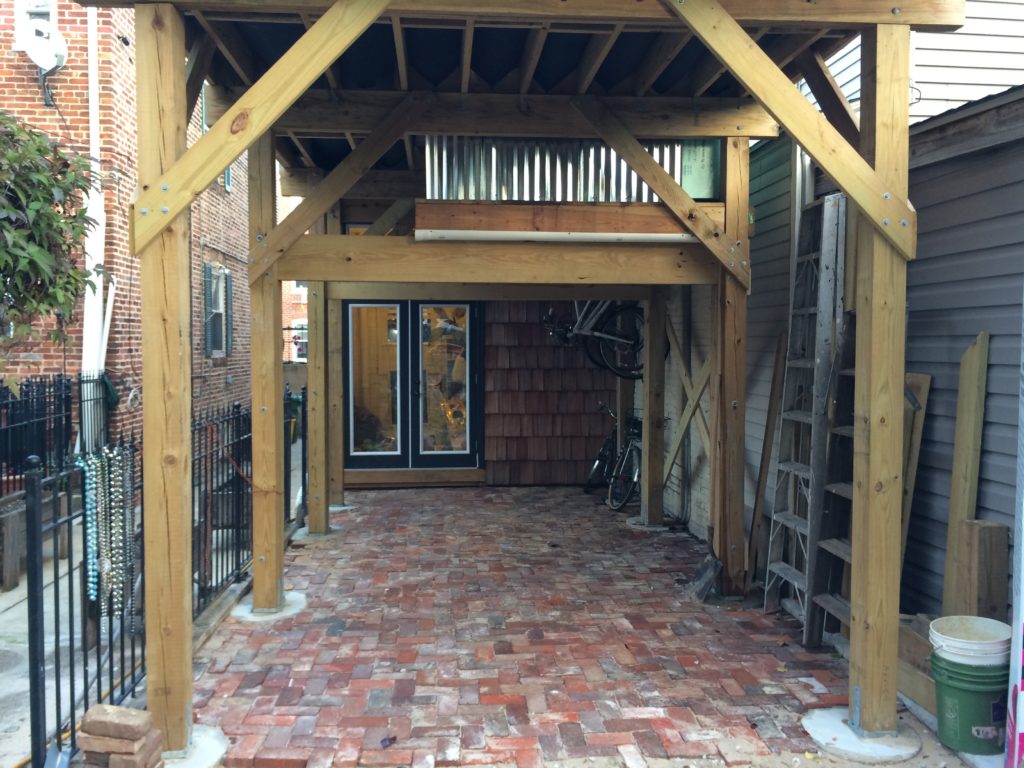
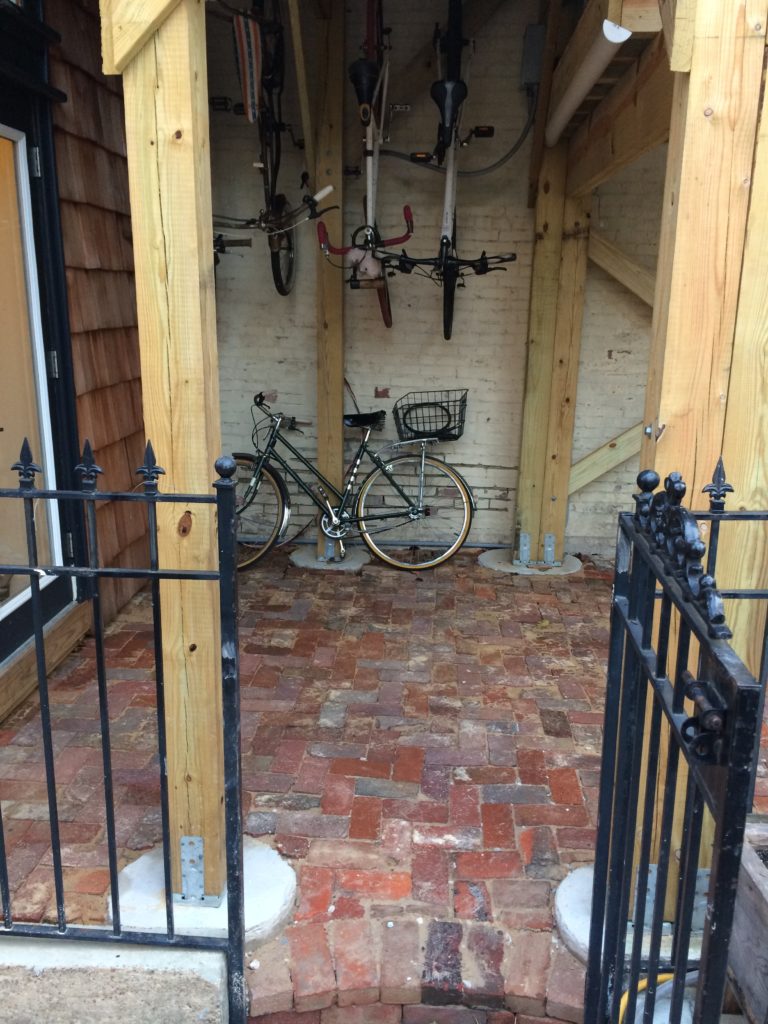
The Patio (Nov 2017)
With all the messy stuff done above, and not wanting to walk on gravel forever, next step was the brick pavers. Just like taking out the old concrete, we brought in the new materials 2 buckets at a time. A layer of stones to help drain away any water, a layer of semi-perm membrane, sand and finally 800 or so reclaimed bricks from The Loading Dock.
Railings Part 1 (Feb 2018)
I’ve wanted to do steel posts with metal mesh from the get go as I wanted to see as clearly as possible the trees while in the hot tub. It took a little while to get to them. We even had a few hot tub parties on a deck 15′ off the ground with no railings at all. Safety 3rd!
Winter outdoor metal fabrication is not my favorite thing, but we a week or two with warmish weather so I started on my posts and squares. I painted them just before we left on a trip to Puerto Rico and let them dry inside while we were away. I put up what I had done for our Chinese New Year party after we returned with early arriving guests helping to drill the last holes. With no mesh, we just zig-zagged paracord to hopefully catch anyone from going through until we could track down mesh.
Railings Part 2 (Oct 2018)
Due to Light City 2018’s crazy schedule and having to build some lasers again to pay the bills, things sat pretty still for 8 months. Over that time we tracked down a galvanized 3″ mesh. For some reason, there wasn’t any locally that couldn’t be called chicken fencing. What we ended up ordering from Boston, was 11 gauge. So back to posts and rectangles I went. It took until around Solstice to get everything cut, welded, painted, and installed.
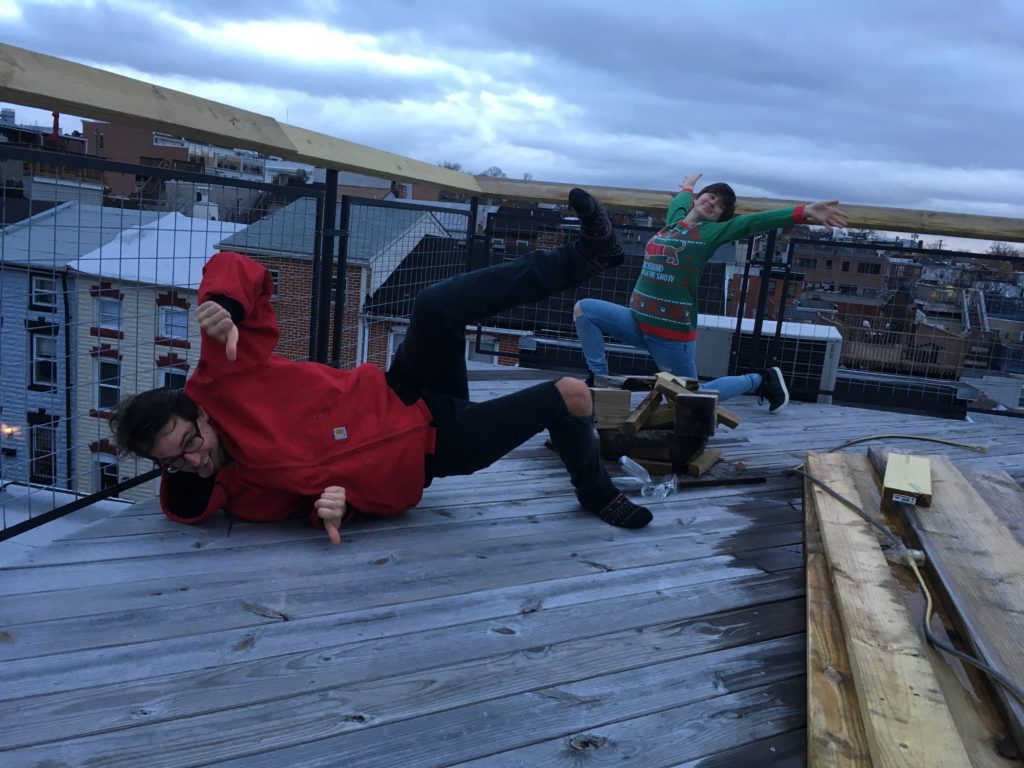
Not sure what I’m doing here 


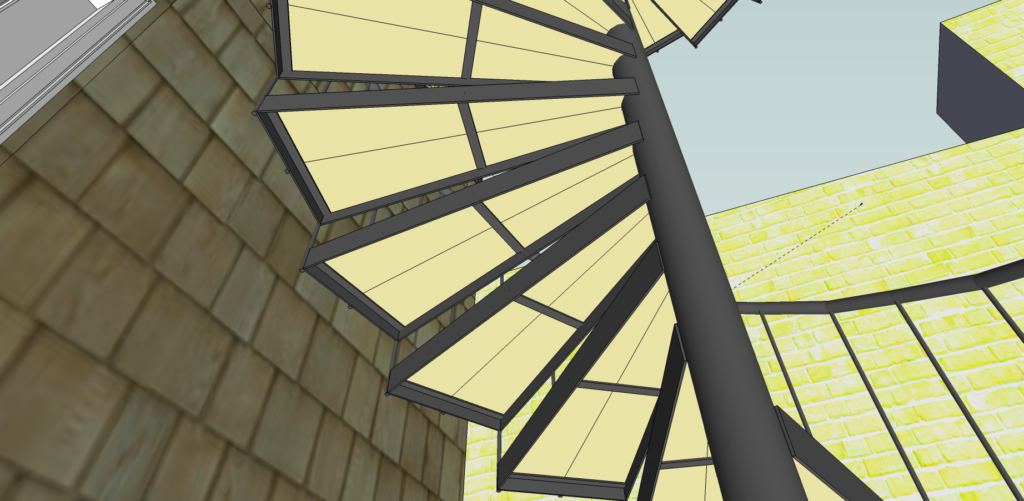
Up Next: Stairs