She’s Older Than We Thought!

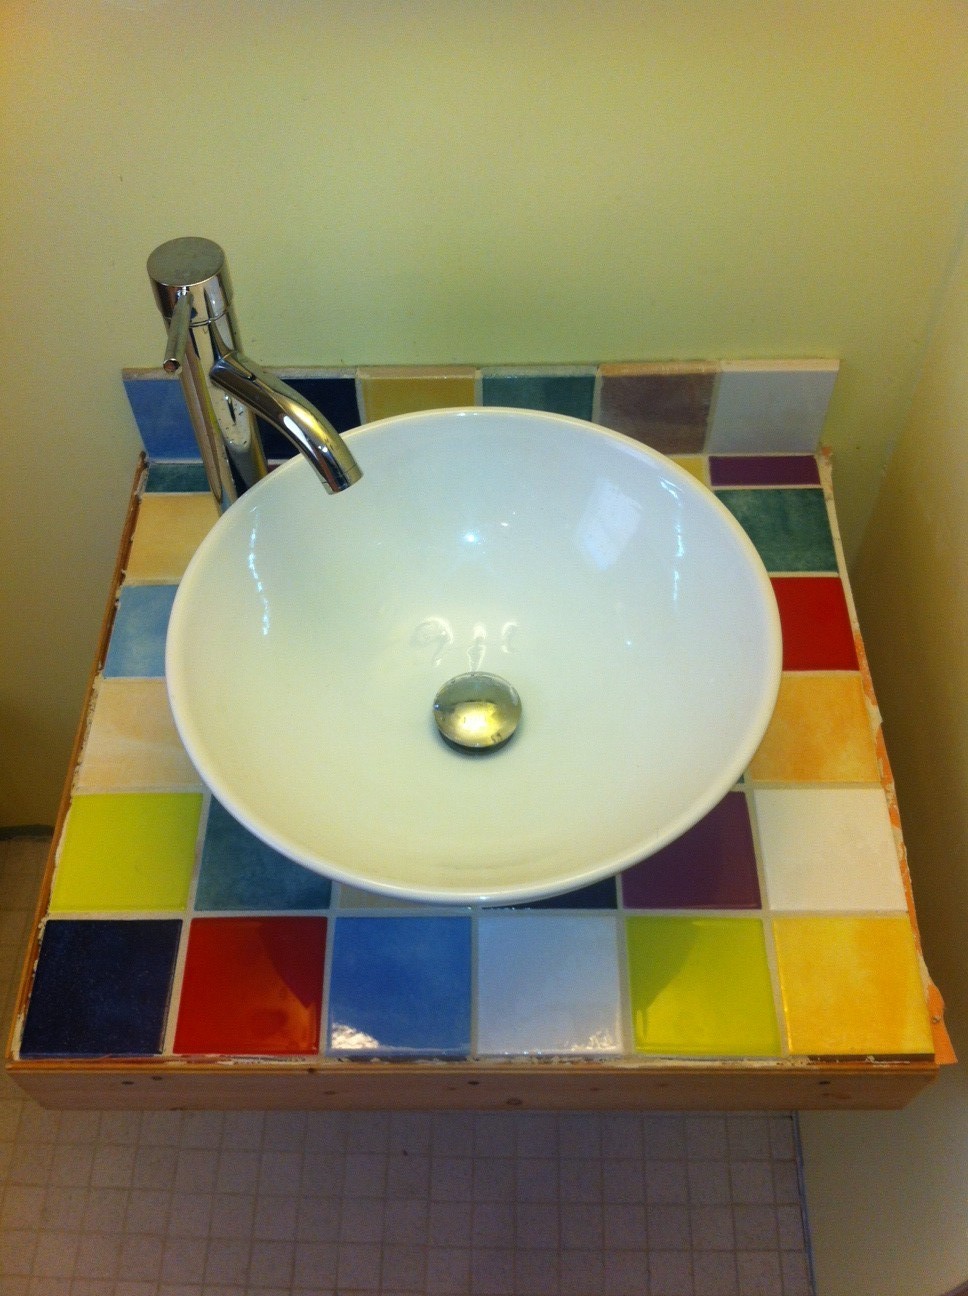
Last Friday I decided to take a day off work so Siri and I could check out some museums.  First was the Baltimore Science Center.  Its a quick bike ride from Formstone Castle.  There we saw the mummies of the world.  We had time to spare after so we headed up Charles Street to Mt Vernon and the Maryland Historical Society.  I had only a few days left to activate our 1 year family membership.  While we were there we found a really cool birdseye drawing of Baltimore.

The north-south running street on the left is Washington and on the right is Collington.  Castle Street is the small street between them.  Our house is the white wall about 3/4 of the way up to Pratt Street

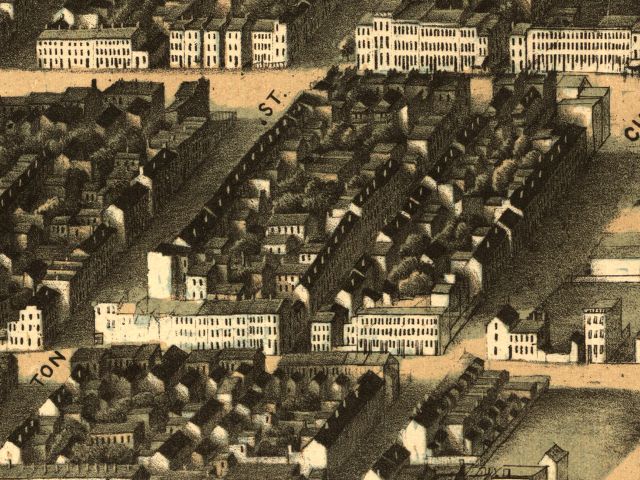
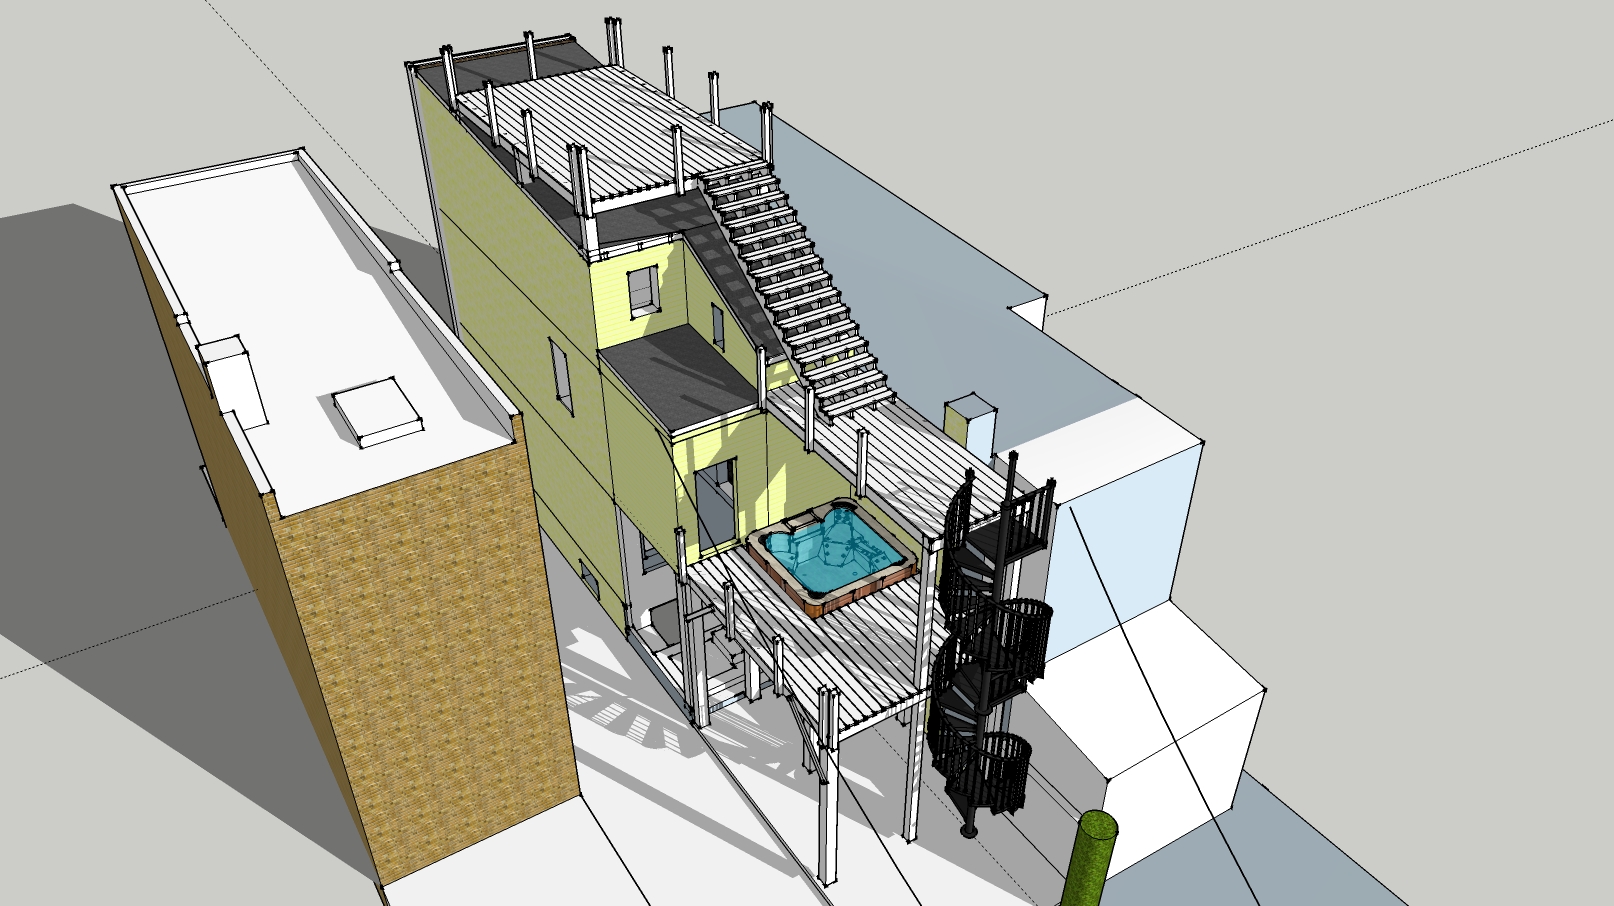
The north-south running street on the left is Washington and on the right is Chester. Castle Street is the small street between them. Our house is the white wall with a flat roof about 3/4 of the way up to Pratt Street.  It has a back yard with trees and what looks to be stables.

The E. Sachse, & Co. published a bird’s eye view of the city of Baltimore in 1869.  I had seen this in some of my Baltimore history books before, but always tiny.  Blown up on a wall it had so much detail.  I had originally thought that the artist had just drawn in notable buildings and flubbed the rest.  After closer inspection, it is pretty damn accurate.  The types of roof are correct as are the number of windows.


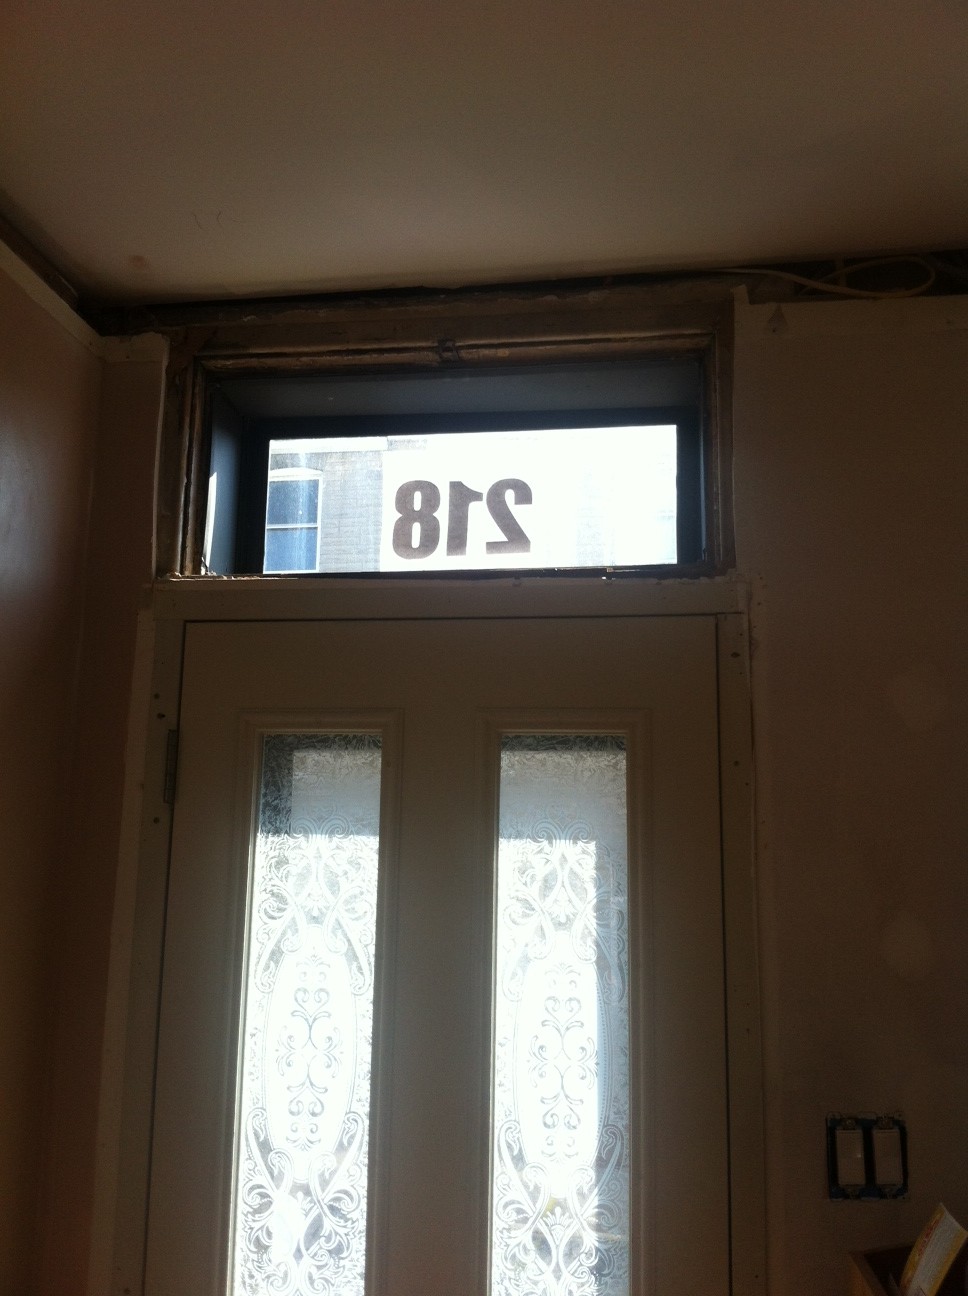
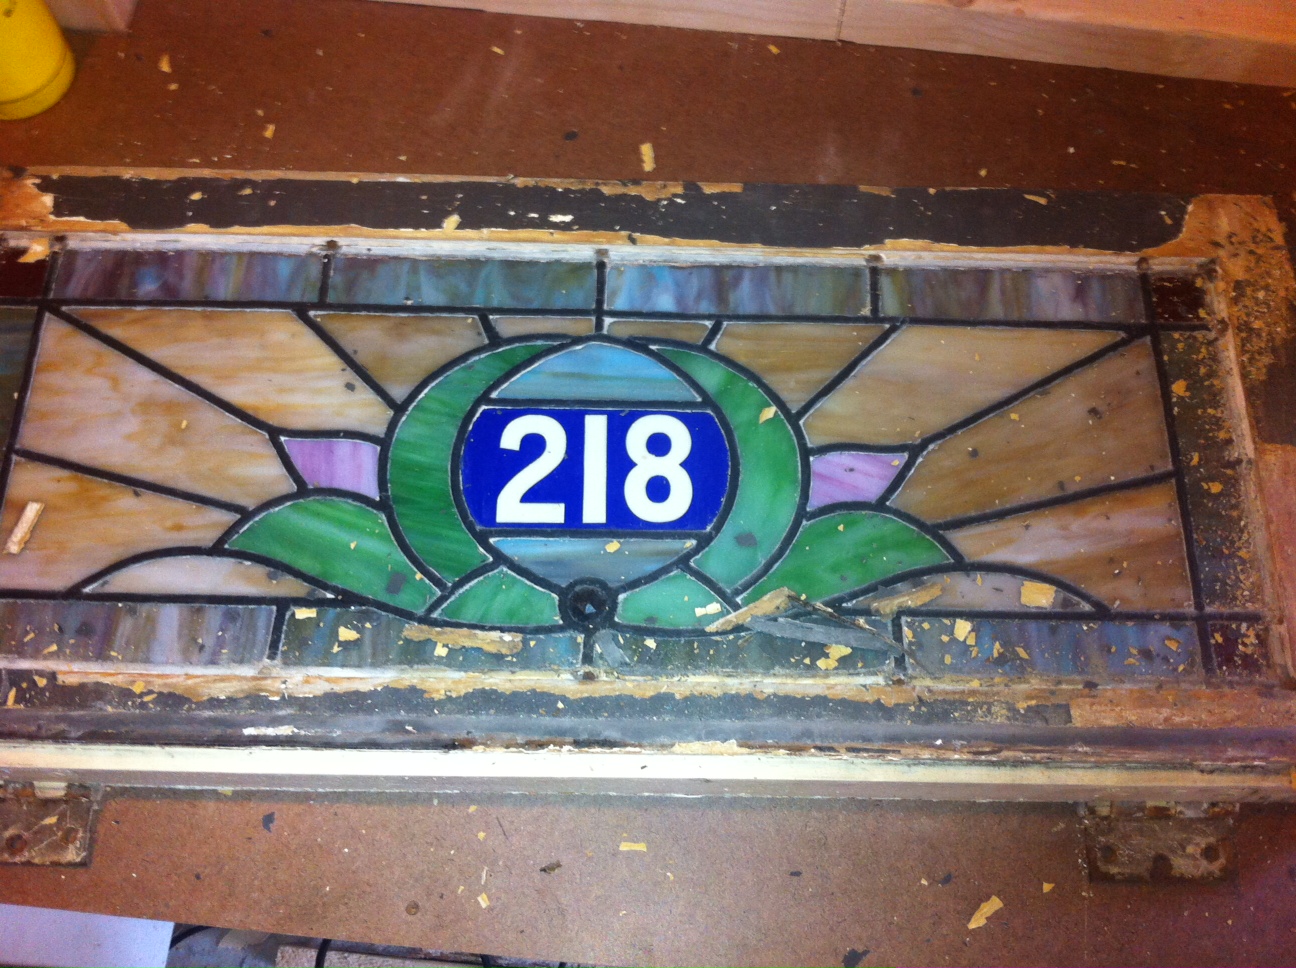
This is a view of the northwest corner of Pratt and Washington which is right above “ST” in the birdseye view.  Nailed it!  I’ve explored the image quite a bit while comparing it to what’s still there on Streetview.  Some of this stuff has not changed in over 150 years.  It will be exciting to finally get a chance to sit down in the Land Records Office and the Baltimore City Archives to see what we can find about this house.

You can view the rest of the map visit the Library of Congress website. This page also has a link to the downloadable JP2 file which lets you view it on your computer.  I downloaded kdu_show for this, but there may be better options out there.


Like Sand Through an Hour Glass, These are the Bricks of Our House

A few weeks ago we started pointing bricks in the stairwell. This is one of those DIRTY projects that should have been done before we moved in, but logistically it had to wait.

This job is DIRTY. It involves scraping out mortar from between joints which creates a good deal of dust, even more sand and to do it right, lots of water is sprayed inside the house. Where does it all go? Down. All the way down both flights of stairs. This makes it pretty much impossible not to track it around the house. Iris also seems to need to go to the bathroom 10x more than normal when there is unavoidable sand on the stairs.

Sitting on a board.

I’ve gotten pretty good at balancing myself on a plank. Since I’m going to get covered in mortar and water, I hardly bother to dress. Usually its just cut off sweatpants and bare feet.

This job has gone smoothly so far, but I have barely made a dent in the 450 square foot wall. The house becomes an indoor beach complete with sand dunes on the stairs. I do the work in chunks because the clean up is so time consuming. It is impossible to leave it dirty when we have Iris or guests so there have been long gaps between working days while I wait for there to be no one around.

The single brick thick walls are taking priority. The century old mortar has long since turned to dust and gravity is the only thing holding up the wall. I’ve been able to replace mortar more than half the depth on most of these. One day I may try to hit them from the other side, but good mortar halfway though is enough to sure up the walls for more serious repairs to the wall above Siri’s office door. These bricks are literally falling out and will need to be removed and re-layed to do it right. Better hurry up though. Fall is already here and we can’t have a gaping hole in the side of the house much longer.

We had not planned on replacing the stairs, but after all this mess, I think the only way to get the area cleaned up when this is done is to rip out the old stairs and replace them. I plan on drawing this up in Sketchup in a few days. I’ll be sure to post my ideas.


20131127-134315.jpg

LADEE Launch

LadeeLaunch

This is the trajectory of the Minotaur V rocket carrying LADEE to The Moon. The launch is this Friday evening from Wallops, VA. Should be clear so we’re hoping we can catch a view from the roof.

Follow up: This was amazing!  We could actually see the flames and smoke trail.  We could also clearly see one of the stages fall away and the next stage fire up.  Totally worth going up on the roof for.

Siri’s Favorite Hobby

20130801-220638.jpg

Organizing her books.

This week we sealed the first of 4 sections of bricks on the 1st floor.  This allowed us to seal the bricks and put up book shelves.  We used leftover rough cut joists for this.  I screwed small oak supports on both ends of the shelf and the big joist just hangs over it hiding it.  Need to redo the trim around the window eventually, but at least we have a place to put the books.  We’re trying to clear out space on the basement bench shelves so we can clear out the little storage area under the stairs in the basement for major brick / floor work once we get back from vacation.

Us vs Heat: Victory or Defeat?

Monday afternoon, returning from work, I declared success. We finished up the wiring on Sunday morning and by Sunday afternoon we were relaxing in a 65 degree house. The weather forecast for the week is 99 degrees F and high humidity. Good thing we have air conditioning.

And then the power went out… and stayed out. Its been nearly 48 hours now and BGE is still working on the issue. News crews have been in the area so our discomfort is not in our heads, its news worthy! Without electric, there is little work I can get done on the house, if I could stand doing it in the heat.

Kitty and I tried to find comfort on the roof, but the breezes were not enough, so we packed our bags and headed to Ian’s house for the night.  Hopefully power comes back on tonight so we can get back to work.

Cat on a Hot Tar Roof

Cat on a Hot Tar Roof

OMG ITS HOT!!!!

We’ve spent the last two weekends working on the air conditioning system mentioned in the previous post.  Some of those days on the roof were actually pretty nice but some where terribly hot.

Last summer when I was looking at old newspapers, I found an article from July 7th, 1901 where 451 people died due to heat in Baltimore IN ONE WEEK!  Air conditioning seems like a luxury, but after reading this it seems like a necessity.

As for getting ourselves some much needed air conditioning, we have mounted our compressor on the roof with some 6″ lag screws.  It looks sort of strange standing like a monolith from up the street, but can’t be seen from the opposite sidewalk.  Its set back from the face of the house by 7 feet.  We plan to mount it to the deck next spring which will be set 8′ back as dictated by Baltimore City Code.

After the unit was in place, we ran our line sets and electrical through downspouts to each indoor unit.  To finish up we need to tie in our 240 volt power wire on both ends.  One to a double breaker and the other to a cutoff switch by the unit (code).  Once we have power we’ll vacuum down the system and release the charge that came in the machine.  If all is well, we’ll spray foam the holes in the walls and we’ll be done.

Its Getting Hot in Here

We should have started the process of installing air conditioning a month earlier.  Its June now and in Baltimore it can get into the 90s with high humidity… and has.

We’ve decided to stay ductless.  We’ve compared brands online and settled on the Mercedes of Mini-split systems: Mitsubishi.  After a visit from a contractor that Home Depot lined up, we got a quote for a Mr. Slim system: $14,000 installed.  HA!  That’s not going to happen.  We looked up the exact parts he quoted and found the parts to be around $4000.  We’ll see how I feel once its installed, but $8000 for labor is a bit ridiculous.  In classic Mike & Siri manner, we’ve gone and jumped in with both feet (4 total) and bought the same system online.  We can do this ourselves.

The Guts

The Guts

We’ve picked everything up and it looks good.  Like our washing machine, fridge and dishwasher, this thing is a scratch and dent model.  There is a little dent on the  service cover, but once this is on the roof, nobody will ever see it.  We got a $200 discount for this which covers the line set.

The technology for this is more advanced, but the same concept as our True fridge.  There is a compressor / condenser unit that is separate.  In this case it will go on our roof.  It connects via power and a high and low line set to the indoor units.  This compressor supports 3 circuits.  One for each floor.  The indoor units are about 3′ x 1′ x 1’and mount on the wall.  A 3″ hole is made in the wall for the line set, power wires and condensation line.  We’re going to run these up the outside wall to the roof where we will put the compressor.  Speaking of the compressor, this thing is BIG.  Bigger than I thought it would be at least.  It stands around 3′ tall and is just as wide.

Siri is taking a trip next week and I hope to get this mostly set up while she is away.  I’ll need to mount the wall units and drill the holes through the walls in 3 spots.  I’ll also need to recruit some  helpers and get the compress onto the roof where I’ll bolt it in and wire it up.  Next step is getting the line sets installed. This will be tricky 3 stories up on a ladder, but I imagine I can handle it.

For the final step, we will be calling in a licensed HVAC guy who will basically turn a knob on the compressor and sign off that it works.. and then take a few hundred dollars from us.  This is lame, but we need it signed off on so we can get our 7 year warranty.

Preakness Visitor from the Sky

This afternoon we got a brief visit from the Goodyear Blimp.  We were watching the pre-race show for the Preakness when we heard this strange propeller sound getting louder and louder.  I thought it was strange so I ran out and looked up.  What a sight!  The Goodyear Blimp above Formstone Castle!

P1020946 P1020951I climbed up on the roof to see where it was. Looked to be over Canton at first and then headed back the way it came.

Goodyear04

Roof Deck for Next Year’s Birthday Party?

We’ve been busy getting the house ready for my big birthday party this weekend.  While I’m stuck at work I’ve been drawing up some deck ideas on Sketchup for an awesome roof deck.  The decks are easy; code compliant stairs that don’t cost more than the deck are the hard part.  Also I have a sunken hot tub on the lower level.  This is supported by its own mini/super strong deck.  Railings coming soon.  Who wants to party on this next May?

Roof Deck Ideas

Roof Deck Ideas


Getting To Work Again Finally

It was good to take some time off after moving in, but that couldn’t last forever.  We still have a long list of things to do.  Even now, months later, the fridge is still not working, but I can’t sit still until its done.

It was time to get back to the fun stuff: BUILDING THINGS.  First order of business was the joists under the kitchen floor.  It was clear at the last two parties that people noticed the floor as soon as they went through the kitchen and that’s why we decided to fix them first.  These, at some point in the past, suffered the worst from the termites.  The original joists were half cut out and then a new joist was pieced together next to them.  Unfortunately, they did a poor job with the new joists.  They had cut them in half and then joined them by sistering a 3 foot long board in the center held together with 6 bolts.  This resulted in quite a bit of sag and bounciness.  This also bunched the floor boards together and lifted some up making for a pretty noisy floor to boot.

I pulled out the old termite damaged joists.  This was super easy.  I’d compare them to styrofoam, but that’s in insult to styrofoam.   In most cases they came down in splinters and dust.  Very rewarding quick work though.

Here I am tearing out the old joists.

Here I am tearing out the old joists.

After that I removed everything attached to the joists including the 3′ sistering boards.  I replaced them with a 10′ board (this is the width of the hosue) and bolted it all together with twelve 1/2″ bolts.  I’ve done two so far and it made a huge difference.  The kitchen floor, even though its not bolted down to these joists, is now quiet and doesn’t move under your feet.

Repaired Joists

Repaired Joists

I’m waiting to do the end joists for now. I’ll need to do some brick work while I have that one out and that’s just too much with a party a week away.

Another thing I got to work on was my benches in the basement.  These are based around the supports I added for the joists a few months ago.  They are T-posts made from 2x4s that carry the load down from the 4×6 which holds up the ends of any joists that have rotted out of their pockets.  I added peg boards to keep it nice and clean looking and while I was at it I removed the board that was blocking the old basement window.

Finished bench already full of crap.

Finished bench already full of crap.

Siri had jobs to do too. A few weeks ago a small metal cup fell out of the medicine cabinet and broke the vessel sink. This was pretty annoying as it didn’t seem to have taken much force at all.  The new sink looks the same but hooks up a little differently so we had to replace the board under it.  She used some leftover waterproofing membrane and then tiled it.  This is a preview of our shower as well. In the end it looks pretty good.  I will be building a cabinet under the sink at some point down the road.

Siri's fun tile work under the (new) bathroom sink.

Siri’s fun tile work under the (new) bathroom sink.

While Siri worked on the 2nd floor, I took it upon myself to tick one more thing off my list, even if it wasn’t important in any way.  This was to remove the drywall and panel board that covered the transom window from the inside.  The more natural light the better, plus it will help to illuminate our house number at night when the lights are on inside.

Transom window above front door.  Temporary number added so people can find us.

Transom window above front door. Temporary number added so people can find us.

The stained glass window could use a little cleaning and since I was already up on a ladder it was easier just to take it down so it can be worked on at a bench.

Our house number in stained glass removed from the front door tansom for restoration.

Our house number in stained glass removed from the front door transom for restoration.

Next we tackle the shower plumbing in order to finish up the drywall in the 2nd floor hallway.