• About Us

Formstone Castle

~ in Baltimore, Maryland

Formstone Castle

Category Archives: Home Improvement

Refinished Floors for Christmas

26 Wednesday Dec 2012

Posted by Mike in Alcohol, Holidays, Home Improvement

≈ Leave a Comment

Passing out on a heated floor isnt too bad!

Passing out on a heated floor isnt too bad!

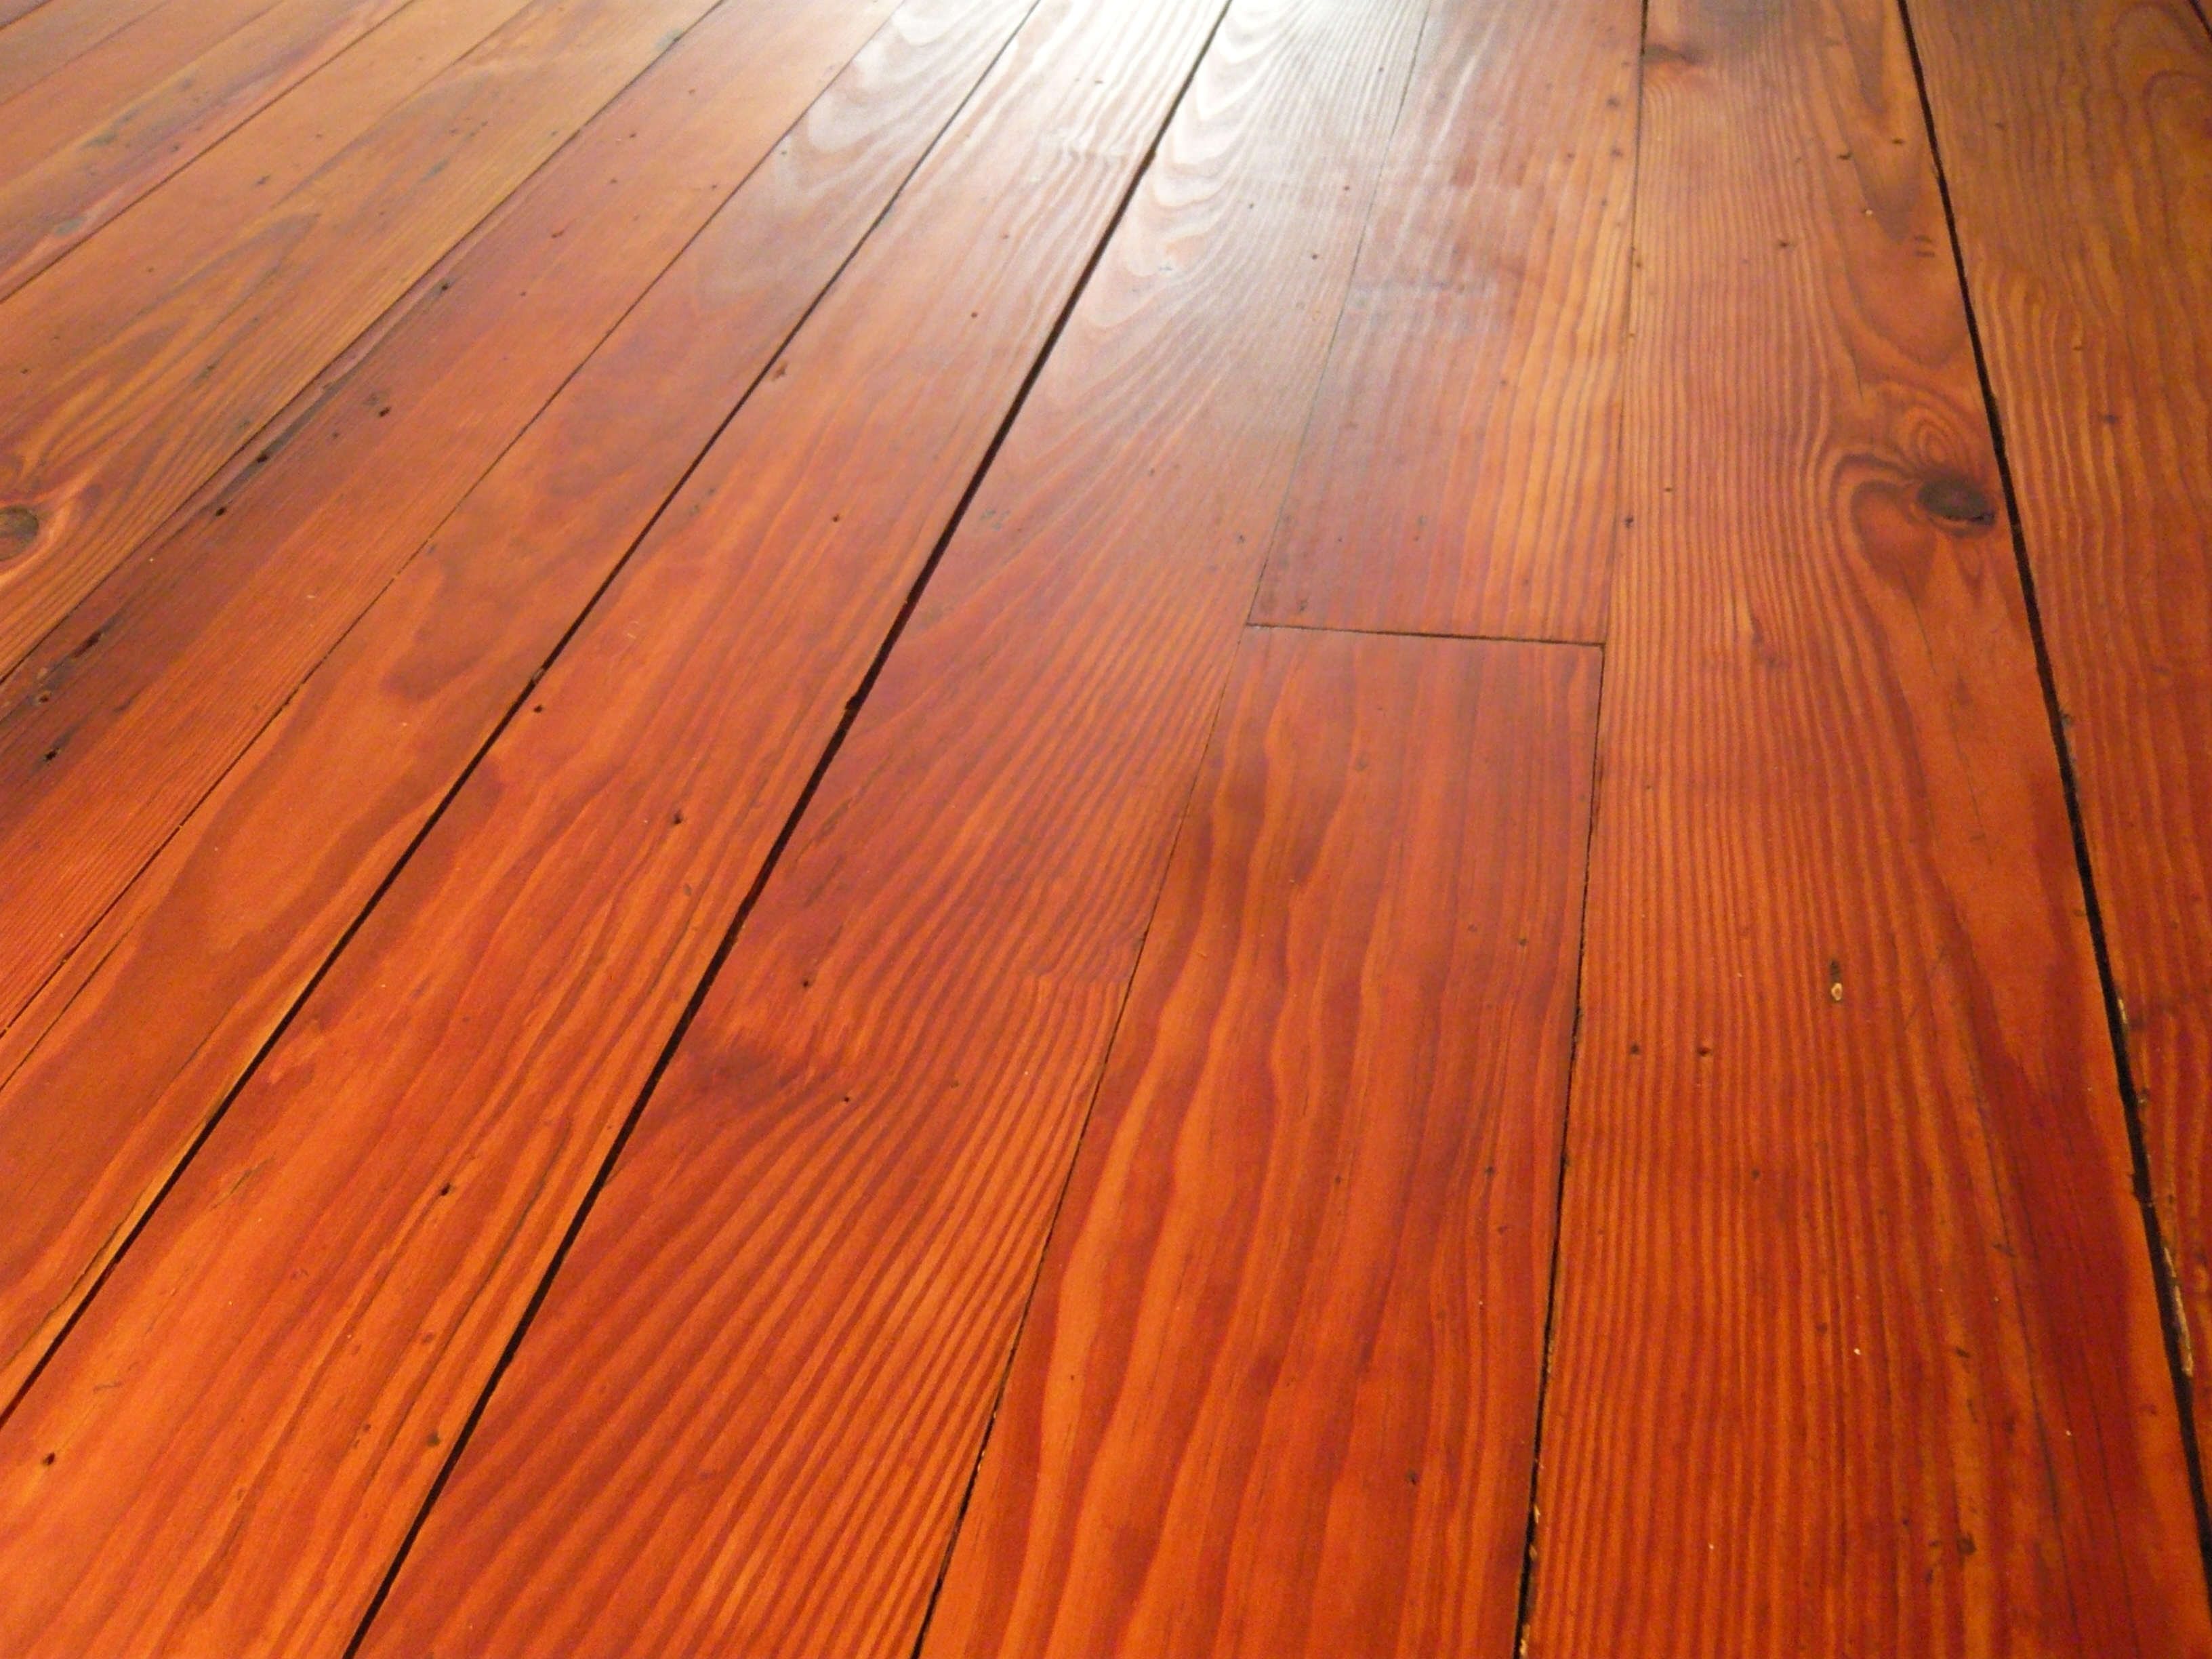
Merry Christmas!  Yesterday we celebrated Christmas on the 3rd floor.  The newly oiled floors had only been prepared 24 hours earlier.  We couldn’t wait another hour to try them out.  We’re quite amazed how nice they look for 130 year original floors. They had been covered since 1953 by linoleum and painted long before that.    Here is how we got from that to this:

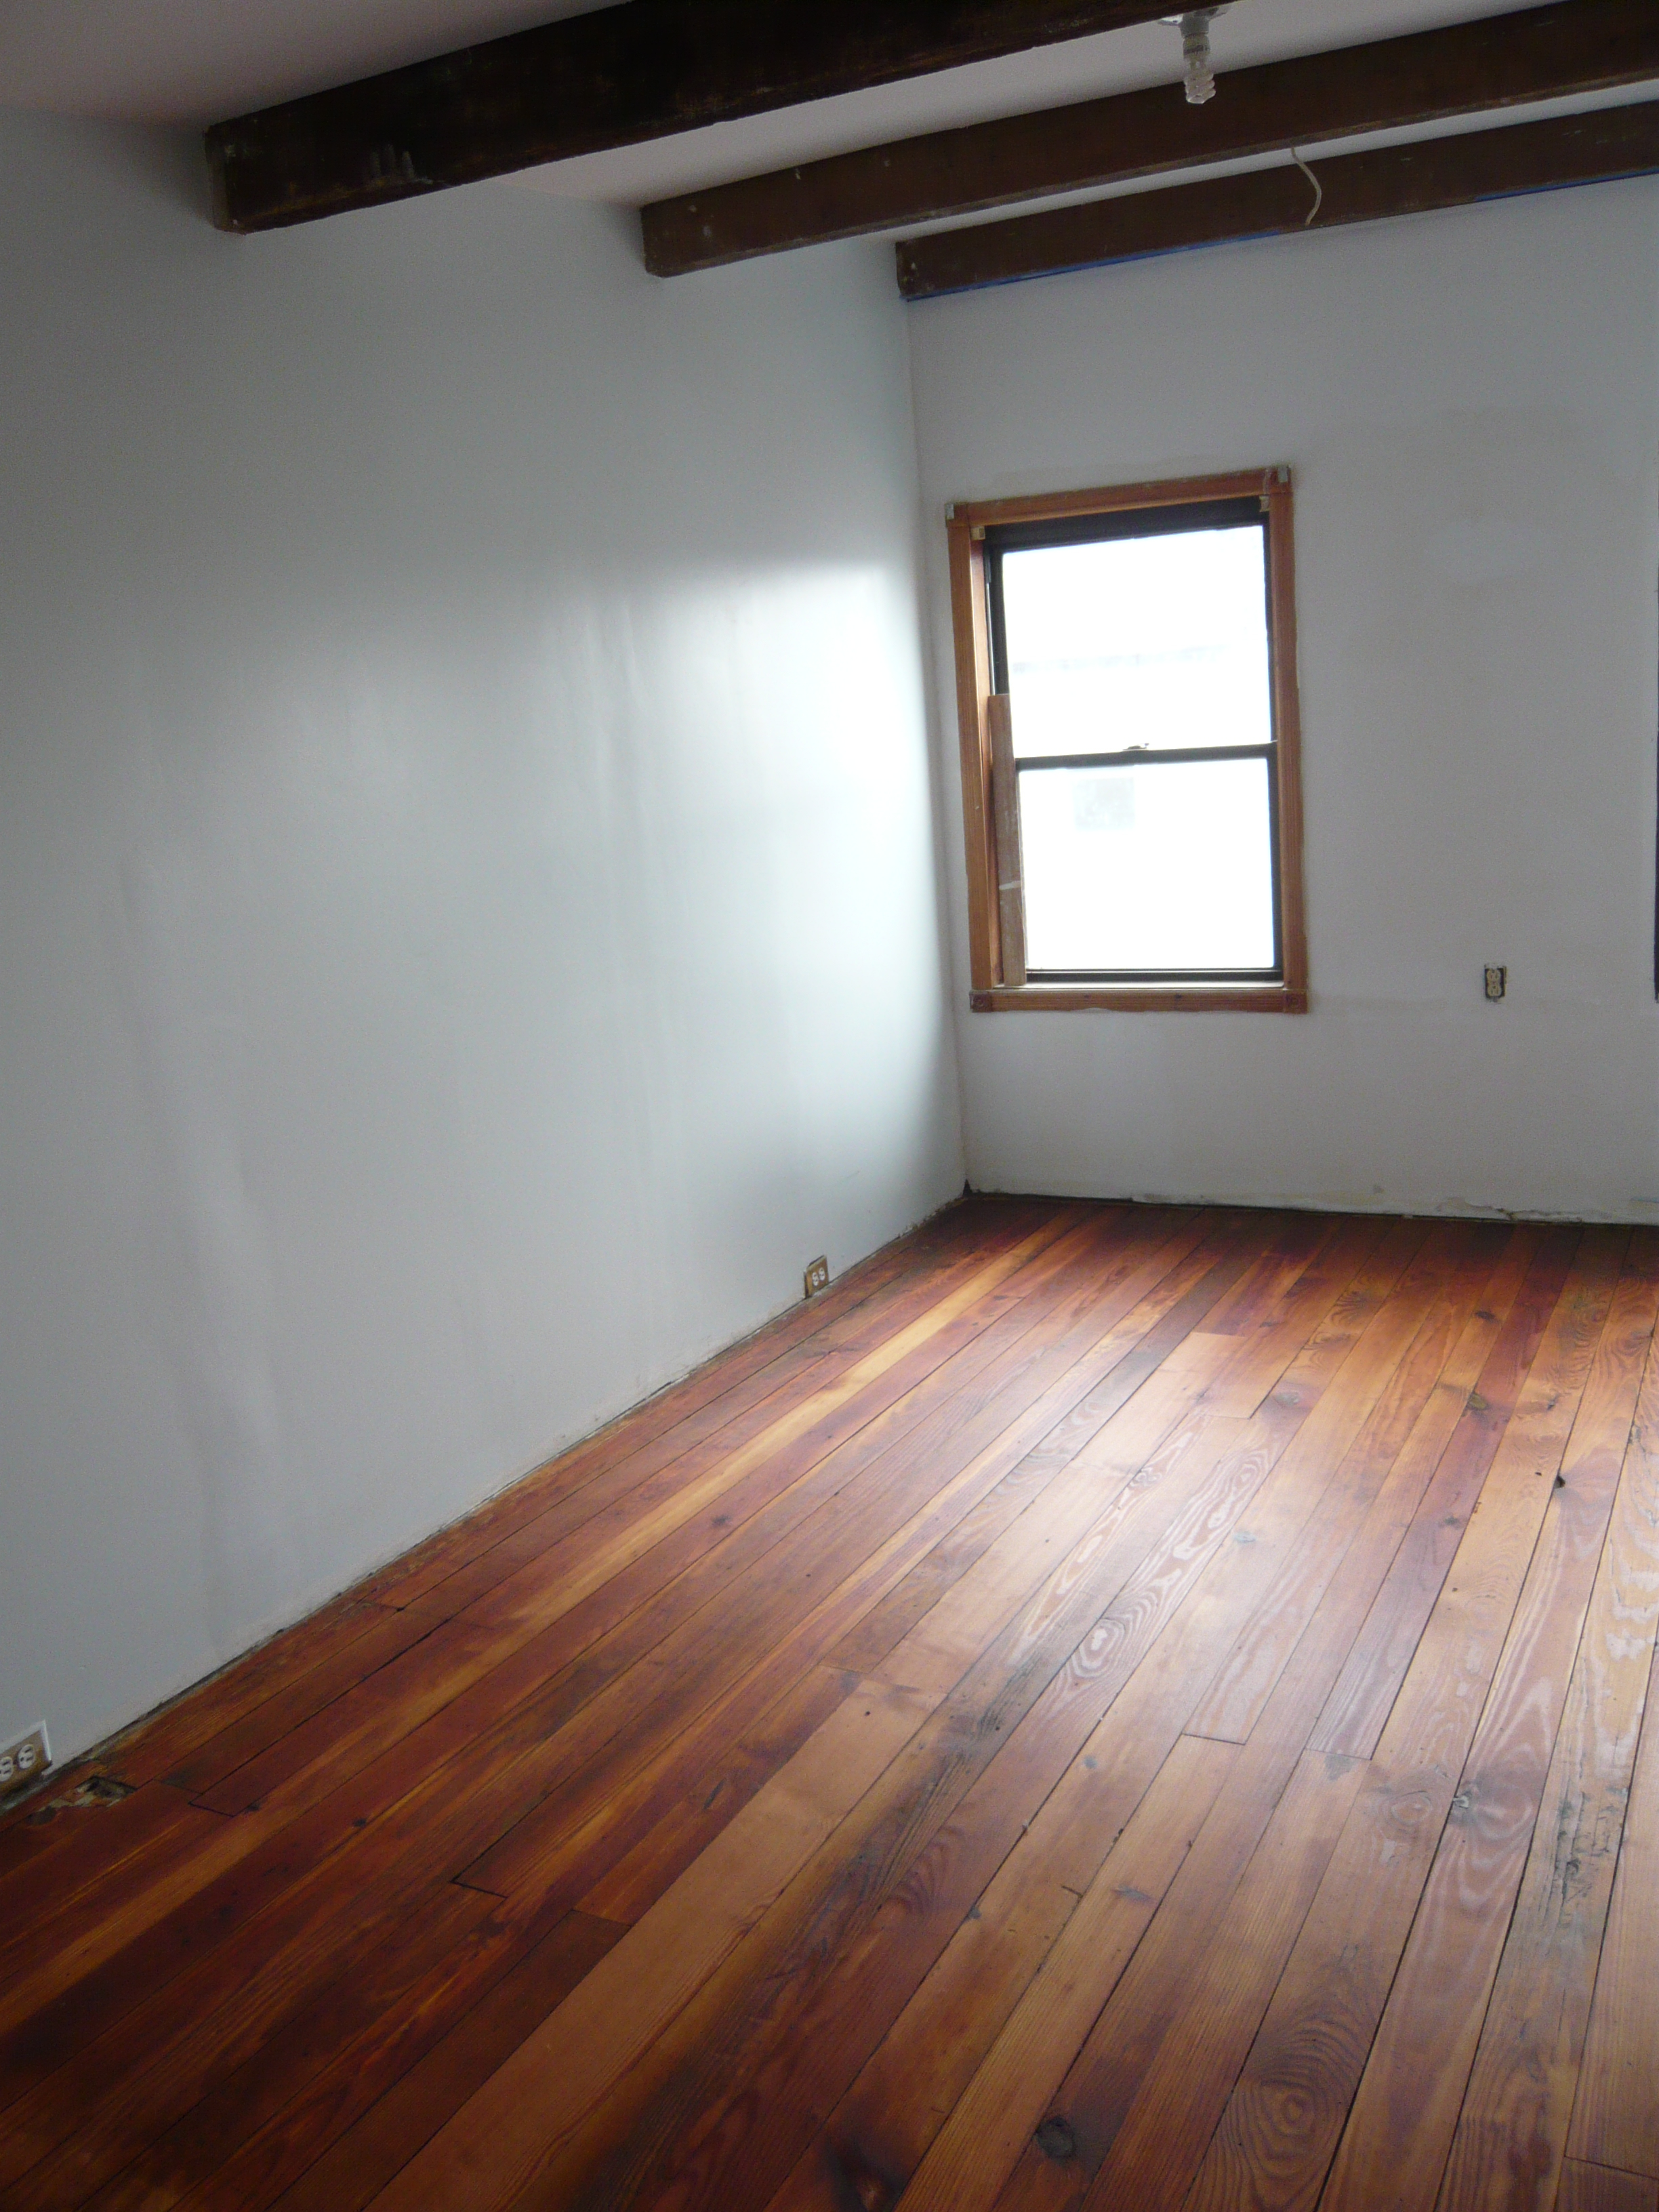
The colors in the wood are just amazing.  They range from bright yellow to dark red.  Very warm!

The colors in the wood are just amazing. They range from bright yellow to dark red. Very warm!

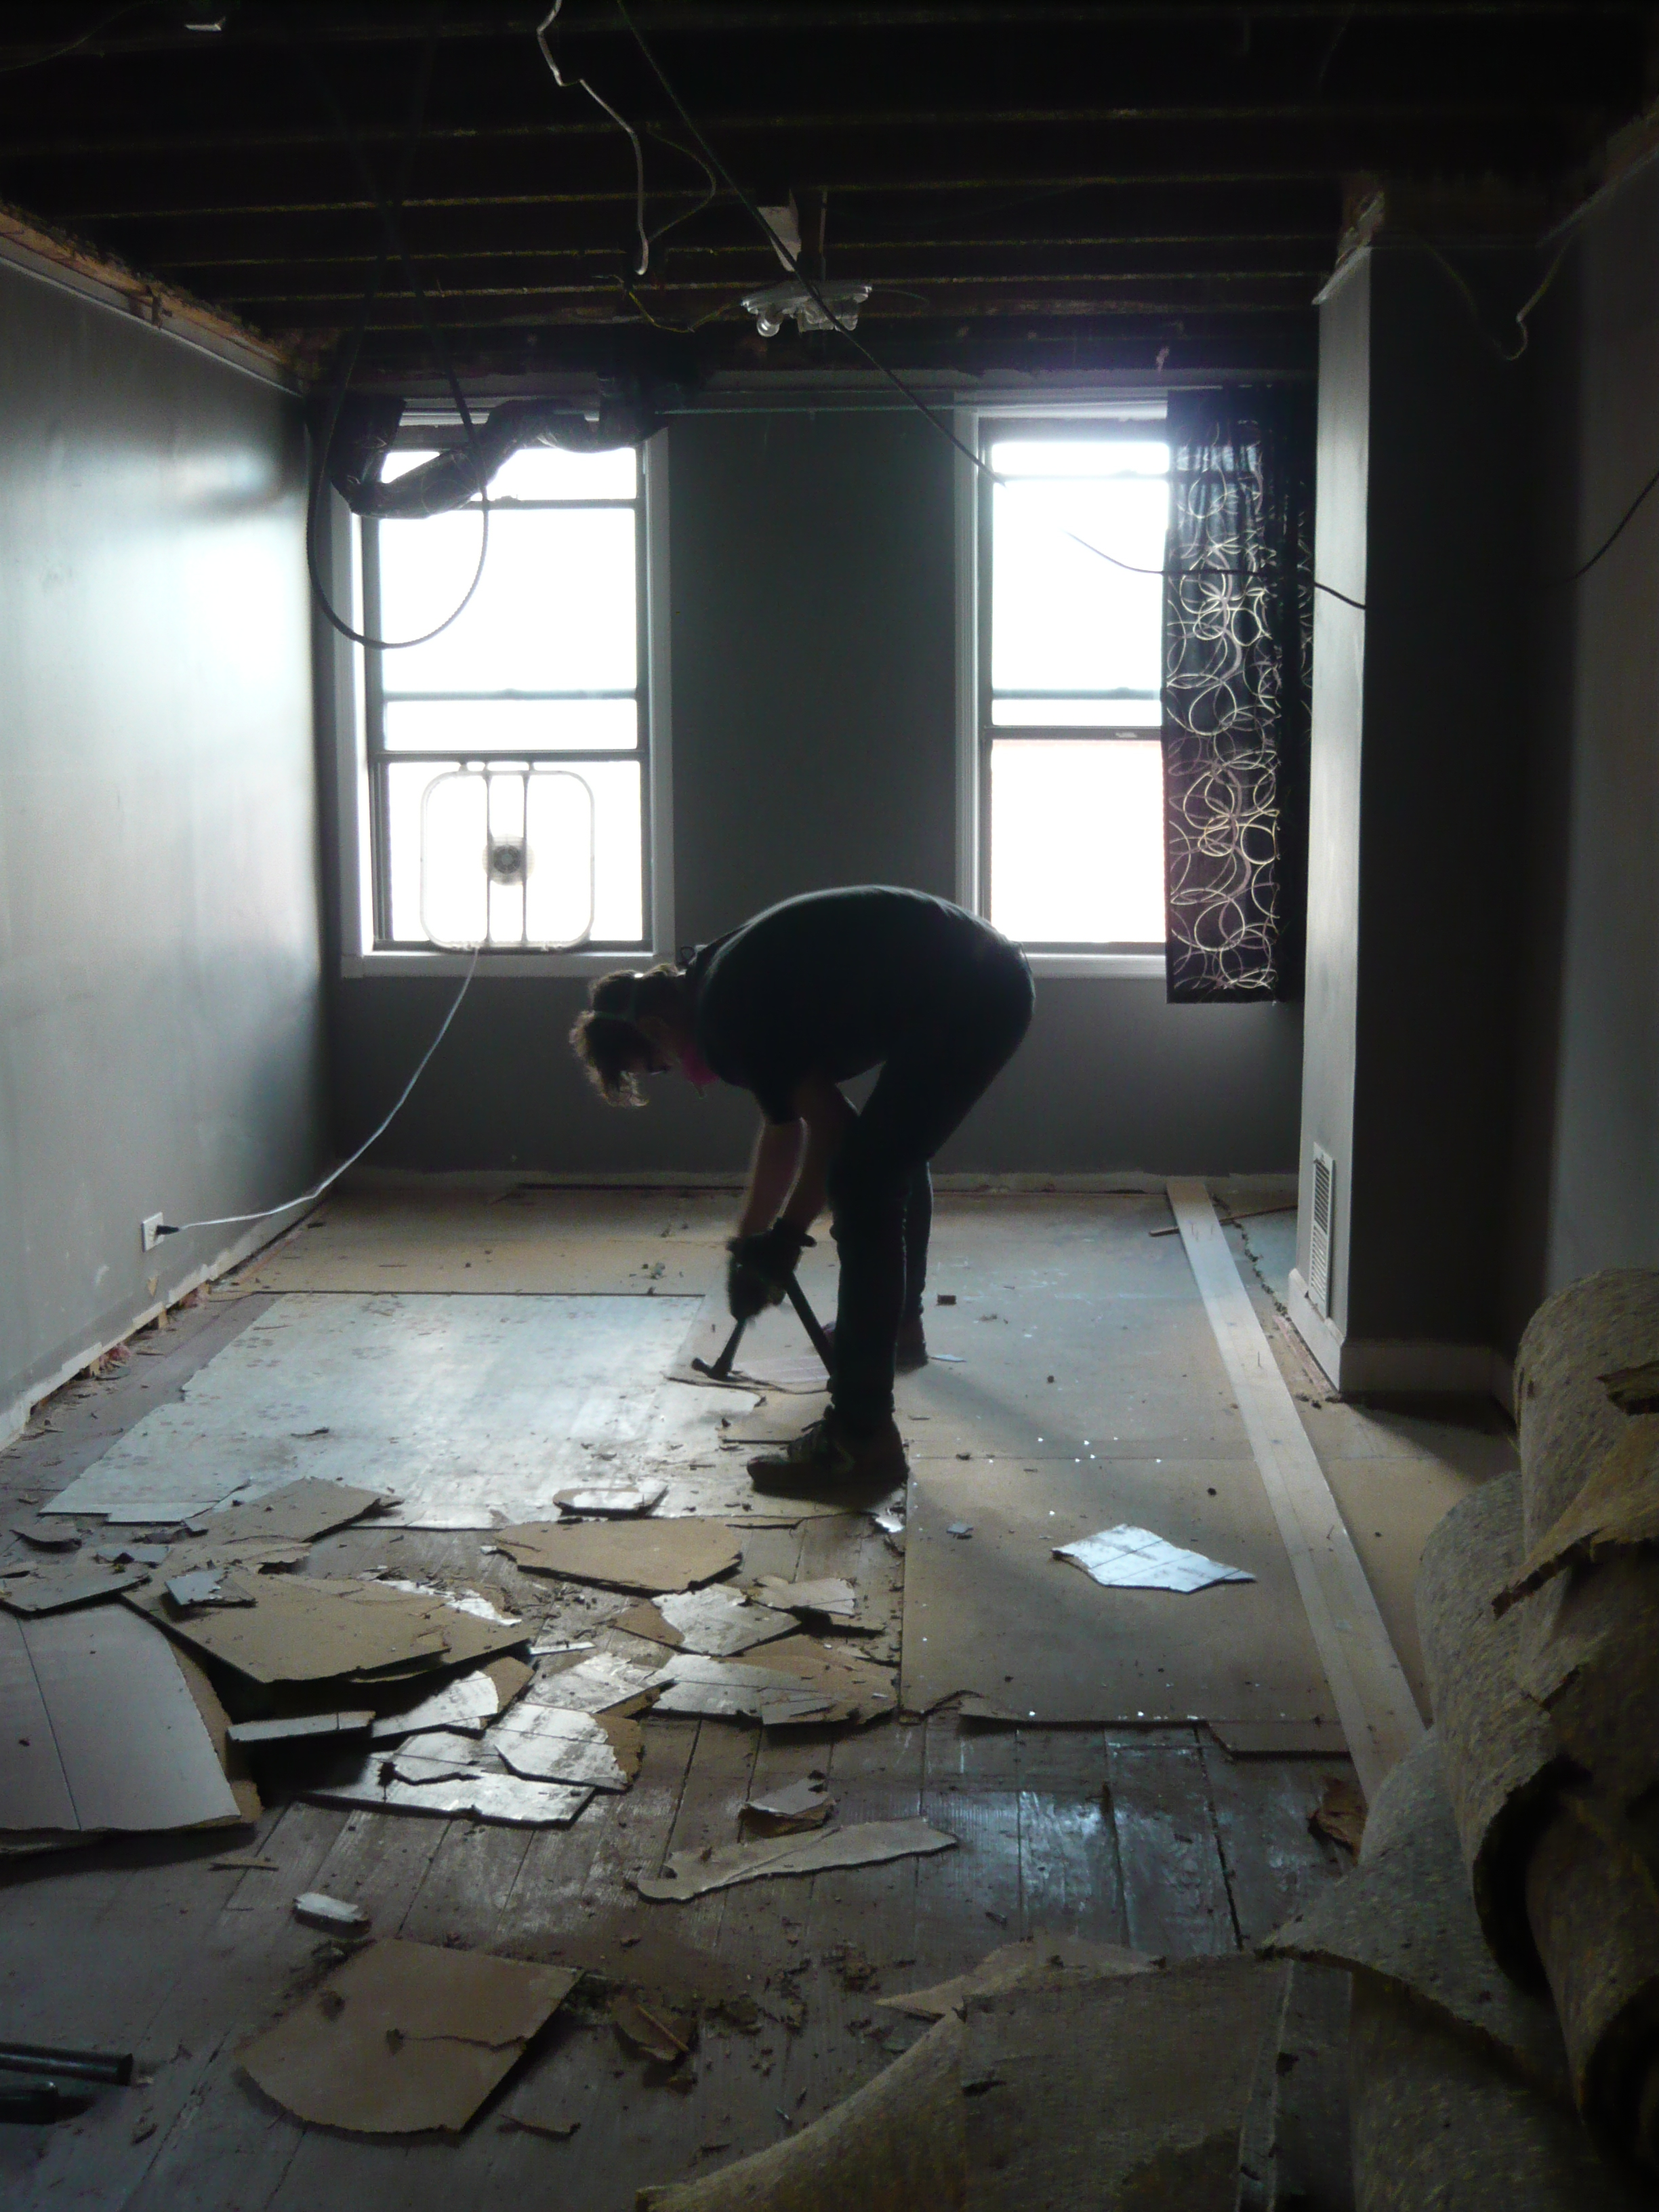
Going way back to our first weeks working on the house, we see how we got started.  Once the laths and plaster from the ceiling and (super shitty) dividing walls were down, we tore up the carpet and everything under it down to the subfloor.

The layers coming up.

The layers coming up.

In most spots there was carpet on top, masonite under that, linoleum under that and then scattered around we found newspapers dated December 1953.  Underneath were ~7/8″ tongue and groove pine planks painted in maybe a dozen different colors.  These patches told the stories of previous layouts and walls.  We salvaged a few boards when we replaced the bathroom subfloor with plywood.  These board were used to replace board that had been damaged when the house was retrofitted with electric decades earlier.  On this floor we worked for several months as we fixed bricks, erected walls, and did drywall.

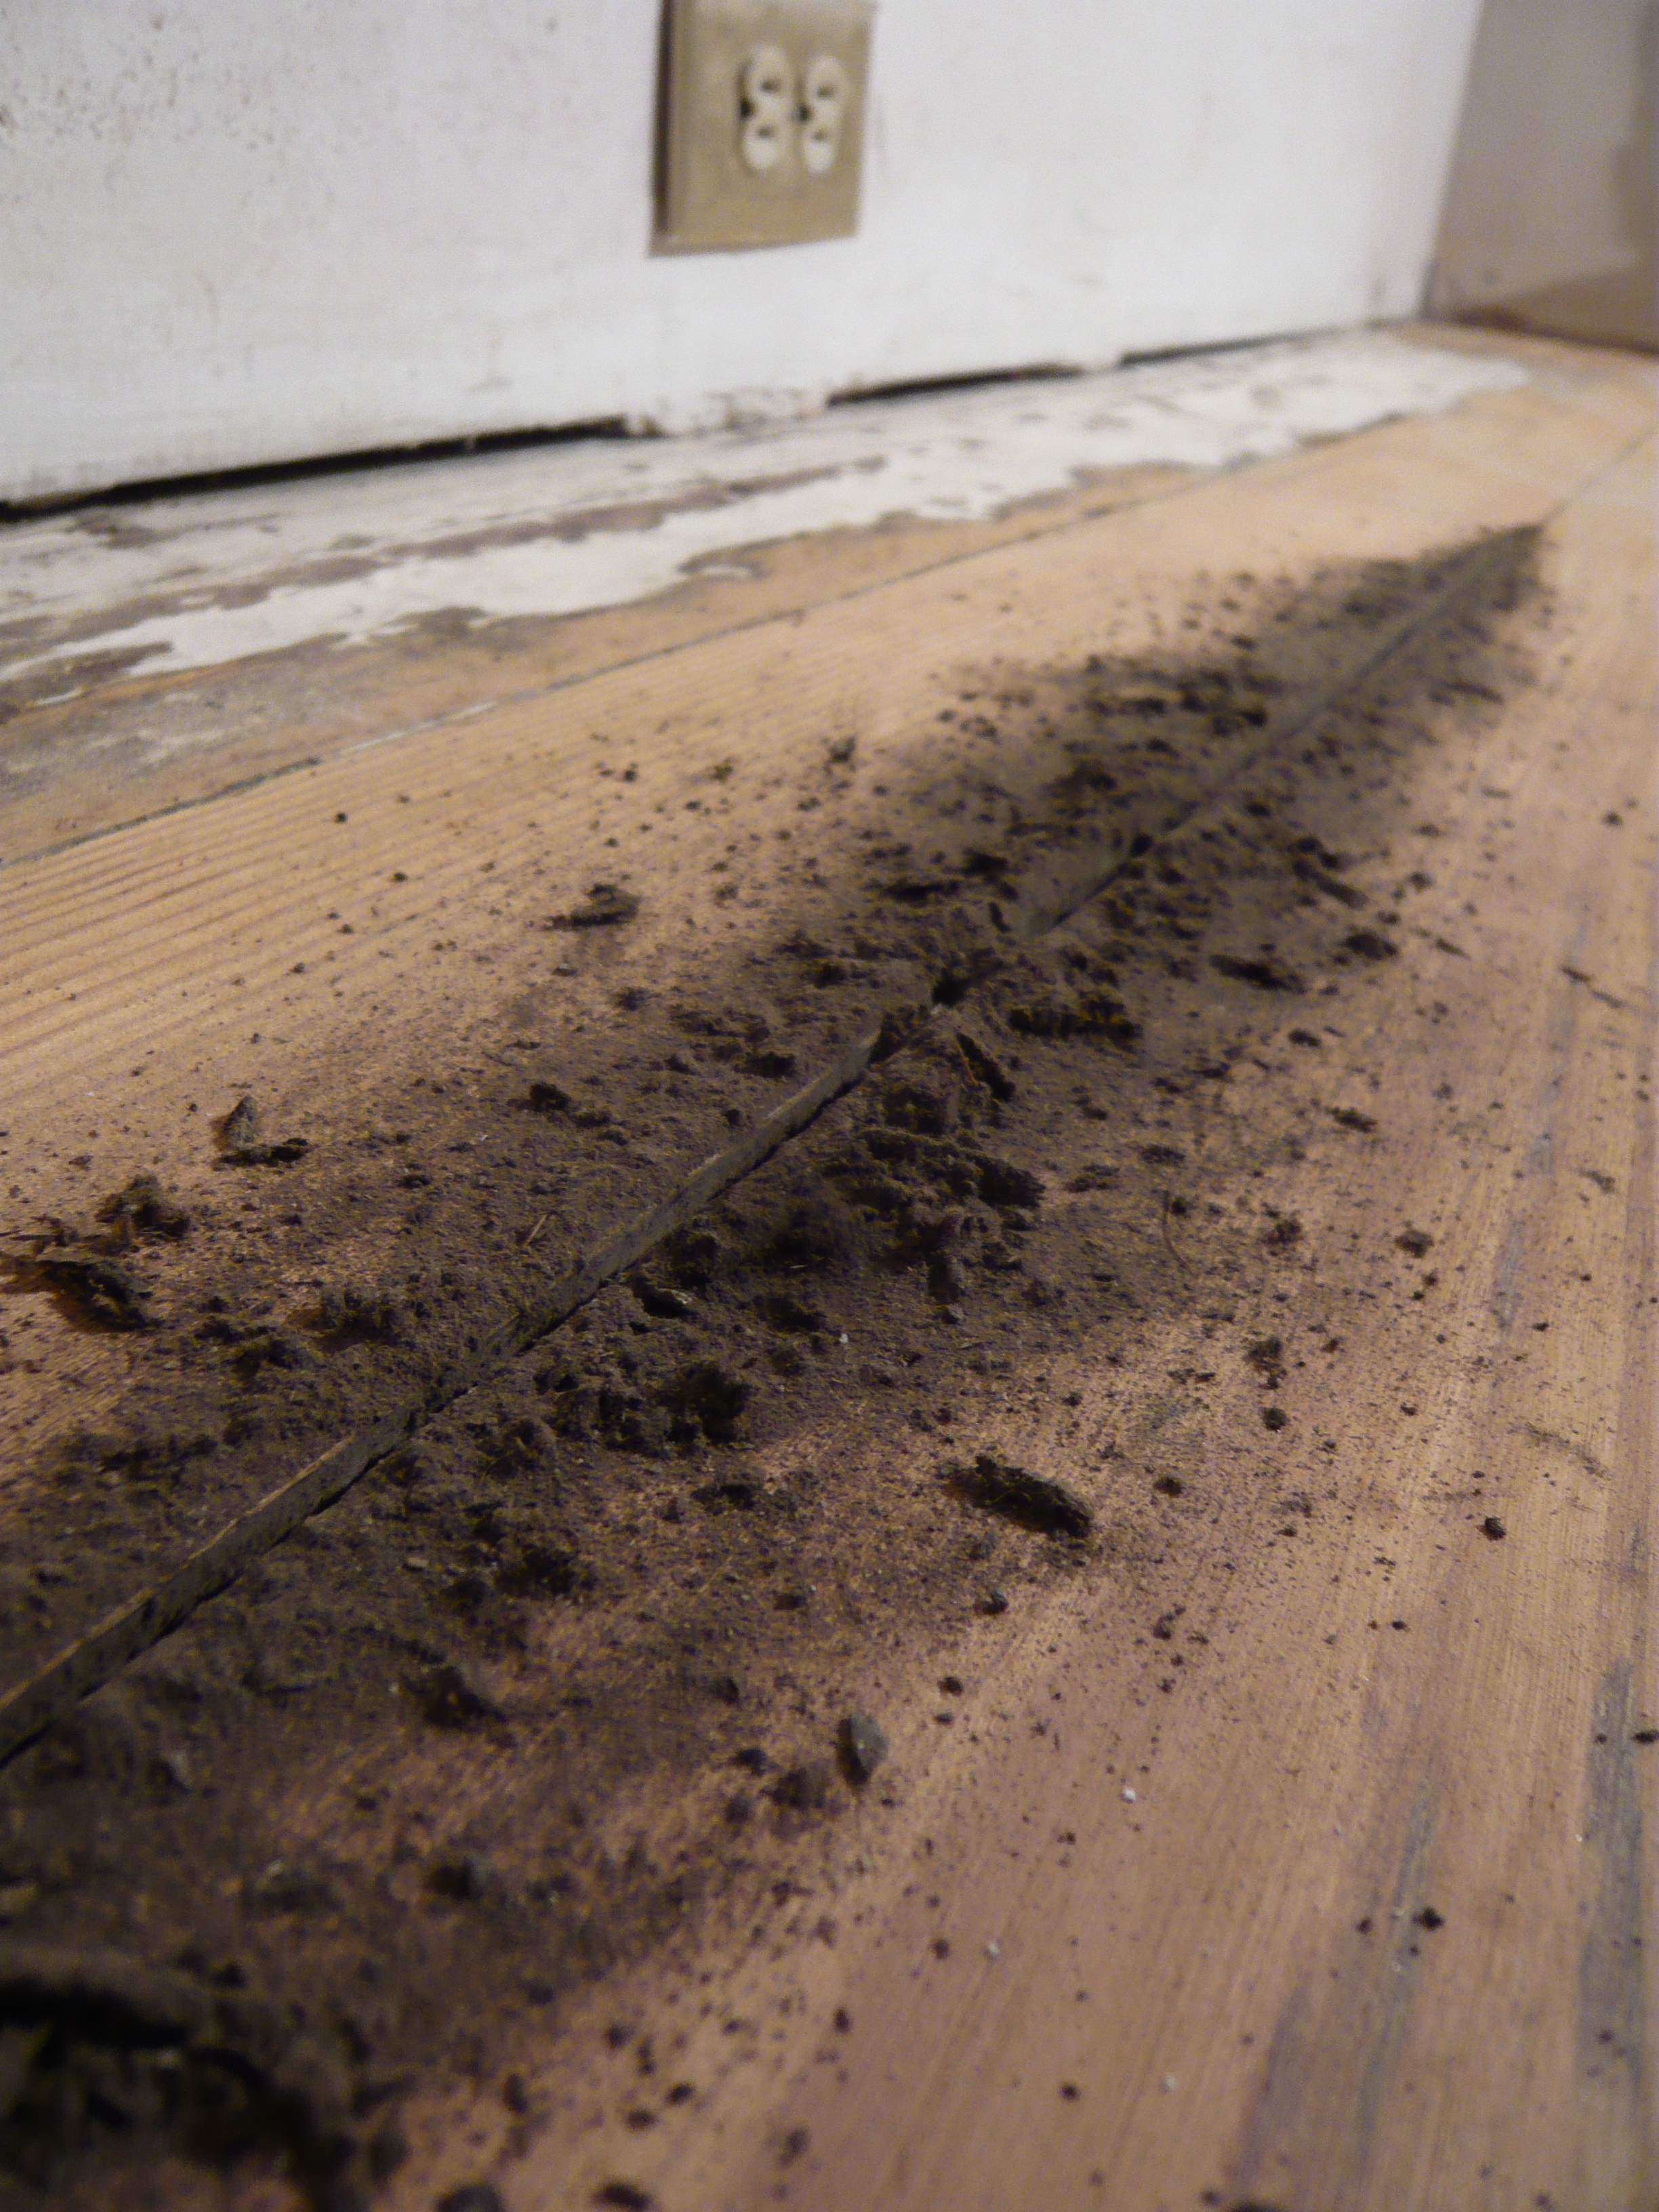
Once the dusty job of drywall was finished, it was time to do the floors.  We went over them looking for nails and scraping dirty and plaster out from between the gaps.  Its amazing how much came up from these gaps.

Antique dirt from between the boards!

Antique dirt from between the boards!

We did a little scraping before the first sanding and a little after when it was easier to tell what was wood and what was not.

Neither of us had sanded a floor before.  I had watched some Youtube videos and read some tips.  Everyone made it sound like we were going to ruin our floors.  Even the guys at Home Depot Tool Rental said we should use a vibrating sander and not a floor sander.  I was convinced I’d look away for a second and find that I had sanded all the way through to the joists below.  We were happy that weekend to have a large crew of 7.  Unfortunately, I had caught some sort of stomach bug the night before and was in no shape to be working on anything

The bad reputation of the drum sander turned out to be completely unfounded.  We had intended to rent it for 4 hours in order to rough sand the top floors.  After the 1st hour we decided we’d need to keep the machine for 24 hours just to rough in a single floor.  The cupping of the boards along with other flaws required some serious sanding time even with the coarsest 24 grit paper.  We learned that sanding diagonally evened out the boards faster.

Most of this happened while I was in bed at home so we didnt get a ton of photos that day, but here are some a week later when I did the 2nd floor.
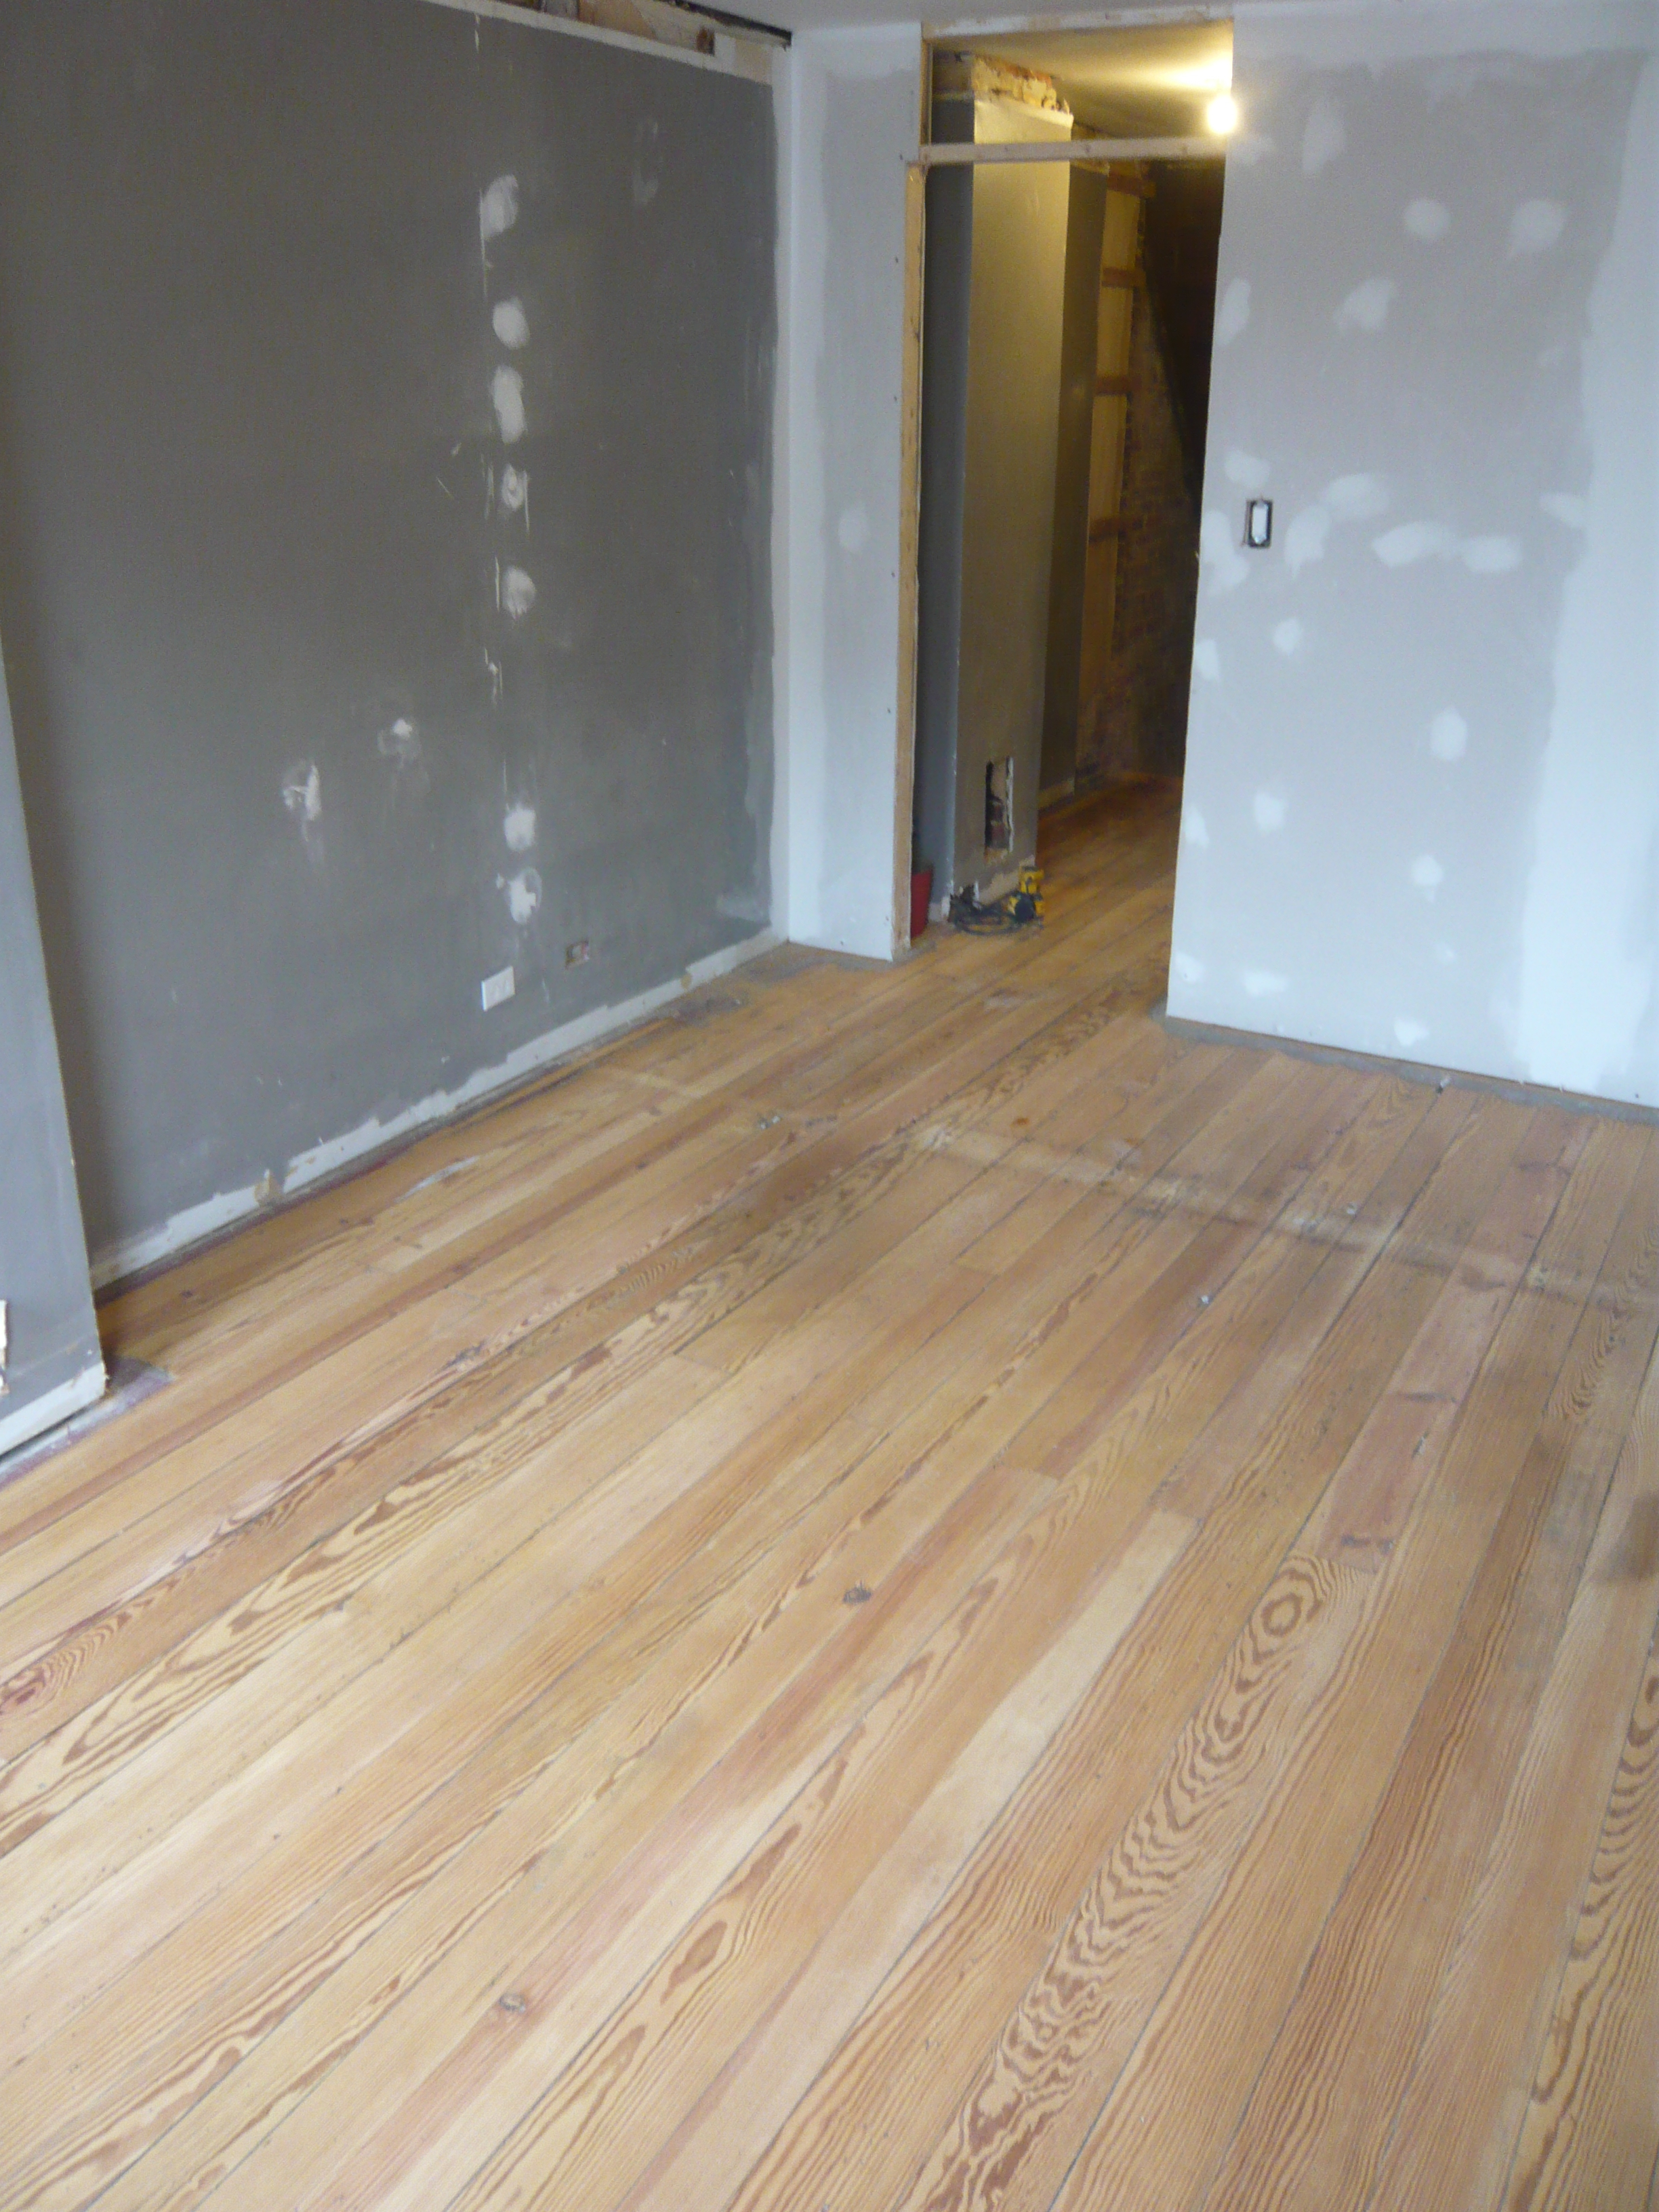
First Pass.  Remove enough to see the nails that were hidden by paint.

First Pass. Remove enough to see the nails that were hidden by paint.

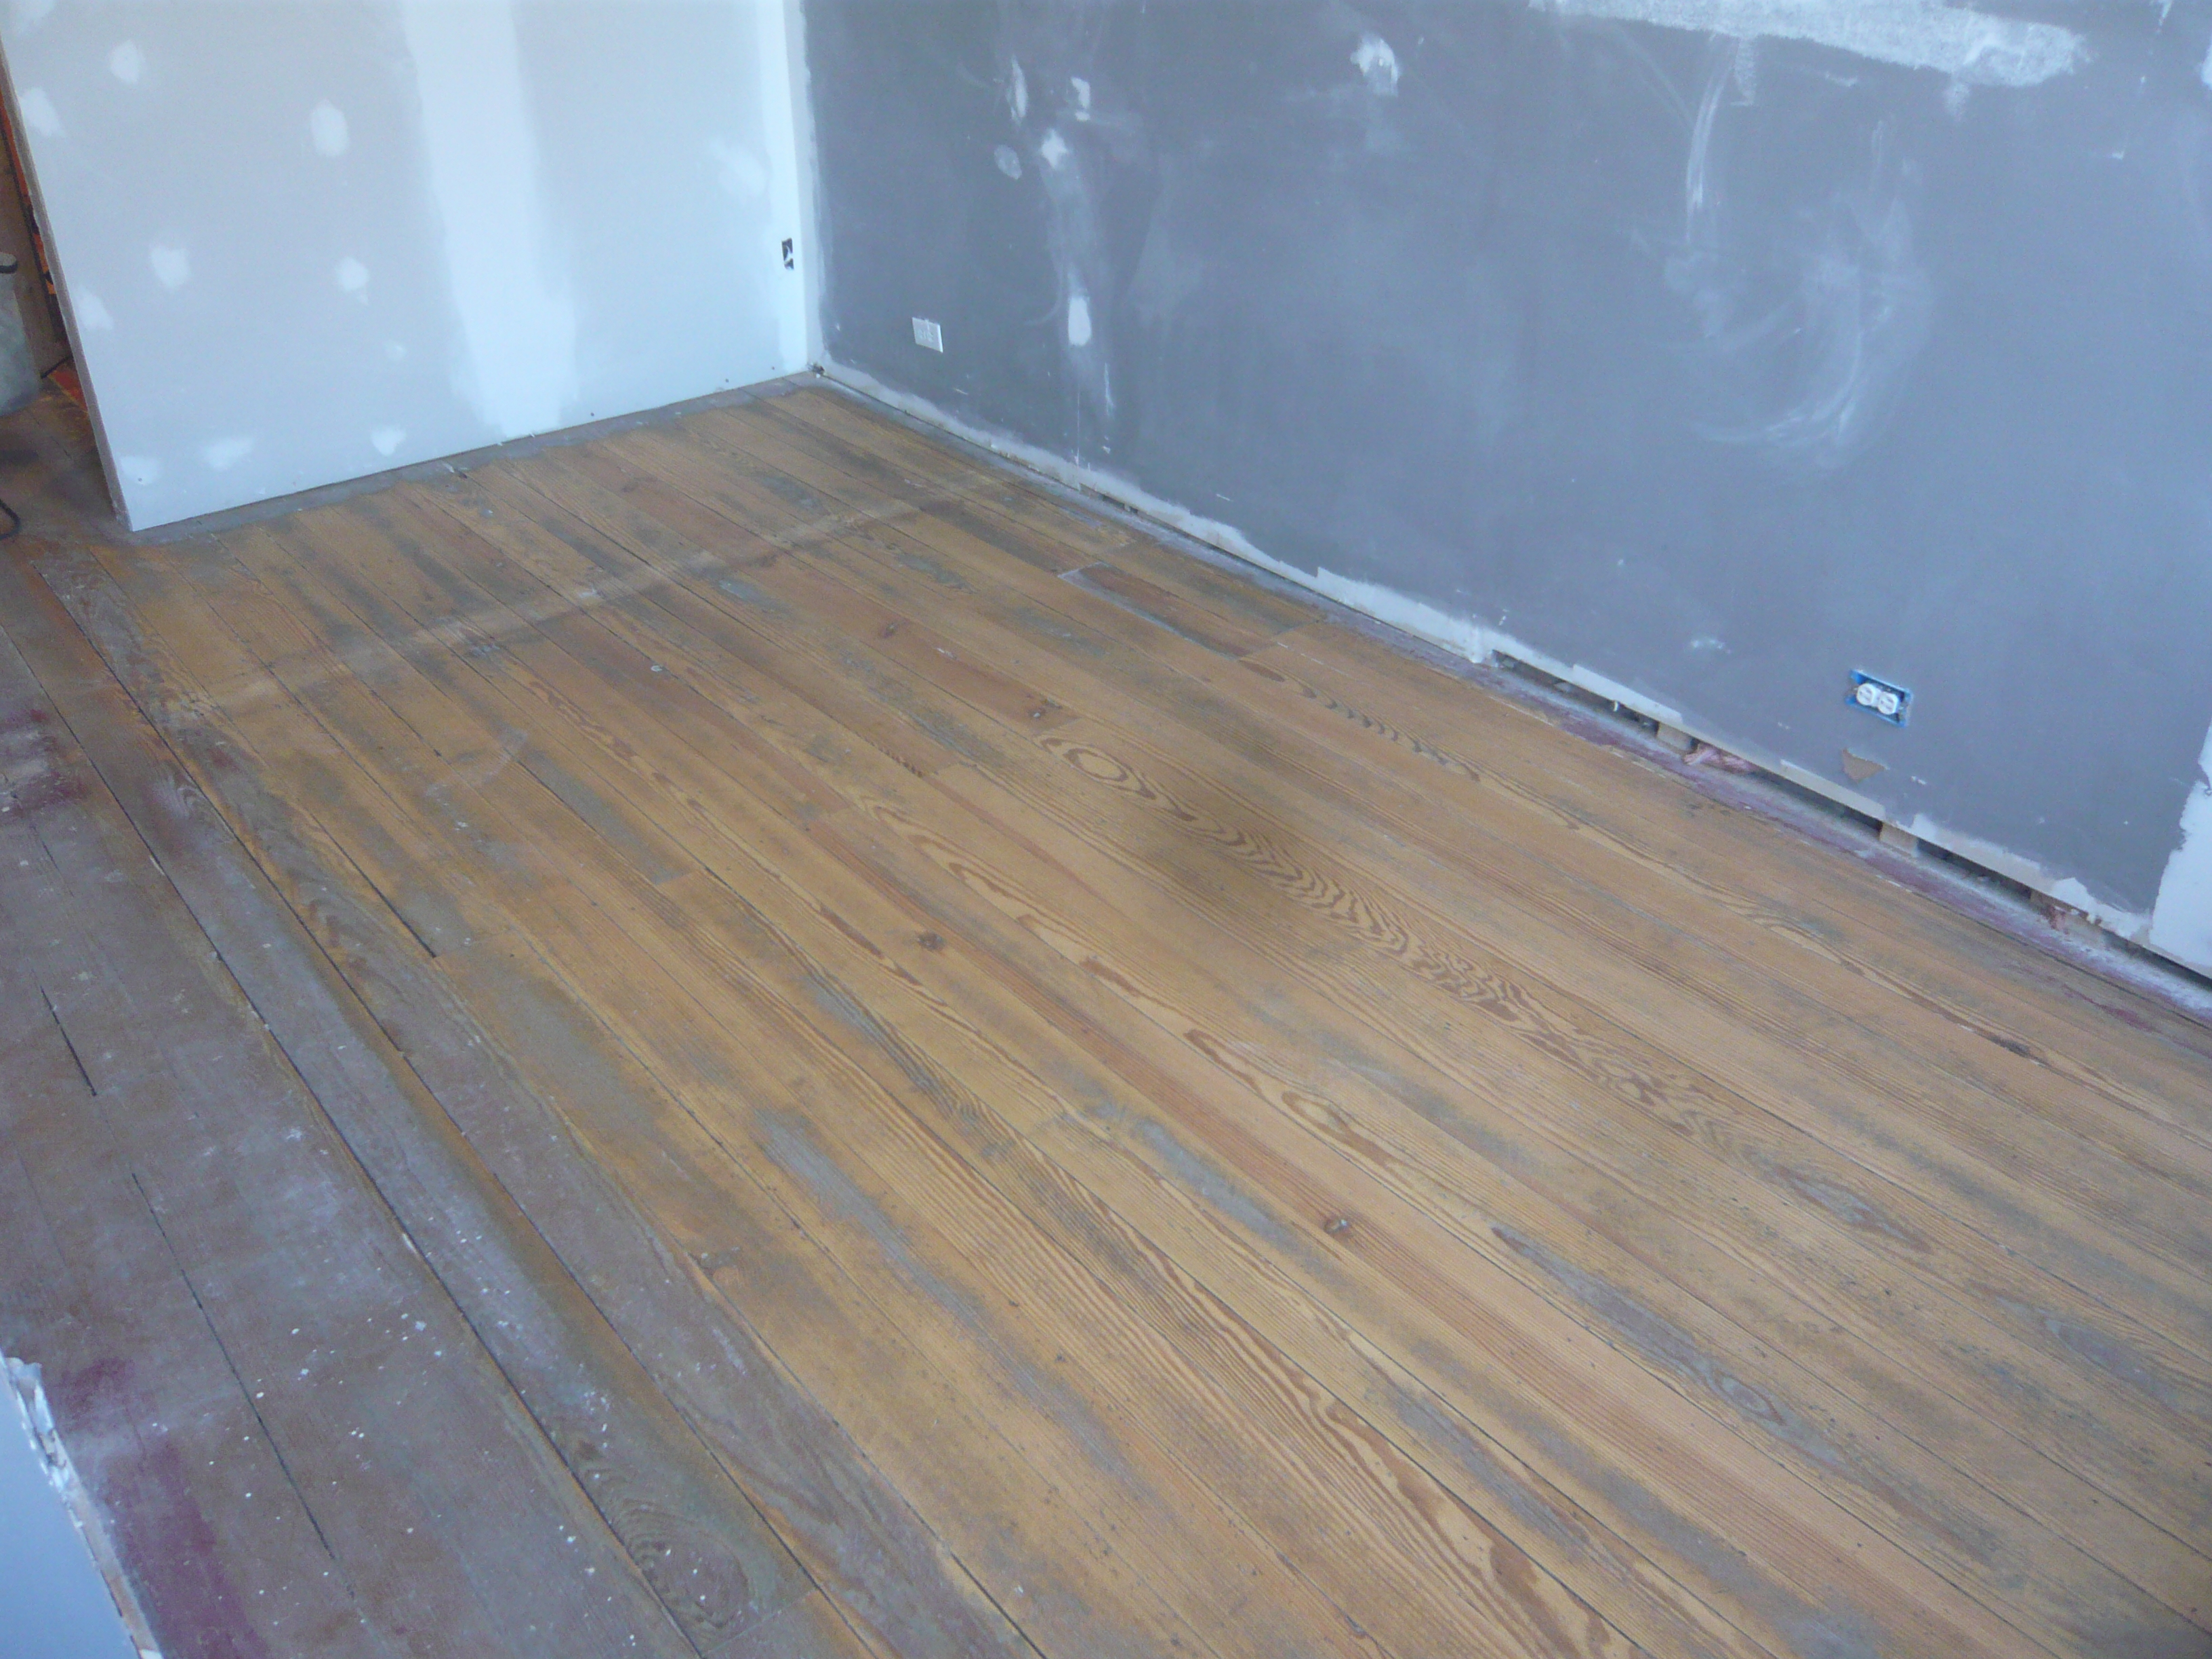
This is the 2nd floor after 24, 36 and 60 grit paper.  Colors in the grain really start to come out after 60 grit.

This is the 2nd floor after 24, 36 and 60 grit paper. Colors in the grain really start to come out after 60 grit.  You can hardly see the thousands of nail holes in this photo.  The 2nd Floor has tons.

After a final sanding with 60 and then 100 grit paper, the colors of the wood just glowed.  There were bright yellows, reds and oranges.  Every board was different.

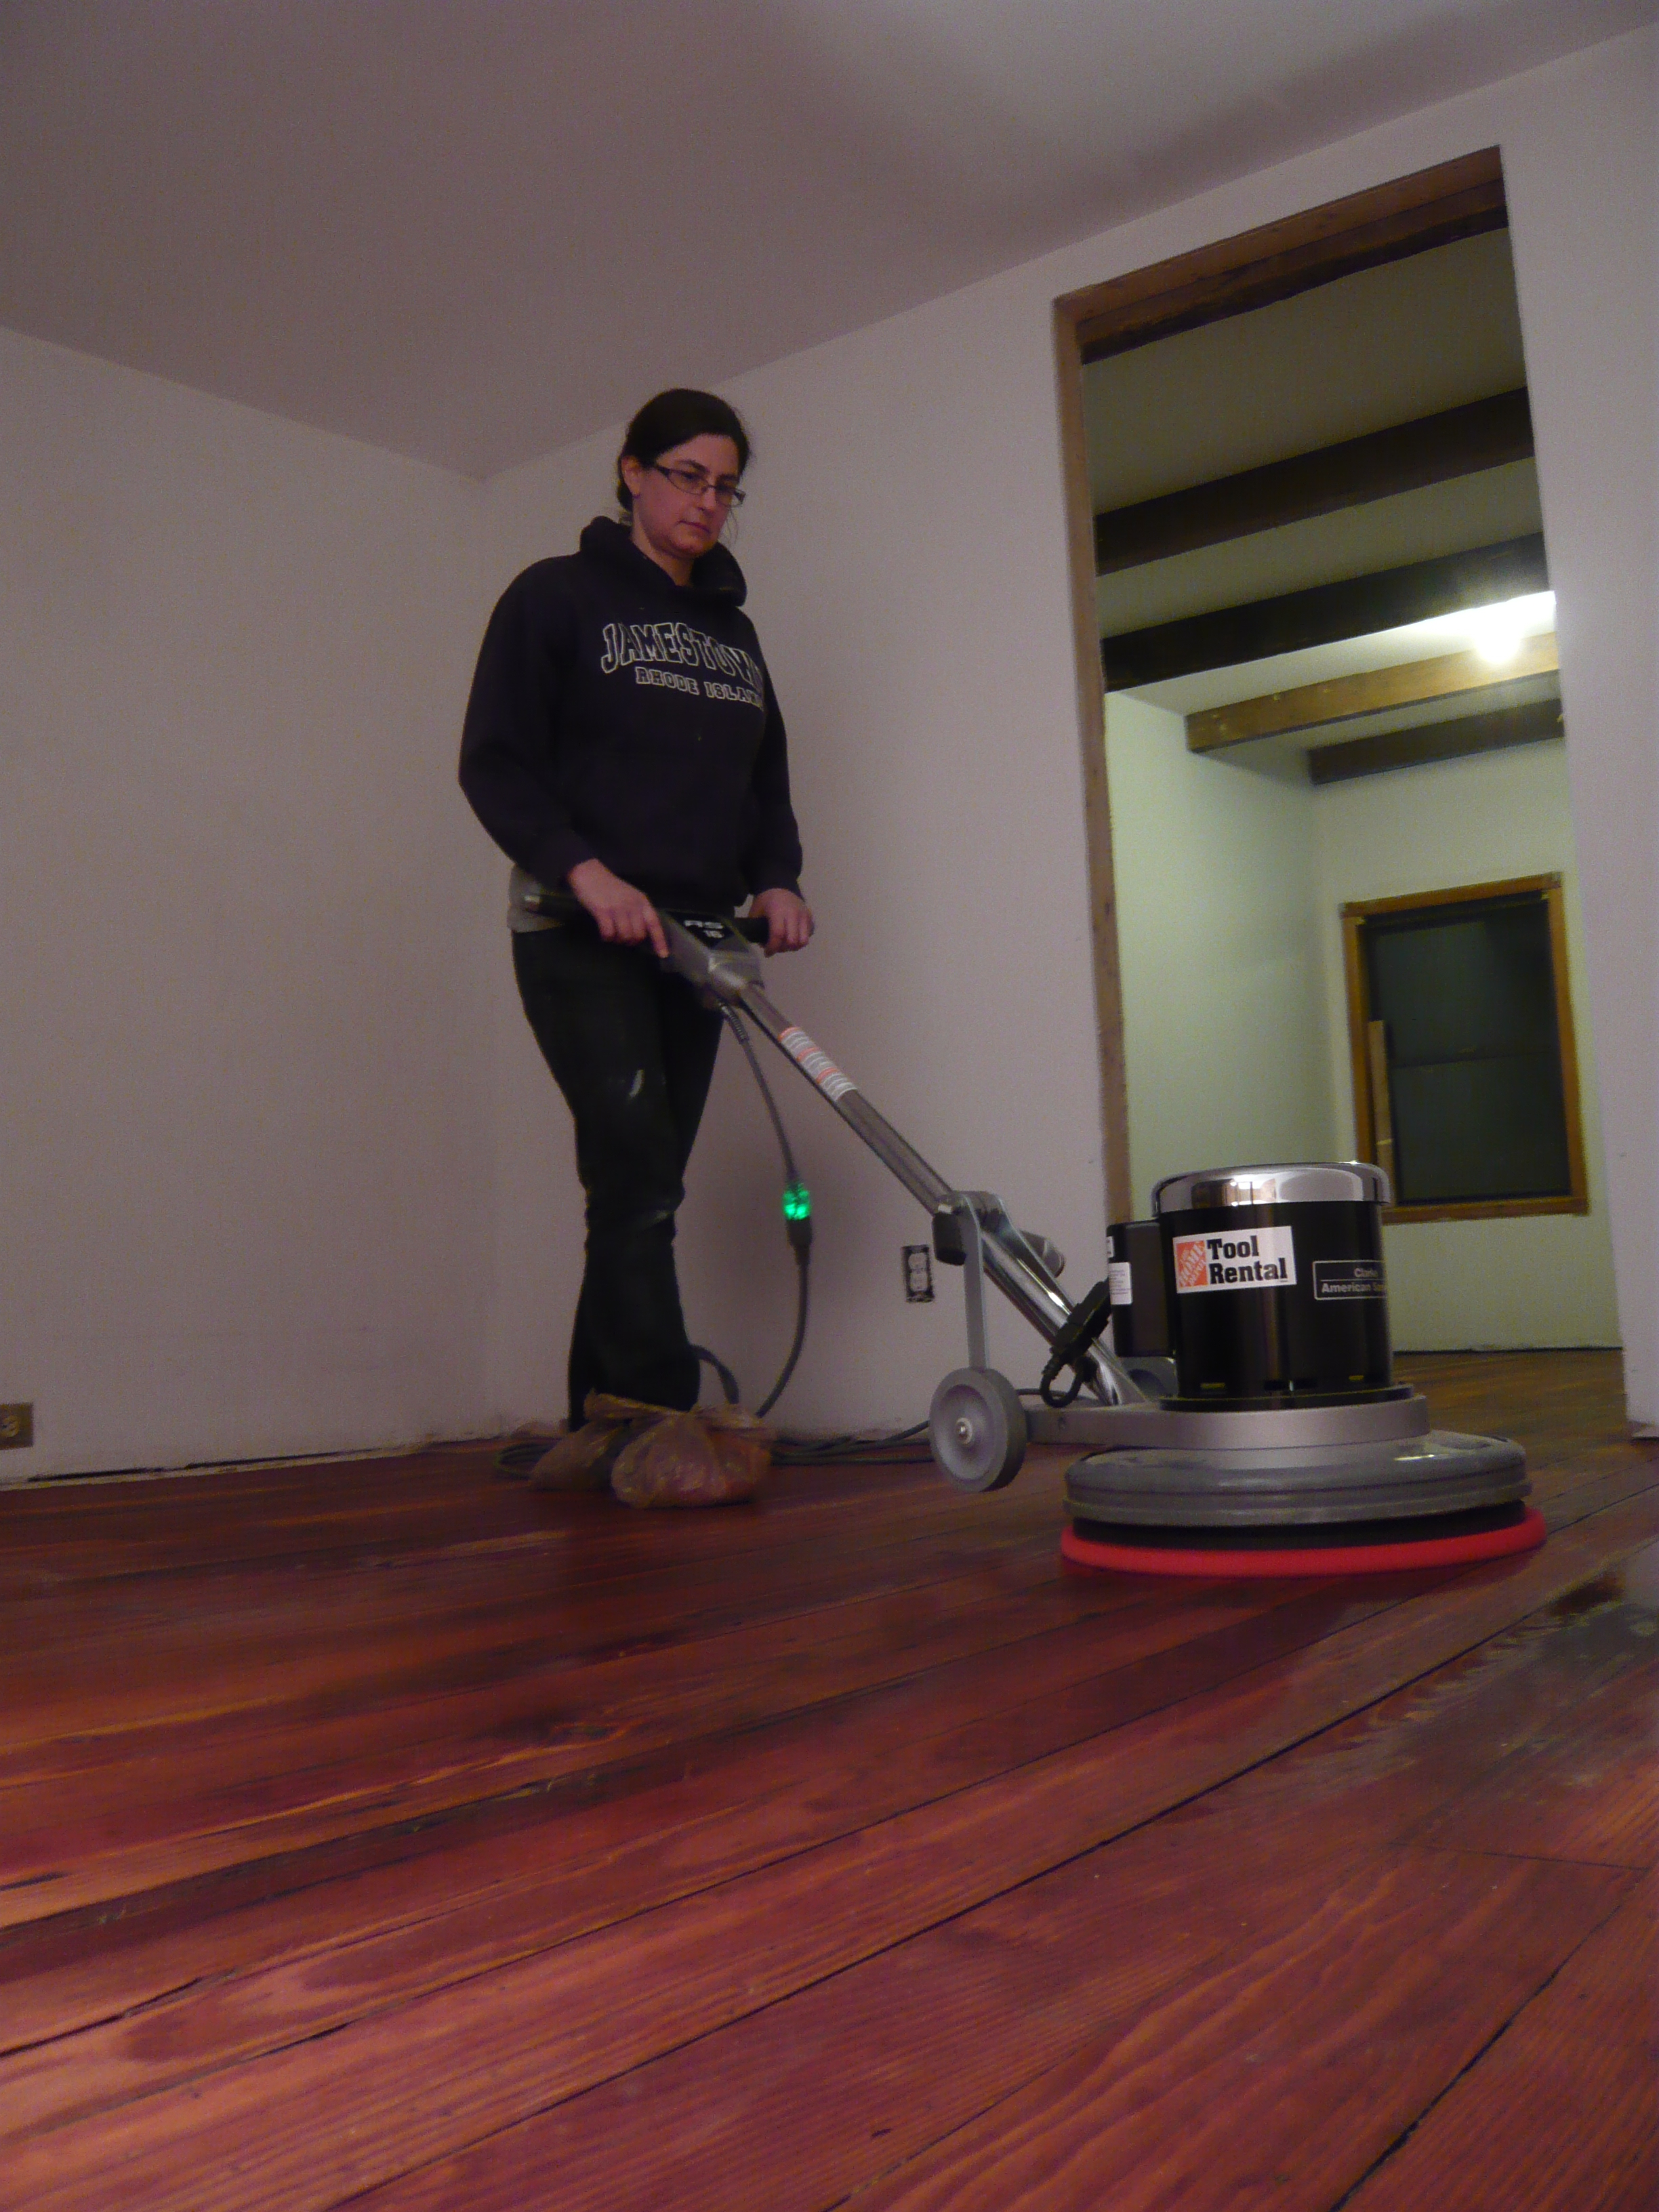
Siri and I decided that we would oil the floors rather than use polyurethane.  This was the old method of finishing floors.  It has more of a satin finish to it, but that’s what we wanted.  One benefit is that if you scratch the floor, you can just sand it out and oil it with a rag.

Siri and the buffing machine

Siri and the buffing machine

This is the 3rd Floor pretty much finished.  What a transformation!

This is the 3rd Floor pretty much finished. What a transformation!


Heat, Hot Water, Toilets and Sinks. OH MY!

06 Thursday Dec 2012

Posted by Mike in Home Improvement

≈ Leave a Comment

This past week we finally got around to crimping our PEX fittings.  We had put this off until we were pretty well done everything else in the hopes that we could rent a  PEX crimping tool for a night to finish it up.  Unfortunately, no where we could find rents PEX tools so now I’m the proud owner of a $60 tool I used for about 2 hours.

All hooked up. The wire nuts on the gray board are currently standing in for our Arduino controlled relay board.

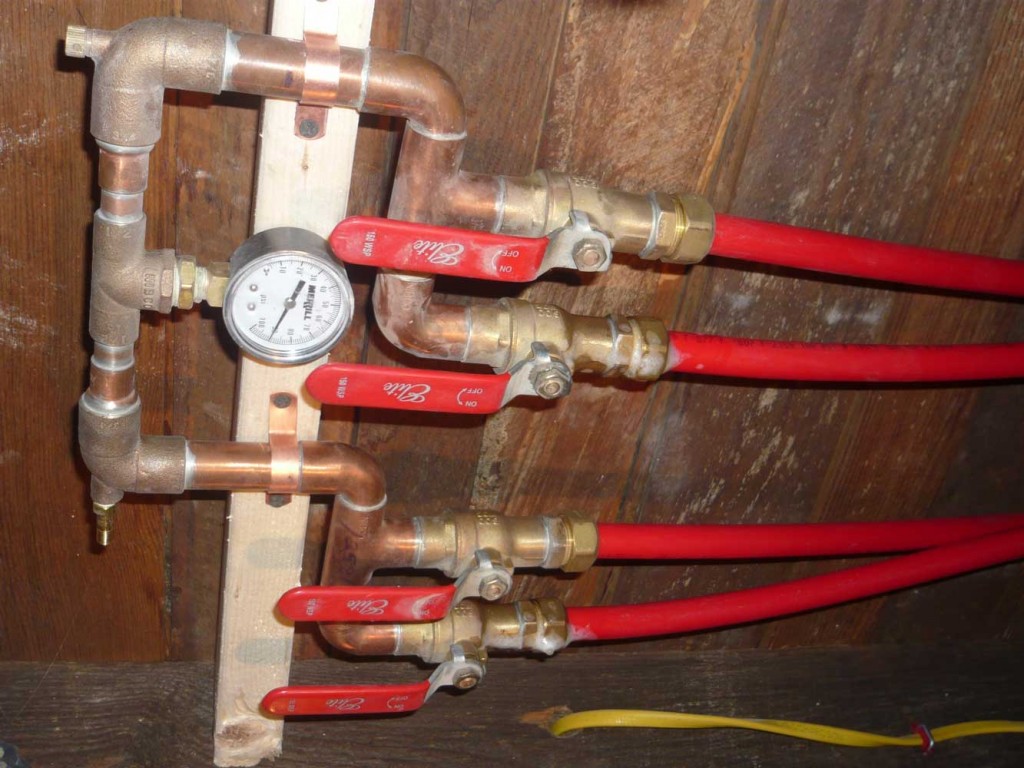
Here is where the bathroom plumbing ties into the core plumbing.  We tested this by running the exhaust through a dryer vent out the window and opening the door on the other side of the basement.  Runs nice and quiet even with the pumps running.  Will likely need to run for a few hours due to the thermal inertia of the house, but once warm, it should only need to kick on every few hours to keep the place comfy.

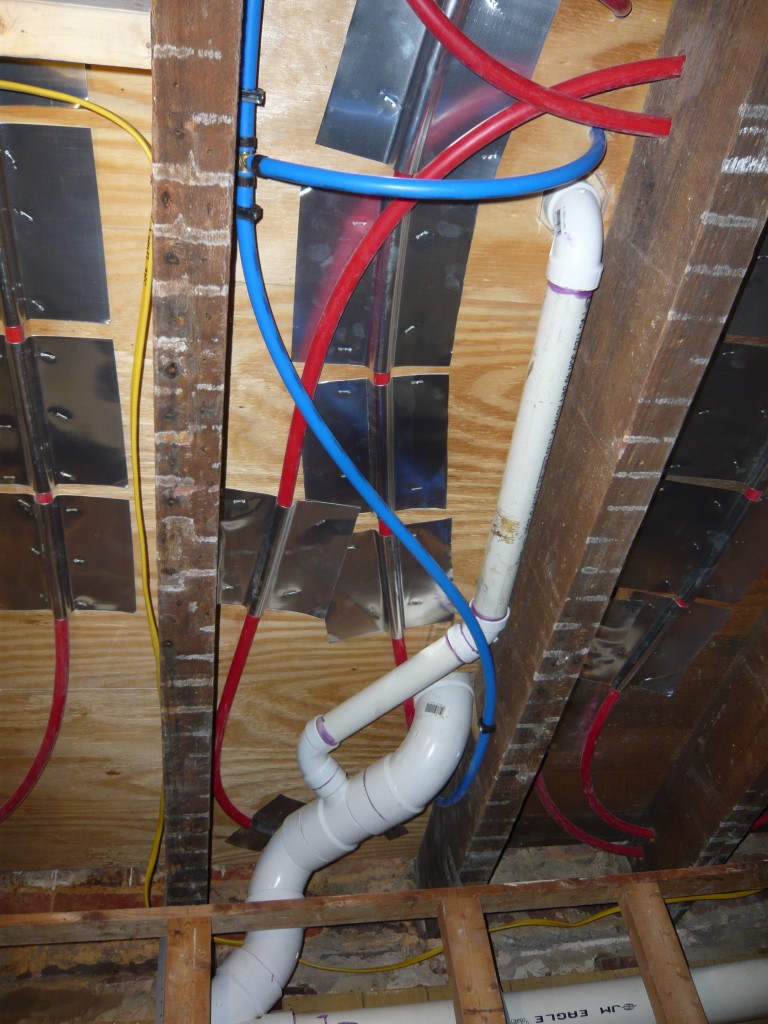
This photo shows plumbing under the bathroom. The big toilet drain and vent which also serves as the sink drain. The blue PEX is for the sink and toilet. Big red PEX is for the heating system.

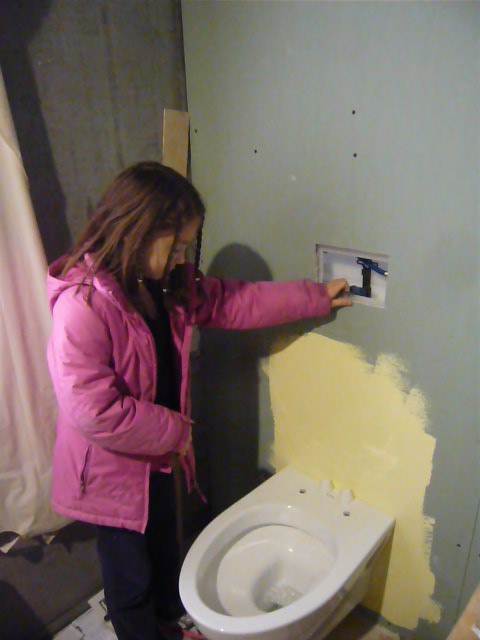
Iris had dibs on 1st flush. She couldn’t get enough. Need to put it through its paces, right?

Getting a toilet it was a big deal.  We’ve been having to walk back to the other house each time we needed to go… or use a bucket.

Shower plumbing should be ready to go too, but first Siri needs to get done the tile which should arrive tomorrow.

The Long Road to Drywall

06 Thursday Dec 2012

Posted by Mike in Home Improvement

≈ Leave a Comment

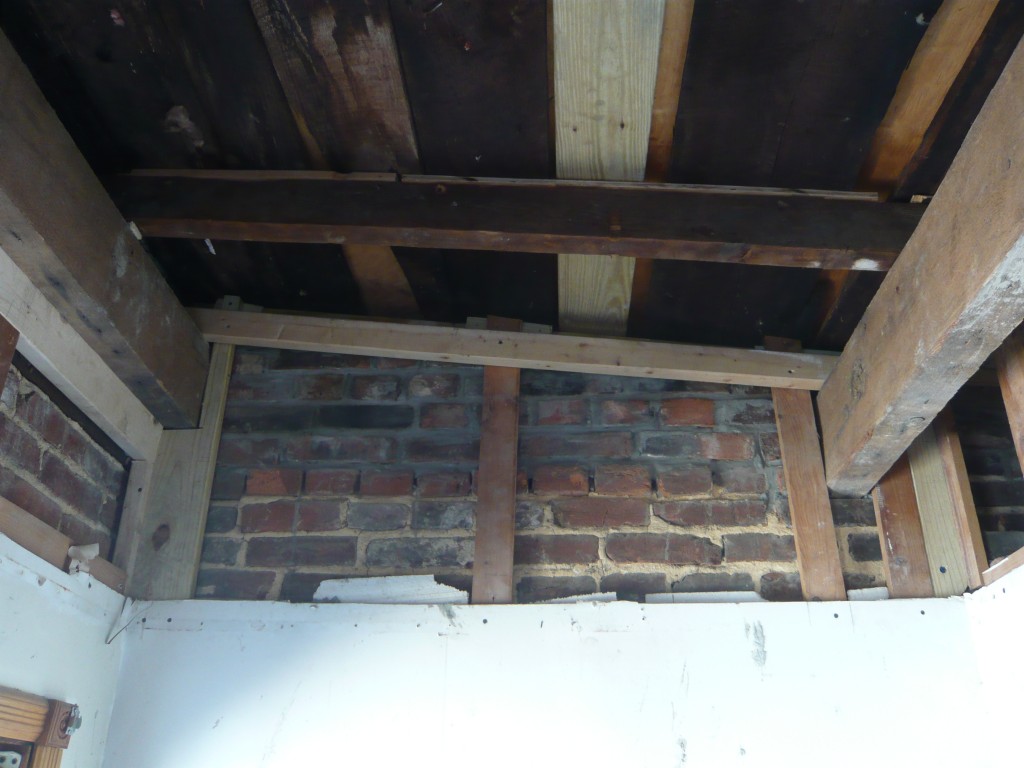
We’re working on drywall now.  It took a whole lot of hard work to get to this point.   Had to finish and test everything first before we covered it up.  After putting up new walls, this included repairing the bricks, the roof, replacing the plumbing and electric.  Lots of work for sure.  Its a shame it will all be hidden away.  Here is a peek at the work that got us here.

After fixing the bricks and roof, we still had to add nailers for the drywall.  This took a while but with that help of my brother and dad, we got it done.  Very tedious work.

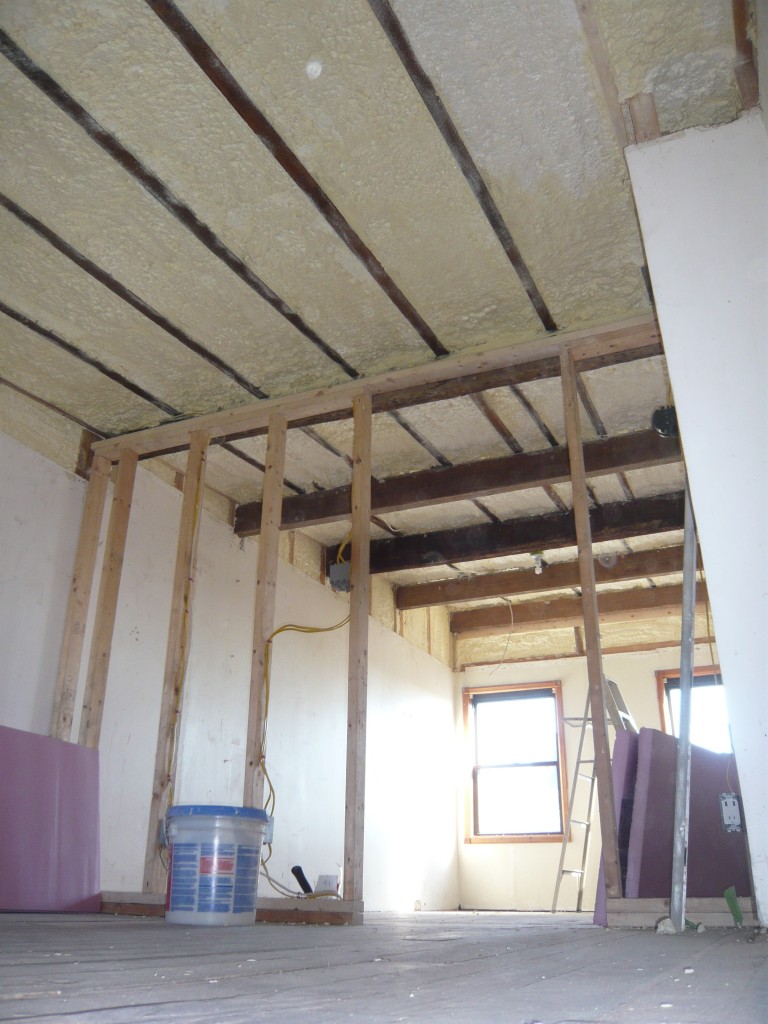
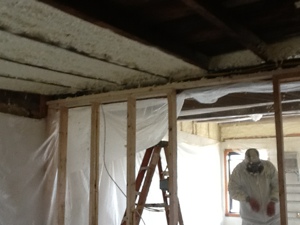
After we got everything up, it was time for spray foam.  We paid a company to do this part.  It took them half a day and they needed a large box truck to carry their machine.  While they were at it, we also had them do the closet / former bathroom / future office / deck entryway.

Spray foam (yellow) in all its glory

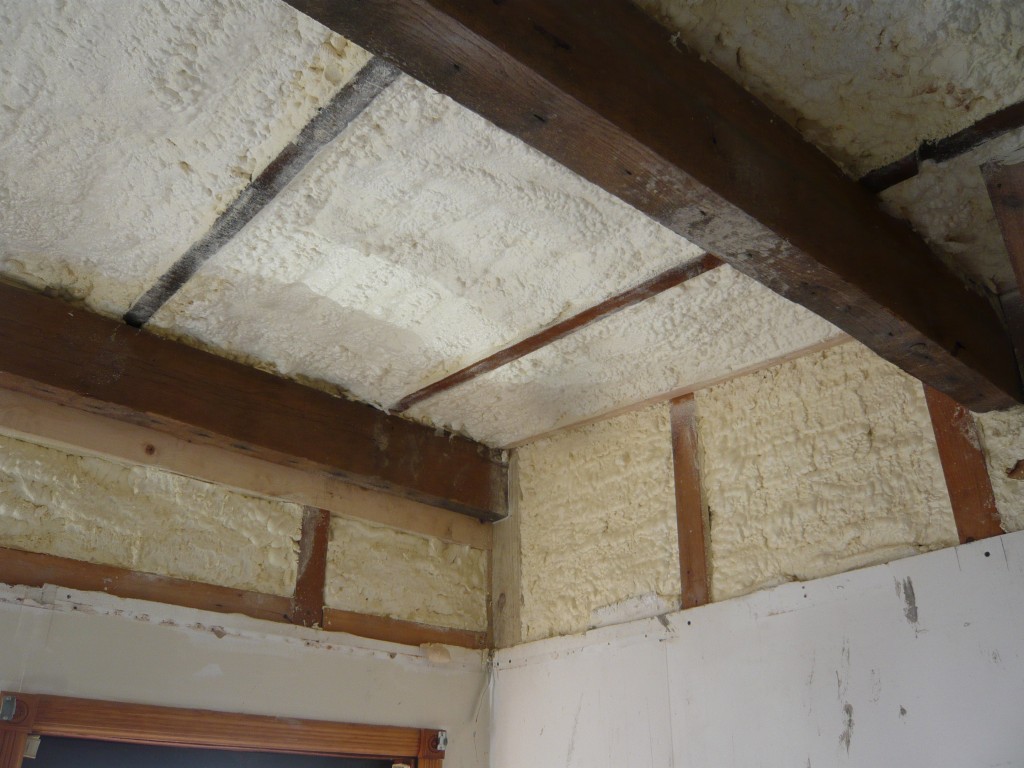
More detail in the corner. Walls are only about 1″ thick, but they act as a vapor barrier and are likely way more effective than cramming in styrofoam sheets which is what is likely behind the drywall that we left in place.

On the 3rd floor, we tried our best, without replacing the whole roof, to meet the minimum recommended R value for a roof in our area of R-38.

  1. Inside Air film: R- .61
  2. 1/2″ Drywall: R- .45
  3. 2″ Pink Foam: R- 10
  4. 1″ Air Gap: R- 1
  5. 4″ Spray Foam: R- 25
  6. 1/2″ Plywood: R- .62
  7. 1/2″ Fiber Board: R- .1.32
  8. Rolled Roofing: R- .44
  9. Exterior Air Film: R. -.17

The total R value for our roof is between R-33.36  and R-38.16.  This depends on the thickness of the foam between the joists.

When they sprayed it, they were careful to not make it stick up higher than the joists so it would be easy to install drywall.  They were a bit too conservative in my view sometimes leaving over an inch of cup between joists.  Luckily, even the sealed air gap itself has a value of R-1.

Pretty good on paper.  Pretty effective in the real world.  With just the work lights on, the top floor can get HOT enough that we needed to open windows.  Condensation shouldn’t be an issue inside the ceilings, but it does occur on the windows and maybe even in the walls.

The guest room doesnt have the 2″ pink sheets as we decided that ceiling height for this small area was more important than R value.  There will be some interesting  transition from the stair way to the 3rd floor ceiling here, but we’ve got it figured out.  I’m not too worried.  For over 100 years people lived in this house and I can’t imagine it had more than R-10 and it had visible air leaks (I mean I could see the harbor looking through them).

Iris helping me to lift one of these heeaaavvvyyy sheets while dad does something likely more significant in the background.

After all the insulation was up, we added the drywall.  On the 3rd floor there was lots of cutting as nothing at all is square or level.  We shimmed with wood and still found some spots that would push in.  We did some experimenting and figured out that we could punch a hole in the drywall and spray in some Great Stuff foam which would act as a shim after the sheet was already up.

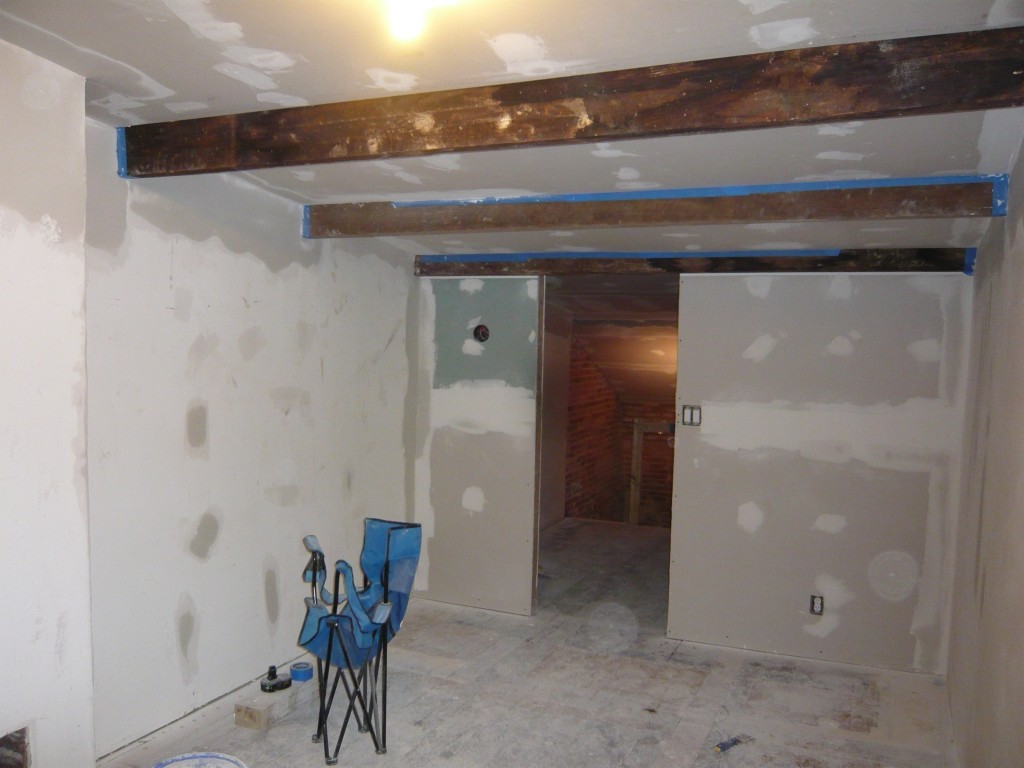
Walls are up, still need to finish the small pieces above where the drop ceiling used to be.  Dad took care of all that little stuff while I worked on finishing things downstairs.  Strangely the old man seems to enjoy this stuff.

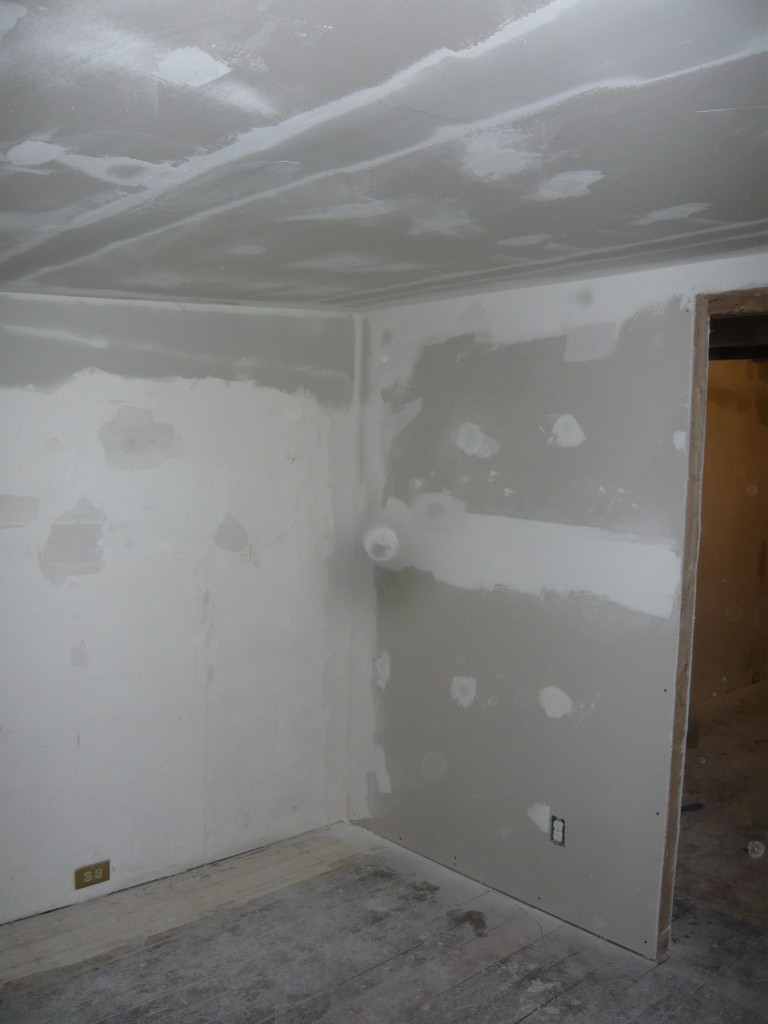
The previous owners only did drywall up to the drop ceiling so we had to do the rest up to the top.  Dad is intent on blending it in with spackle.

Starting to Spackle.  Also, we seem to have developed a black spot in the middle of all our pictures.  Construction and digital cameras don’t mix.

So its coming down to the wire.  We likely have another week of sanding and spackling on the 2nd and 3rd floors before they’re done.  After that we sand / oil the floors.  Hopefully that will be the end of the dust and we can start painting and moving in boxes!

Wired Connectivity Planning

03 Monday Dec 2012

Posted by Mike in Home Improvement

≈ Leave a Comment

All but two of these are already antiquated; how long until they too are useless?

I call wall plates like these memorial plaques.  They are used to remember technologies of the past and are helpful in estimating the date of the most recent renovation  (RJ-11 phone jacks: pre-2005, S-video: 1990-1995, Composite HD: 2000-2007, Ethernet 1998-2008, etc).  For this reason, I’m trying to convince myself that I don’t need to plan anything at all.  How much longer will I need even a cable TV  connection with everything streaming over the Internet and WIFI these days?

Fortunately, we’re putting the TV right over an old and unused air duct to the basement.  I can run wires through this to the basement where I can set up a media server, DVD player, game console.  No need for wall plates at all plus it keeps any hidden on a shelf in the basement.

Its not that simple though.  I need sensors for our heated floors.  Since I’ve never done this (DIY thermostat or hydronic heat) before, I’ll only have a few days to figure out if they’ll work before I need to cover them up for good.  There are also other projects that might not be done for a while that will require wired sensors or power. One is the temperature controlled glass tile back-lighting in the shower. I’ll need to wire up my temperature sensor on the pipes before I cover them up or I lose my chance.  Central 12v power distribution for gadgets? Speaker wires?… Speakers themselves? (a smart house should have a voice.)  Microphones (a smart house needs to hear your commands.)  I’ll think this over long and hard before we put of the last of the drywall.

*There is one non-electrical thing I can think of needing still: a filtered water line to the bedroom.  This would be great for a glass of water while in bed, or even better, a bedside coffee maker.

4 Months In

21 Wednesday Nov 2012

Posted by Mike in Home Improvement, Sketchup 3D

≈ Leave a Comment

Now that we’re putting up drywall, its almost amazing to us that its been only 4 months since we bought the place.  Working every evening and weekend with few exceptions for 4 months feels like years.  Its good to take a moment and think back to the first tour of the house, through the inspections and the purchase just to see how far we came.

I cant remember exactly when Siri first saw this house for sale online.  No sooner than we had looked at the photos online, someone else had a contract in on it.  We were just starting to look, but we knew we’d probably never find a house with a yard in this neighborhood.  It must have been too much work for them to take on.  Months later Siri saw it come up again and we scheduled with Aldo to check it out.  It was the first of two houses we looked at during the whole hunt.  We had an offer in pretty quickly and then there was the waiting.  We must have waited 4 months to hear back from the bank.  Apparently, while we had an offer in, someone had made a higher offer and we were told our only options were to sign the release or wait for the contract to expire.  We were upset, but Aldo worked some magic and finally we were able to put in our counter offer which was approved.

I remember those first excited days after we closed.  We took the day to measure everything for a Sketchup drawing and around a week later we started to tear things out.

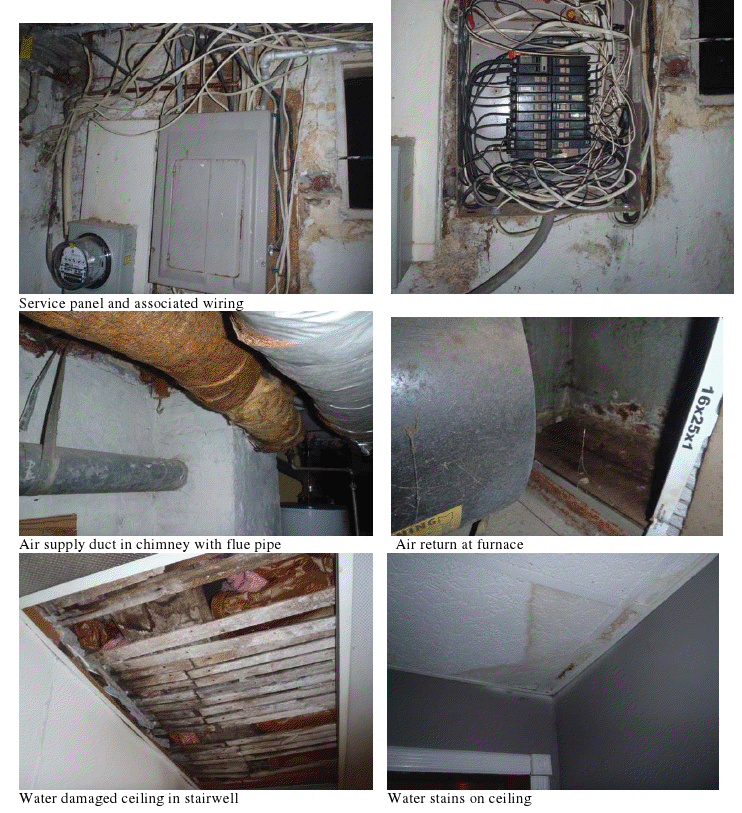
Page 12 of the Inspection Report – Bad Wiring, F’d ducting, Horrible Ceilings.

There were the obvious problems like the drop ceiling and then there were things on the inspection report.  More things we uncovered while renovating such as the 3rd floor bricks, whole house wiring, whole house plumbing…  Other things we simply decided to do now rather than after we moved in (the bathroom).  Somehow even with all the problems, we didn’t feel anything was too bad for us to handle (with help of course).

So 5 months in, it looks like we’ve got about a month until we can move in.  We need to finish up some wiring, plumbing, drywall, floors and bathroom.  Once we’re moved in, we’ll take it a little easier while we finish up.  We’ve come a long way.  It helps to look back at how far we’ve come to give us energy to get us to the end.

Spray Foam

16 Friday Nov 2012

Posted by Mike in Home Improvement

≈ Leave a Comment

Pretty awful cell phone video.

Major milestone–spray foam!

16 Friday Nov 2012

Posted by Siri in Home Improvement

≈ Leave a Comment

Today marks a major milestone in our timeline–getting the roof/3rd floor ceiling insulated with closed cell spray foam. No longer will we be able to see the Baltimore skyline through the holes in the back wall corner where it “joins” the roof! 4 inches of spray foam plus 2 inches of rigid foam insulation should keep things toasty in winter and cool(er) in the summer, as well as add some significant structural strength to the roof itself.

With drywalling the 2nd and 3rd floor planned for this weekend, it feels like we are actually getting this house done!

20121116-115517.jpg

Thank You Hurricane Sandy

31 Wednesday Oct 2012

Posted by Mike in Home Improvement

≈ Leave a Comment

“Super Storm Sandy”

Rain was already starting to fall as we patched the last of the holes in the roof Sunday afternoon.  The day before, dad helped us to add the missing flashing (where we had removed the chimney), tar suspected leaks, and install the 3rd floor window.  All of this needed to get done, but we didn’t think we’d be doing it in preparation for a massive tropical storm.  The massive storm was Sandy and it was due to make landfall only 100 miles east of us on Monday.

Having done what we could to prepare, we spent the rest of the weekend with dad, who helped us to install aluminum heat reflector paper and insulation above the bathroom, finish up the bathroom vent and wiring, get the bathroom ceiling drywall up, and plane the 1″ floor boards down to match the missing floor board on the 3rd floor.  Around 9 I got a text saying work was closed Monday so at least I could be around to keep an eye on things.

When I arrived Monday, we already had an inch or two of water in the basement.  We don’t have a sump pump so we used the shop vac to bail out the water.  After taking a few bucket loads up the stairs, I decided it was time to finally hook up the drain on the utility tub.  Throughout the day we needed to vacuum up about 30 gallons of water every hour or so.

Between vacuuming we were able to get a wall of drywall up in the bathroom.  Siri worked on the thin-set and backer board on the other half of the room.  With no insulation on the roof, the sounds of blowing wind, banging flashing and hard rain seemed even worse.

Tuesday morning we were pretty nervous coming to the house.  The news had said that the worst winds would be in the middle of the night.  Luckily the tree had not blown down, we still had power and the basement was dry; winds had changed direction in the night and stopped forcing water in the back of the house.  I was able to finish up the drywall in the bathroom, cut the floorboards to size, do a little wiring, and help Siri get more backerboard up.  We got really lucky when we cut a section of floorboards out.  I had set the depth on the saw and cut the boards and then Siri reminded me that there was PEX under that board.  Upon inspection we had missed the pex by maybe a millimeter.  Close call!

In the end we were lucky all weekend.  We had power the whole time, no downed limbs, no excessive flooding, no massive leaks; Hurricane Sandy gave me two paid days off work and we used those every hour of them.

Core Plumbing is Done!

24 Wednesday Oct 2012

Posted by Mike in Arduino, Home Improvement

≈ 1 Comment

Tags

Arduino, Furnace, Heating, Noritz, PEX, Radiant Floor, Radiantec, renovations, Water Heater

Core Plumbing

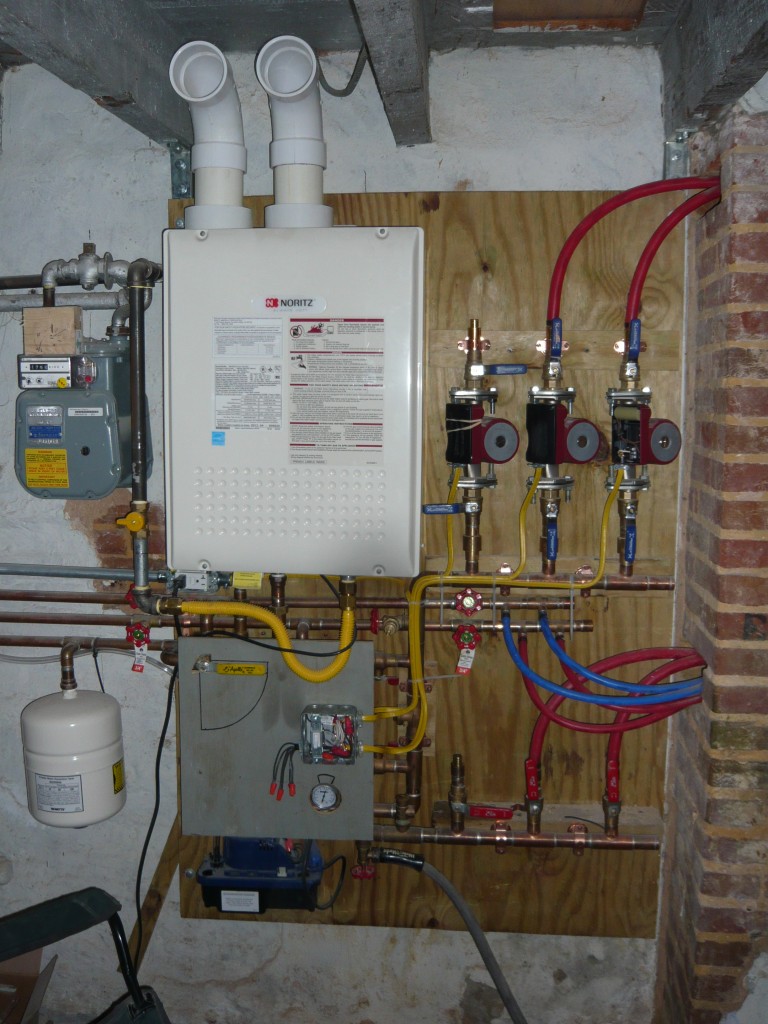
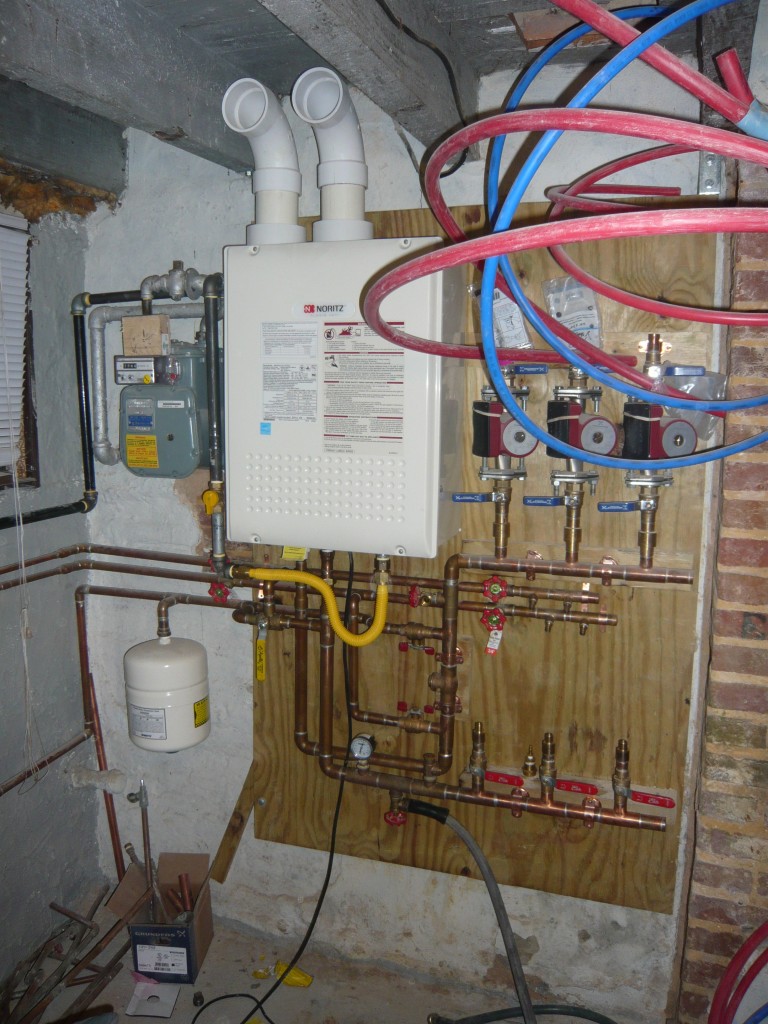
I’ve finally gotten enough done on our core plumbing that I’m willing to post a photo.  This has been my baby for a few months and I’m obsessed with every detail.  As with most of the other projects, we’re aiming to save as much space as possible. We have reduced our entire heating, hot water, gas and water distribution systems from a furnace, water heater, ducting, and associated plumbing into a 4′ wide x 5′ tall x 1′ deep corner.  This transforms a basement only fit for storage into one fit for a workshop.  We’ve gained a full floor on our house.

Here is how the system works:

Water enters from the city via a 3/4″ copper pipe (lower left) through a code required back-flow preventer and expansion tank into our 1″ radiant floor manifold.  From there 3 pumps send water to each of our 3 floors (once we hook up the PEX you see in the top right), back to the lower manifold, through the tankless [high-efficiency condensing] water heater, through a 1 way valve and back around again.

This design uses manifolds made by Radiantec and is laid out based on their reference design.  I’ve made a few slight changes to save space, but keep everything oriented as they suggest.  They key was layering everything in planes.  I planned this out in Sketchup which really helped to visualize different layouts before I even had the parts in hand.

We get hot water out of the system for the house from just after the water heater and before the heating circuit’s one way valve.  Hot water that is removed is replaced by water from the water main.  Cold water for the house comes from different parts of the system depending on the position of a manual diverter valve. When we are heating the floors, the valve pulls cold water from the main before it gets to the heating circuit.  When we are not heating the floors, cold water has to go through all of the floors before being taken out before the water heater.  In addition to preventing stagnation during the summer, this is supposed to supplement our cooling by removing a few BTUs of heat via the floors as we use water.  Summer heat literally goes down the drain.  The downside of this is that our “cold” water will now be room temperature.  Since I dont like drinking warm water, we’re going to tap into the main just after the back-flow preventer for nice cold drinking water which we will run through filter to remove the city water taste.

Due to the efficiency of the water heater and its low exhaust gas temperatures we are able to use PVC pipe for the intake and exhaust (top).  This is going to be run across the ceiling and out the side wall into the alley.  The run is short enough and has so few bends that we can get away with running 3″ PVC.

The electricity has not yet been run around the basement.  We will need around 1 amp for each pump and an amp for the water heater itself.  We’ve decided to try and build our own thermostat based on an Arduino microcontroller.  Input will be temperature sensors in the floors of each room (Dallas DS18B20) and output will be solid state relays which can supply up to 2 amps per circuit.  I’ve come up with a simple algorithm that turns the pumps on if the temperature is below a set point (and off when they reach the set point + hysteresis).   The hard part is the interface.  We have an Arduino Ethernet shield which allows us to connect to the controller via our network (and the Internet).  I’m hoping to make apps for our phones that allow us to set the temperature and check the status of the house from anywhere with a wifi connection.  Data logging is also a goal.  This is going to take a little while to implement so for now we’ll set the temperature with a laptop via USB.

PEX: 3rd Floor Installed

23 Tuesday Oct 2012

Posted by Mike in Home Improvement

≈ Leave a Comment

90psi and holding…

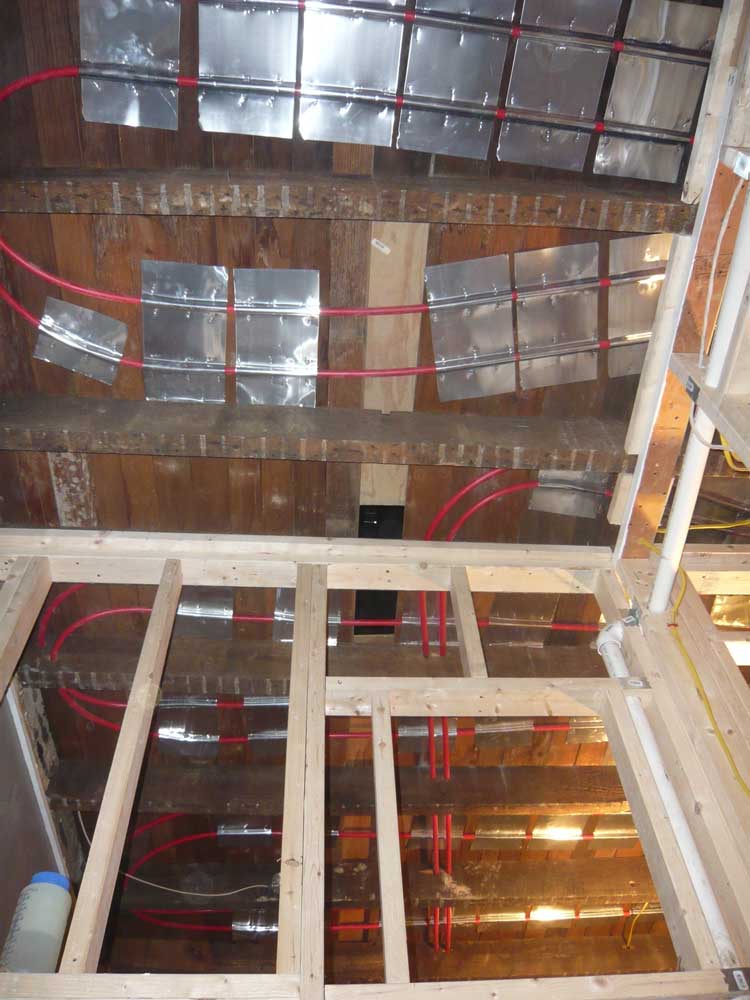
We got a whole floor done, just the two of us, this past weekend.  We learned a whole lot along the way too.  Little things like exactly where to drill the holes in the joists, how to alternate the hoses so they don’t cross over, how to work keep the spool from binding up…. and a few others.  It was a good education in handling PEX.

The PEX has a mind of its own.

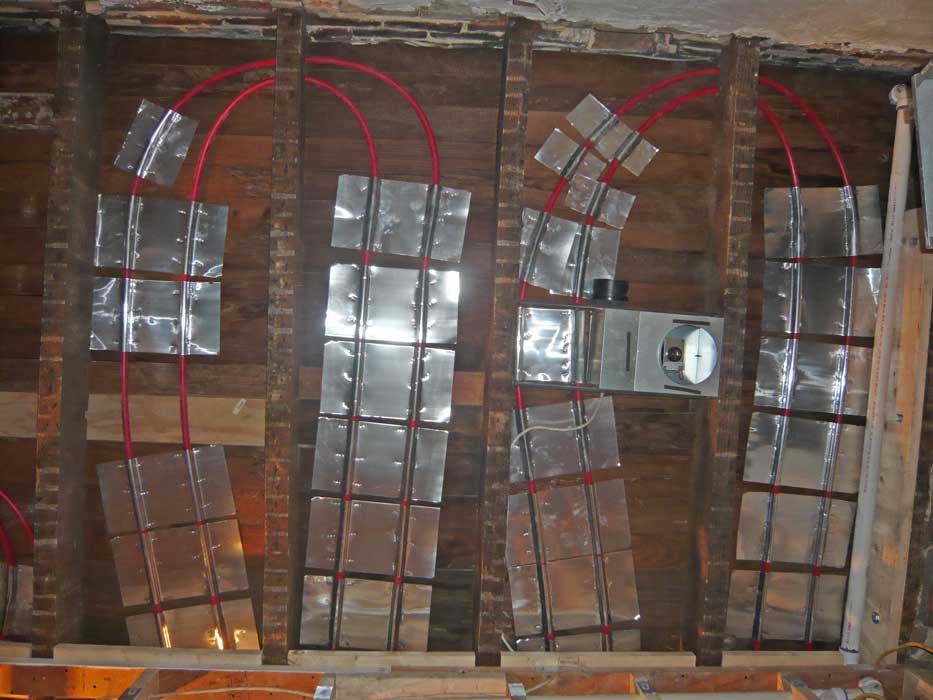
We had to learn a new lesson every joist.  The widths varying between 12″ and 24″ had us changing strategies every few feet.  The first circuit, we drilled holes on top of each other at the end of the joists.  This was not the best way.  On the 2nd circuit, we drilled them as high up as we dared next to each other.  This allowed us to alternate inside and outside hoses so we would not have any cross overs.  This resulted in a flatter layout with more parallel hoses which allowed us to use more heat transfer plates. (We got 400 plates and have 14 gaps for 3 floors (42 gaps) so…. 9.5 plates / gap).

We’ll find a board to fill that last spot. I swear!

We’ve still got two floors to go.  By the time we get to the basement we should be pretty good at this.

← Older posts
Newer posts →

♣ Recent Posts

  • After a Decade, the Bathroom Wall is Done!
  • Paid Off the Mortgage
  • Mesh Panels
  • The Giant Deck Update
  • Light City 2018 – What Lies Beneath

♣ Recent Comments

  • Iris on Security
  • Iris on The Kinetic Couch Awakens
  • Iris on The Kinetic Couch Awakens
  • Iris on The Kinetic Couch Awakens
  • Micah on Core Plumbing is Done!

♣ Archives

  • January 2023
  • June 2020
  • April 2020
  • March 2019
  • May 2018
  • March 2018
  • May 2017
  • April 2017
  • February 2016
  • January 2016
  • October 2015
  • September 2015
  • June 2015
  • April 2015
  • March 2015
  • February 2015
  • January 2015
  • December 2014
  • November 2014
  • August 2014
  • July 2014
  • June 2014
  • May 2014
  • February 2014
  • January 2014
  • December 2013
  • November 2013
  • September 2013
  • August 2013
  • July 2013
  • June 2013
  • May 2013
  • April 2013
  • March 2013
  • February 2013
  • December 2012
  • November 2012
  • October 2012
  • September 2012
  • August 2012
  • July 2012

♣ Categories

  • Alcohol
  • Arduino
  • Art
  • Building
  • Cats
  • History
  • Holidays
  • Home Improvement
  • Sketchup 3D
  • Space

♣ Meta

  • Log in
  • Entries feed
  • Comments feed
  • WordPress.org

Proudly powered by WordPress Theme: Chateau by Ignacio Ricci.