I’ve vowed to take off for the month of October since it seems every October since we bought the house we’ve had some massive time critical project to do seriously impacting our Halloween costuming abilities. With a few days left in September, there are still projects to do before it gets cold.
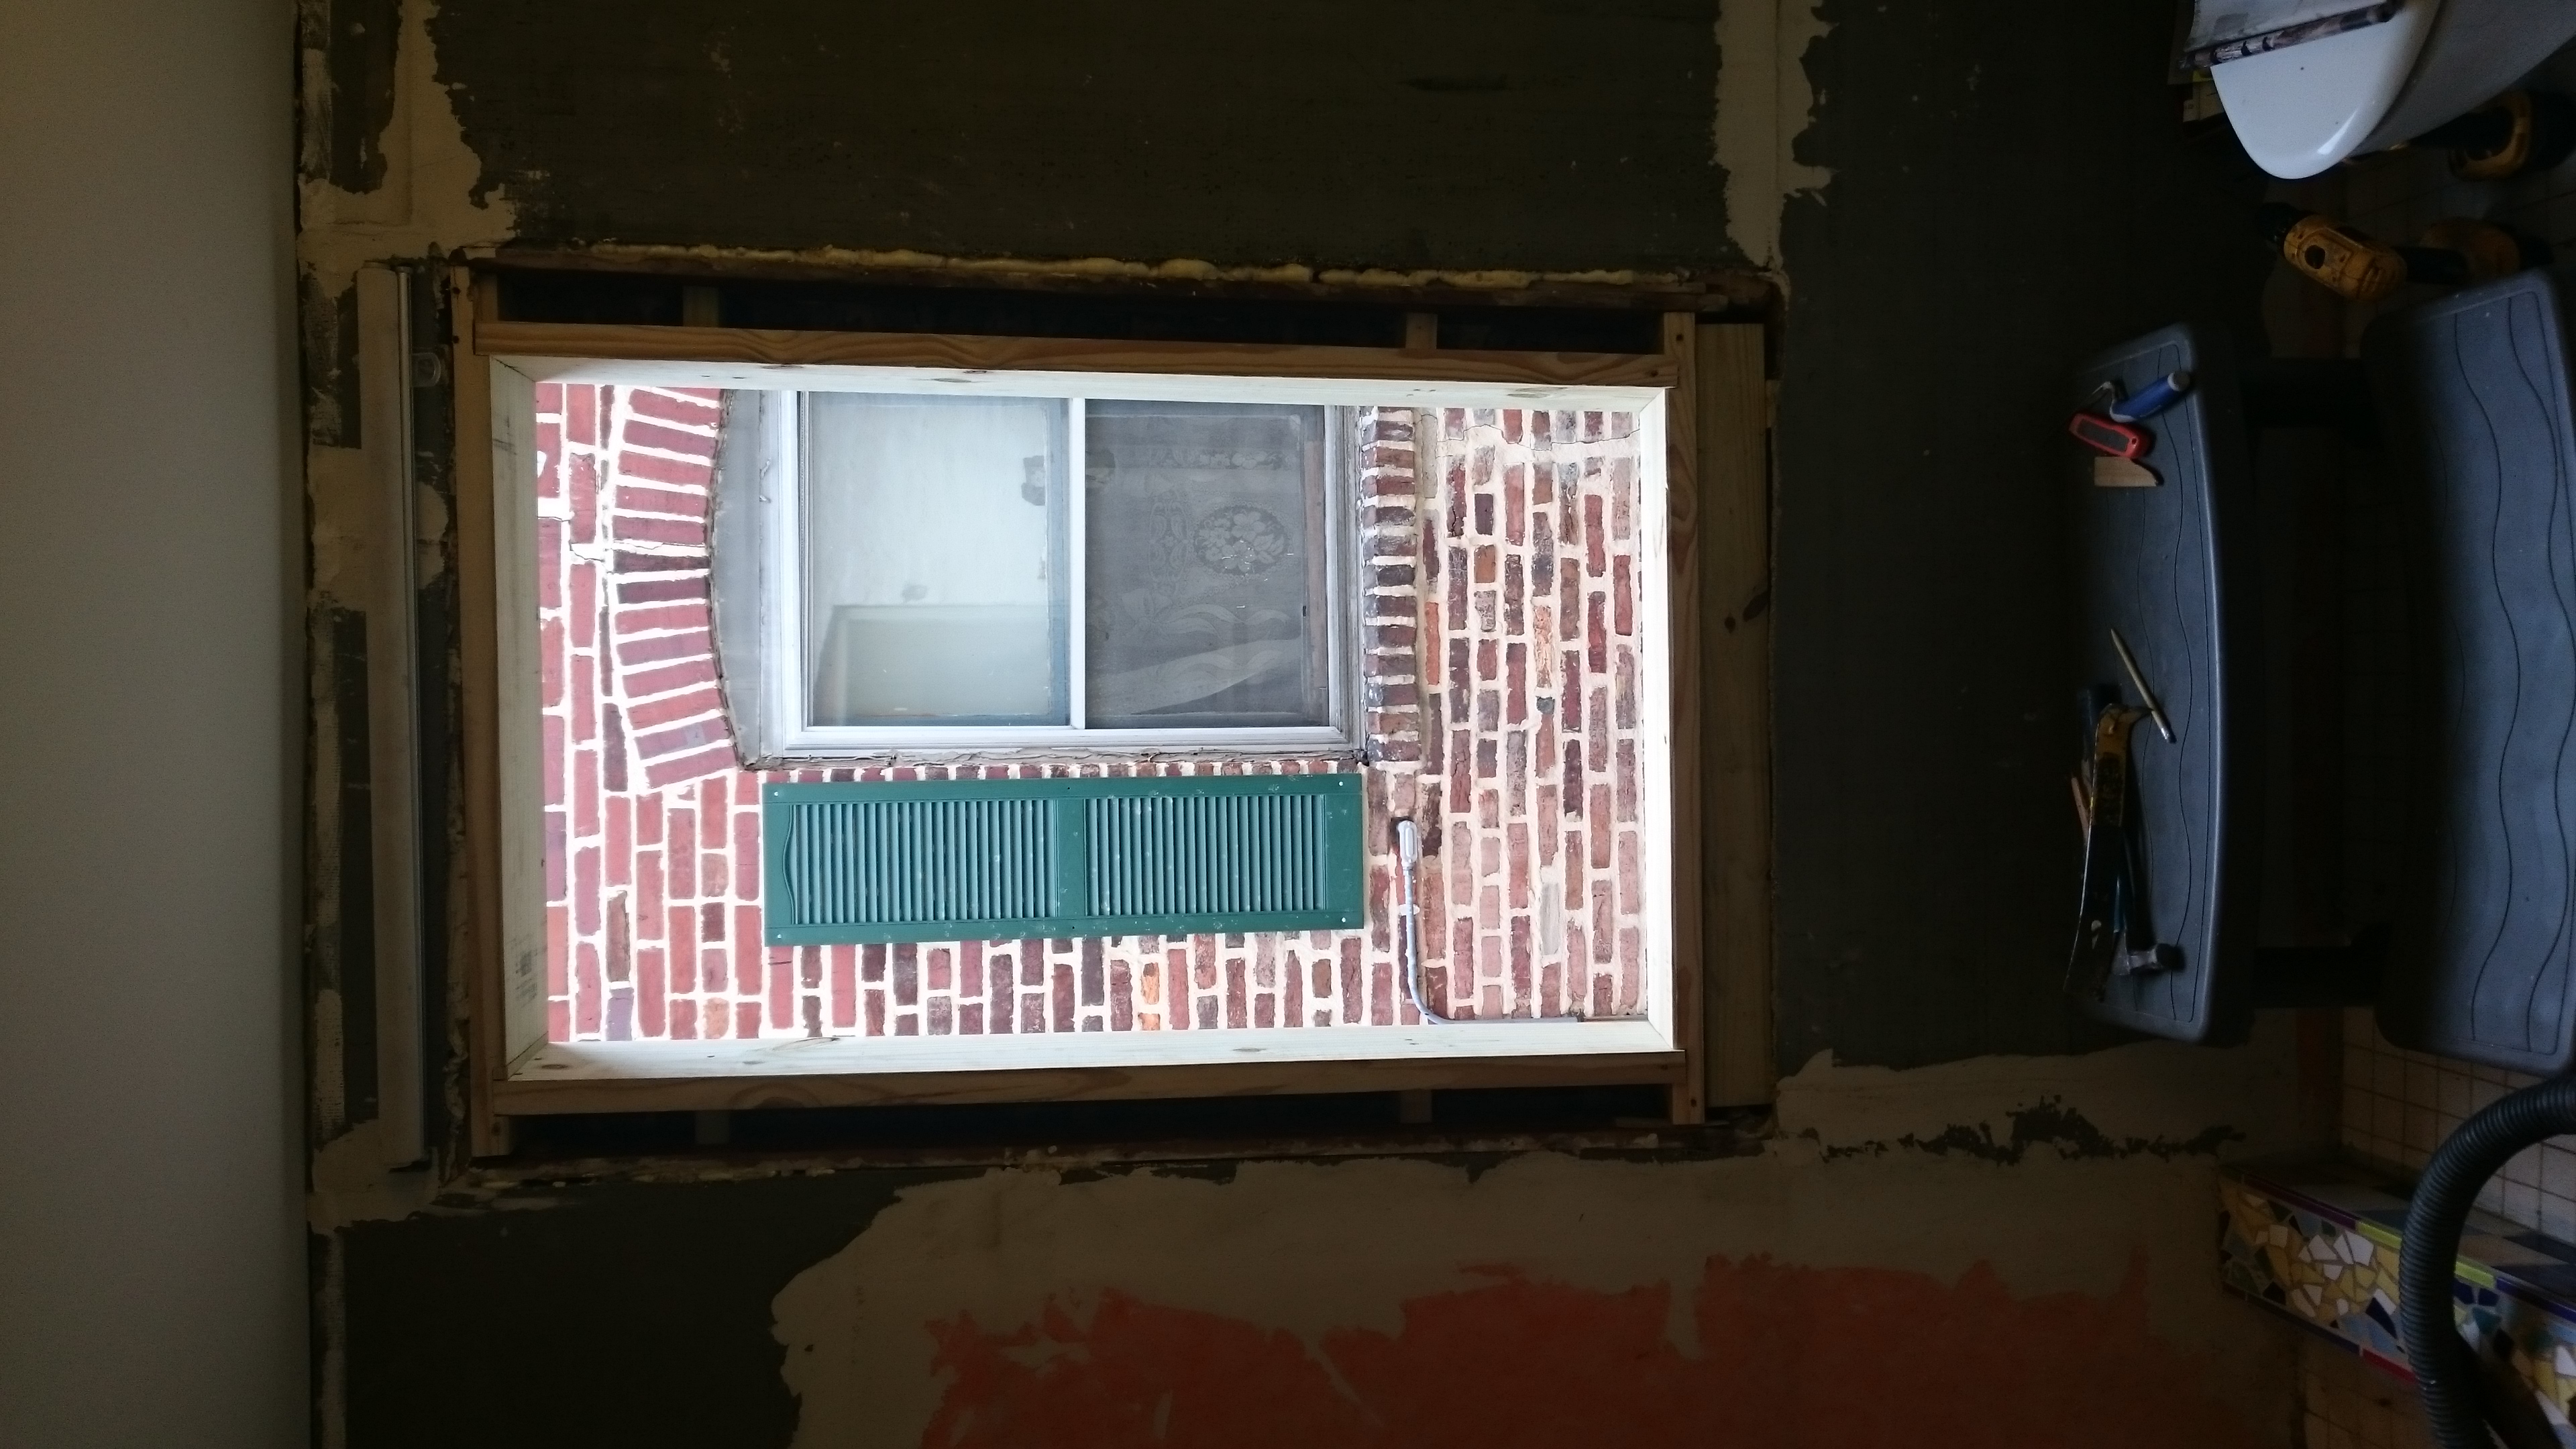
First off is the bathroom window. This wasn’t a huge priority, but it is one of the few things that would really suck unless its already open window weather. The main problem is that the wood frame is rotting away and letting water in which has ruined the bricks under it. To fix it I decided to take it all out down to the bricks, relay the bricks that are loose, point the joints around the ones that I can reach and then re-frame the window.
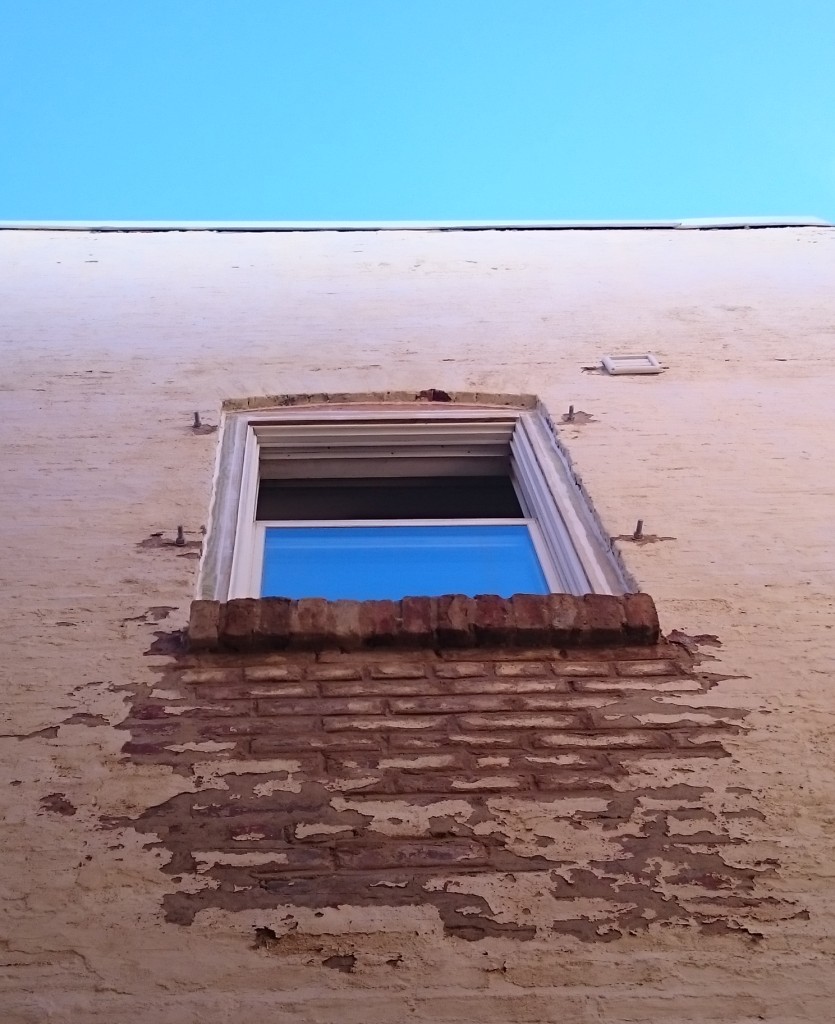
Refamed. You can see the width of empty space beside the new frame where the old counter weights would have been.
Needs some paint.
First round of bricks went well until I realized that the old mortar wasn’t going to harden. It all had to come out and be redone. That set me back a few days, but I powered through and got the bricks (re)done and framed it up.
I added 4 studs as well on the sides of the windows. These are to be used to hang a window box. We may or may not close it in. It’s main purpose is to hold plants to give us a little more privacy from our neighbors who have a window just oppose ours.
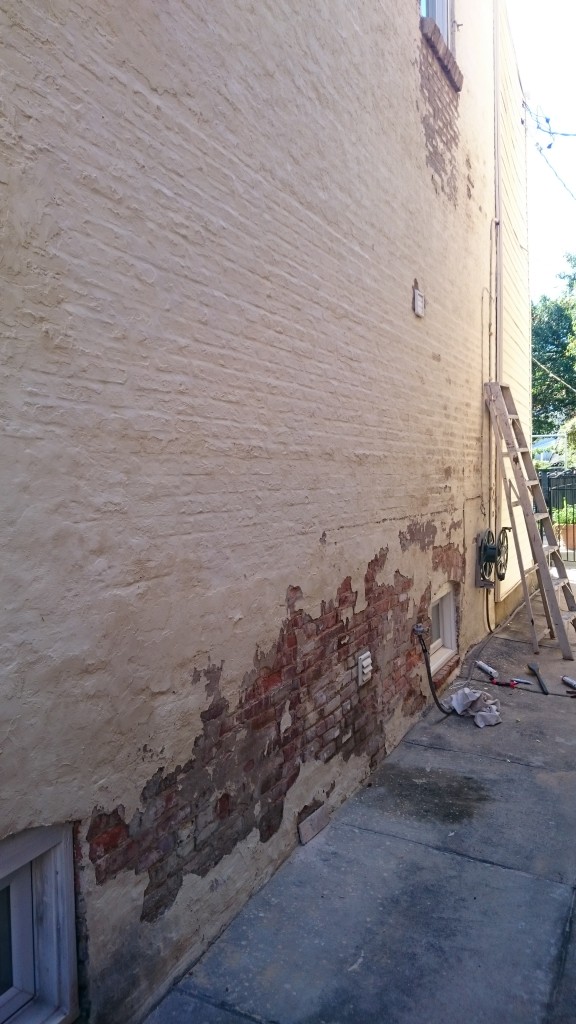
While the weather held out I also knocked off some loose mortar from the alley bricks and Siri painted it up.
Also refurbished our non-venting stove vent to actually vent outside. This involved disassembled the whole thing, washing it inside and out, blocked off the front vent, opened up the rear vent and adding some ducting. I’m no longer shy about making holes in my walls so out came the impact drill. I circle of 1/2″ holes later and I was through the brick wall to the alley. Finished it up by spray foaming the inside and rebricking the outside.
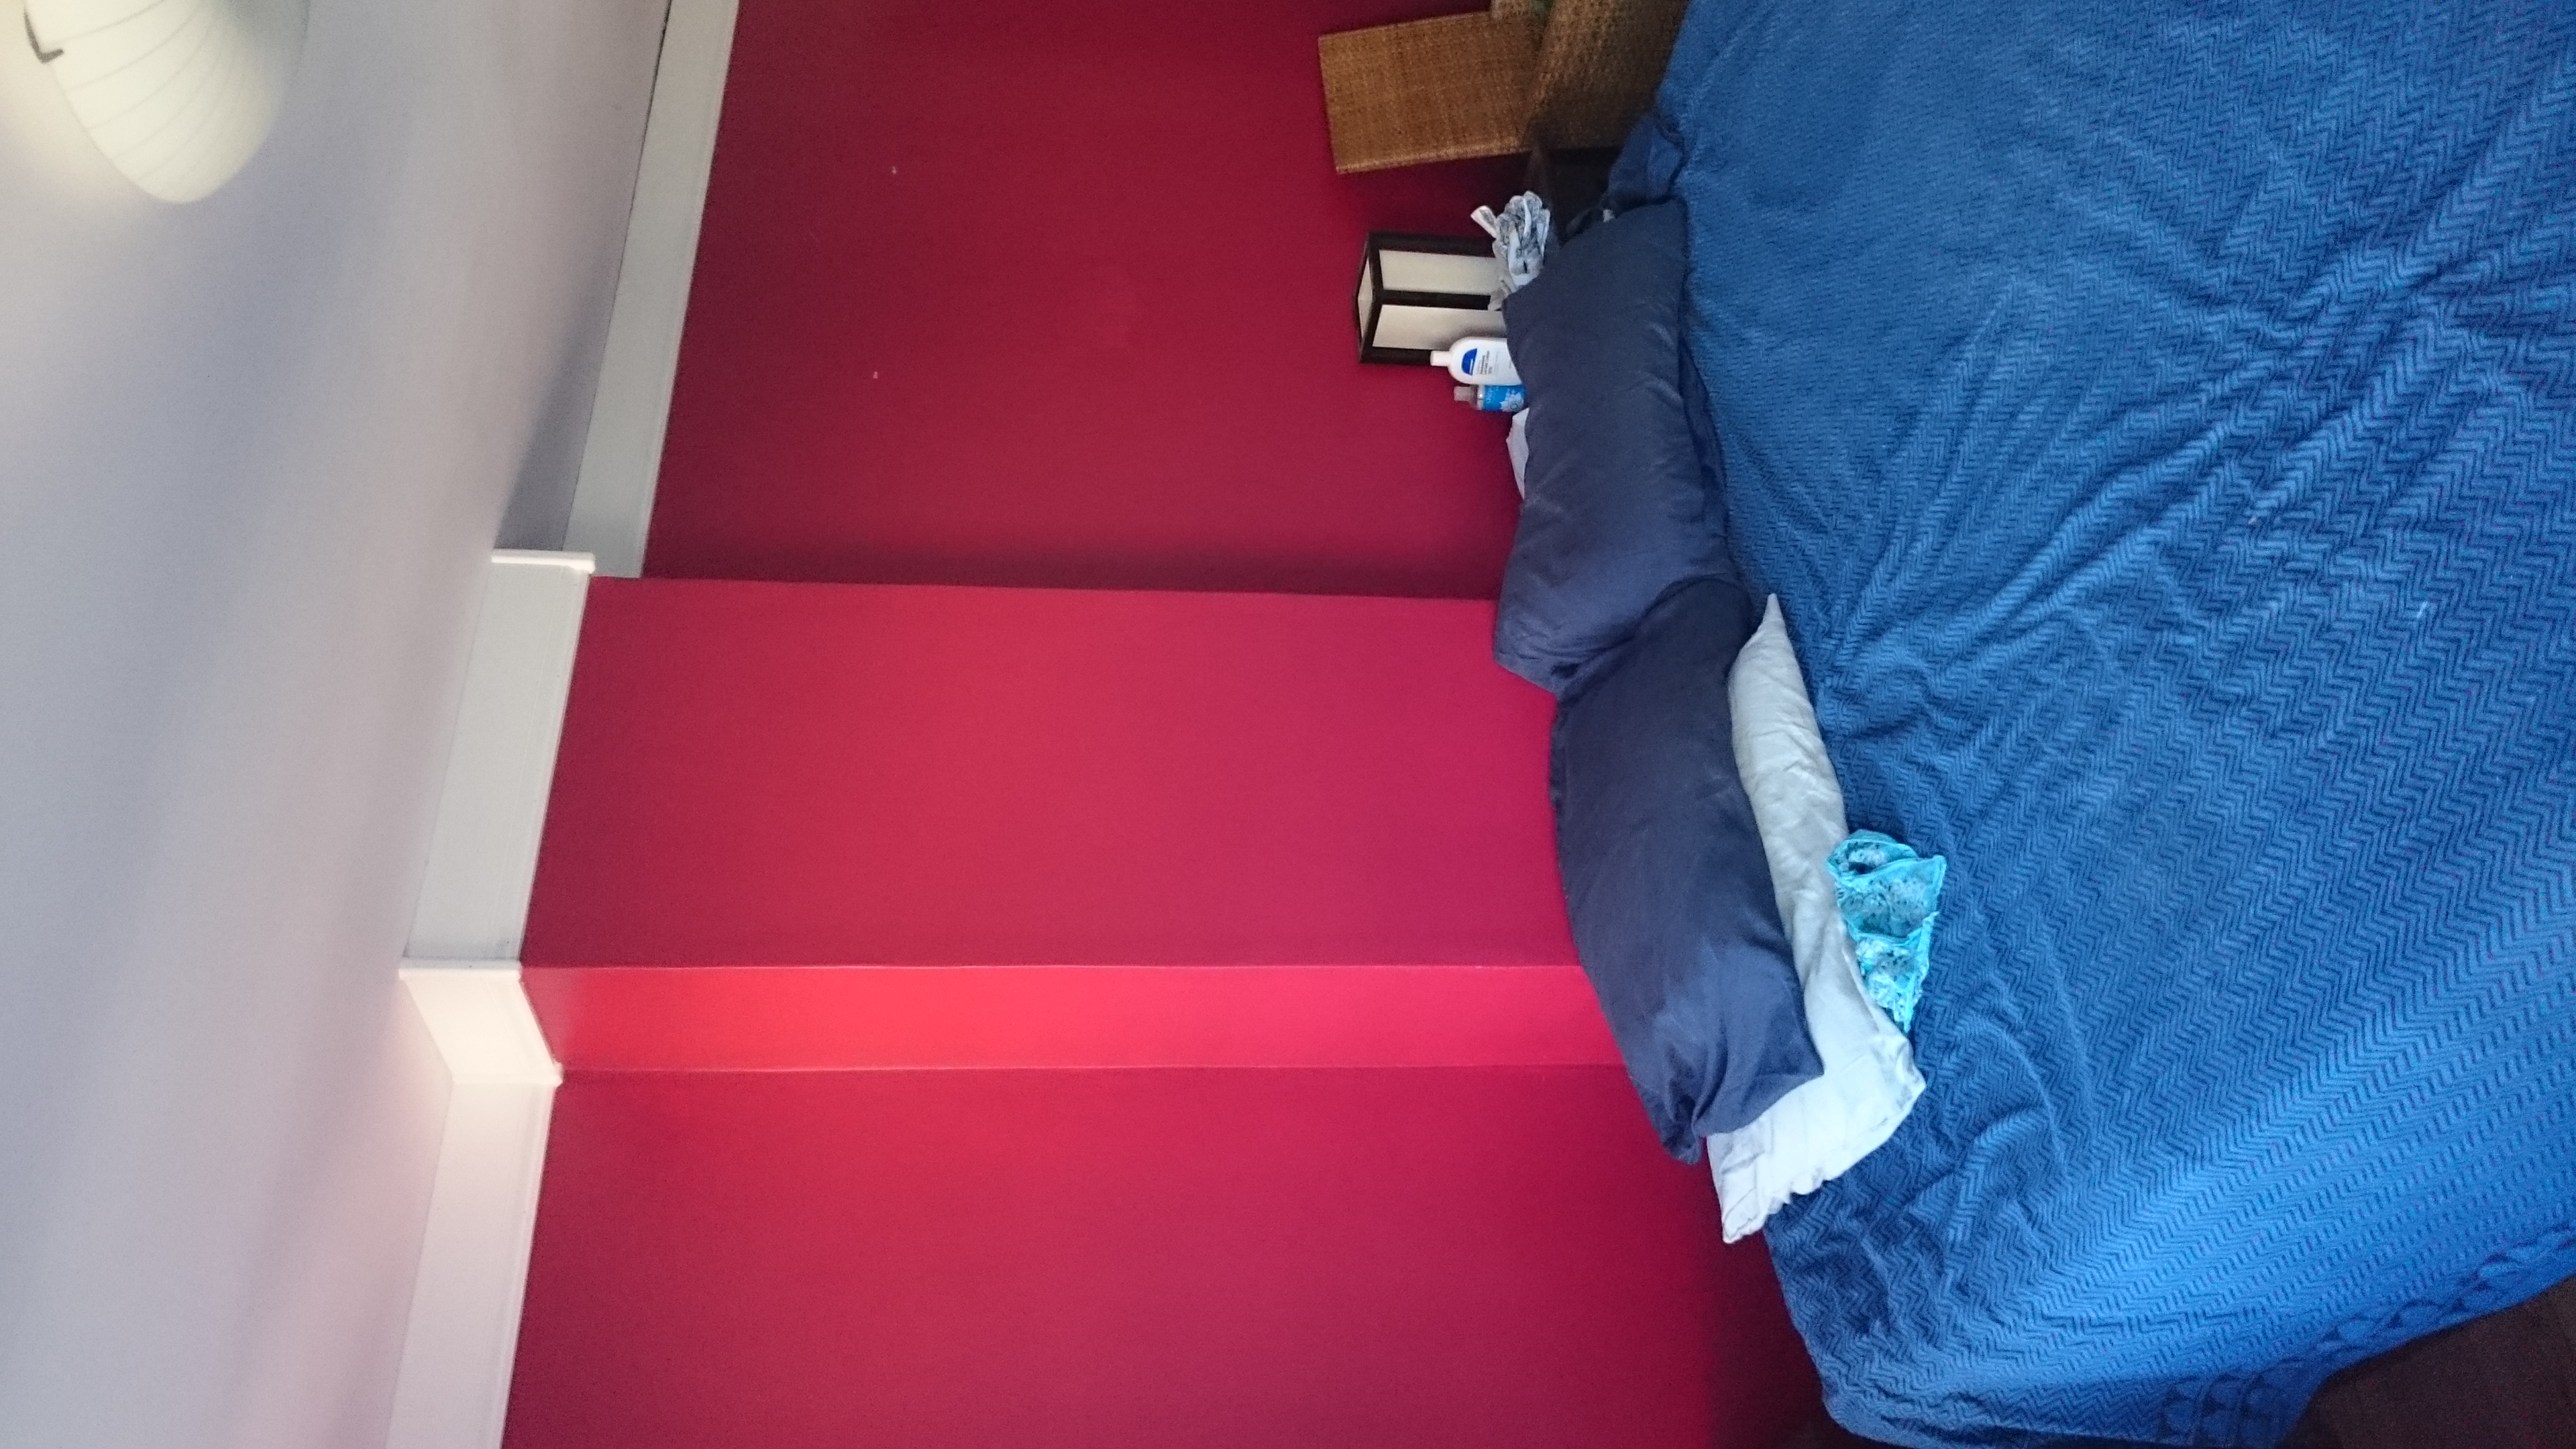
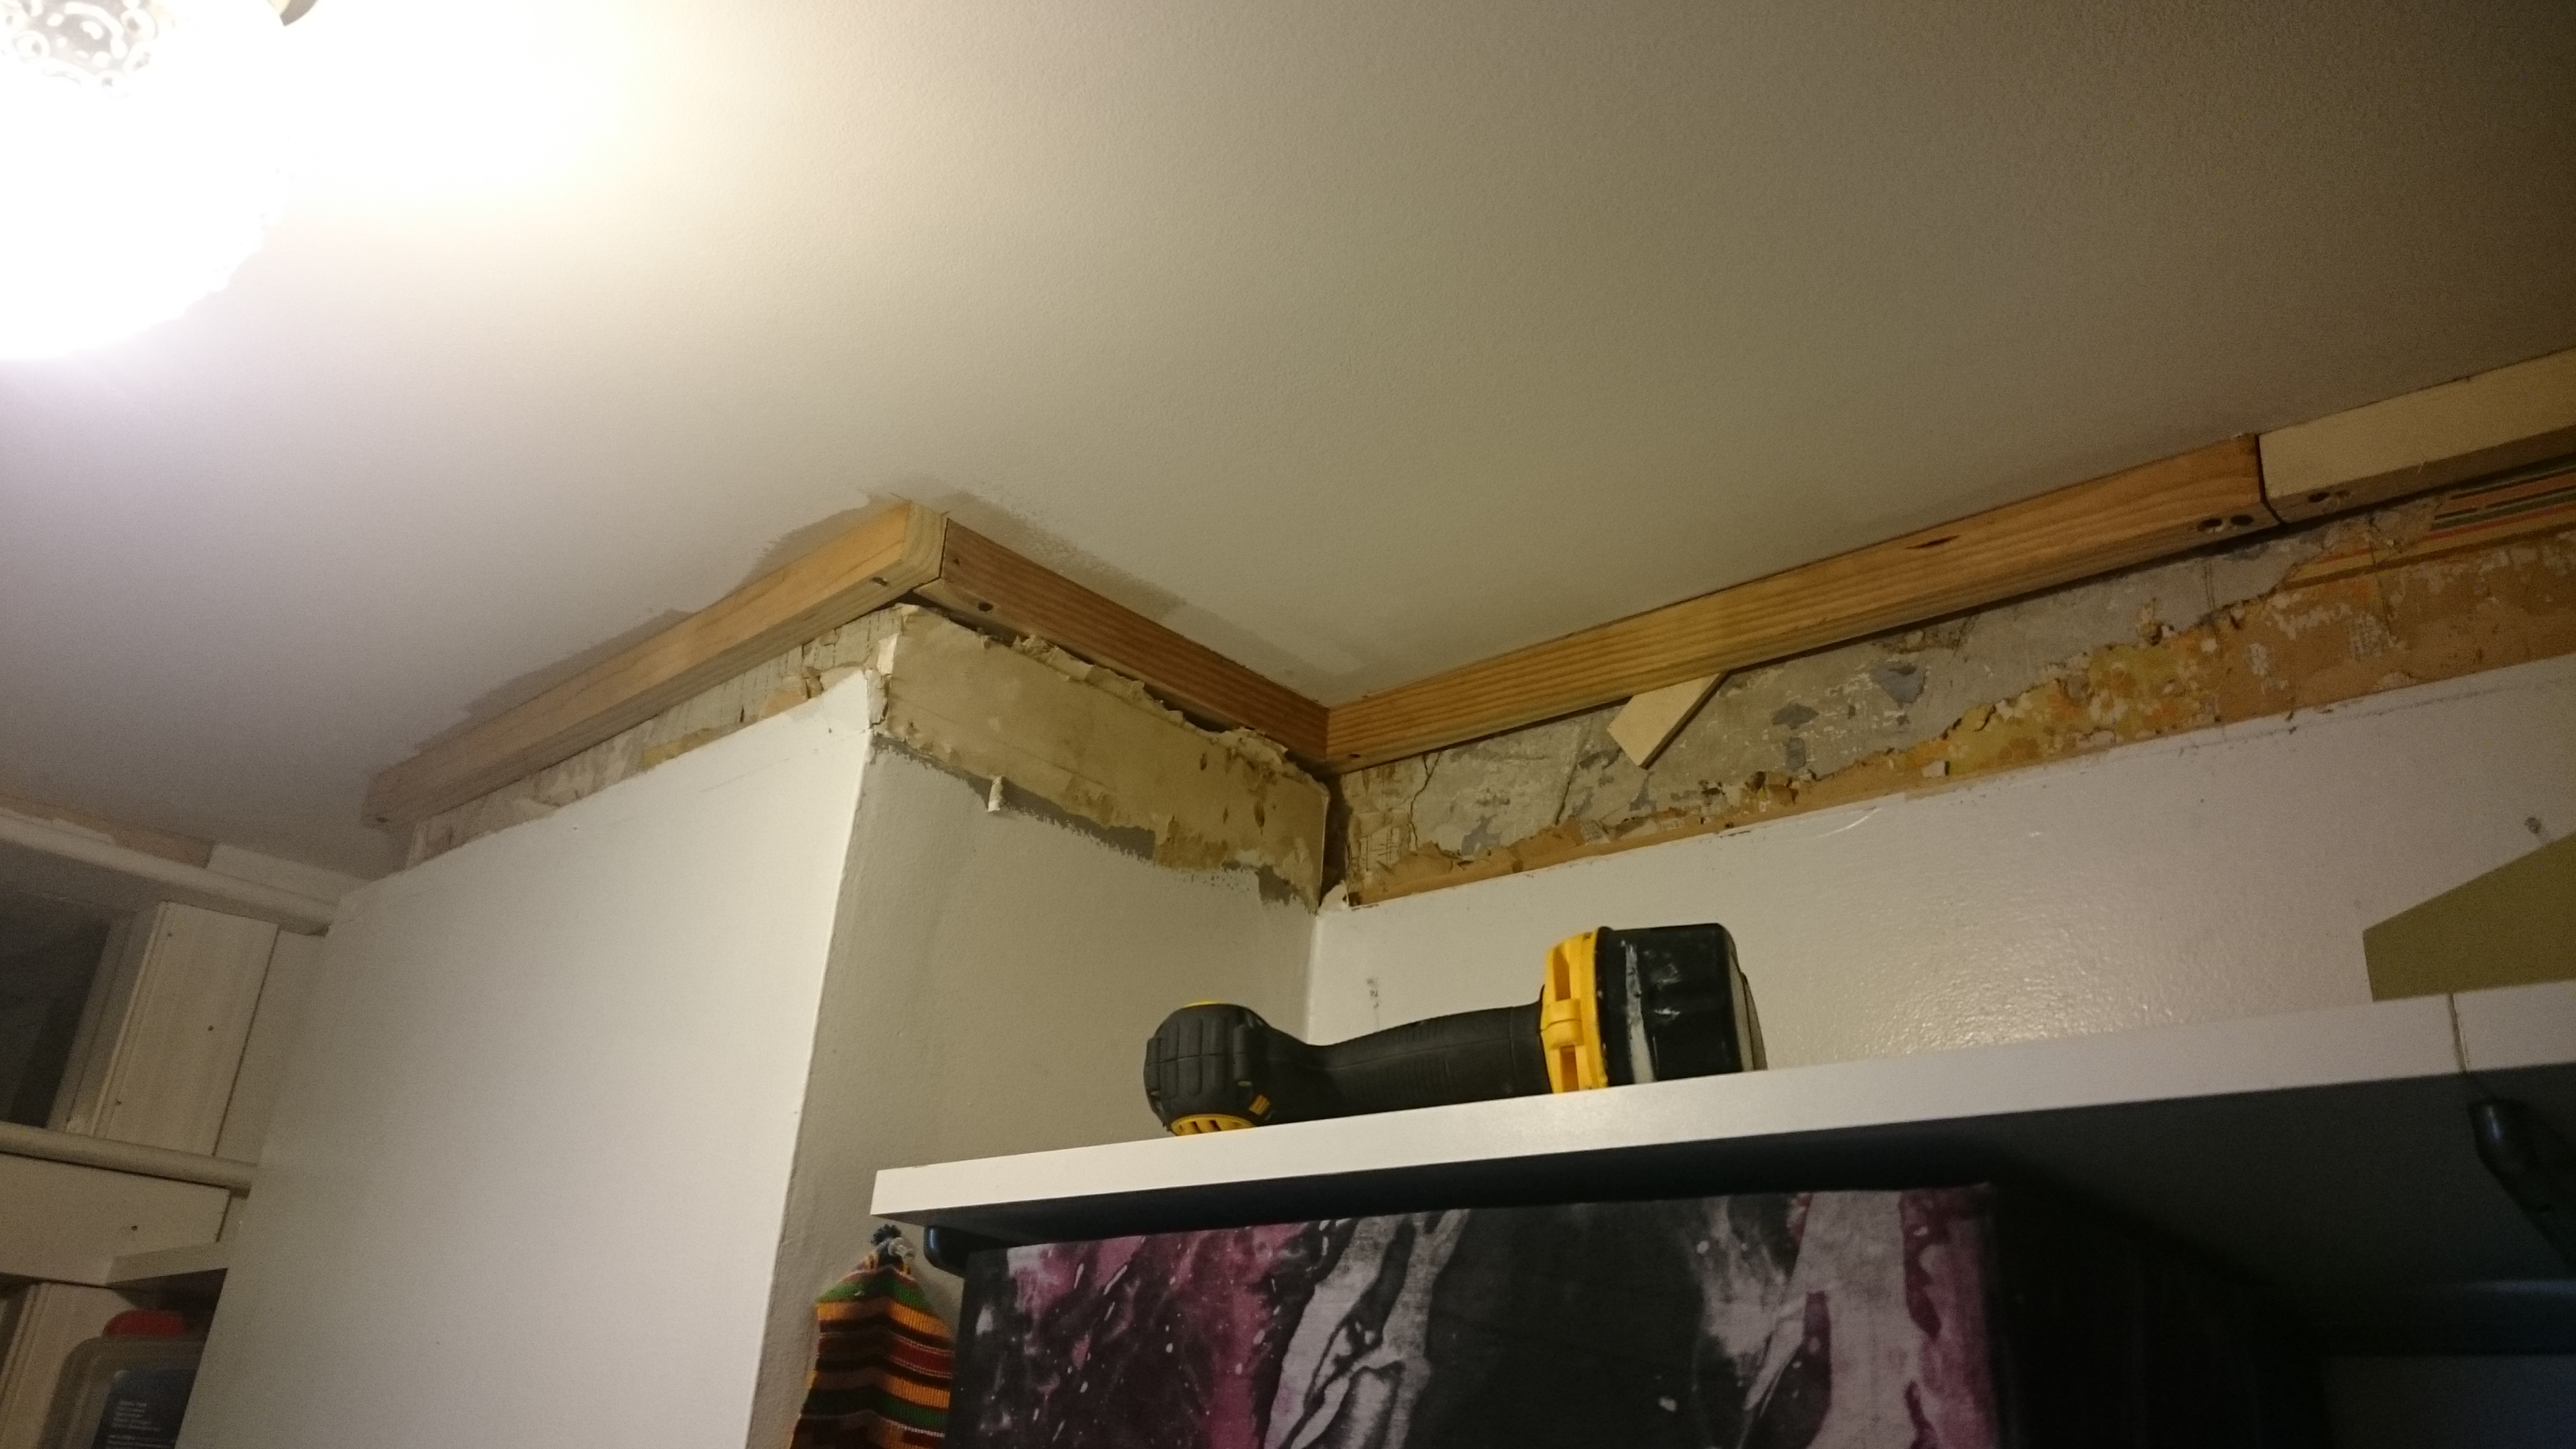
We bought our base boards for doing trim in the fall the same day we had the truck for getting the steel and joists used on the stairs. They’ve sat in the shack since them until I could catch up on some things. Finally that day has come. Having painted boards little by little over the last few weeks, and making some little corner pieces, I was all ready to go. My brother came over and brought his trim nailer, chop saw and air compressor. Six hours later we finished the trim in the bedroom.
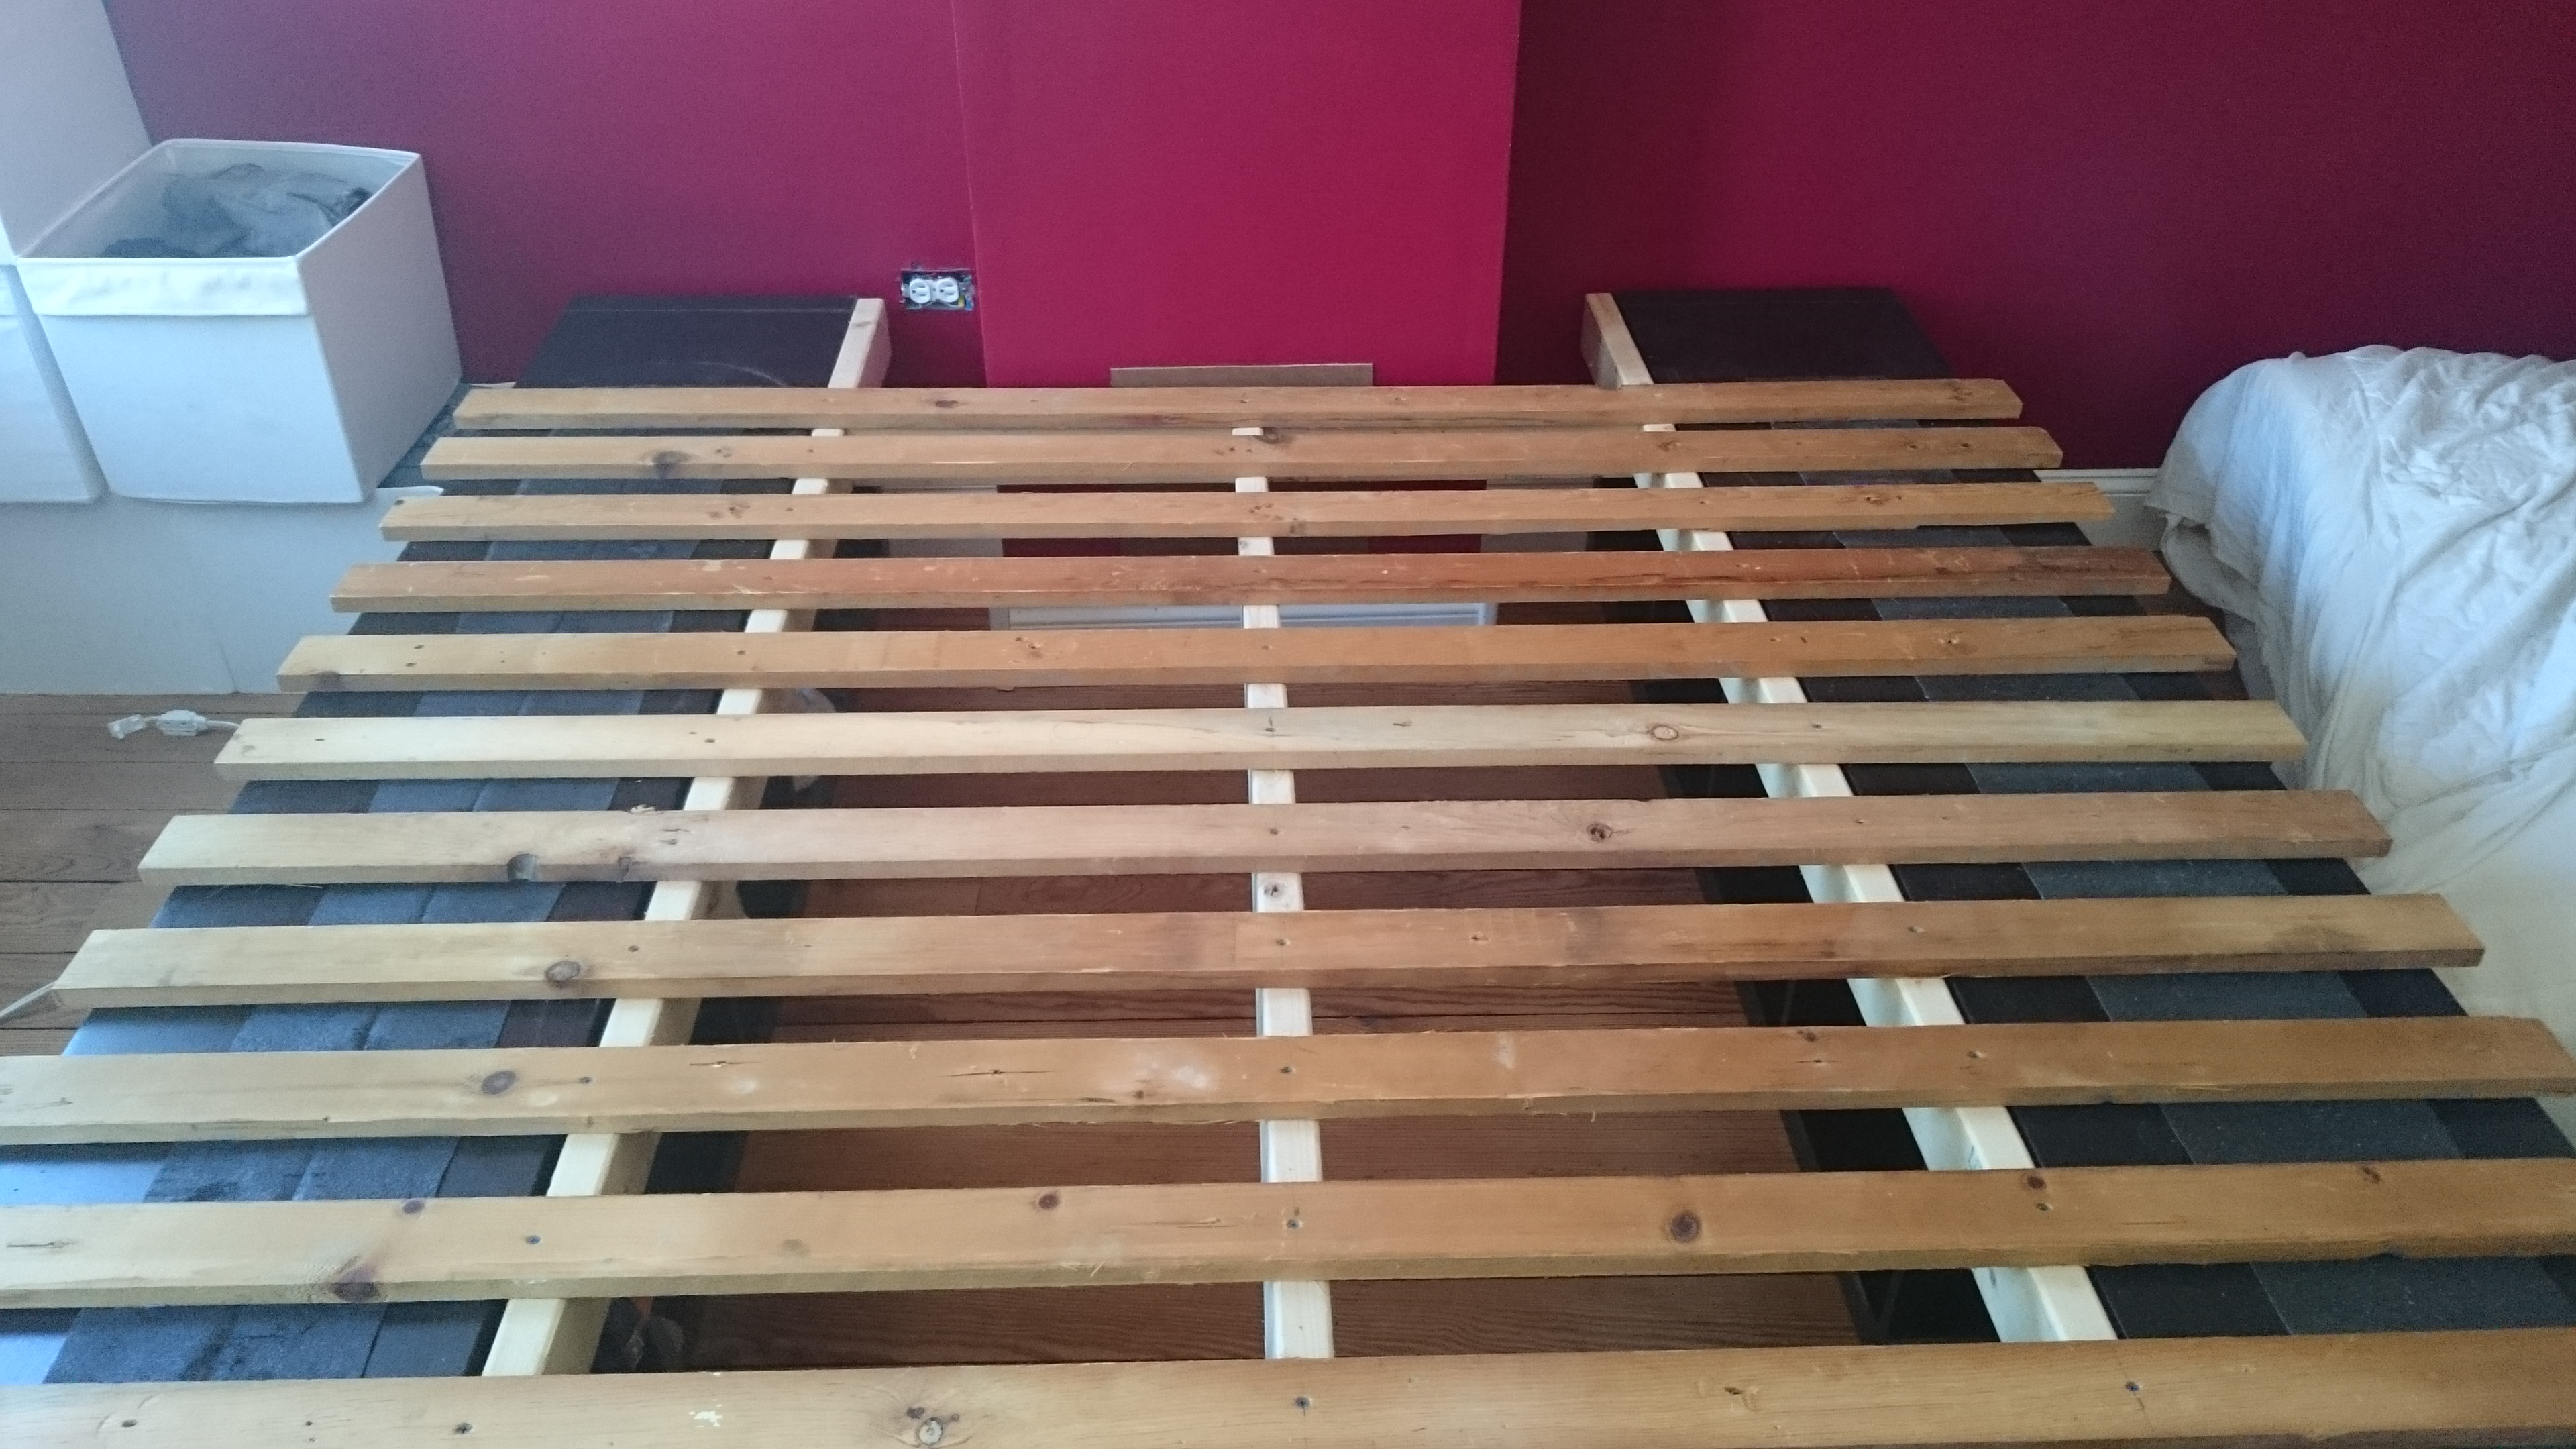
With the trim done I could finally move the bed across the room. This was a bed we built out of IKEA shelves and leftover strips of wood we tore out of the 1st floor ceiling. Previously it was against the end unit wall and got really cold in the winter.
Also, it was opposite was the chimney which meant that I had all of 12 inches to squeeze past every night leading to many bruised knees. Moving it across the room lets use wrap it around the chimney a few inches giving me 24″ at the end of the bed to maneuver.
Over the next few days I added trim in the kitchen, hallway and living room. Eventually I had to return the air tools and could take a break from the madness for a few months. It was until September that I got a chance to finish up the front of the living room.
<ADD TONIGHT!>
This seems like a short, maybe insignificant post, but this is HUGE for us. We’ve stared at the gaps between the walls and the ceilings for nearly 3 years. It was obviously something we could live with, but it was obvious and sloppy to anyone who visited.
Siri and I met through Couchsurfing (happy hours) in DC. Hosting guests has been an important part of our lives before and since. When we bought a house, we knew we needed a guest room to host CSers as well as friends and family. We were its first guests moving into the 3rd floor outside of Iris’s room as we finished the 2nd and 1st floors below.
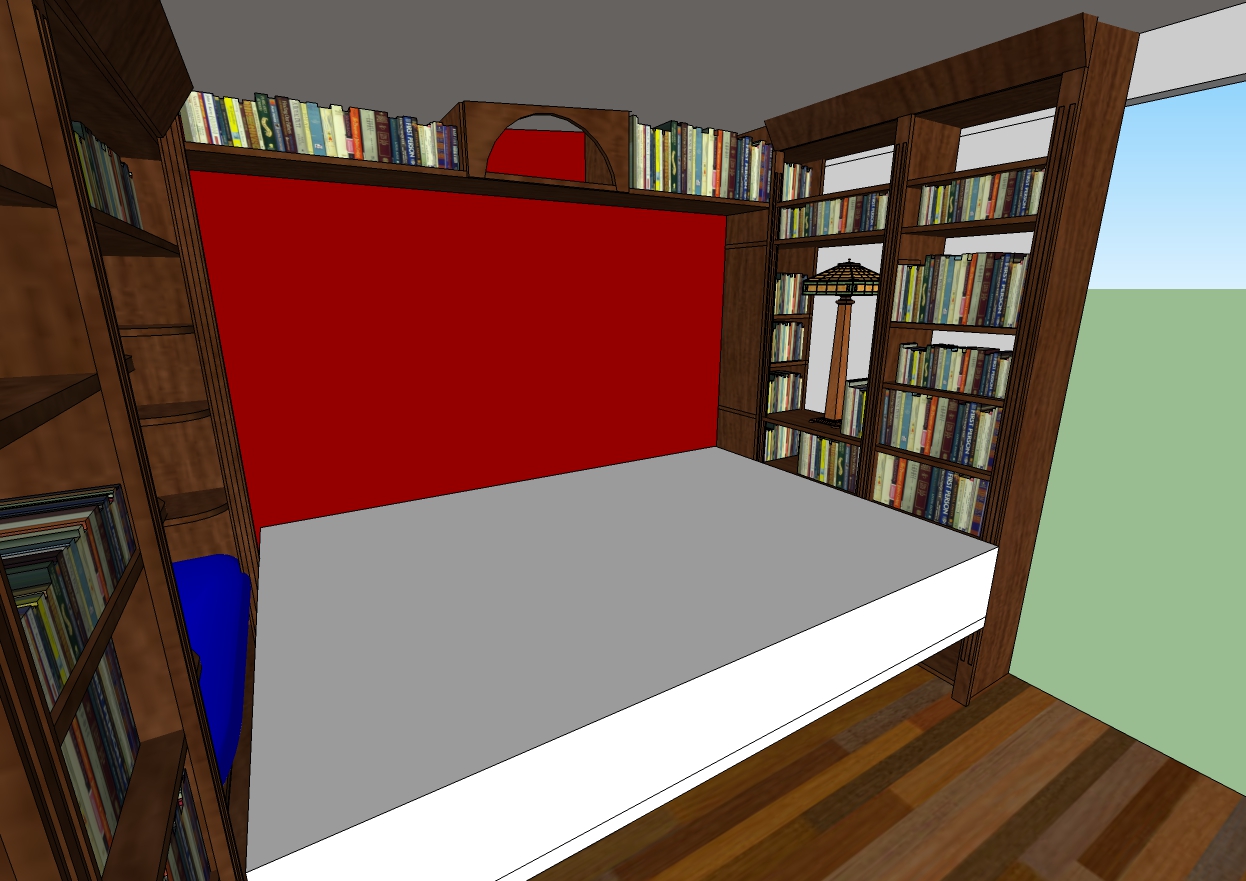
With so little square footage, we needed it to be a flexible space as well. The idea was and old style study / library. The shelves will store our books about travelling, oddities collected while travelling, and Baltimore history books for guests to learn about our city. There will also be a huge map of the world which will fold down, revealing a full size mattress for guests. Everything you need for your adventures.
We’ve been storing 4×8 sheets of furniture grade plywood in the shack for months. Part of spring cleaning was to put it to use and get this room built. It’s not cheap though. About $50 per sheet and I didn’t want to ruin any making up my mind. As usual, its time for Sketchup:
It looks like everything should be about 12″ deep in order to fit the mattress in between with a few inches to spare. This should also save on materials as well as a 4×8′ sheet cuts in to 12″ sheets very efficiently.
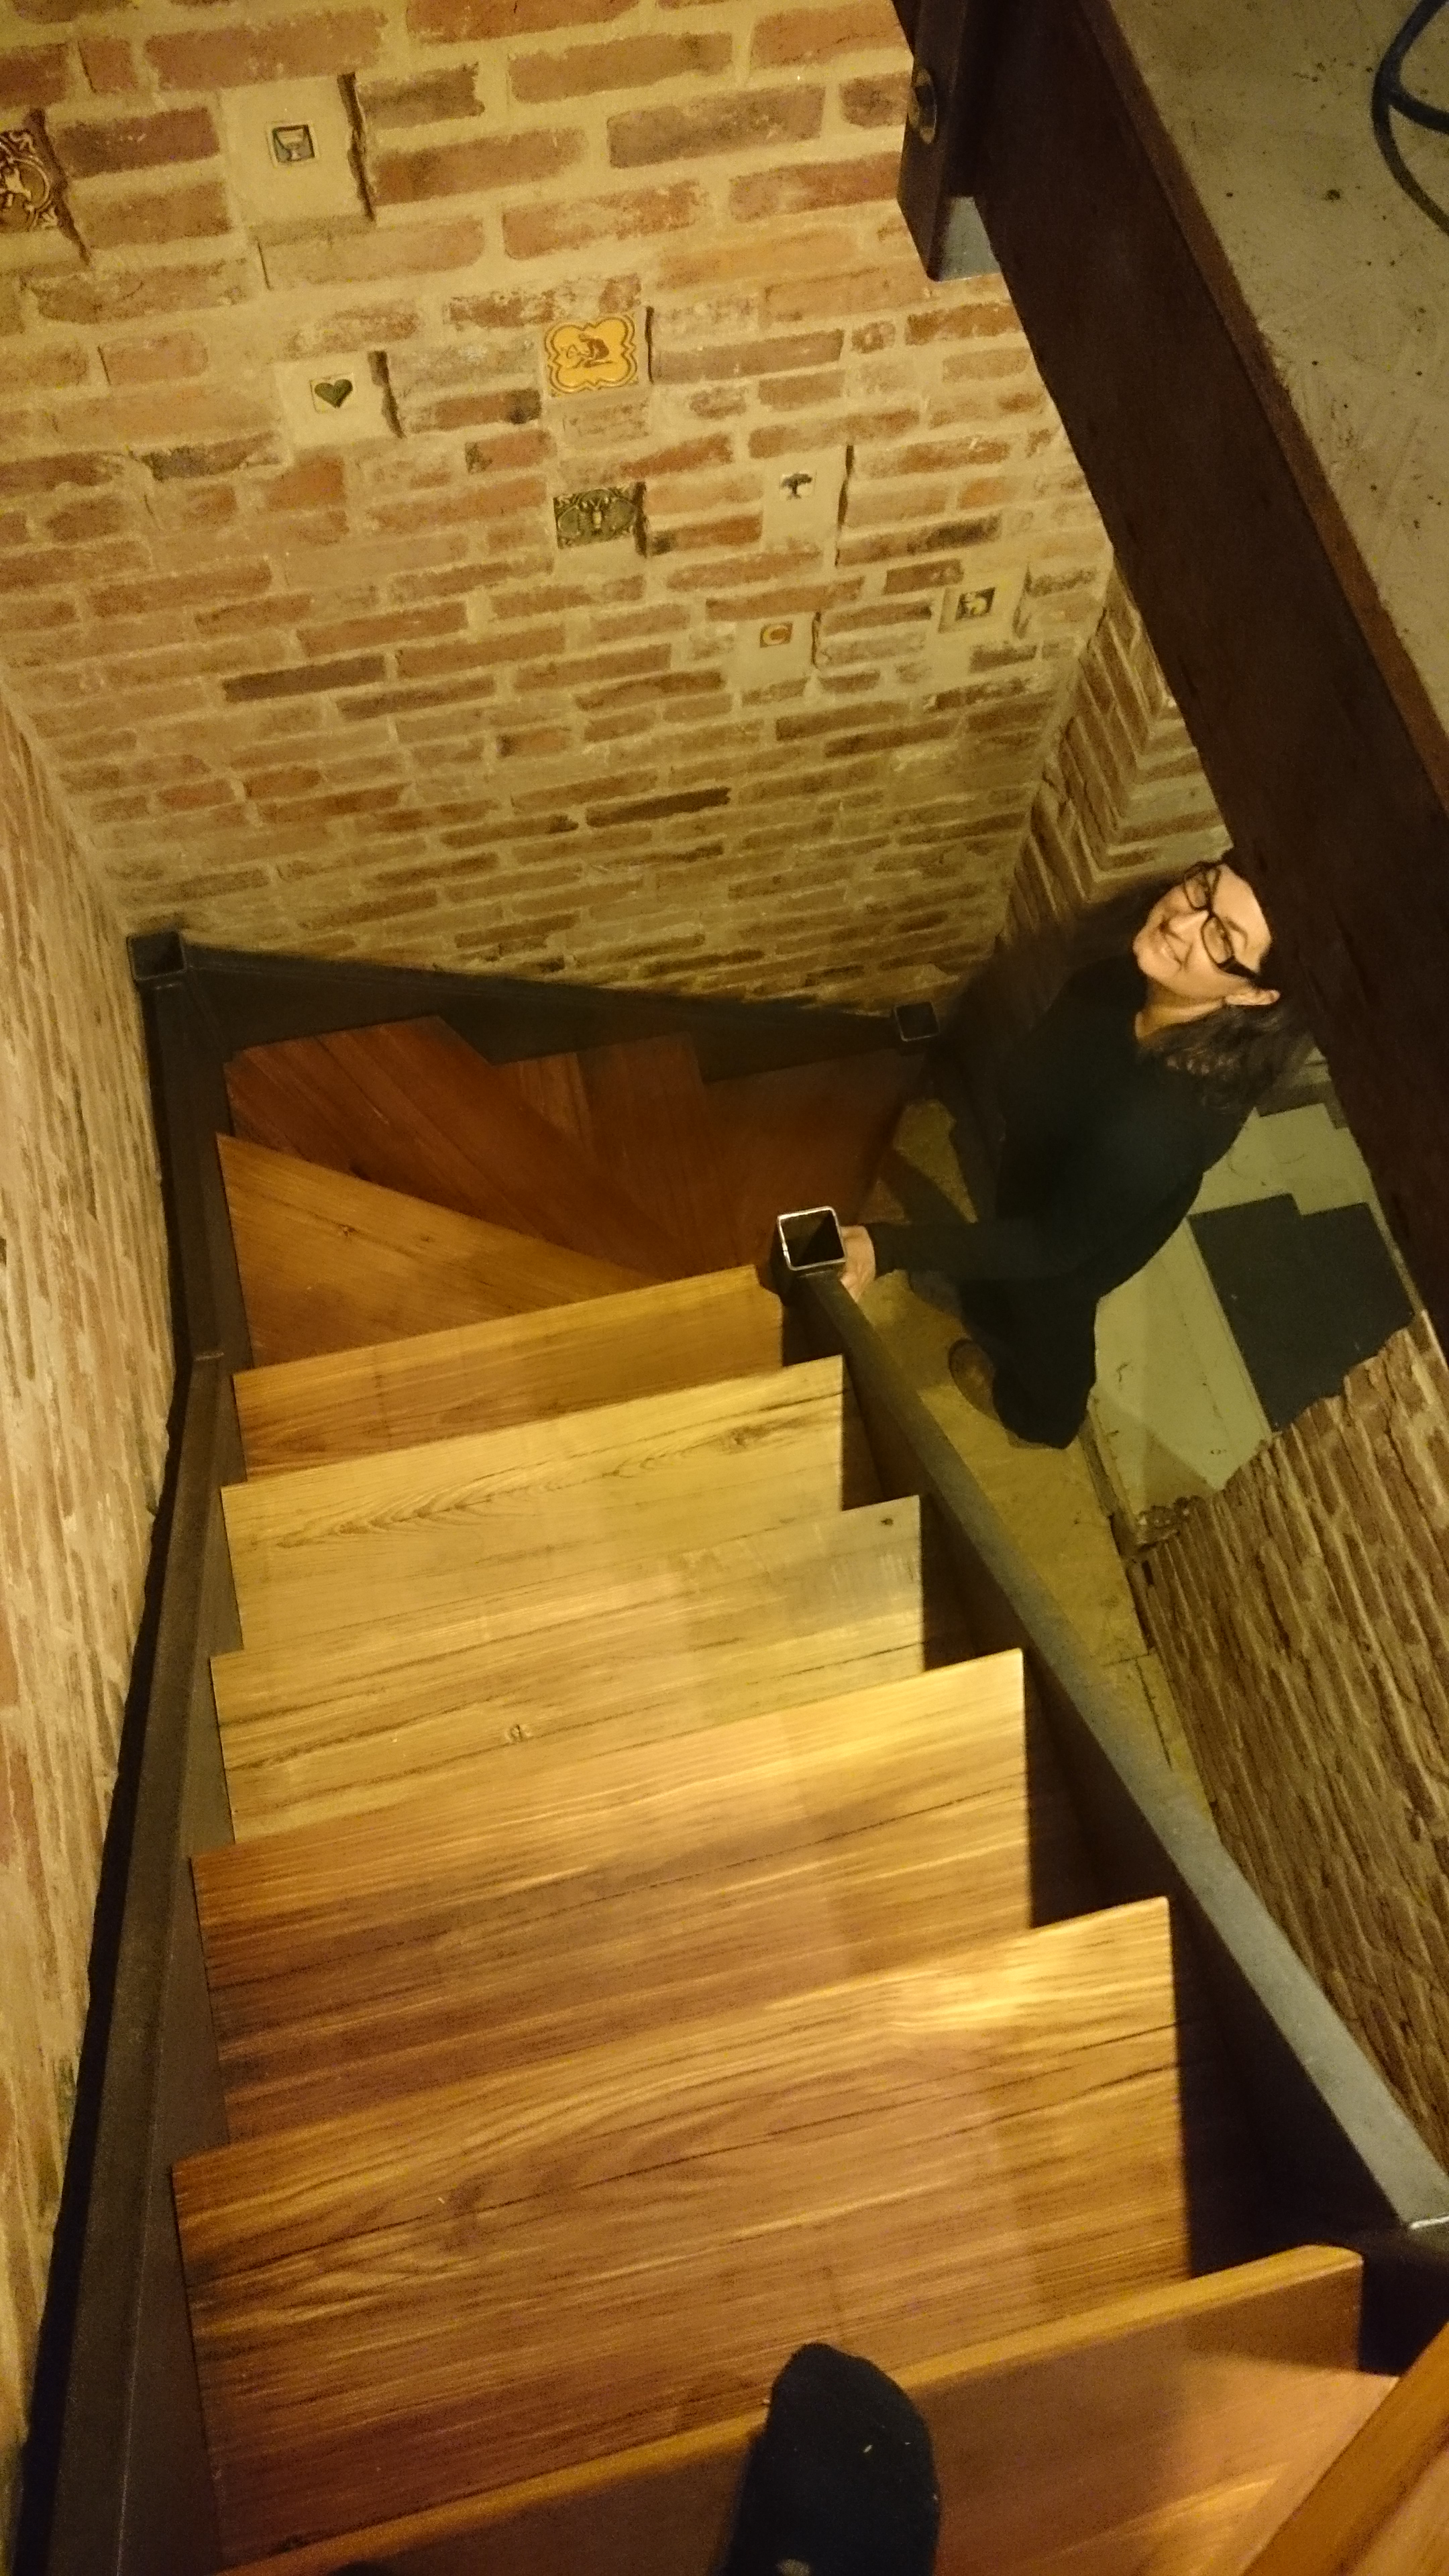
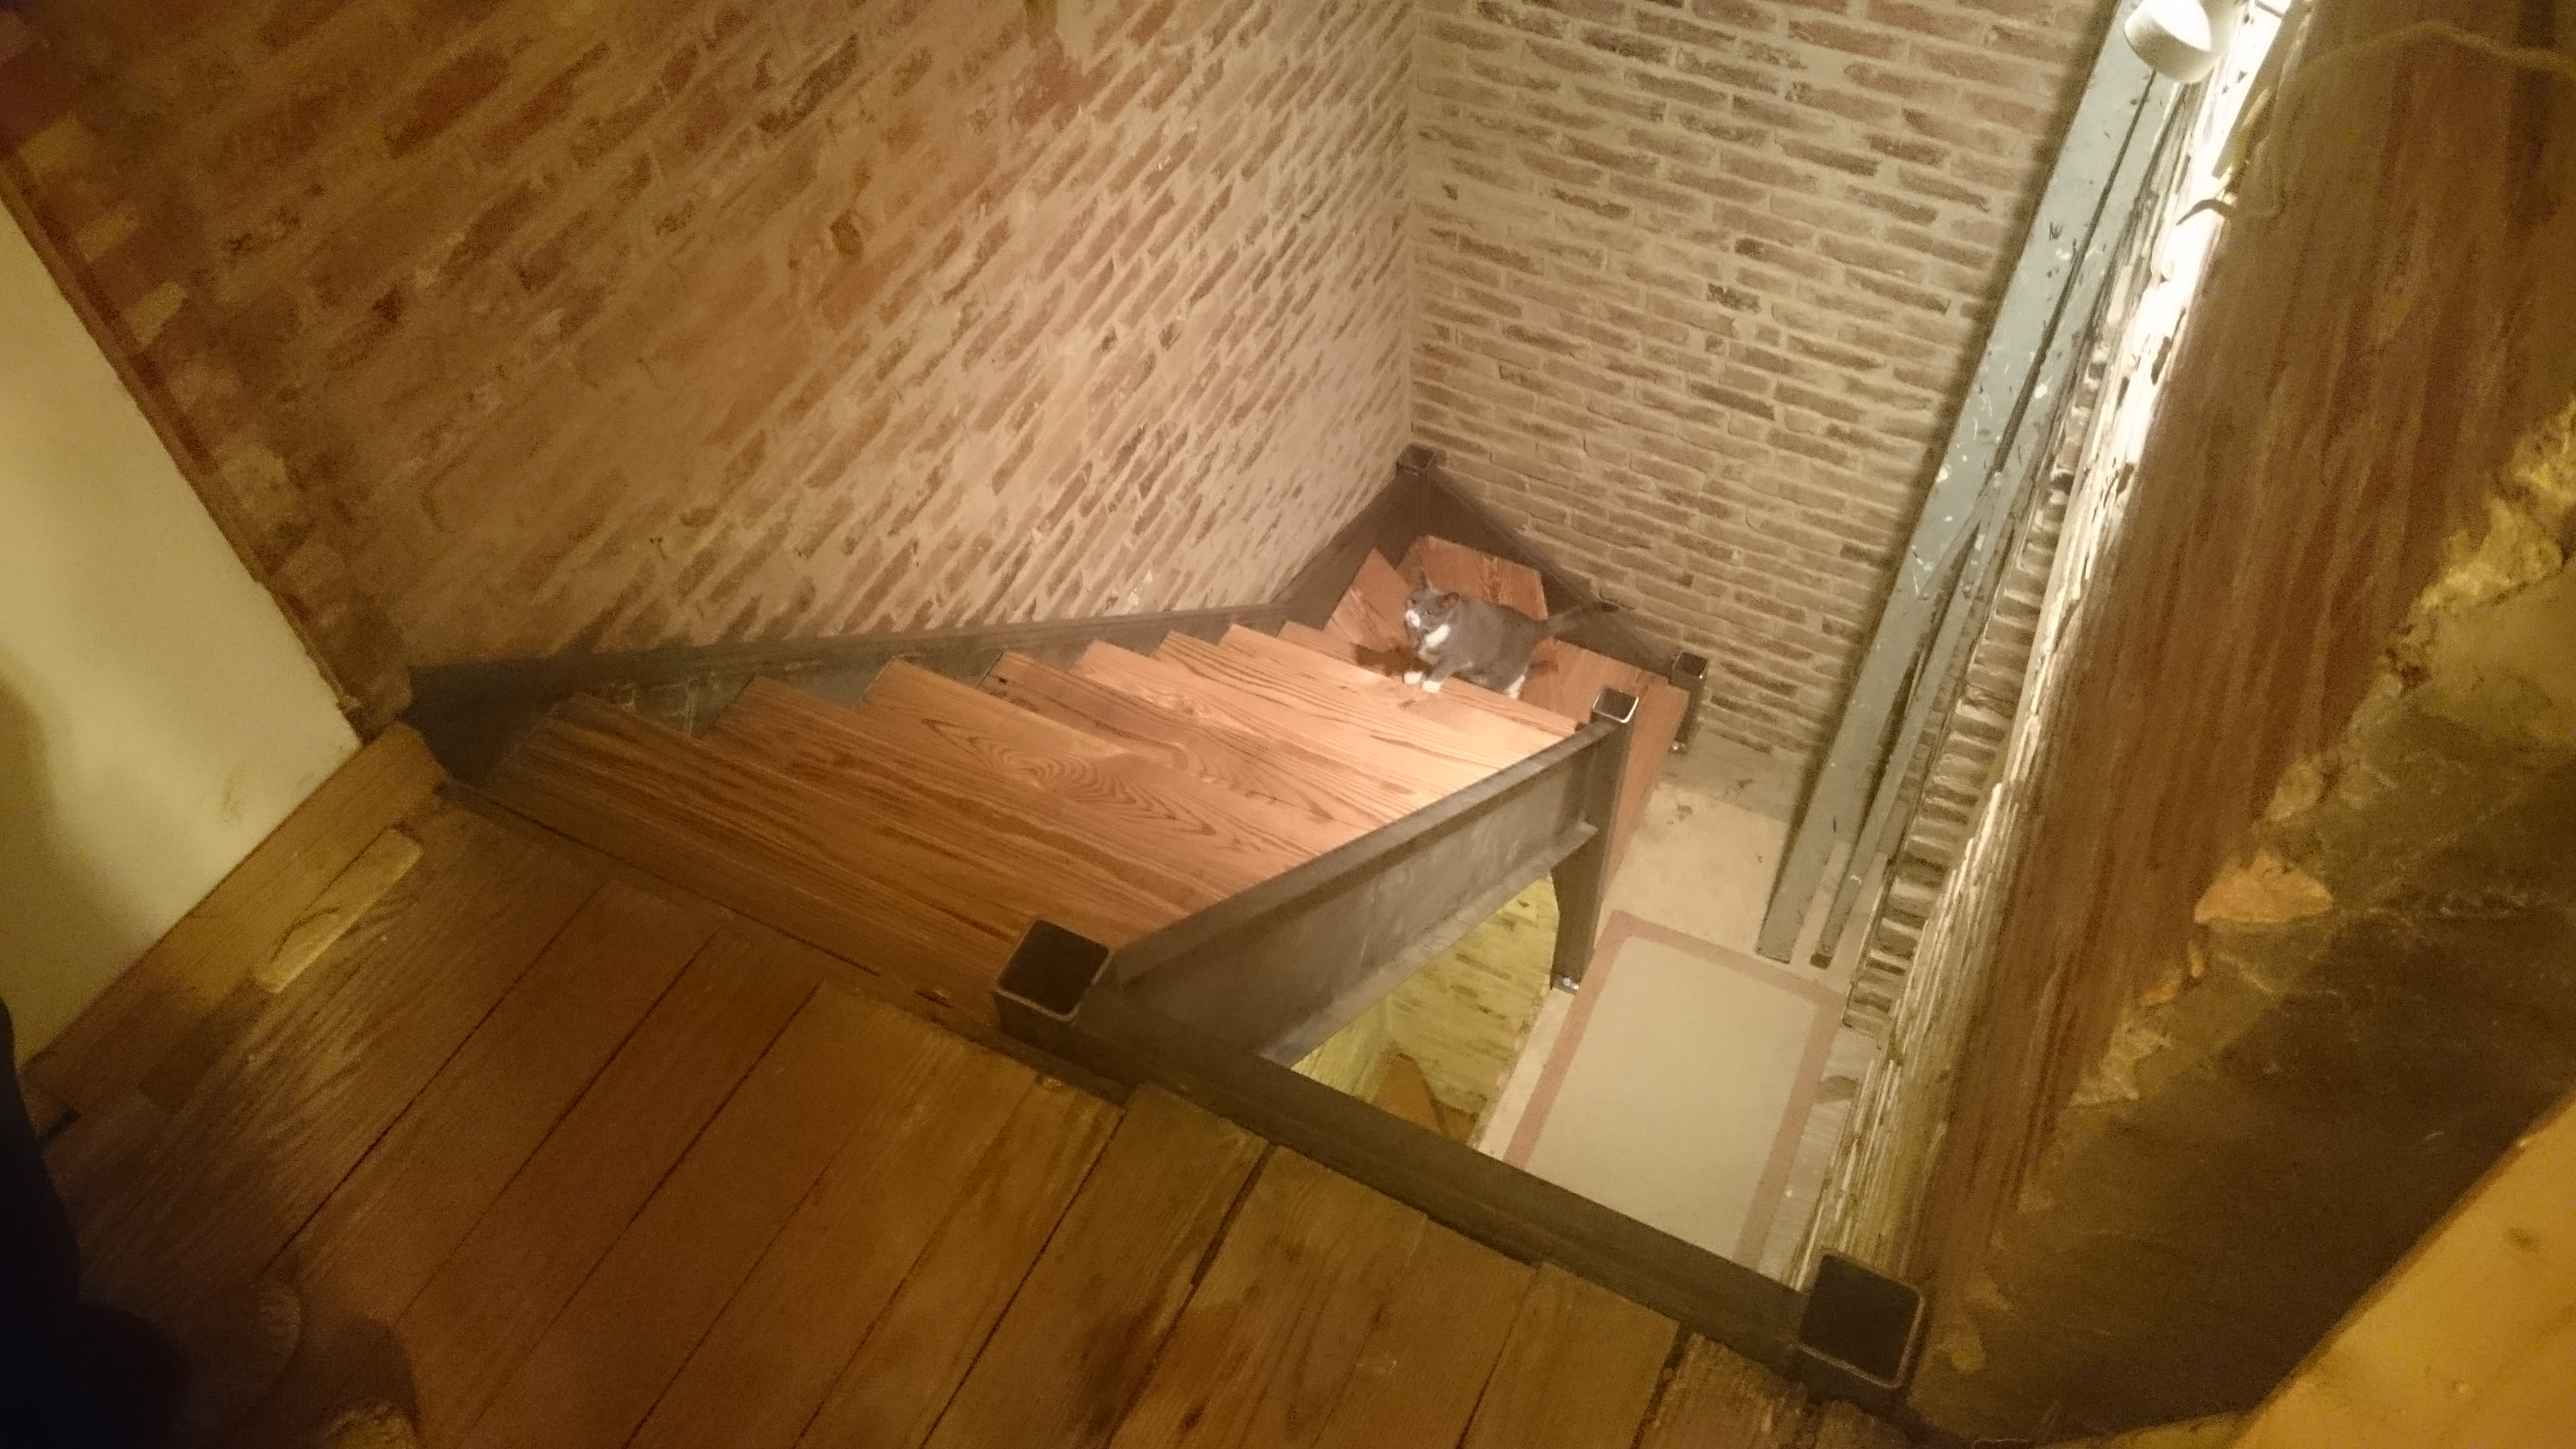
With the help of the wonderful Casey and Alana we had gotten the top 3 curved treads and the 5 straight treads up several weeks ago after a marathon 12 hour day of working on them. After that we came to a stand still; we were out of joists to make more stairs.
Siri and I picked 15 feet of joists from our friend Adam. After a quick planing, I marked them out in pencil in the basement to maximize every inch. My goal was to build them while Siri was away in Seattle for a week. I had a friend Julia come help me cut the boards. Over the next few days I glued, bolted and clamped them together, and then sanded them. I finally got them in about a week after Siri got home. Finally we can go all the way up and down without a ladder / stools.
Glamour shots will need to be taken to do these justice. They look so good.
Emi inspects the stairs for code violations.
To really be done we need to get some railings. We don’t really miss them though since we never had them to begin with. Maybe something else for a few weeks though…
Saying goodbye to the old stairs was hard / not hard. Like the set above them they had been repaired far too many times and way too poorly. Look at all these bandaids. There was even a dab of caulk holding this together.
There was certainly some craftsmanship involved with these tight double winder stairs though. Once most of the repairs were removed, you could see a bit of elegance in how they were built. Harder to see is the wear and tear on the risers. How many feet needed to climb this staircase in the last 150 years to wear down spots in them?
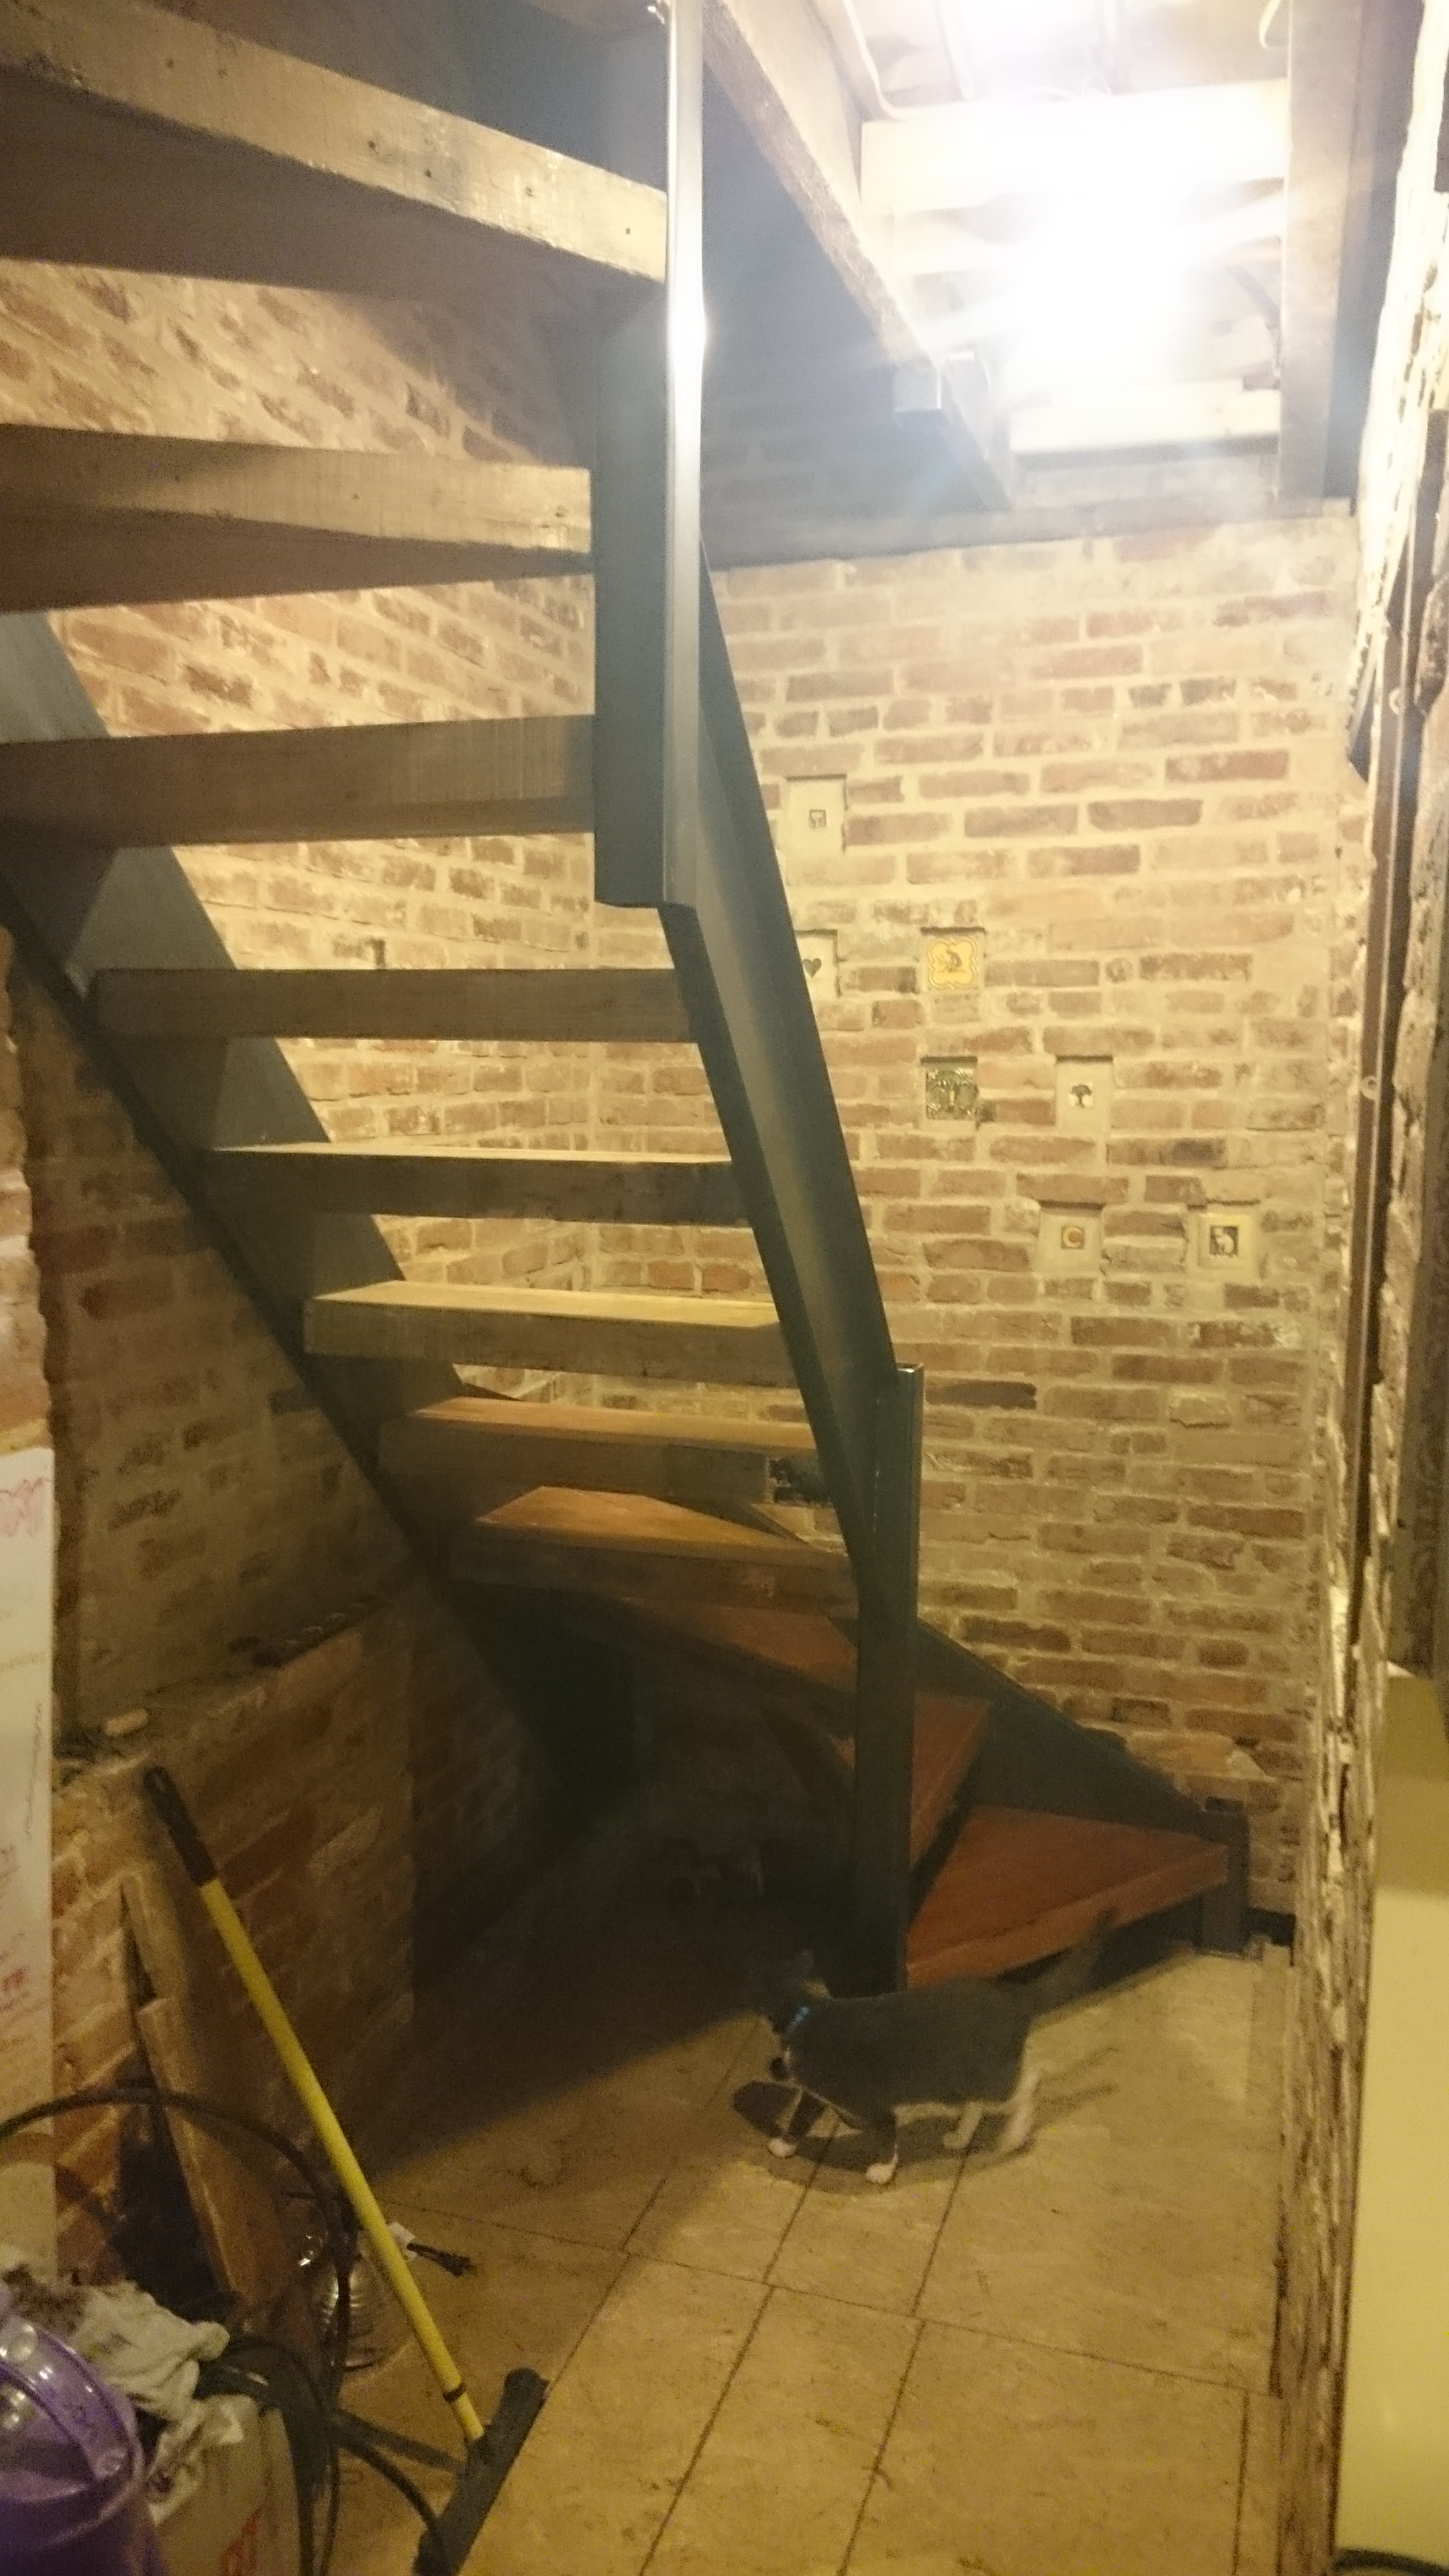
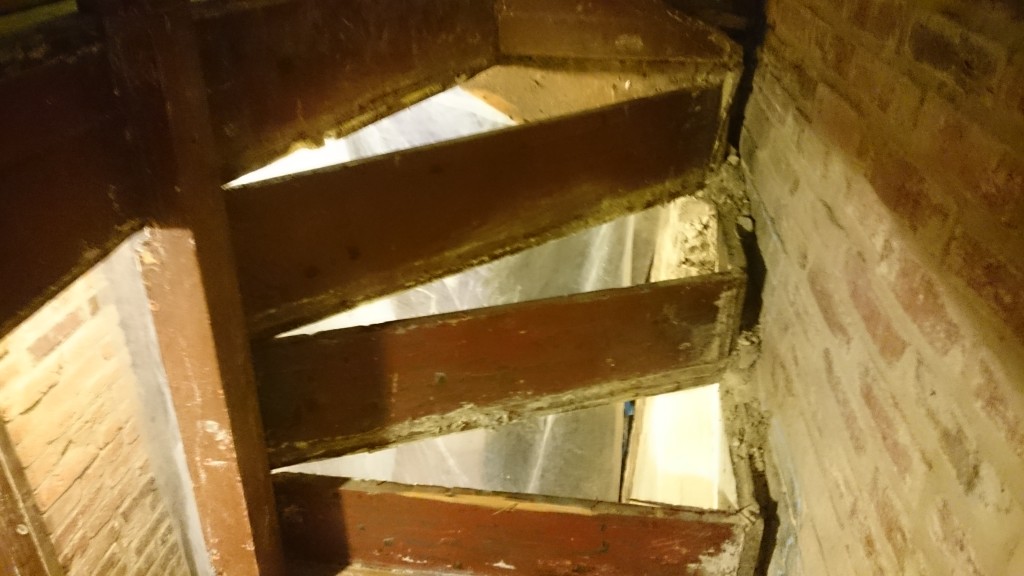
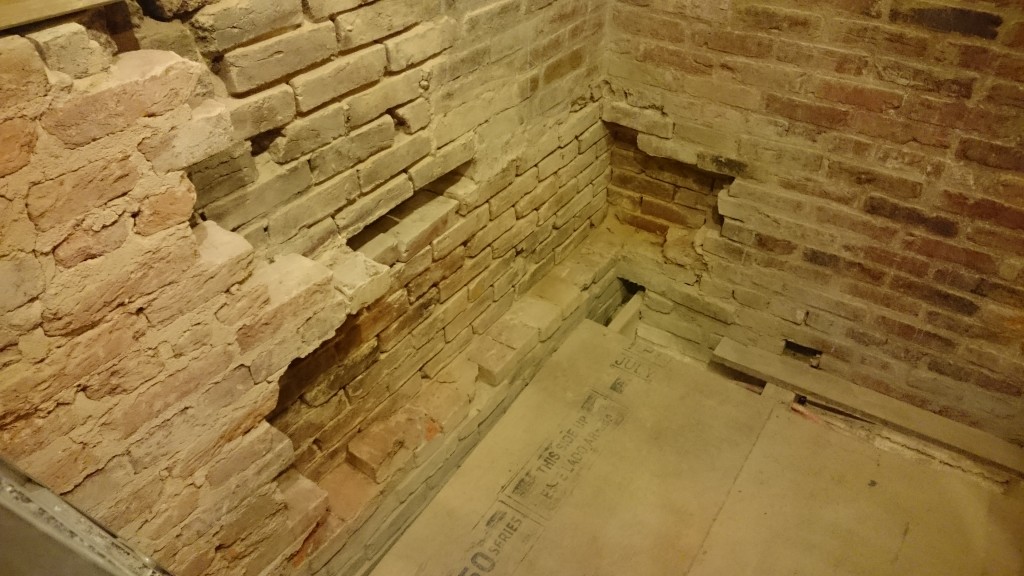
Yet, out they had to come, because, like before, there were bricks to be done. This section was where we would show guests the need for all the pointing by pulling bricks right out of the wall.
Before
Once its cleaned up though, it looks pretty good. The steps in the bricks are no accident. They’re the size of our Ikea shelves. We’ll be adding 3 under the stairs to the 6 already have along the wall in the kitchen.
After
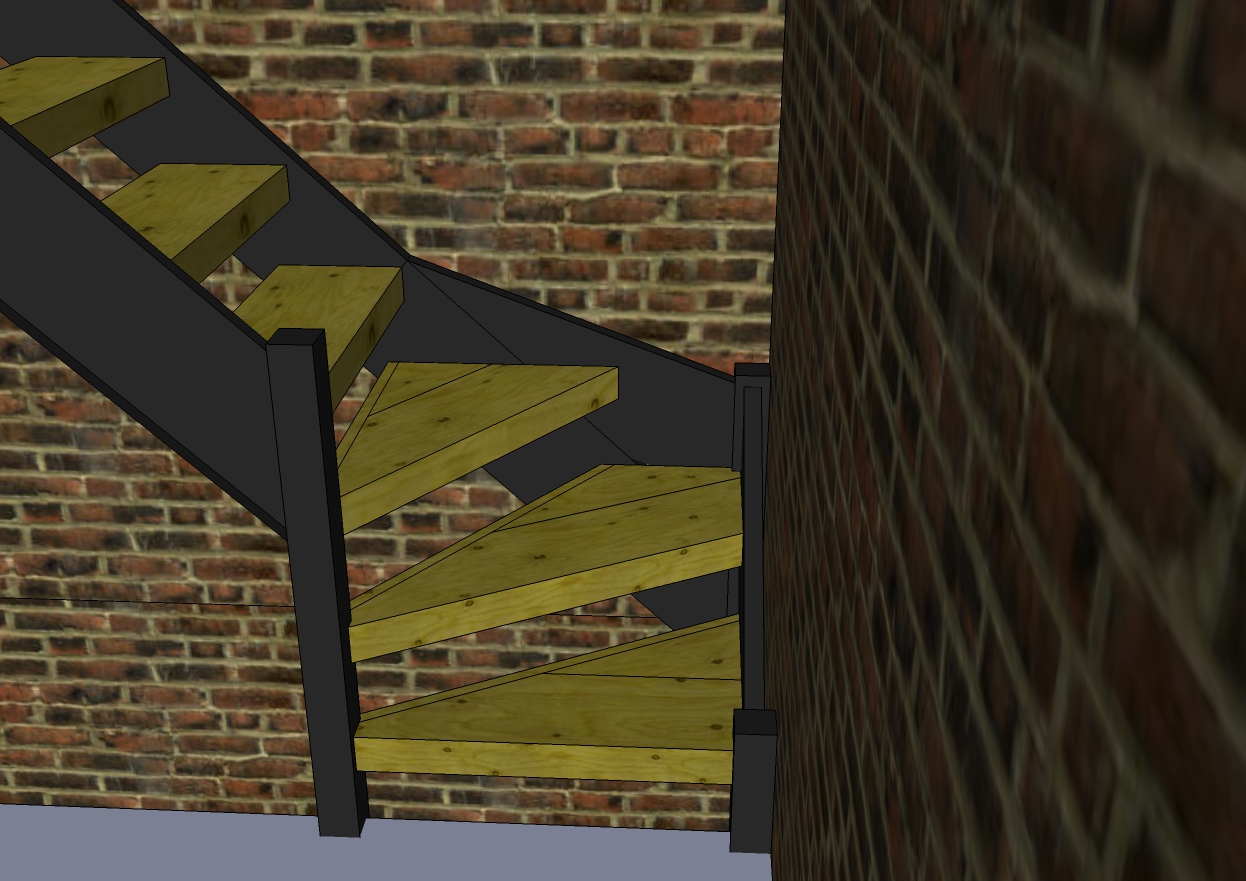
While the top stair had one turn with 3 steps / 90°, the bottom stair case has two turns: the bottom with 4 stairs / 90° and the top with 3 stairs / 66°. Naturally this makes the stairs smaller (22° vs 30°). To correct the bottom, we spread out the bottom 4 stairs from 90° to 120° overall and reduce the top stair which was integrated into the 2nd floor making all the curving stairs 30°. The 5 straight stairs in the center had their run increased from 8″ to 8 5/8″. Not a huge gain, but it will do.
Only a few days in at this point and we already done with the steel. This is quite different than the last set. Getting there. Less than a week to go and we can open this nice bottle of champagne that we set aside for when the bricks and stairs are all done.
Miyk tuk te stars down so i iz a first flor cat now. Witowt stars to 2 flor tey hav lader. how doz i clim??? i dont now! so i trapd on 1 flor. and dor to owtsid iz not wurkin. so i trapd insid!! can sumbudy help?????? i want not be trapd! and yes i stil haz houz!!! not orunj cat! me own al!!!!!!!!! ecsept not like bein trapd.
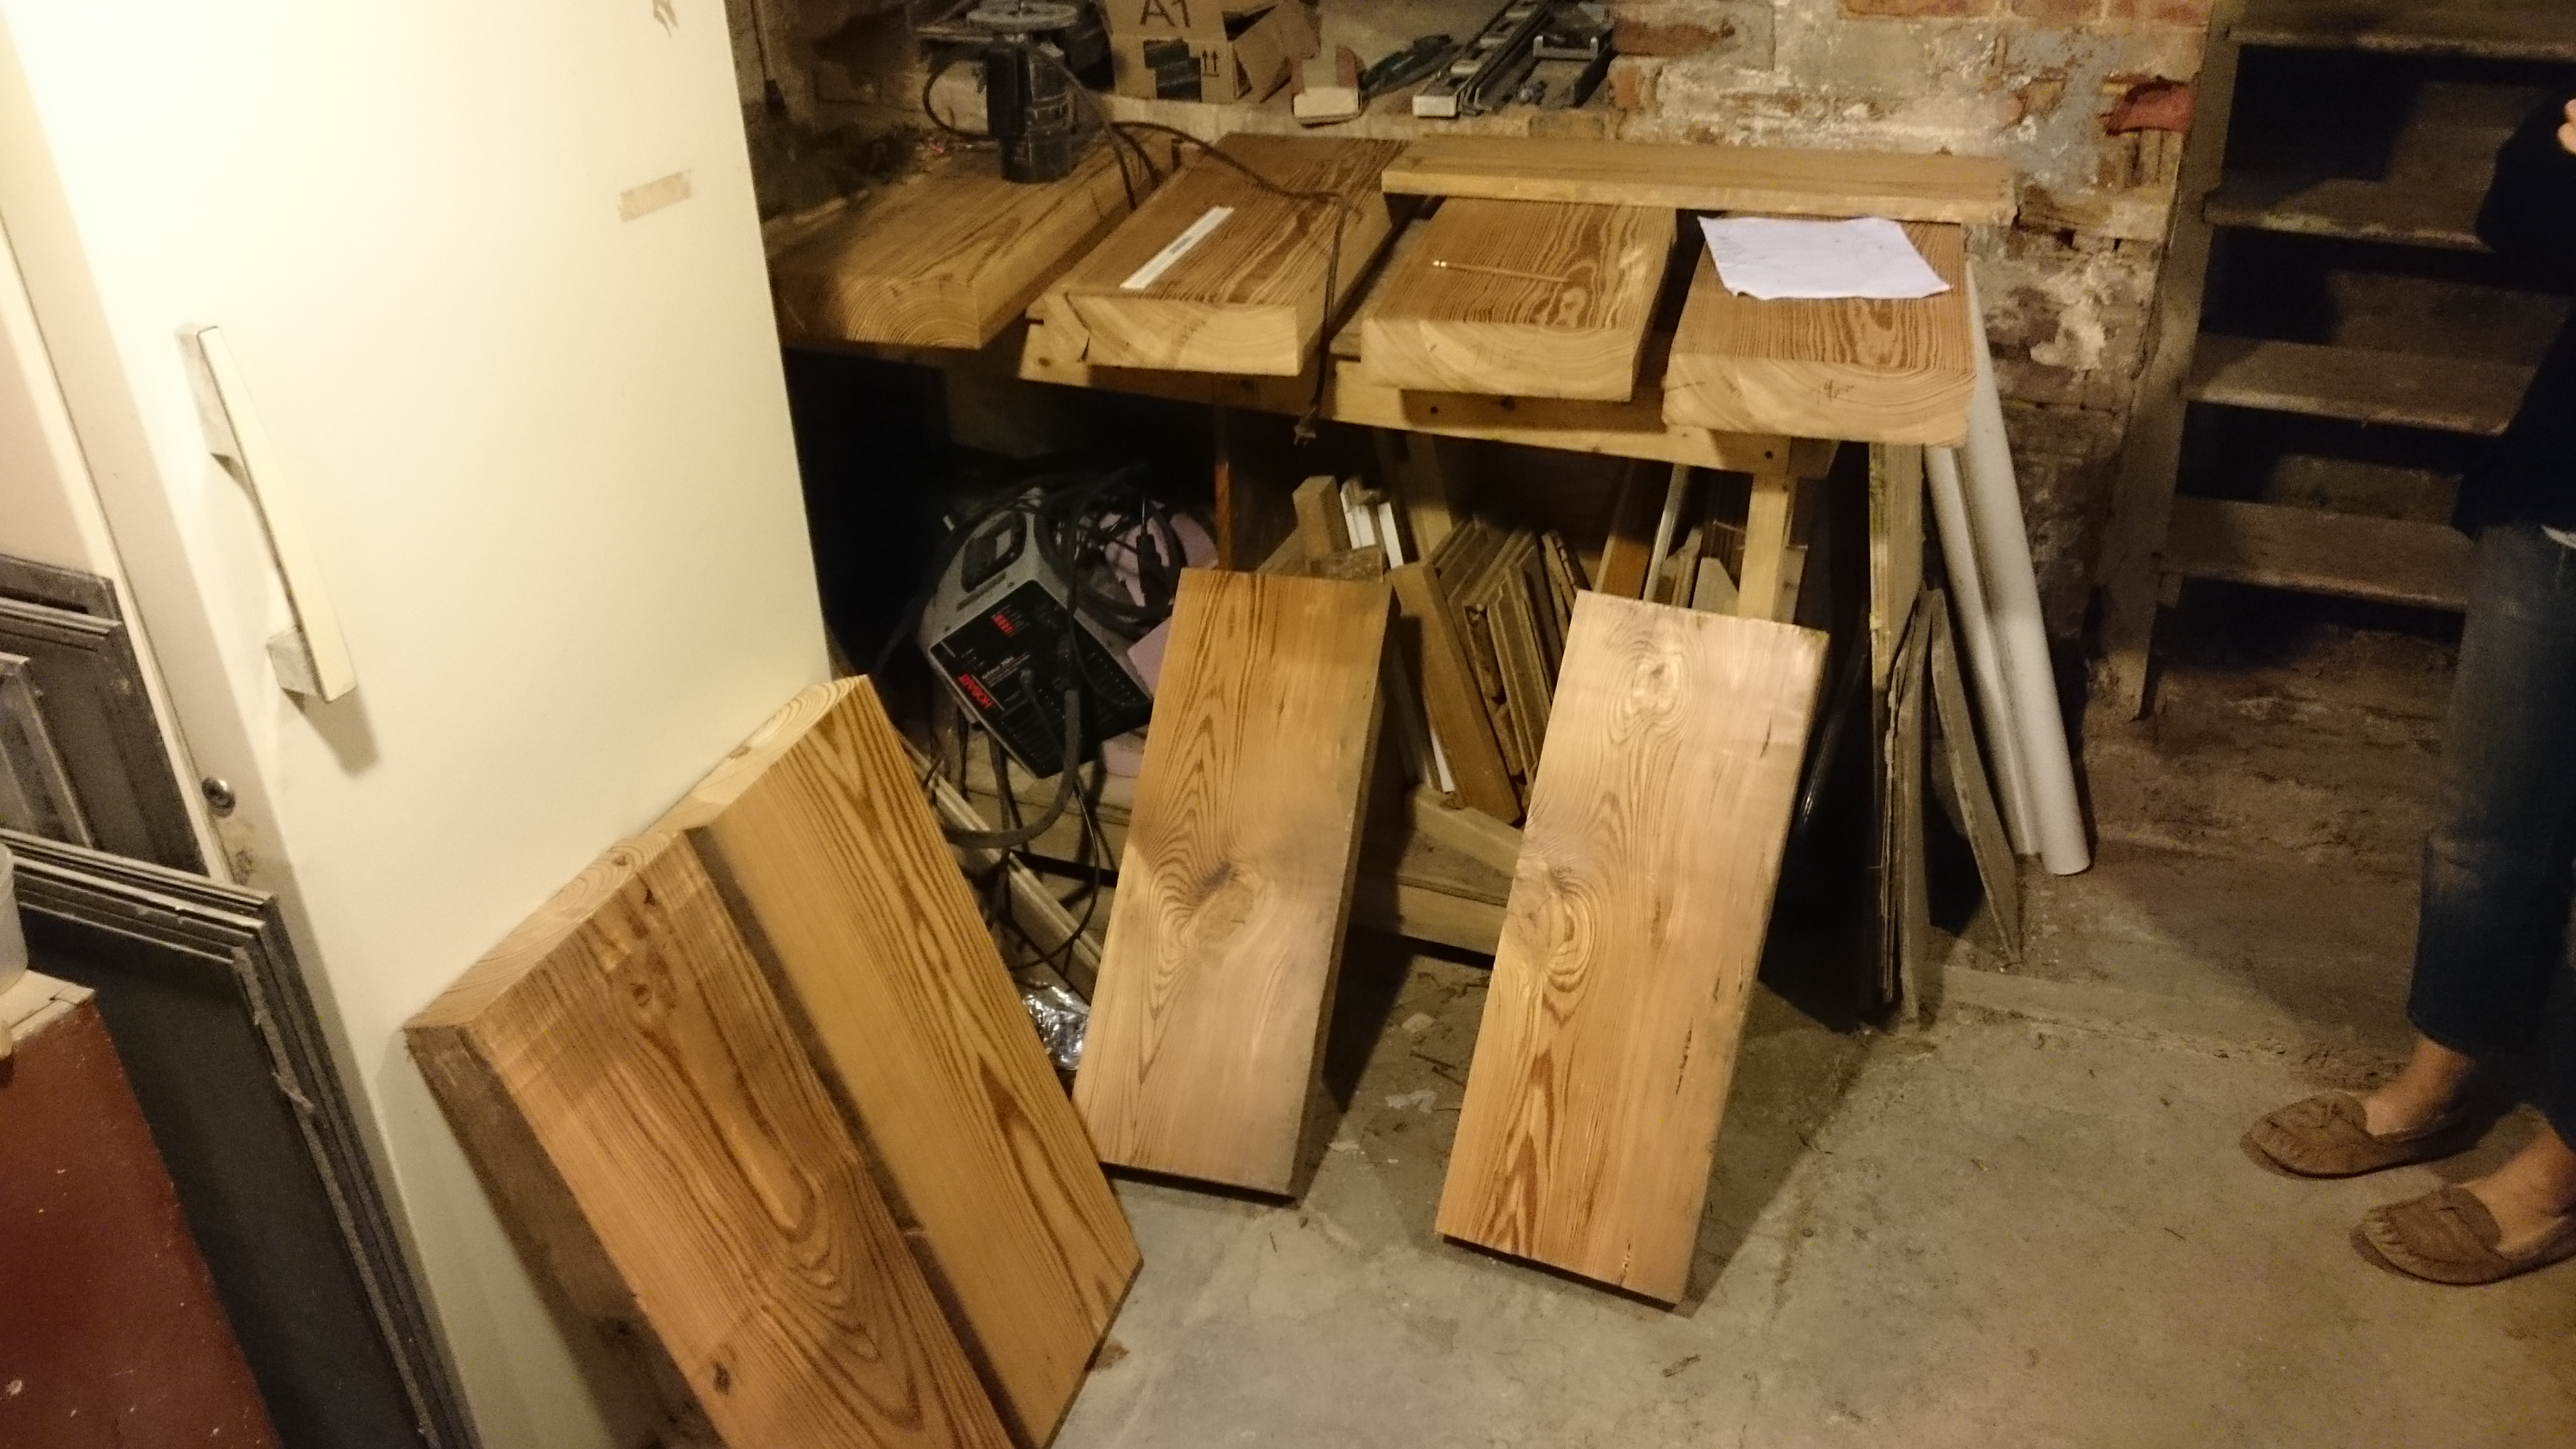
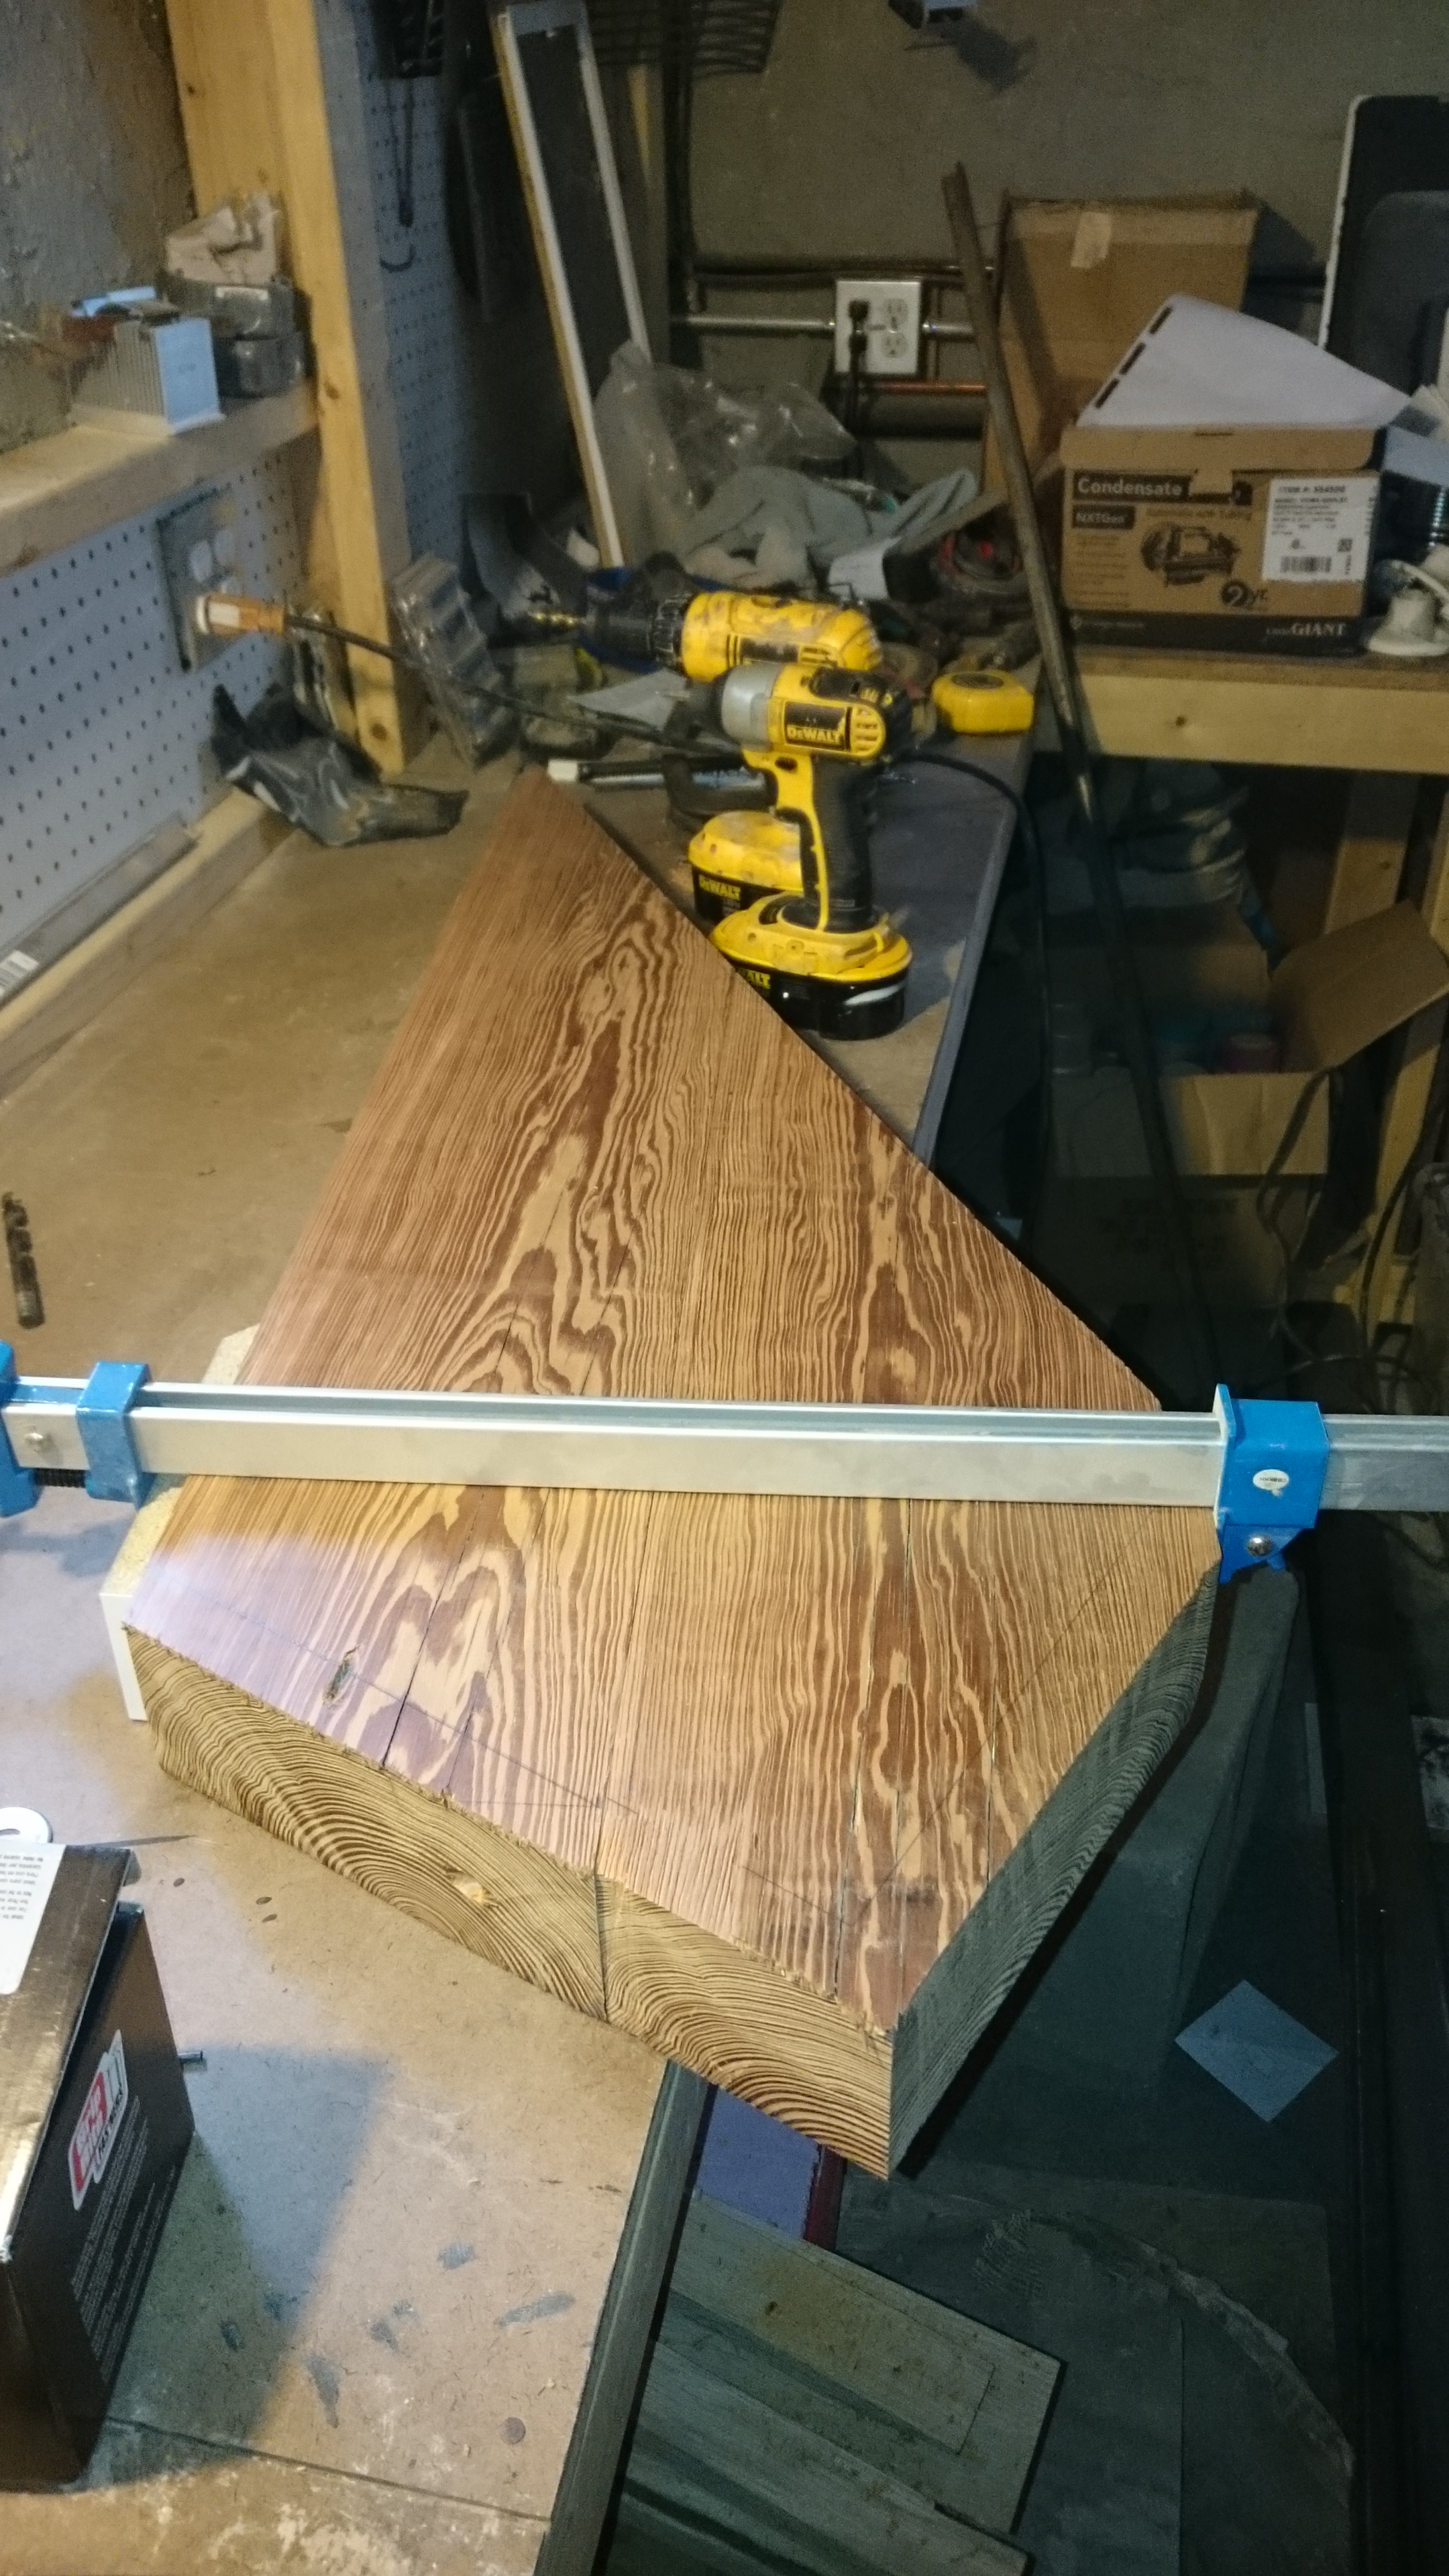
Once the steel was up, the focus shifted to the stair treads. For these we tracked down some giant joists that a friend was removing from an old warehouse. These things were precious (and cost a lot too). You can’t just buy 3×16″ old growth pine new, it needs to be salvaged from somewhere. We estimated we’d need about 60′ so we rounded up and got 70′ to be safe. We would need a total of 13 straight stairs (3″ x 10.5″ x 28″) as well as 11 corner stairs of varying sizes. I clean, measured and cataloged the wood. The wood was ripped down to <12″ to fit though the planer and then planed down (on one side) to 2 7/8″
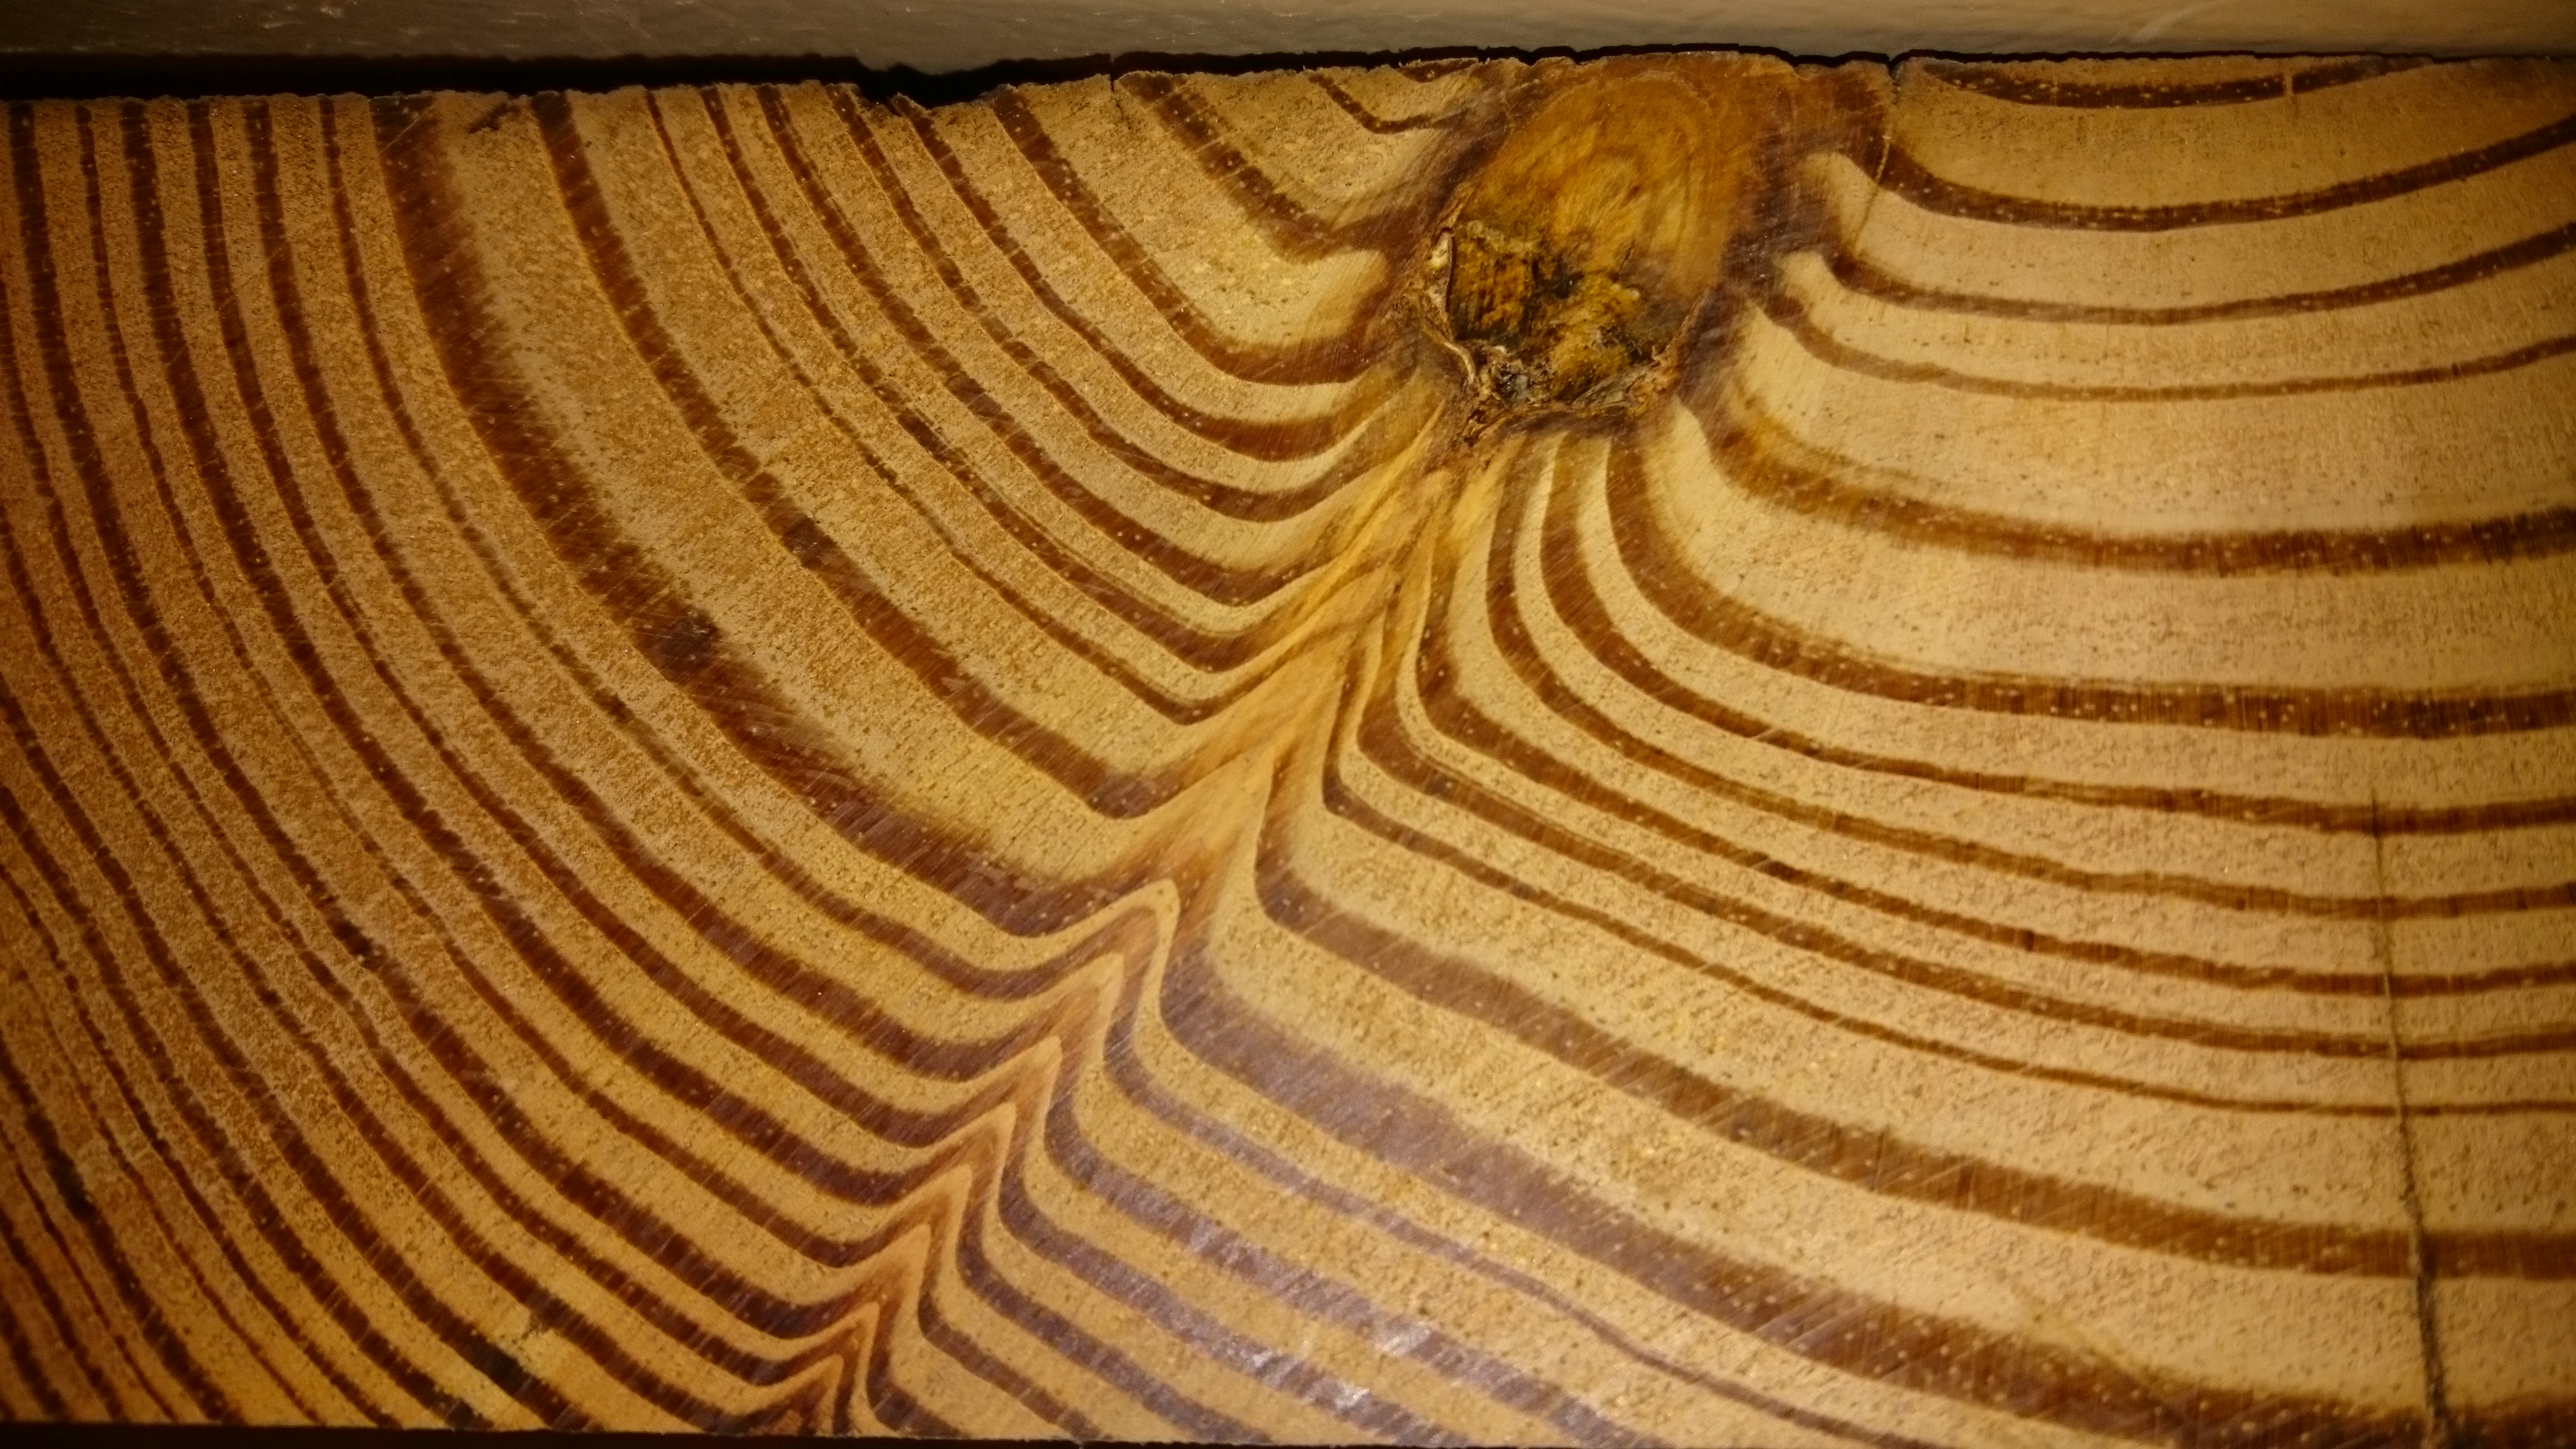
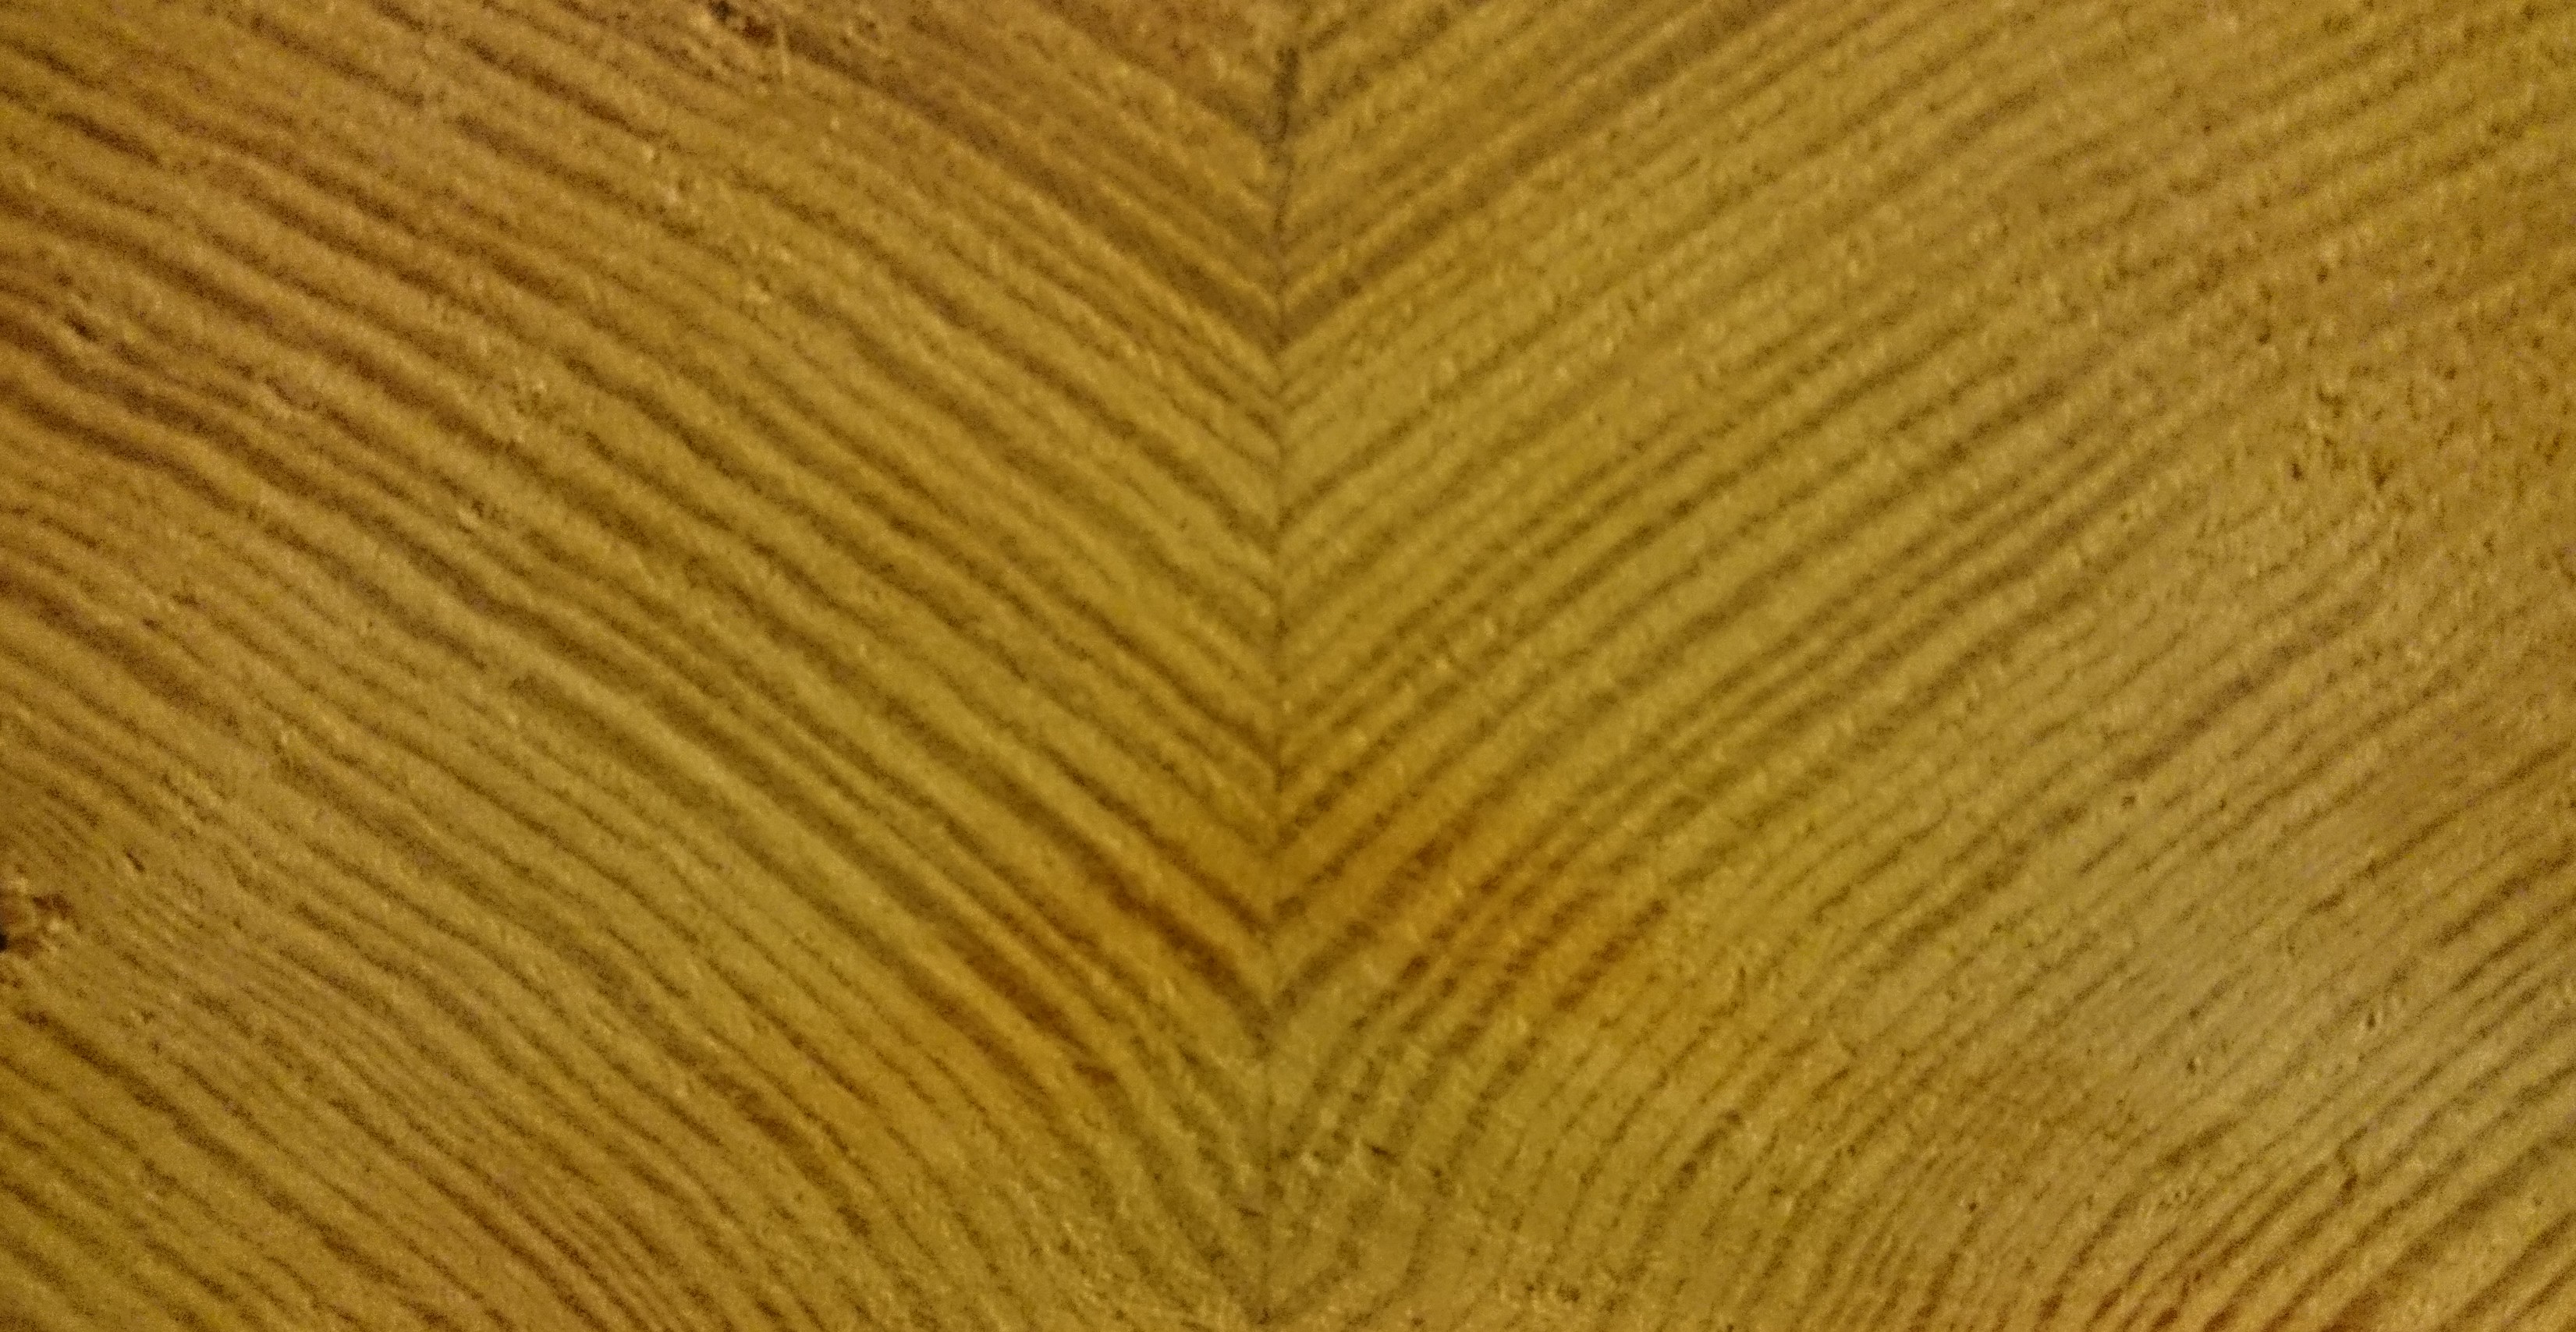
The wood grain of the treads is hypnotizing.
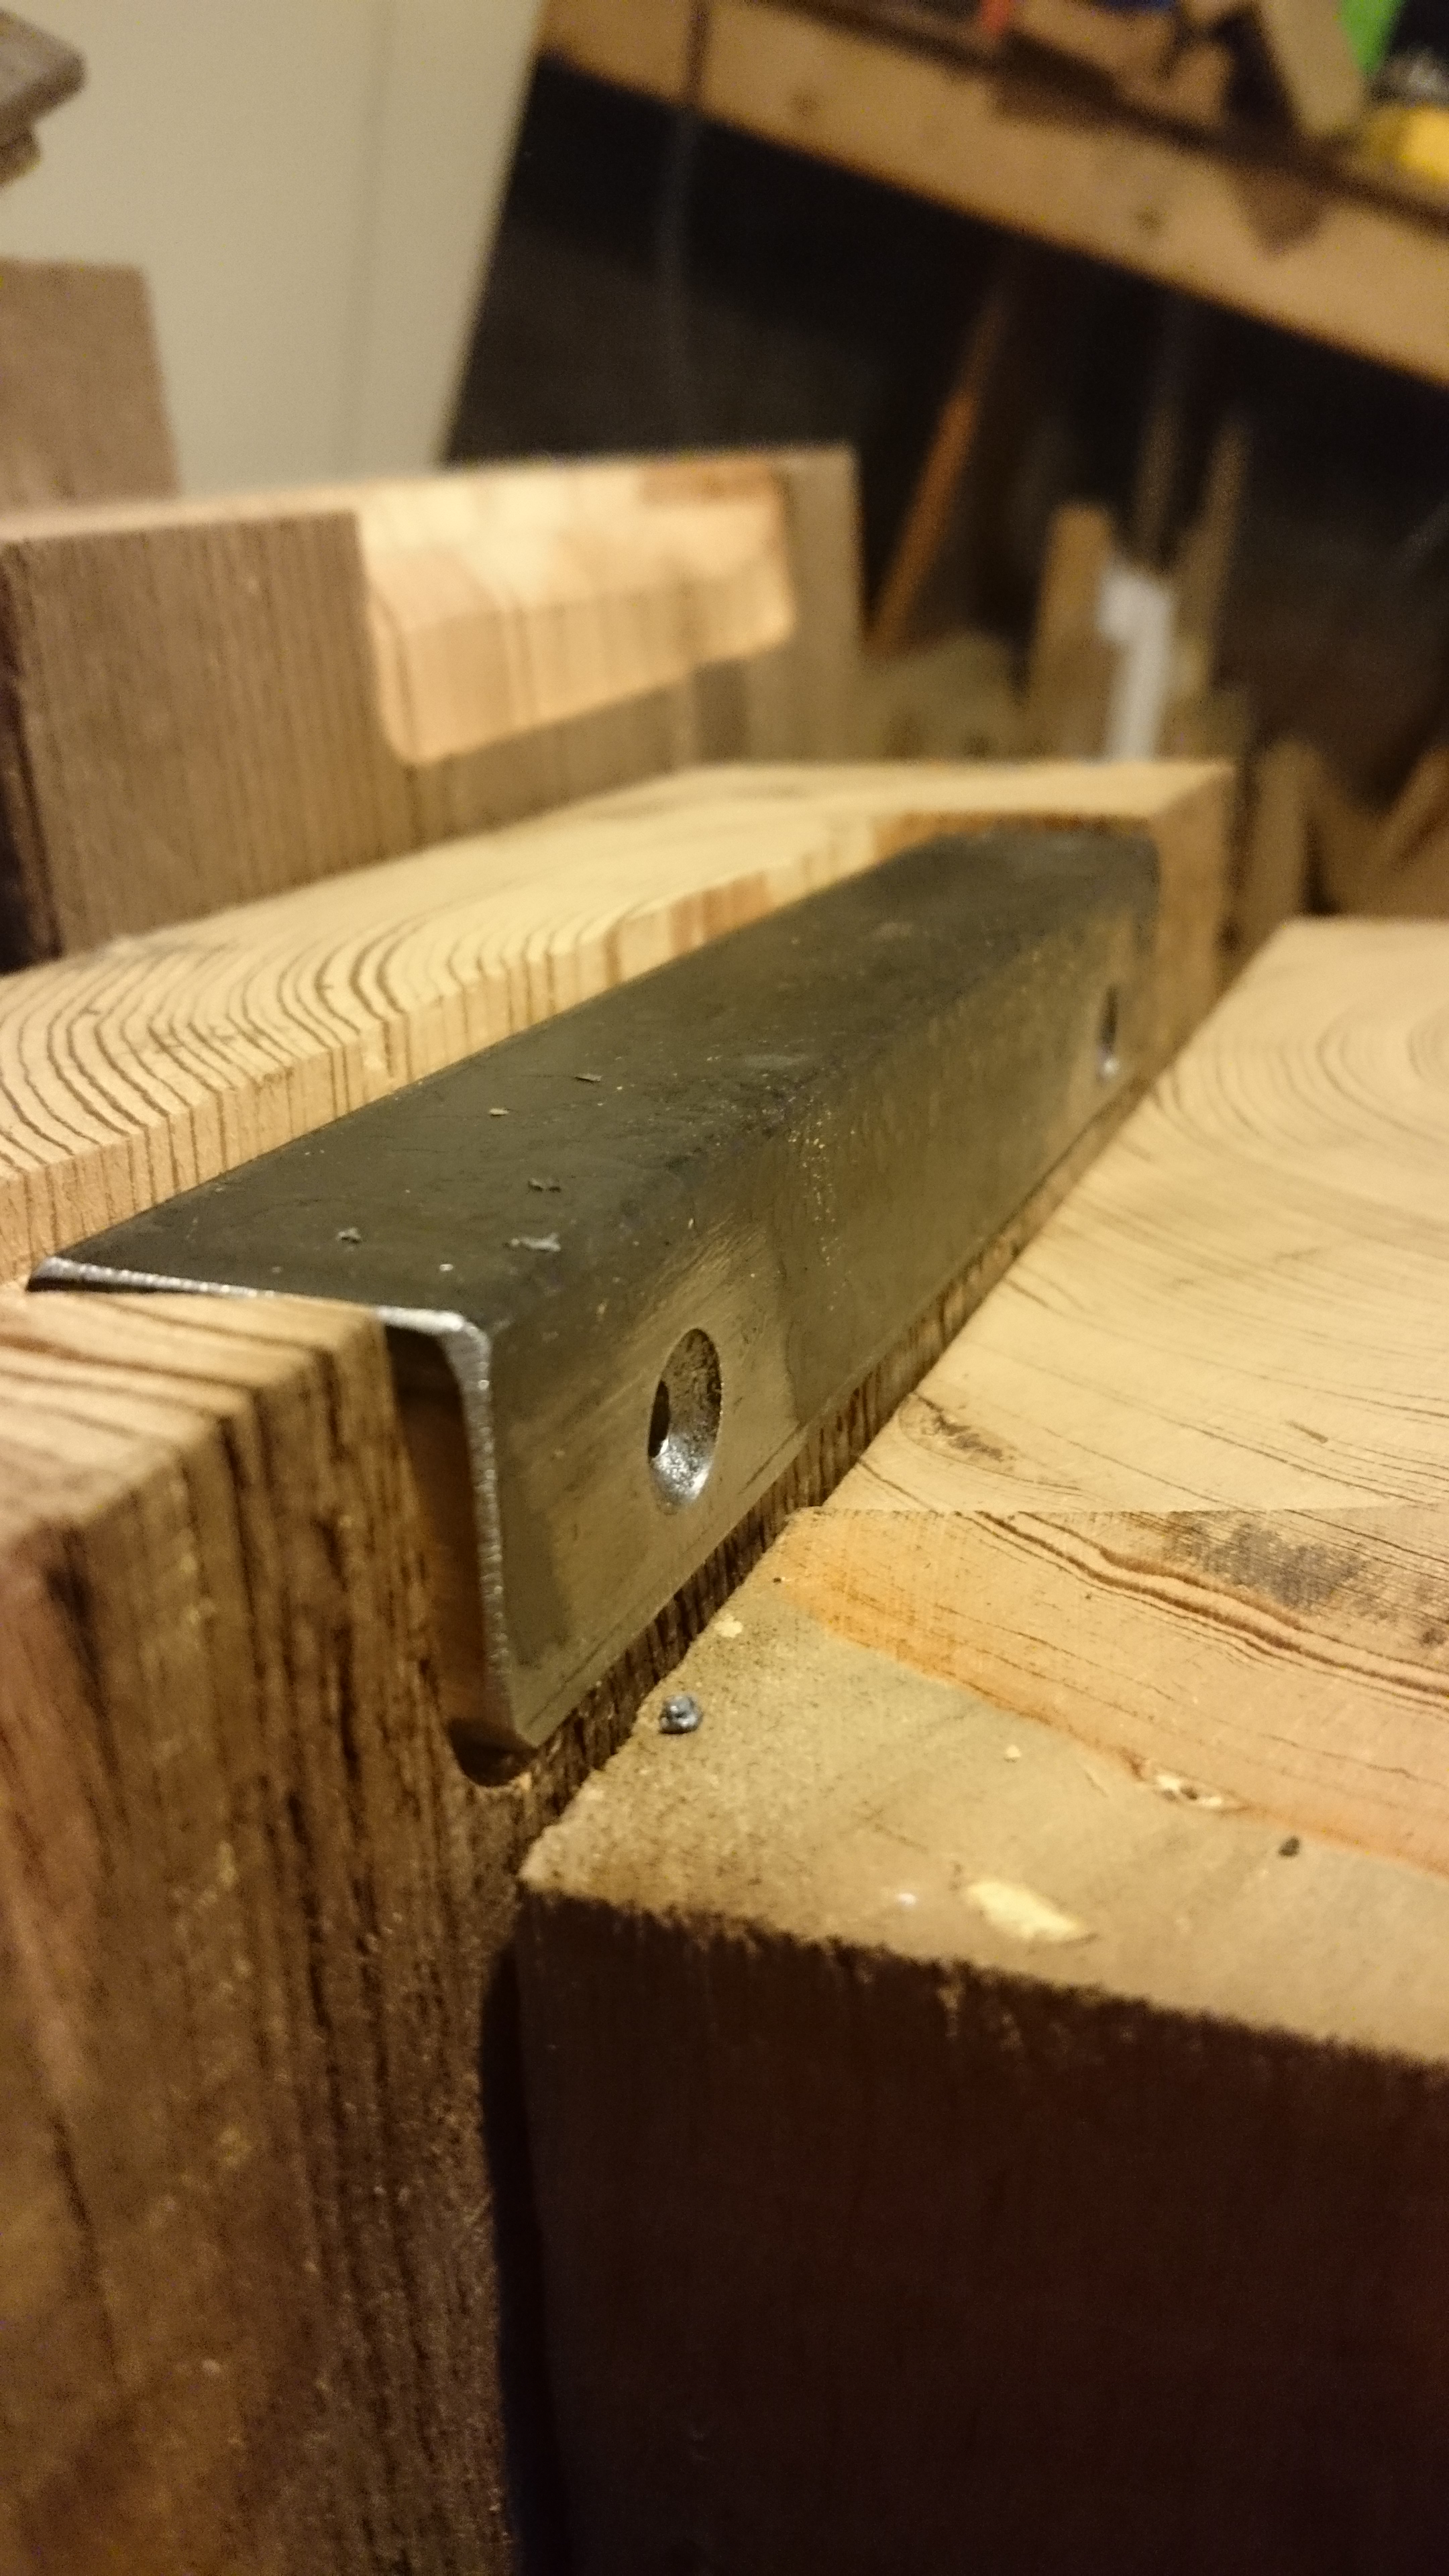
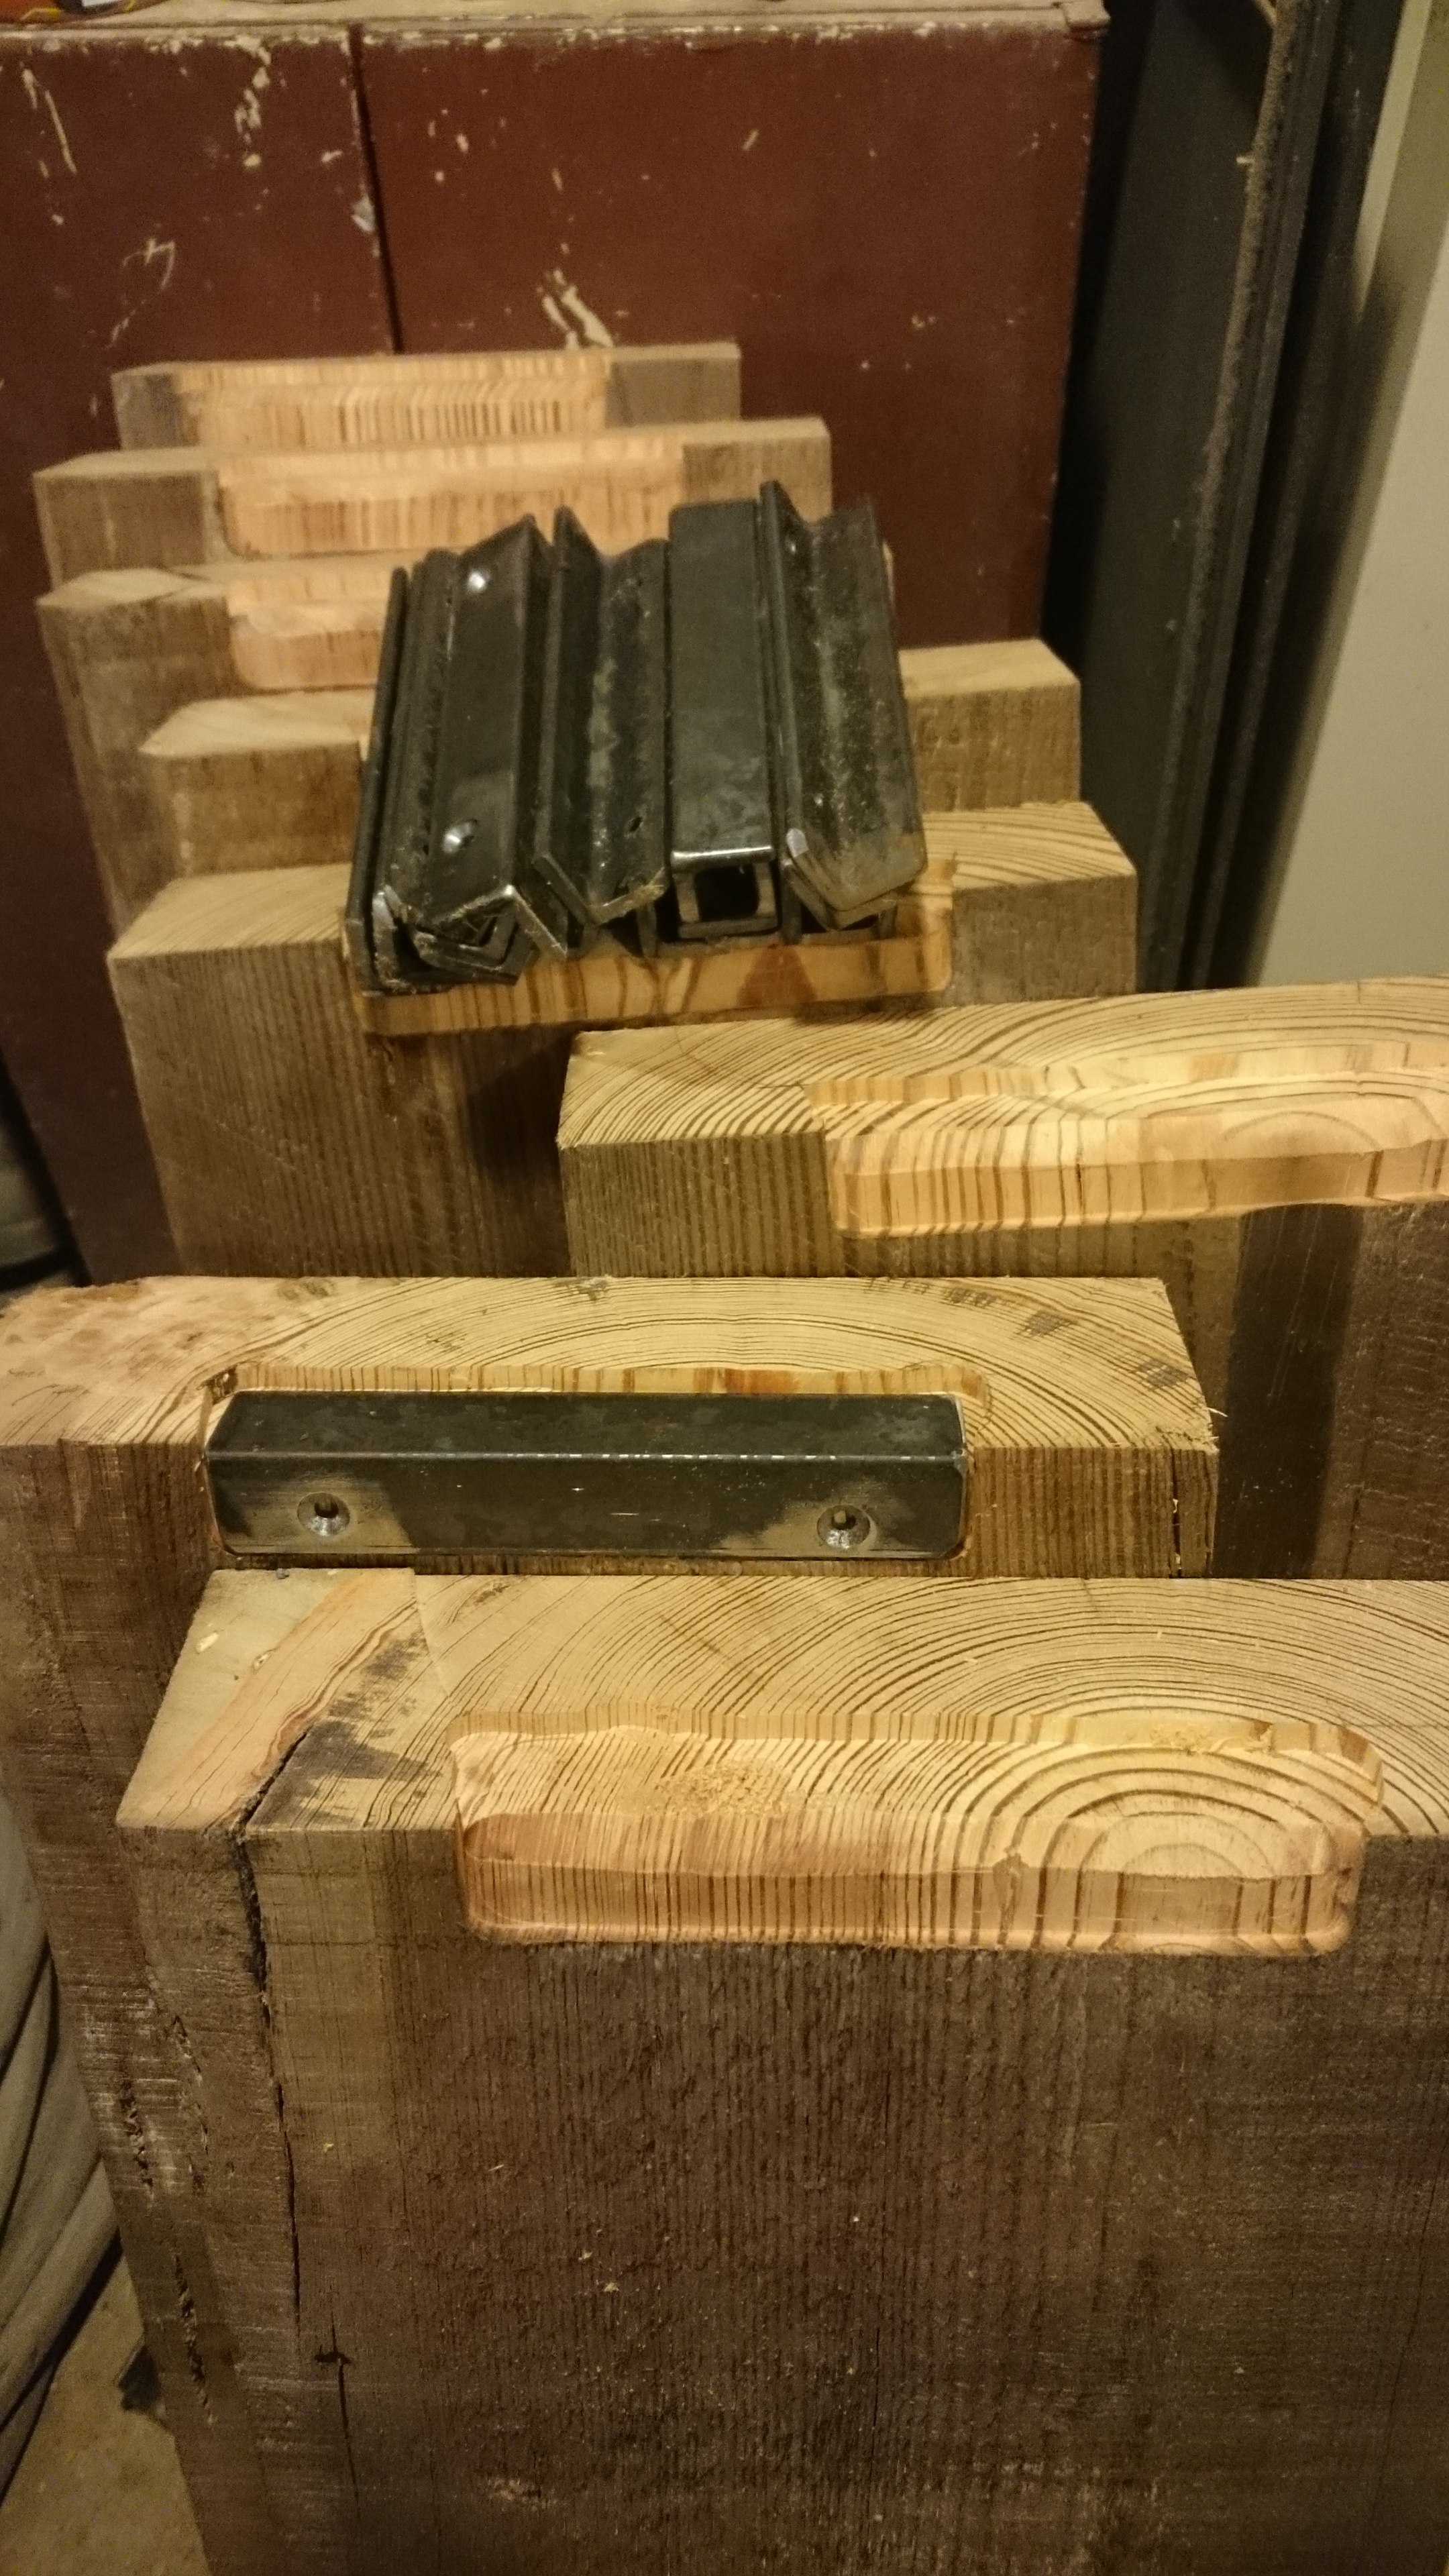
Somewhere in here we decided that it would be worth the extra effort to flush mount the brackets in the wood. We would weld on the angle so that it and any ugly welds were hidden by the board. This took a whole lot of routing, but I made a jig to set up guides and it went pretty smoothly. I also got a pretty good system down for churning out brackets in 8 easy steps including countersinking the hole so the screw too was flush.
One bracket was a lot of work.
A lot of brackets were a WHOLE LOT OF WORK.
The problem with 100 year old joists is that they’re never perfect. Even once planed, most boards still had flaws and bad edges that needed to be removed. In the end we just barely had enough that can be used as 10.5″ straight treads and a whole bunch < 10″ wide. TO SKETCHUP!
Visualizing the 3 corner stairs was hard so I drew it up in Sketchup.
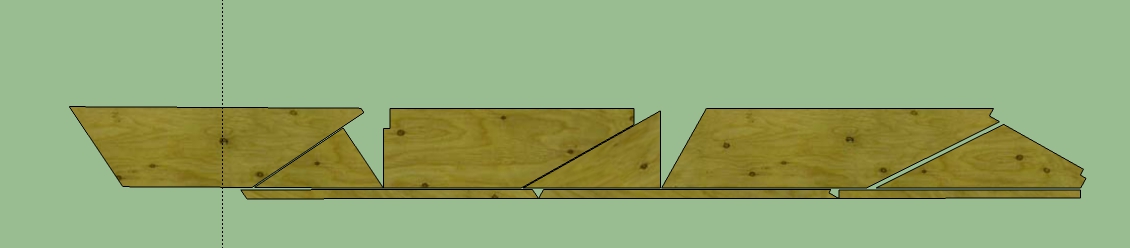
Since the steel was already in place, we could get some really accurate measurements in order to draw up this in Sketchup. Once digital, I started playing around with stair designs. One of the challenges was my requirement that both the back and the bottom needed to be rough cut and the top and the front had to be immaculate when planed and sanded AND the grain had to run parallel to the front edge of the stair. In the end I decided to do a 3 piece design. I would cut 1″ off the rough cut side for the back and then build the tread out of the 8″(or so) board and then glue it all back together. To save material I arranged this in Sketchup to waste as little board length as possible.
Drawing this helped me to figure out how to use our narrowest boards to make our widest treads most efficiently.
I put a lot of faith in my drawings. I printed out a layout with measurements of all the edges and diagonals so I could draw this out on the boards and check my work. Second step was to cut off the rough edge. Next was to rip the board down to the correct width. Then a very technical free hand (eyeballing it) cut of the diagonal to be cut straight. This angled cut off would rotate around to be glued with several 4″ long 1/2 lag bolts thrown in for some serious clamping and pining duties.
Rotating had some cool benefits. Since it was basically the same grain pattern, only further down the board, the resulting assembly has the grain mirrored along the nearly invisible glue line. Upon cutting, this is what we would see:
Beautiful symmetry when I assembled the pieces.
The last cuts were made to straighten out the back edge so I could glue back on the 1″ rough edge. Once this was all together I sanded just like we did the floors. On the finished boards its hard to tell they’re not once piece.
Almost there. One to go. All but the very bottom step still need sanding.
Final fitting of the boards was a challenge even with the help of Sketchup, particularly in the corner. That particular “kite” stair had to line up on both the not perfectly 90* corner and two sides of the post and have no more than a 1/8″ gap on any edge. For this we made a template out of an end-of-life dry erase board.
Straight stairs needed some final touches as well. Here is a photo of the finished top stair which had to tie in the the hidden brackets, the 3″ post stubs, the C-channel and the bricks.
Some pieces seem so complicated. I began referring to the stairs as my wooden spaceship.
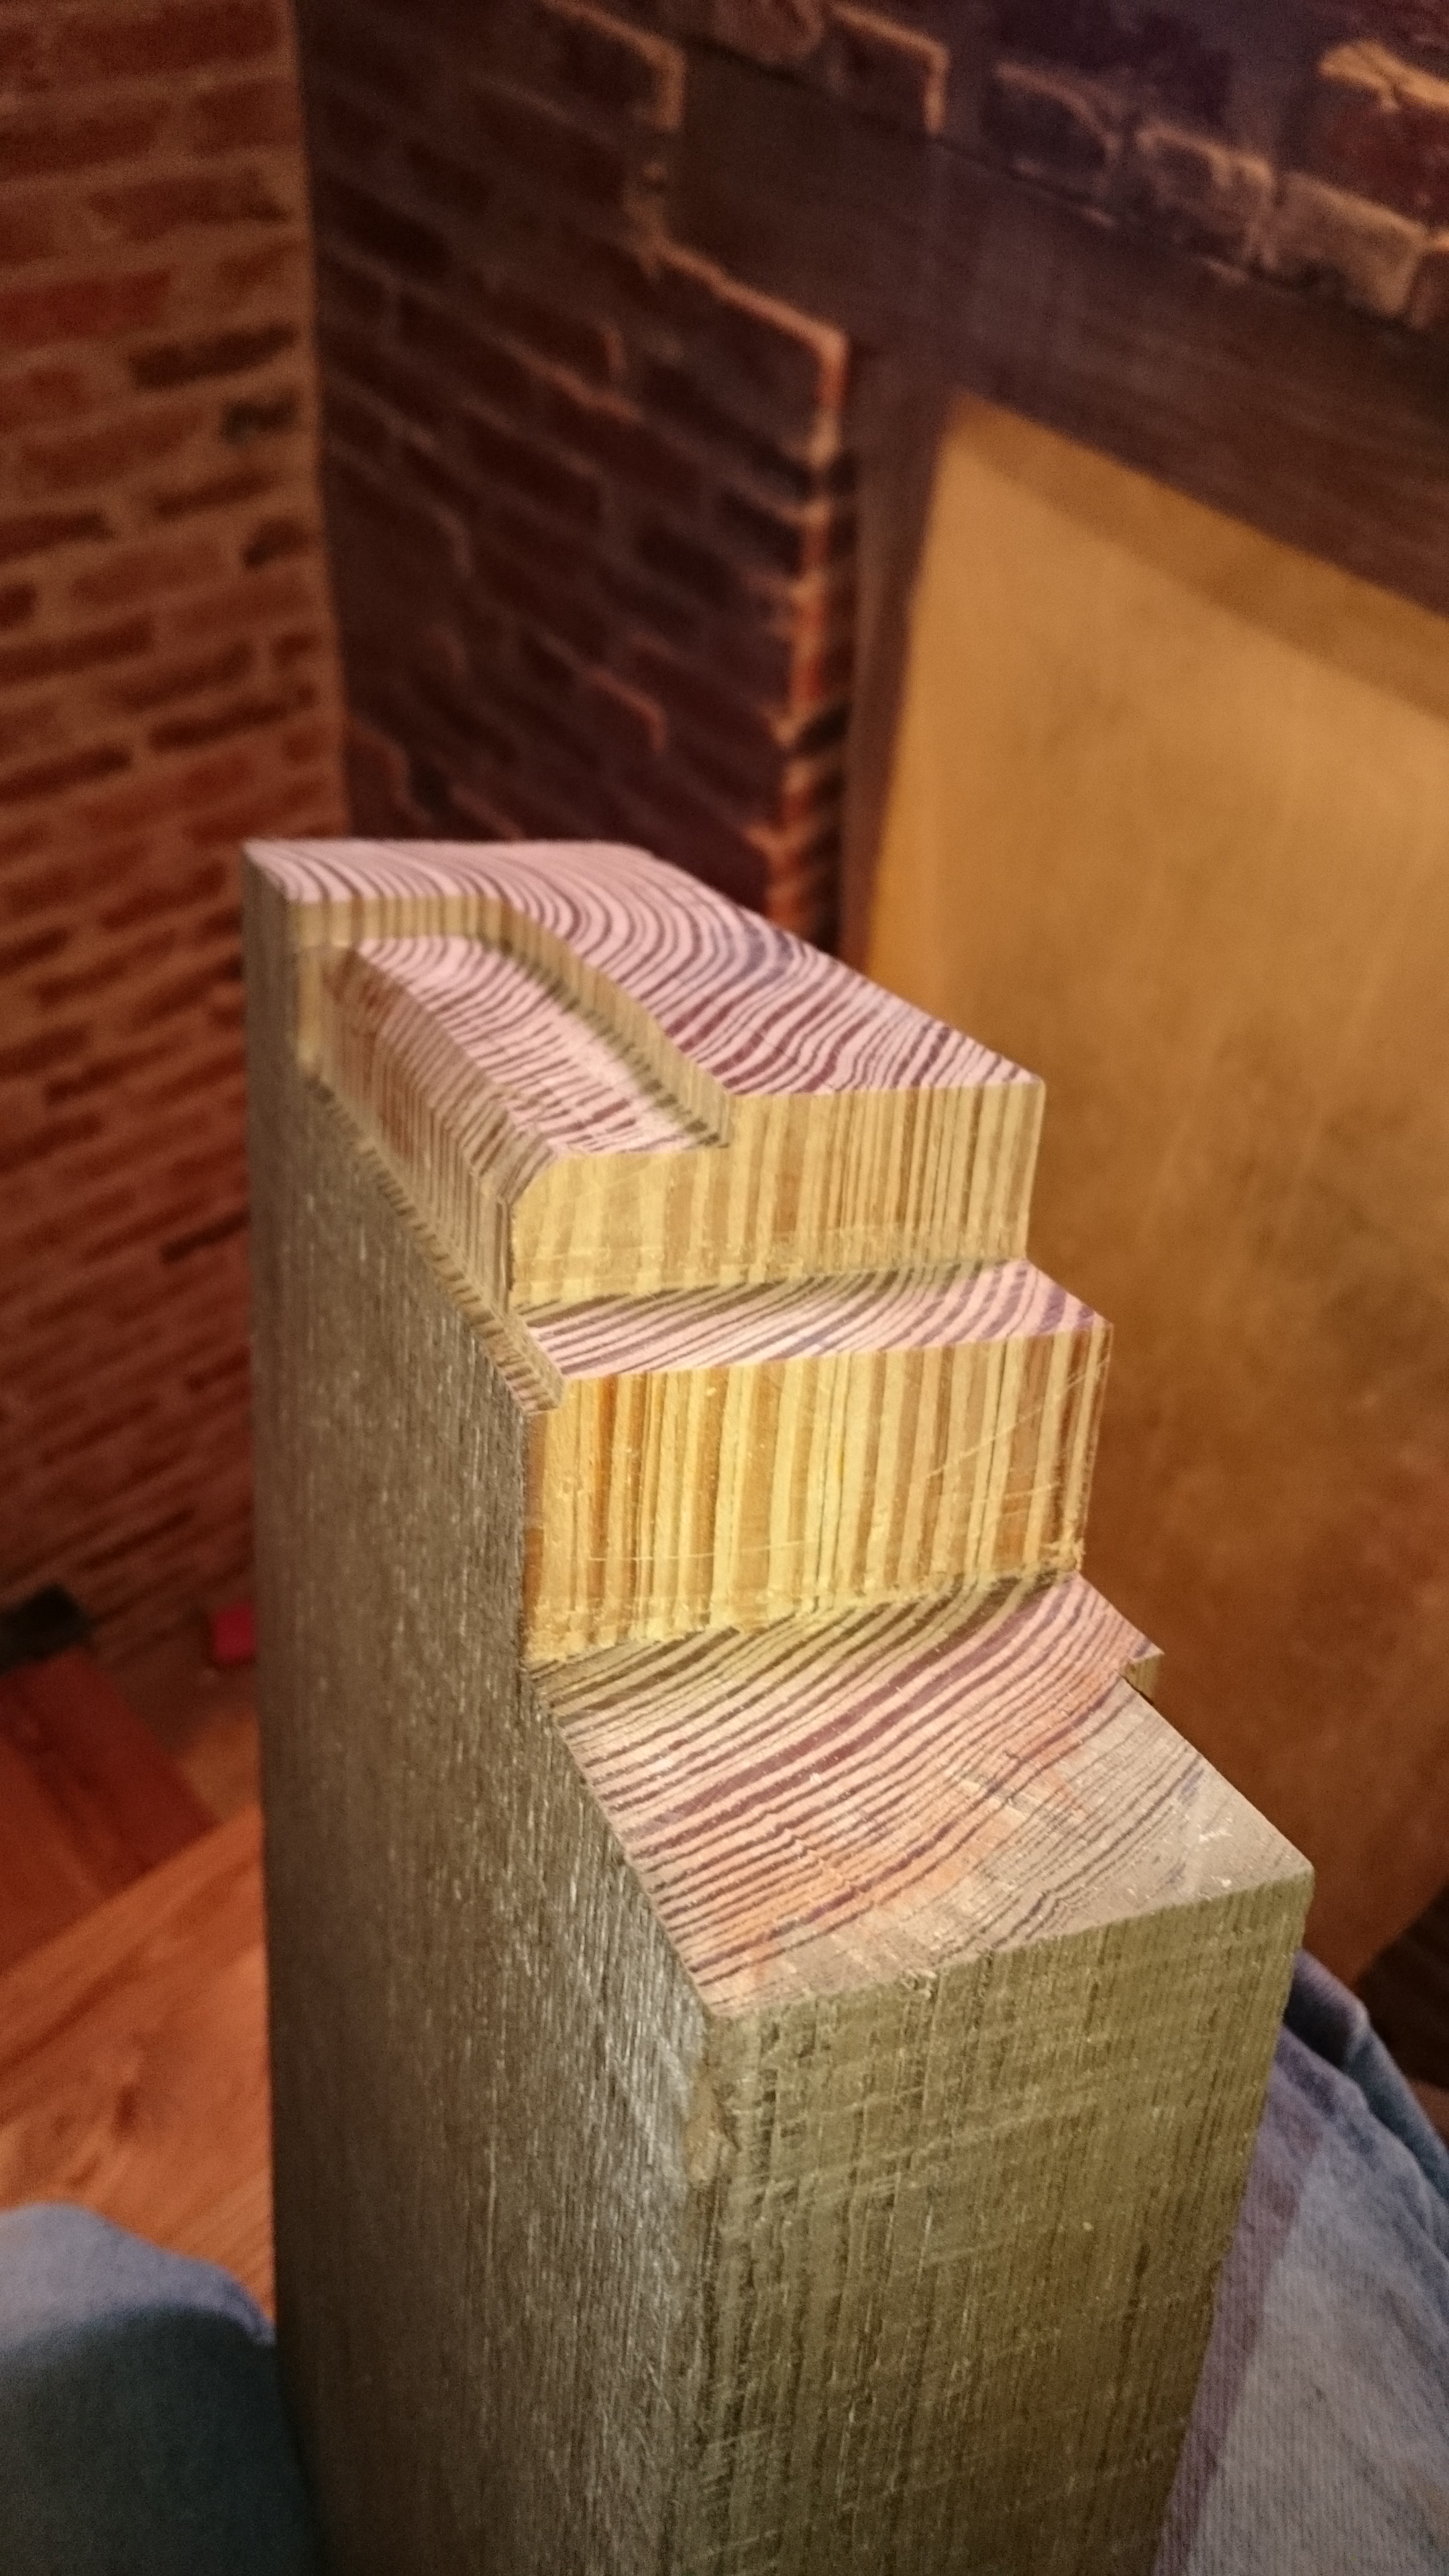
There are a whole lot of cuts in there, but in the end it makes for a very clean and simple step.
Not so complicated when it is snapped into place.
Not that complicated from below
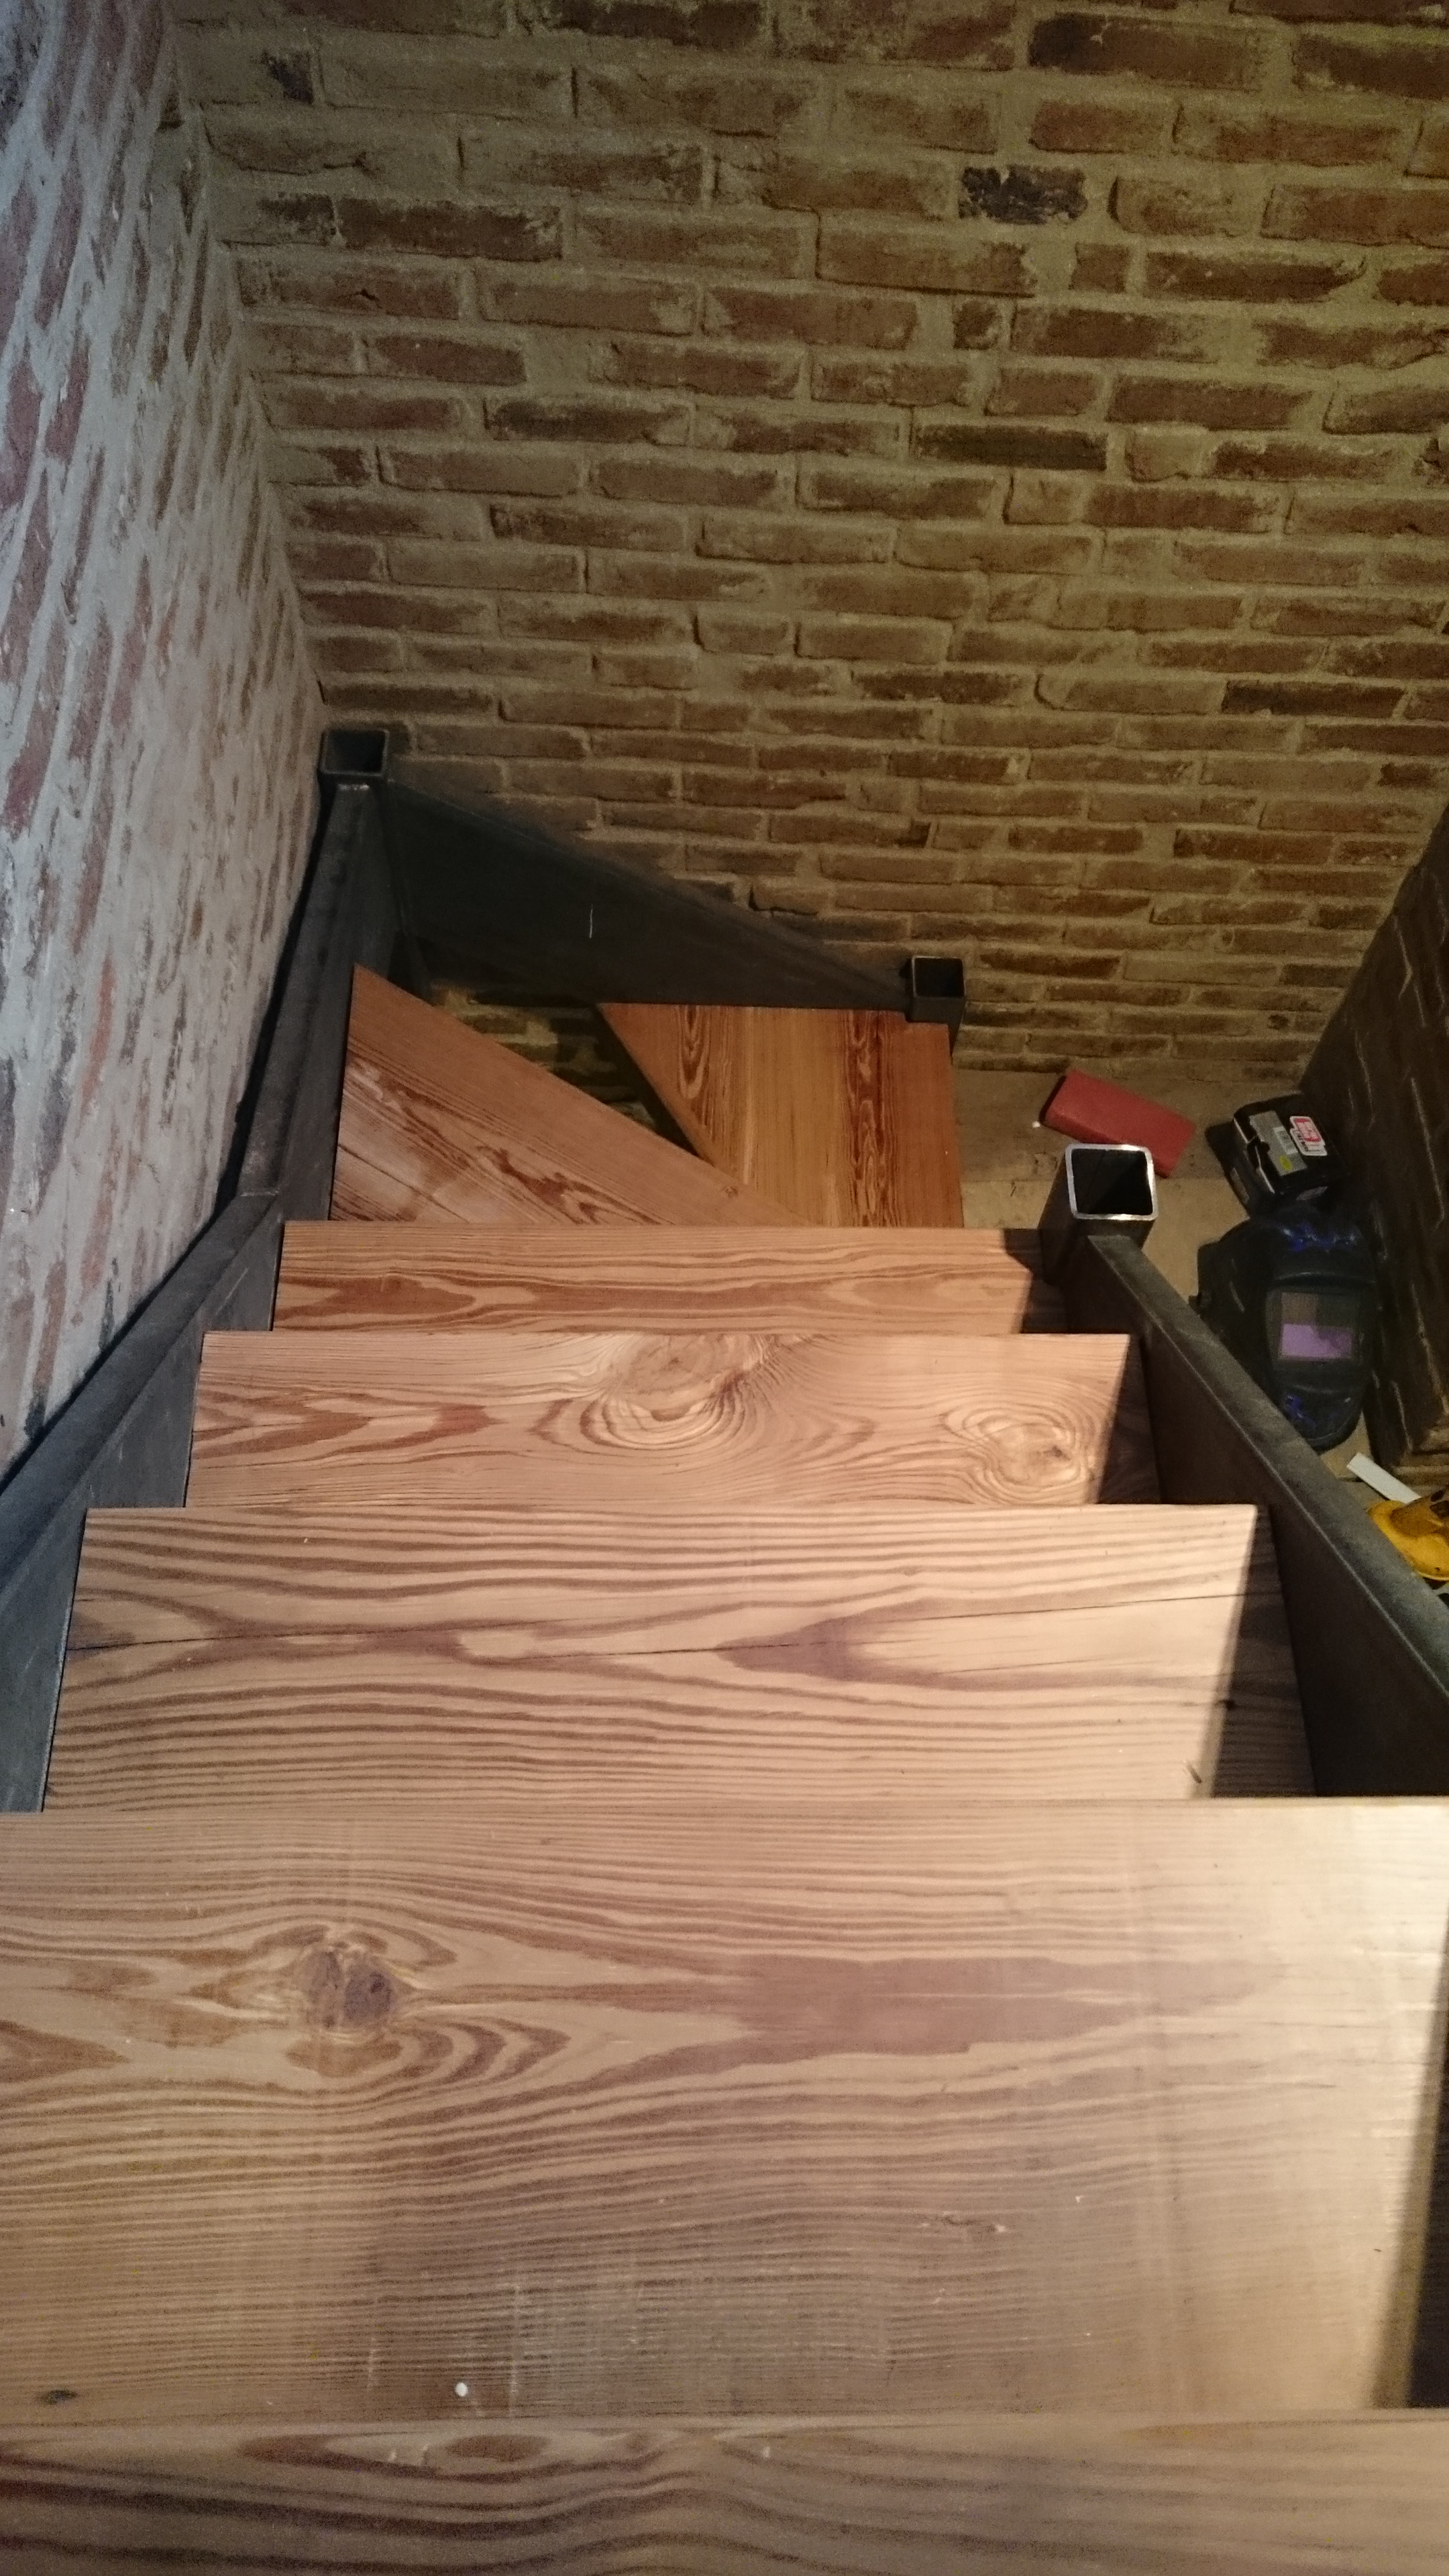
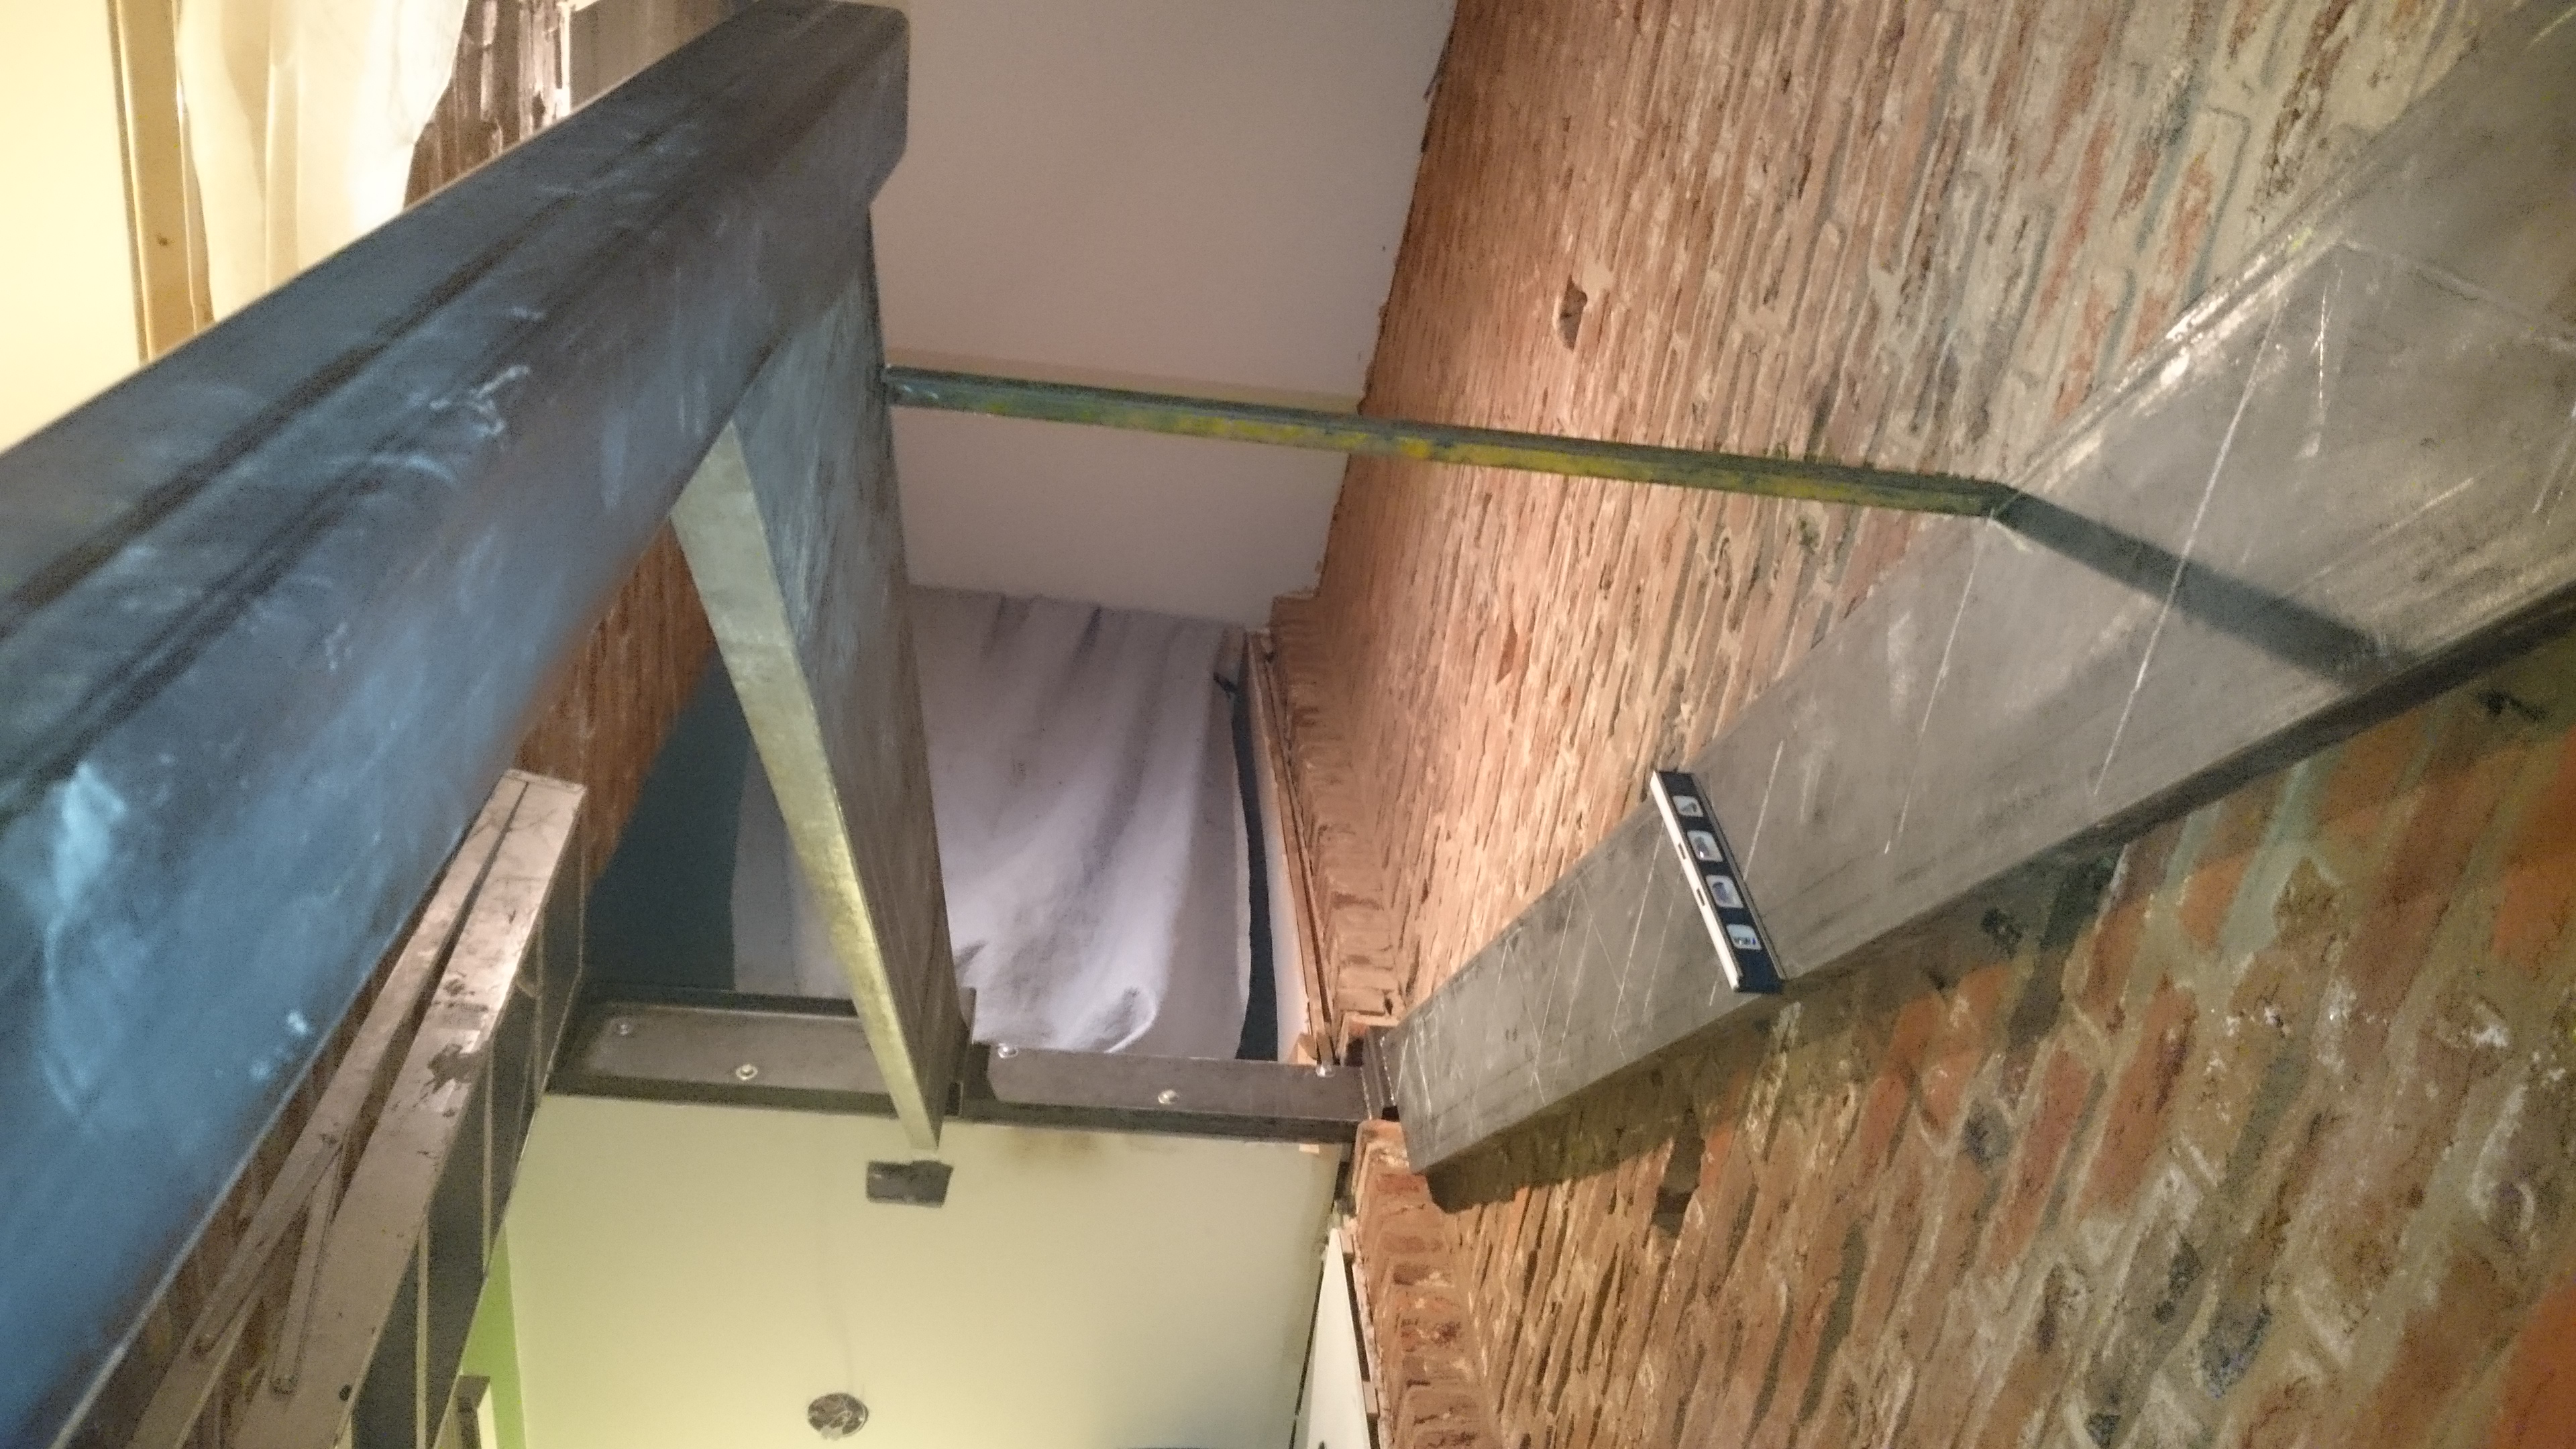
Finally this flight is coming together. Here is a view looking up.
Looking up at the rough cut bottoms from below. The glue haze only shows up in photos :-/
Note that the stairs progress around the post just like in the Sketchup drawing. Also see the steel brackets I made in order to get as much surface area as possible on the smallest part of the stairs.
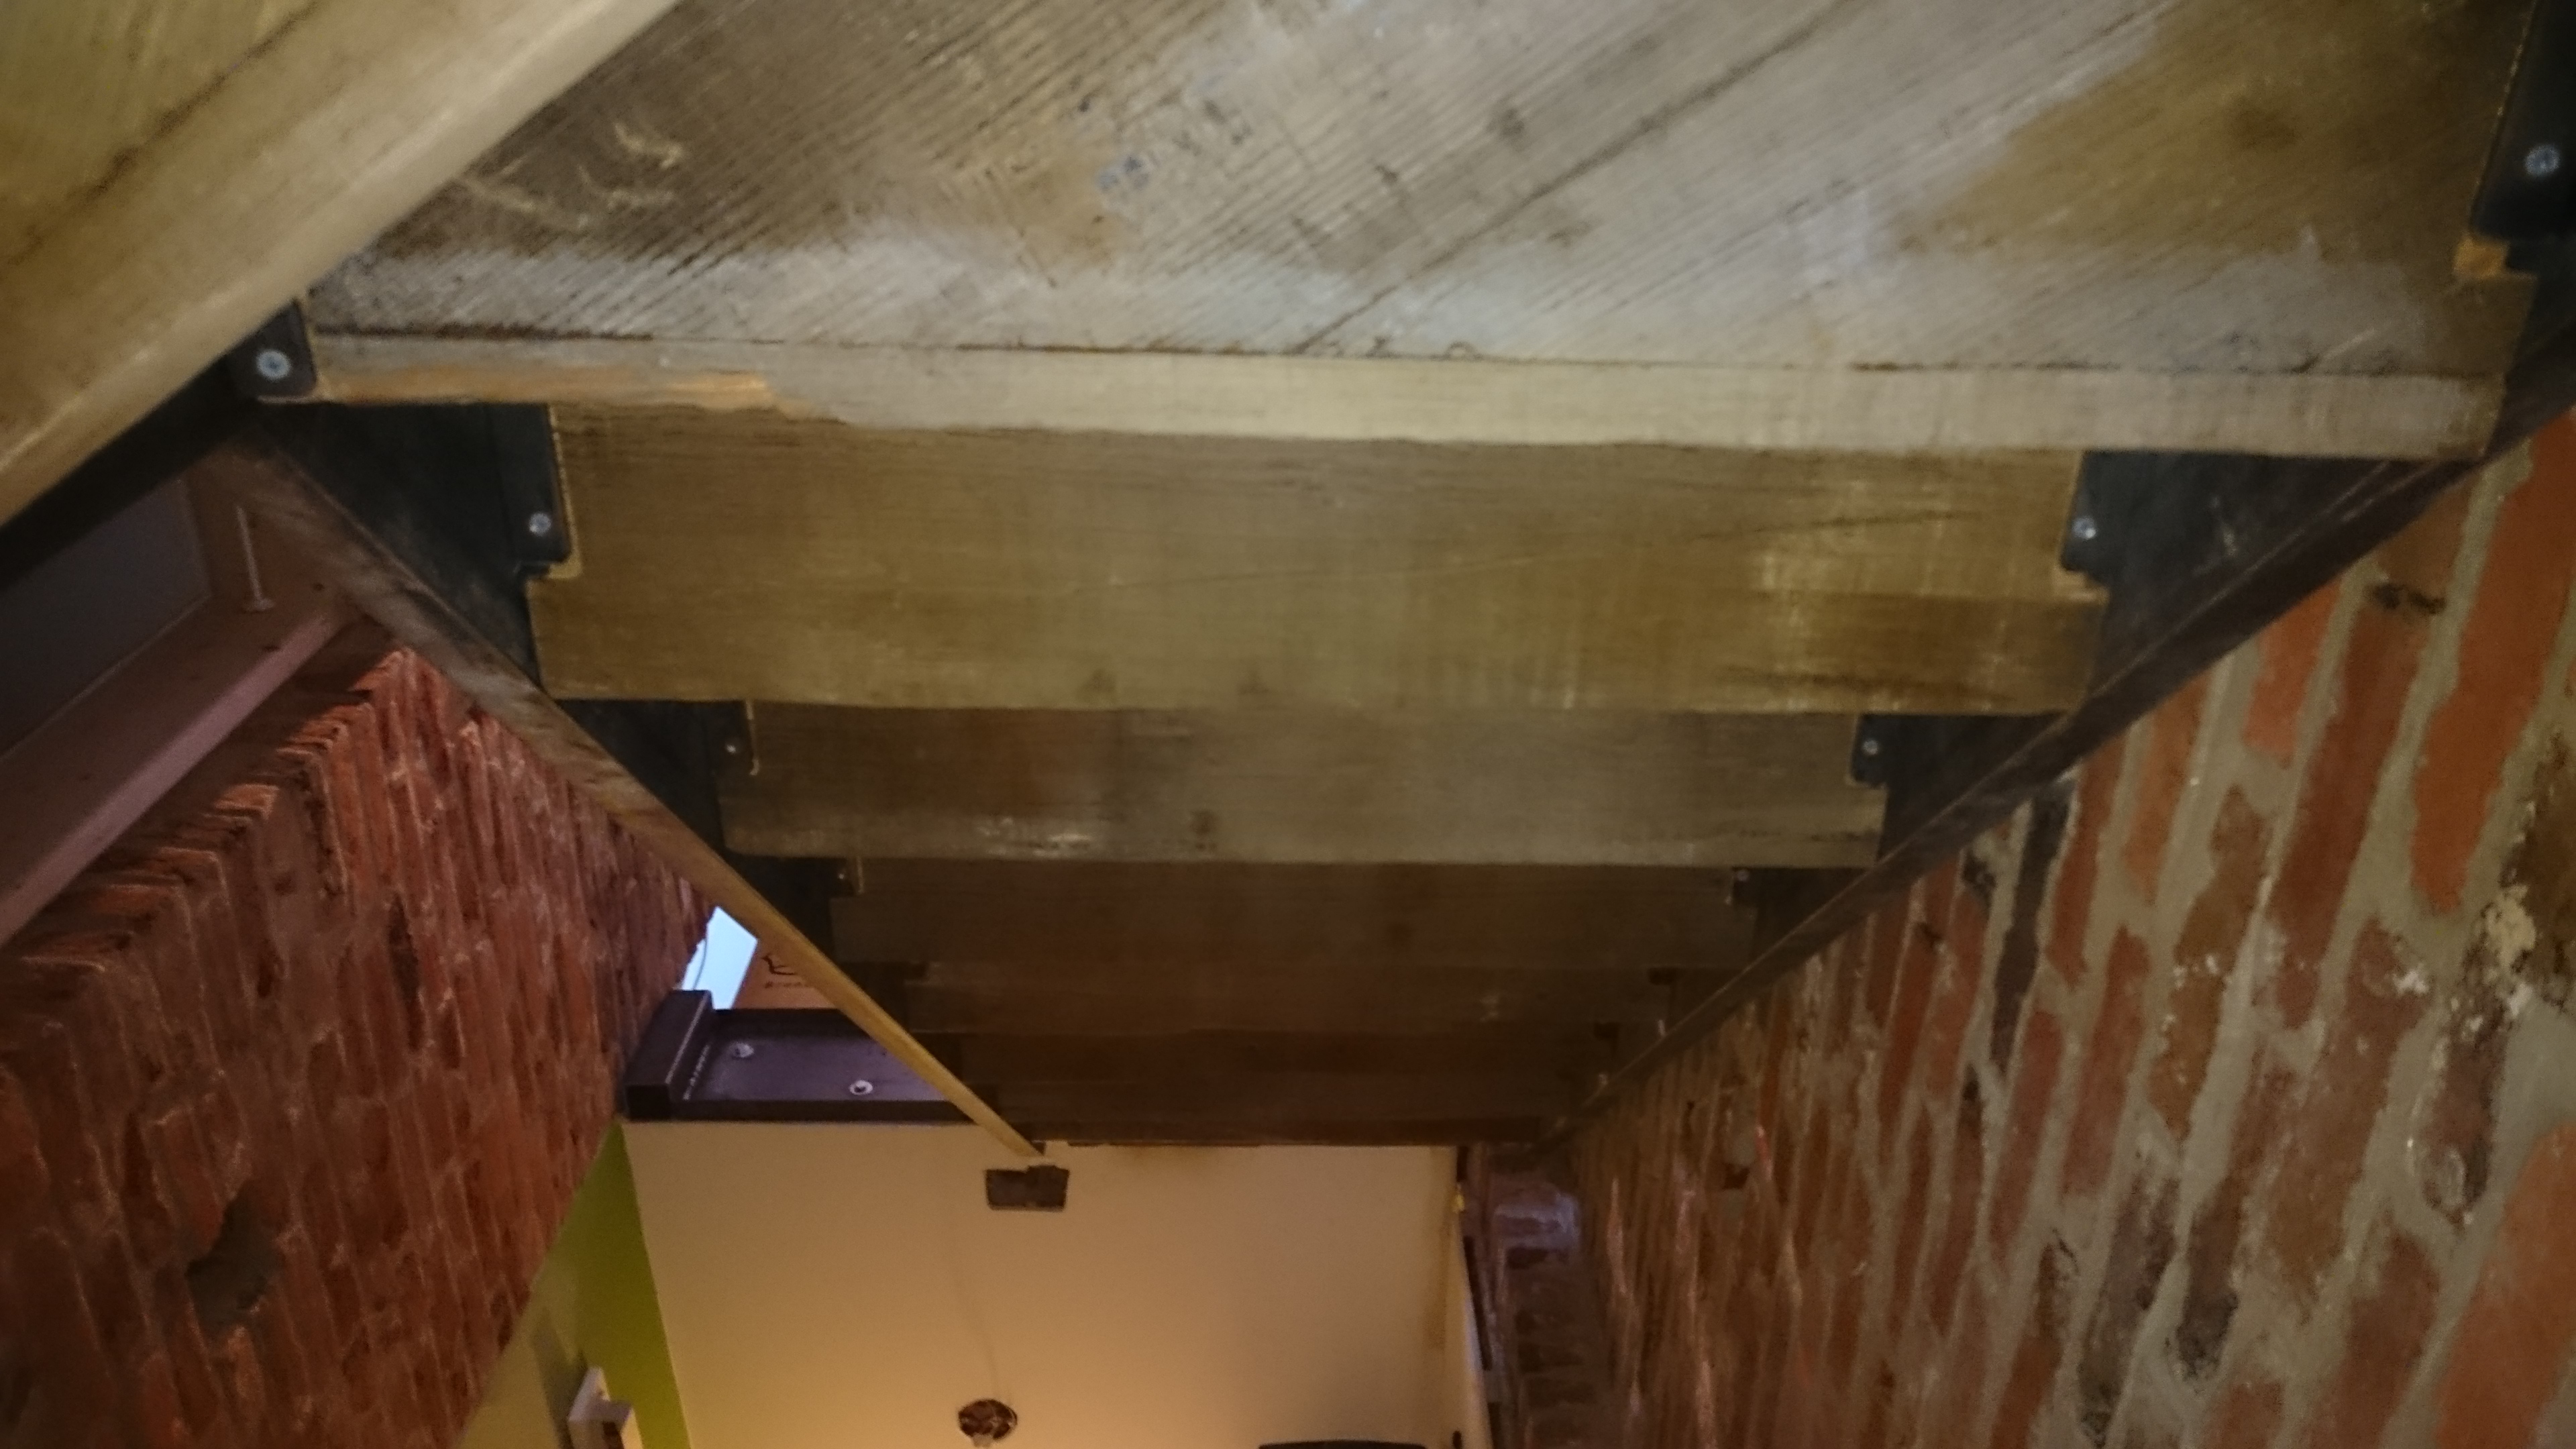
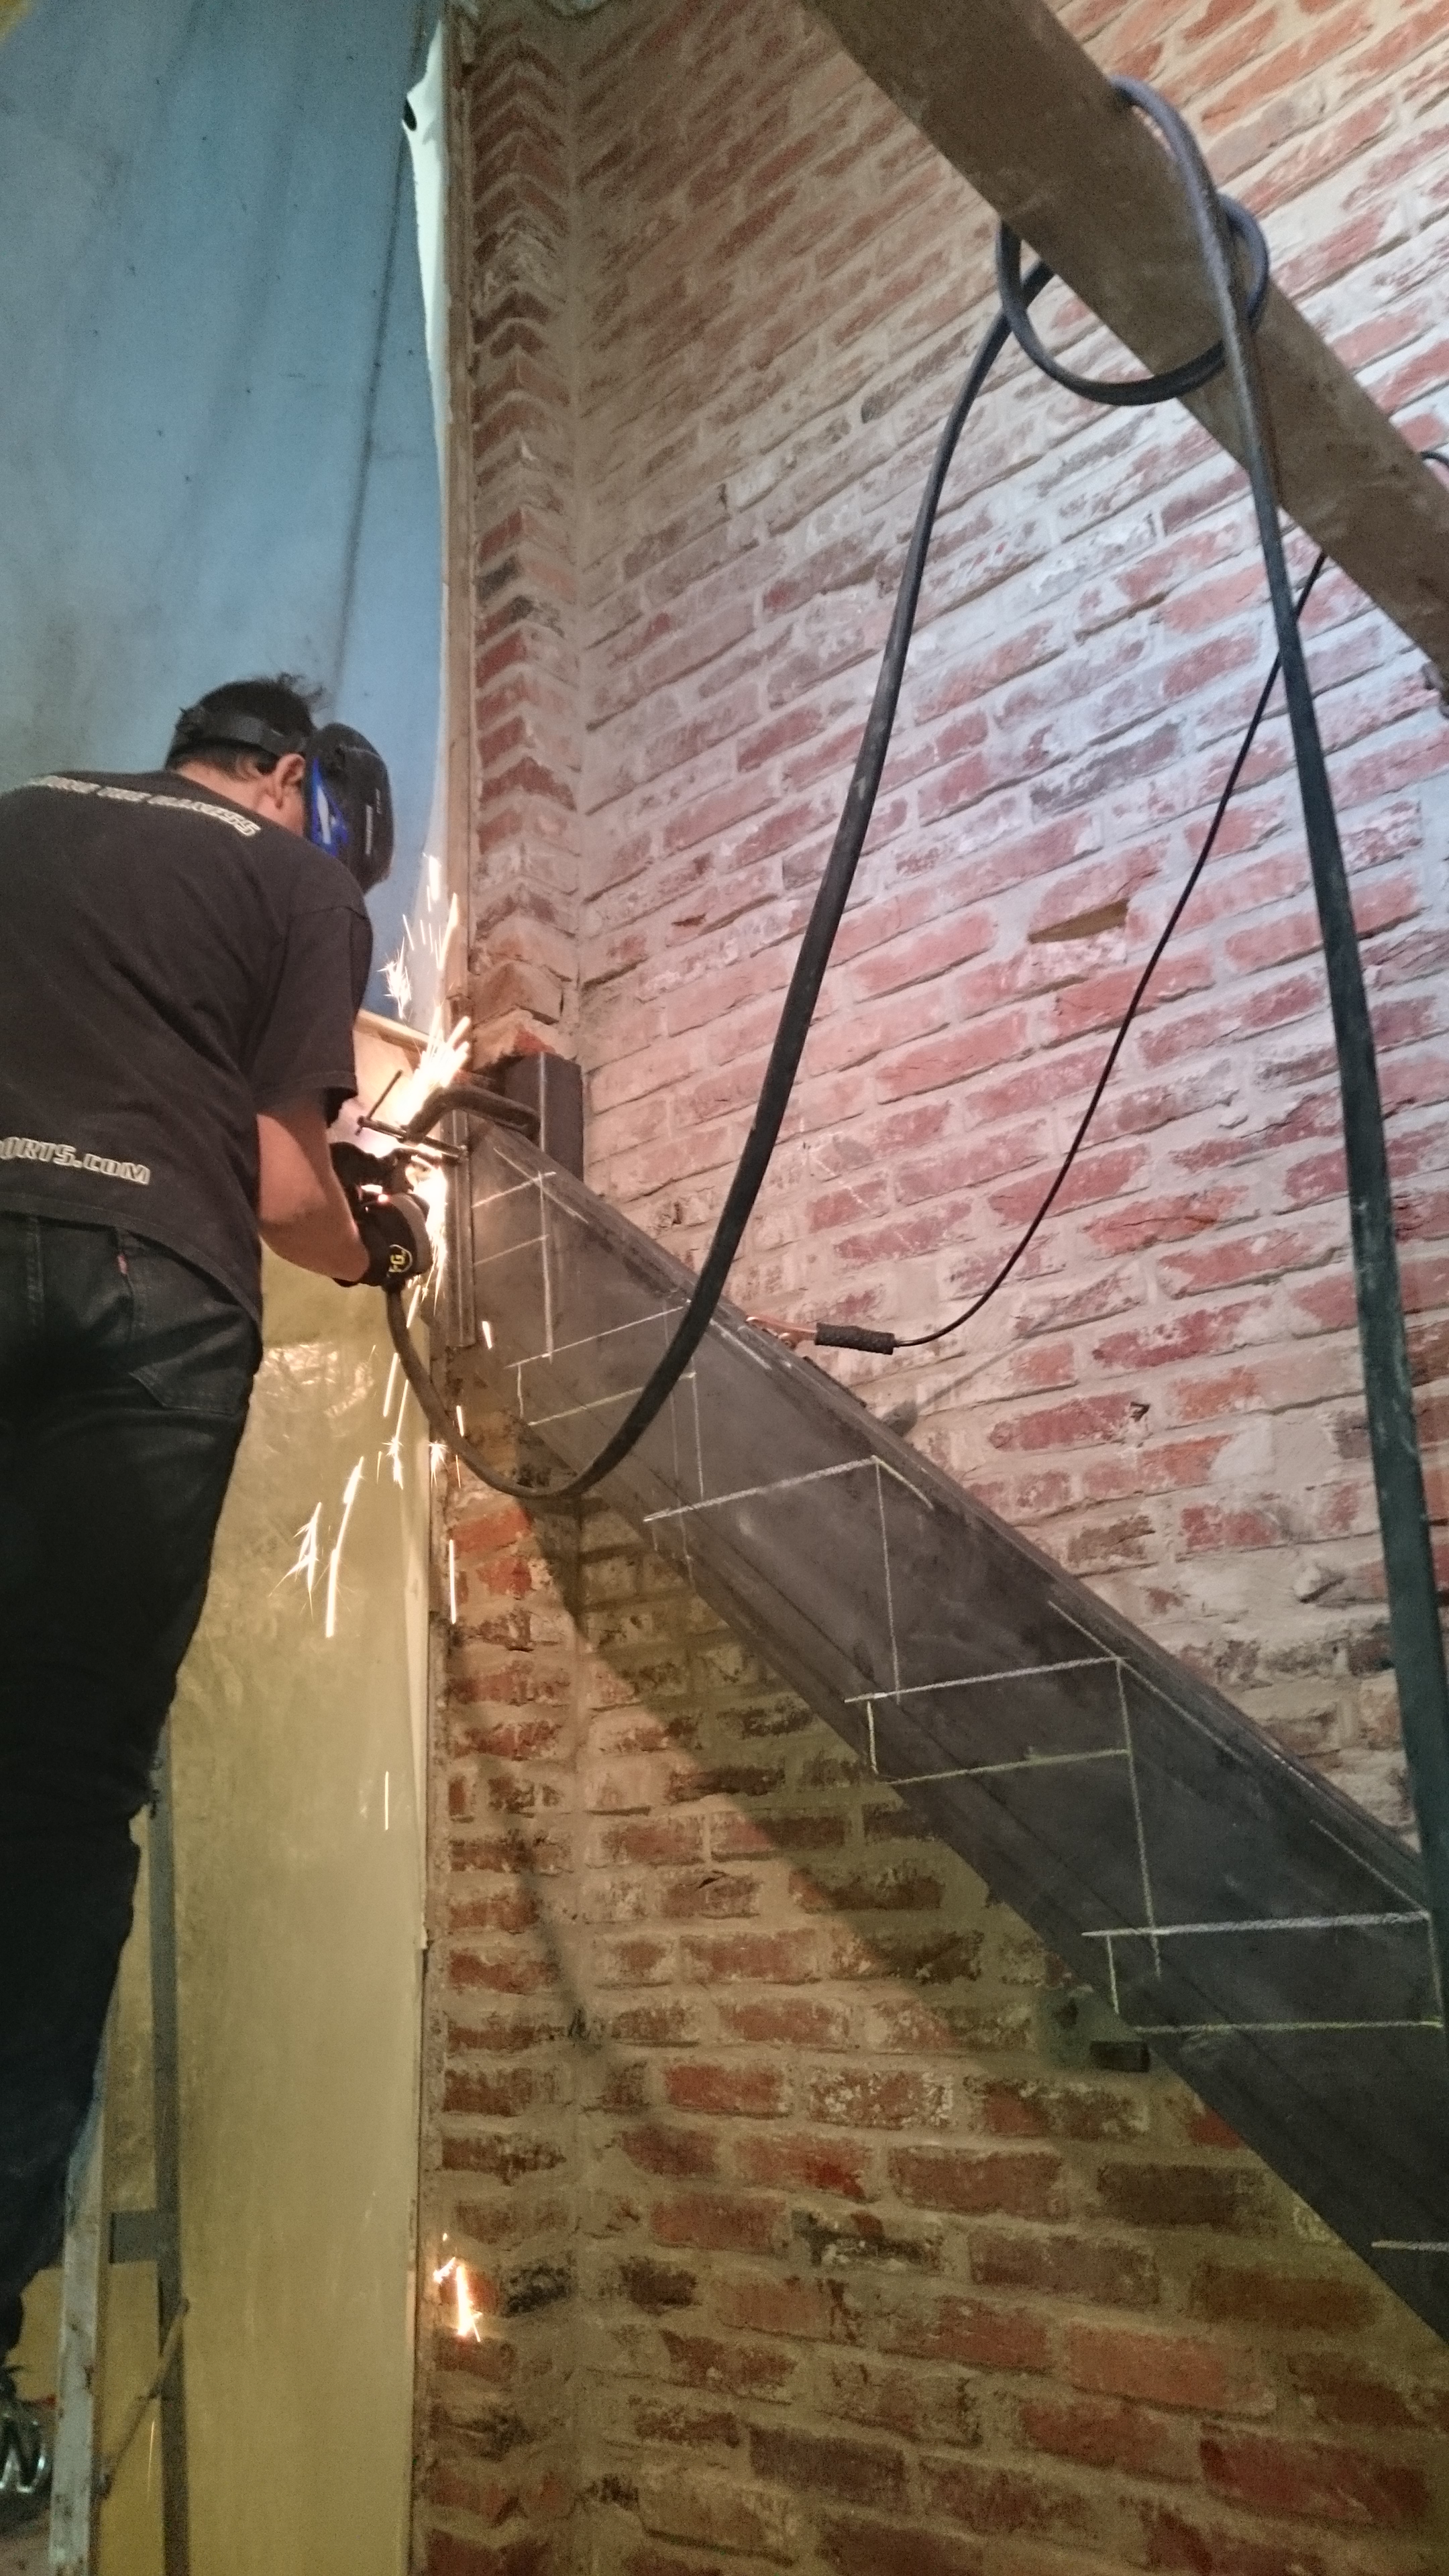
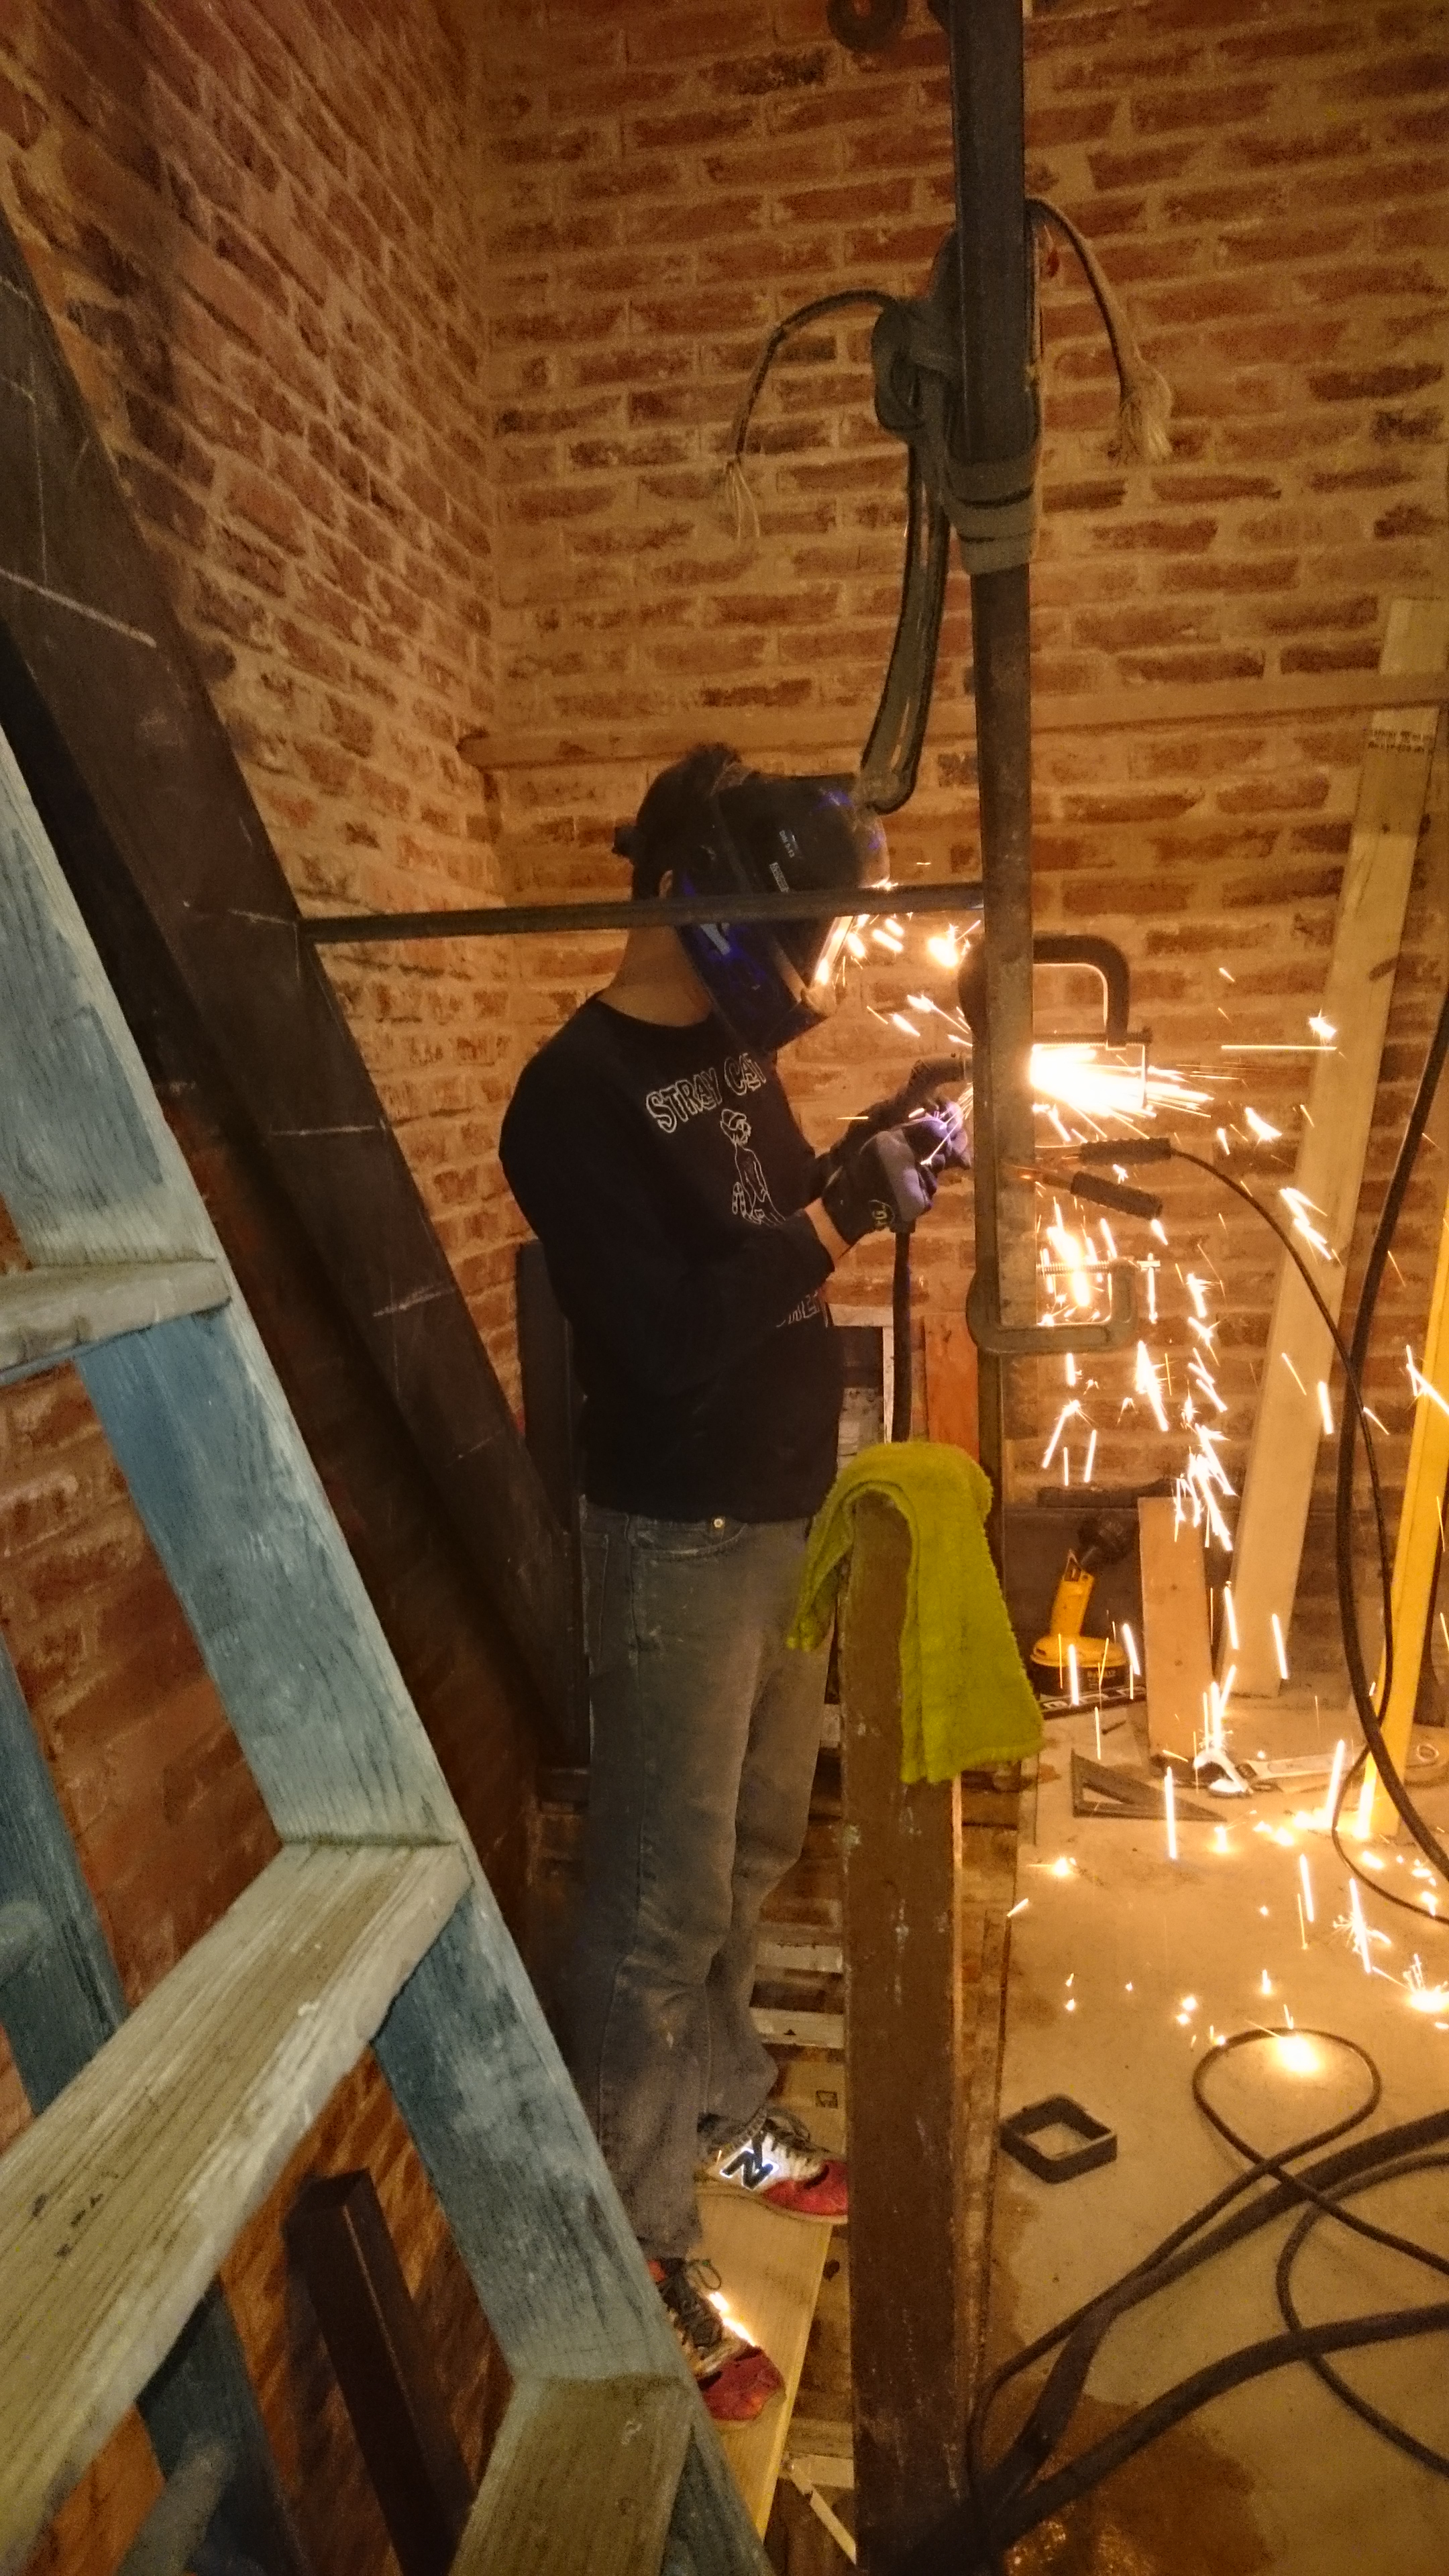
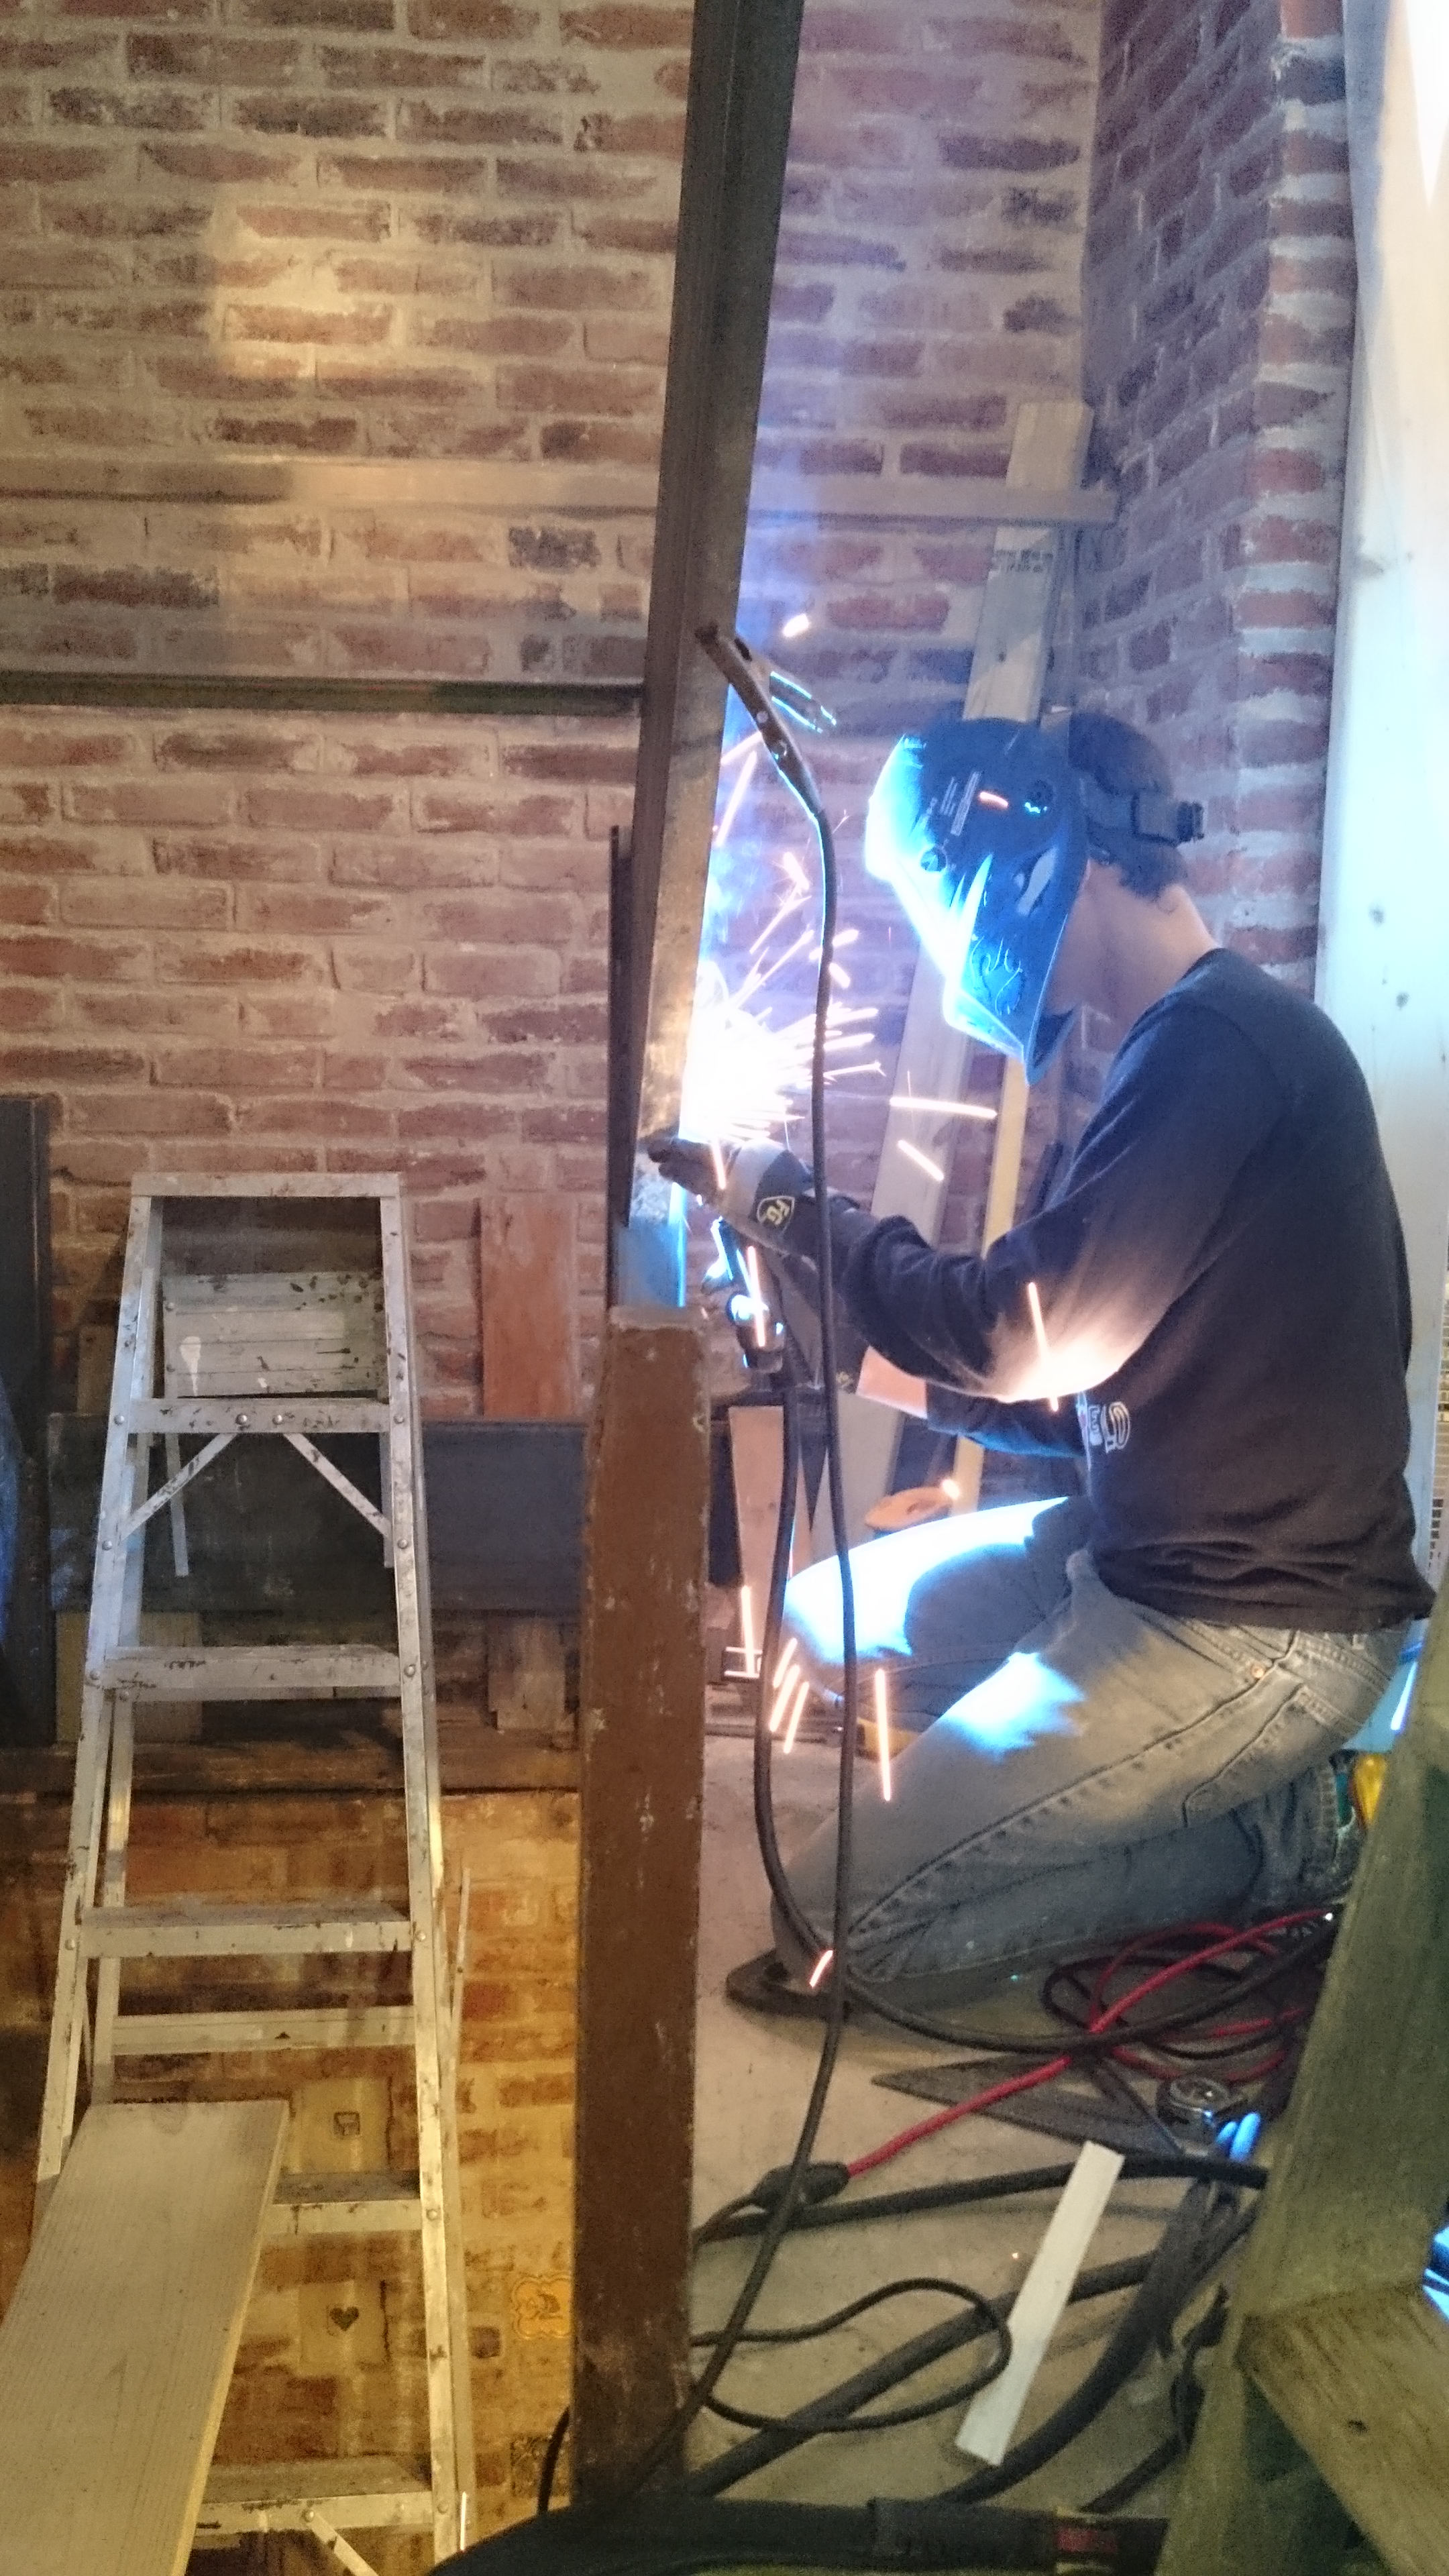
Finally, the weekend is here. Time to relax. Yeah right. Its time to build these stairs. We had previously done a test lift of the 12′ channel but it was far from being in place. We needed to a good bit of cutting and fitting before we were happy with the results. We had gotten a plasma cutter last week with the goal of saving us serious time. Rather than taking the parts down every time to cut with a dirty smelly torch, we could just pull them off the wall a few inches, put down some wet towels and cut the metal there. For most cuts and welds Siri served as the fire safety supervisor.
Turns out I can’t cut a straight line to save my life. Guides to the rescue.
We are aiming to change the geometry a little with the top stairs. Previously, the stairs were very steep, but with one long tread at the top. To fix this we tilted the stringer a little bit until finally we got an even 9″ of run to 8.5″ of rise all the way down to the turn with 1.5″ of overlap. That and a railing should make these stairs much less terrifying.
Sparks! Also chalk lines so we can have an idea where the stair treads will be.
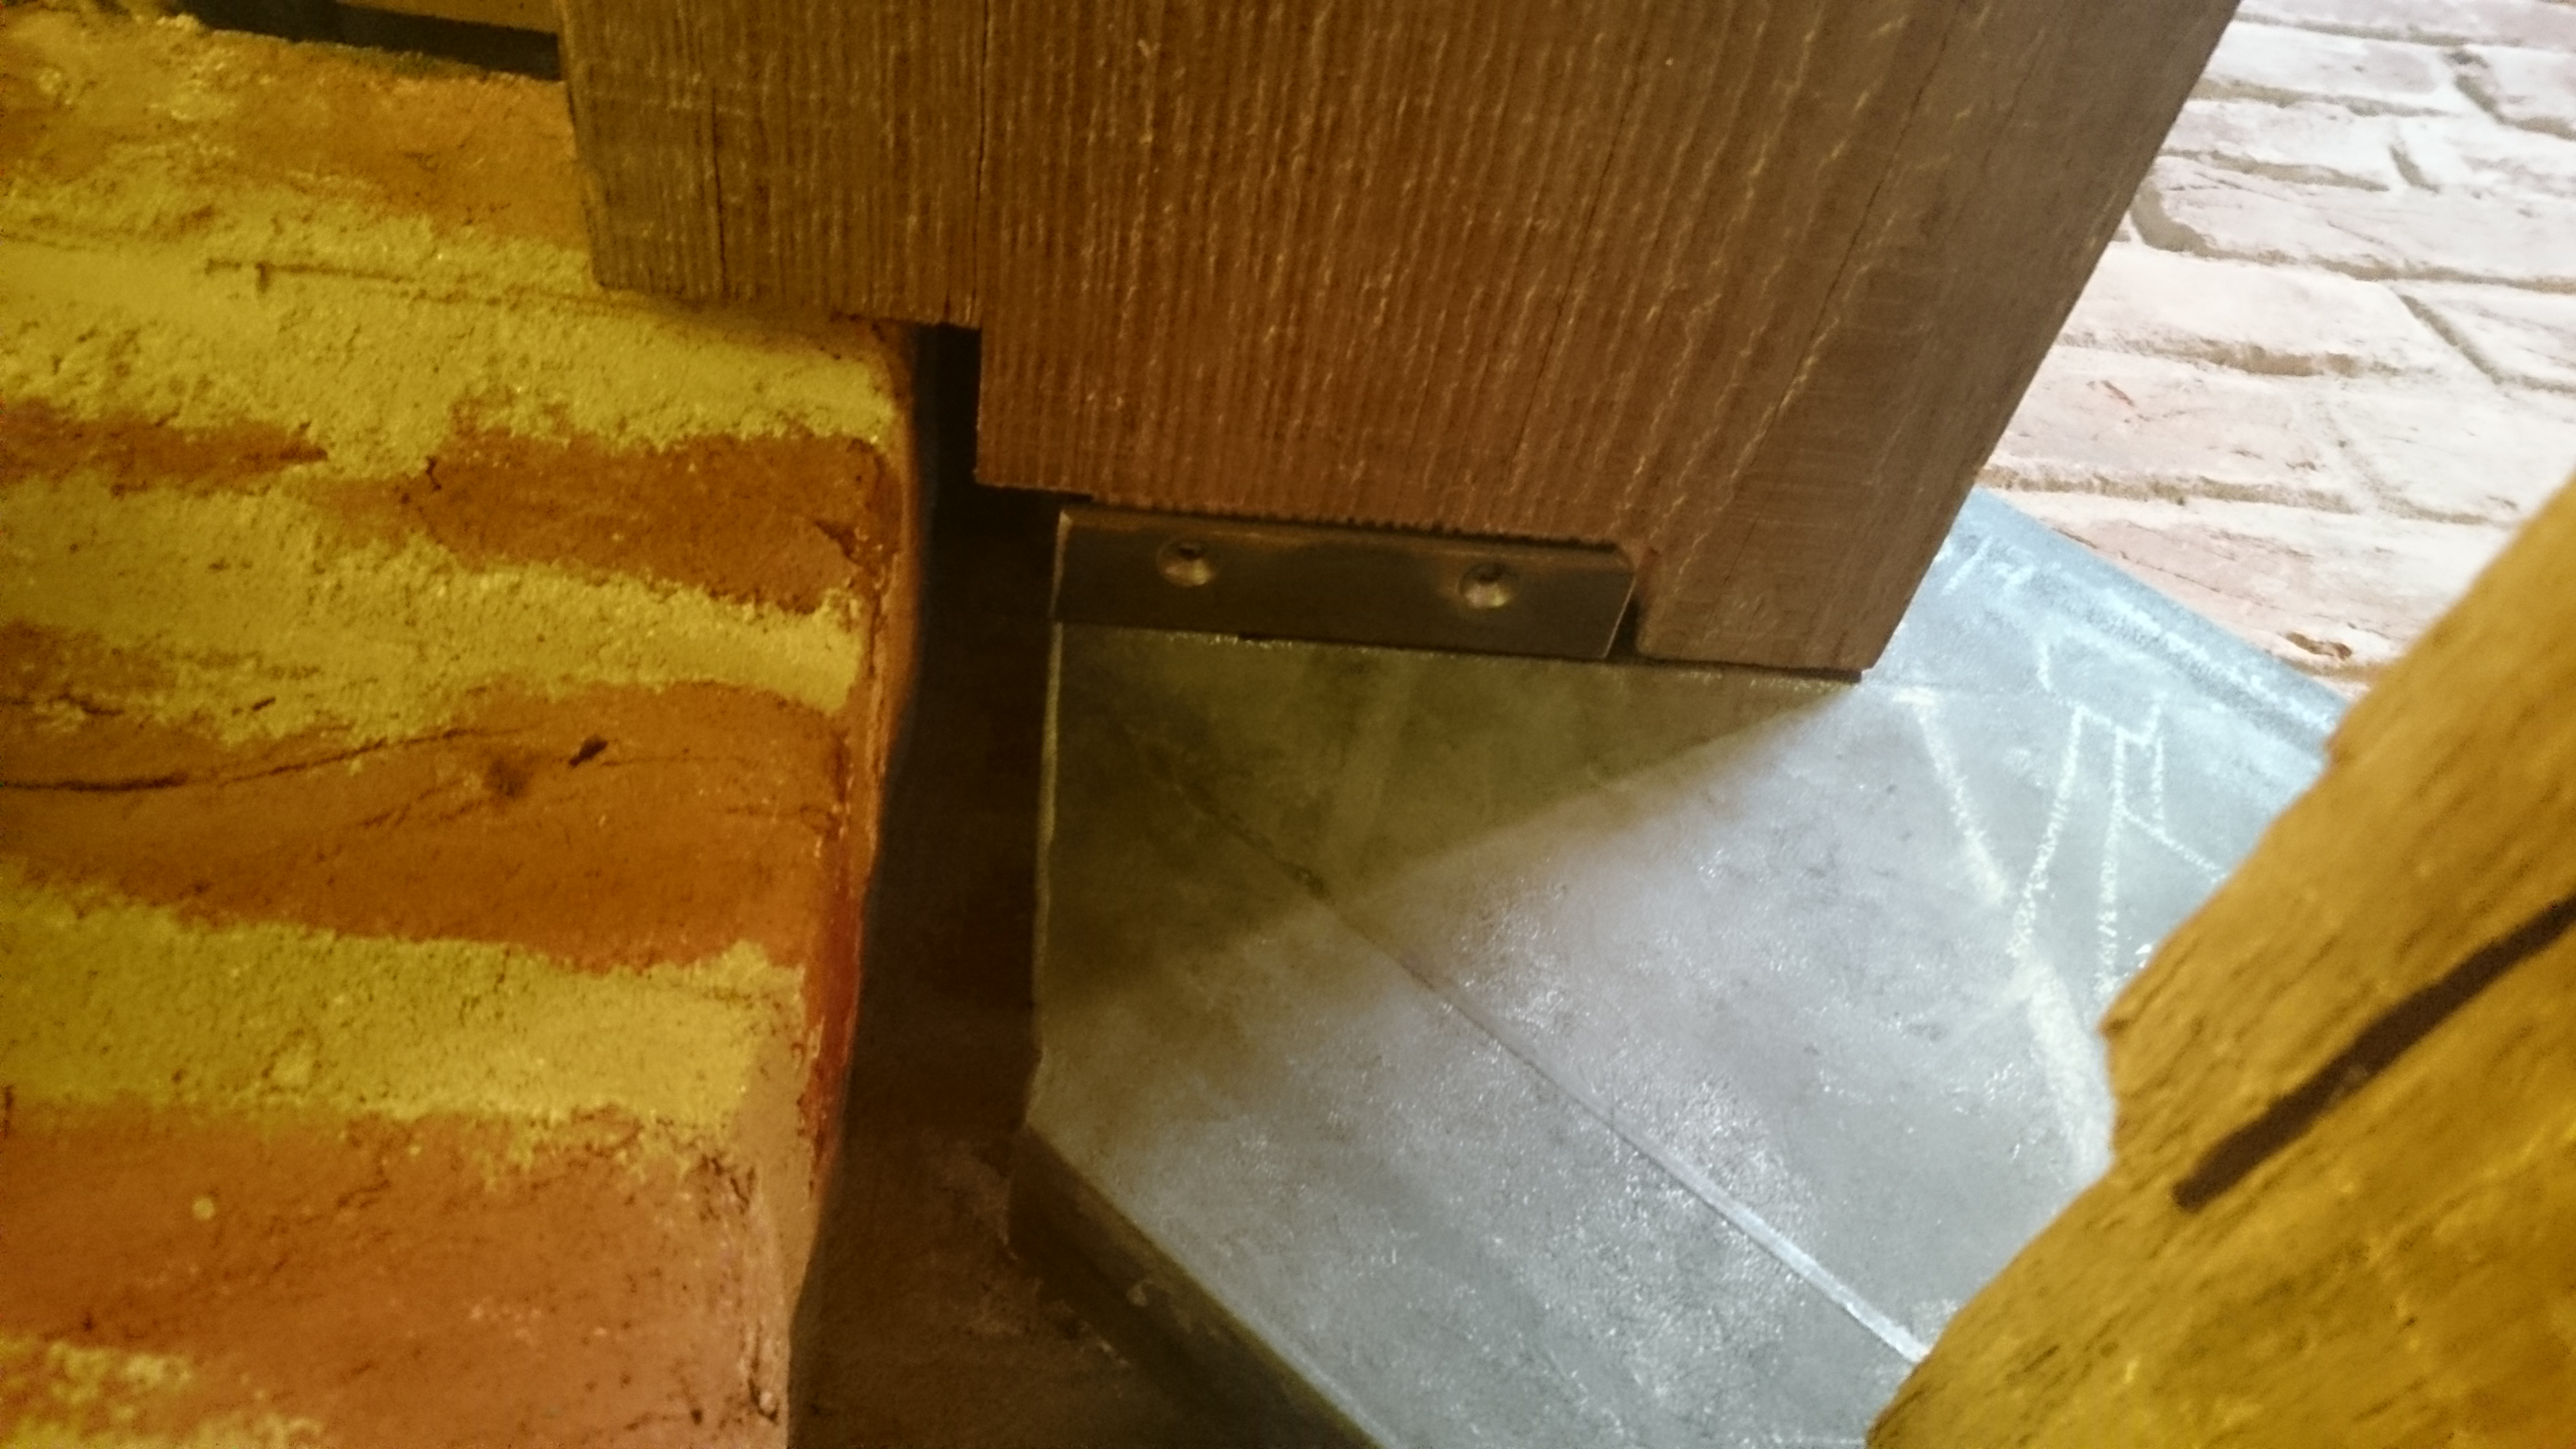
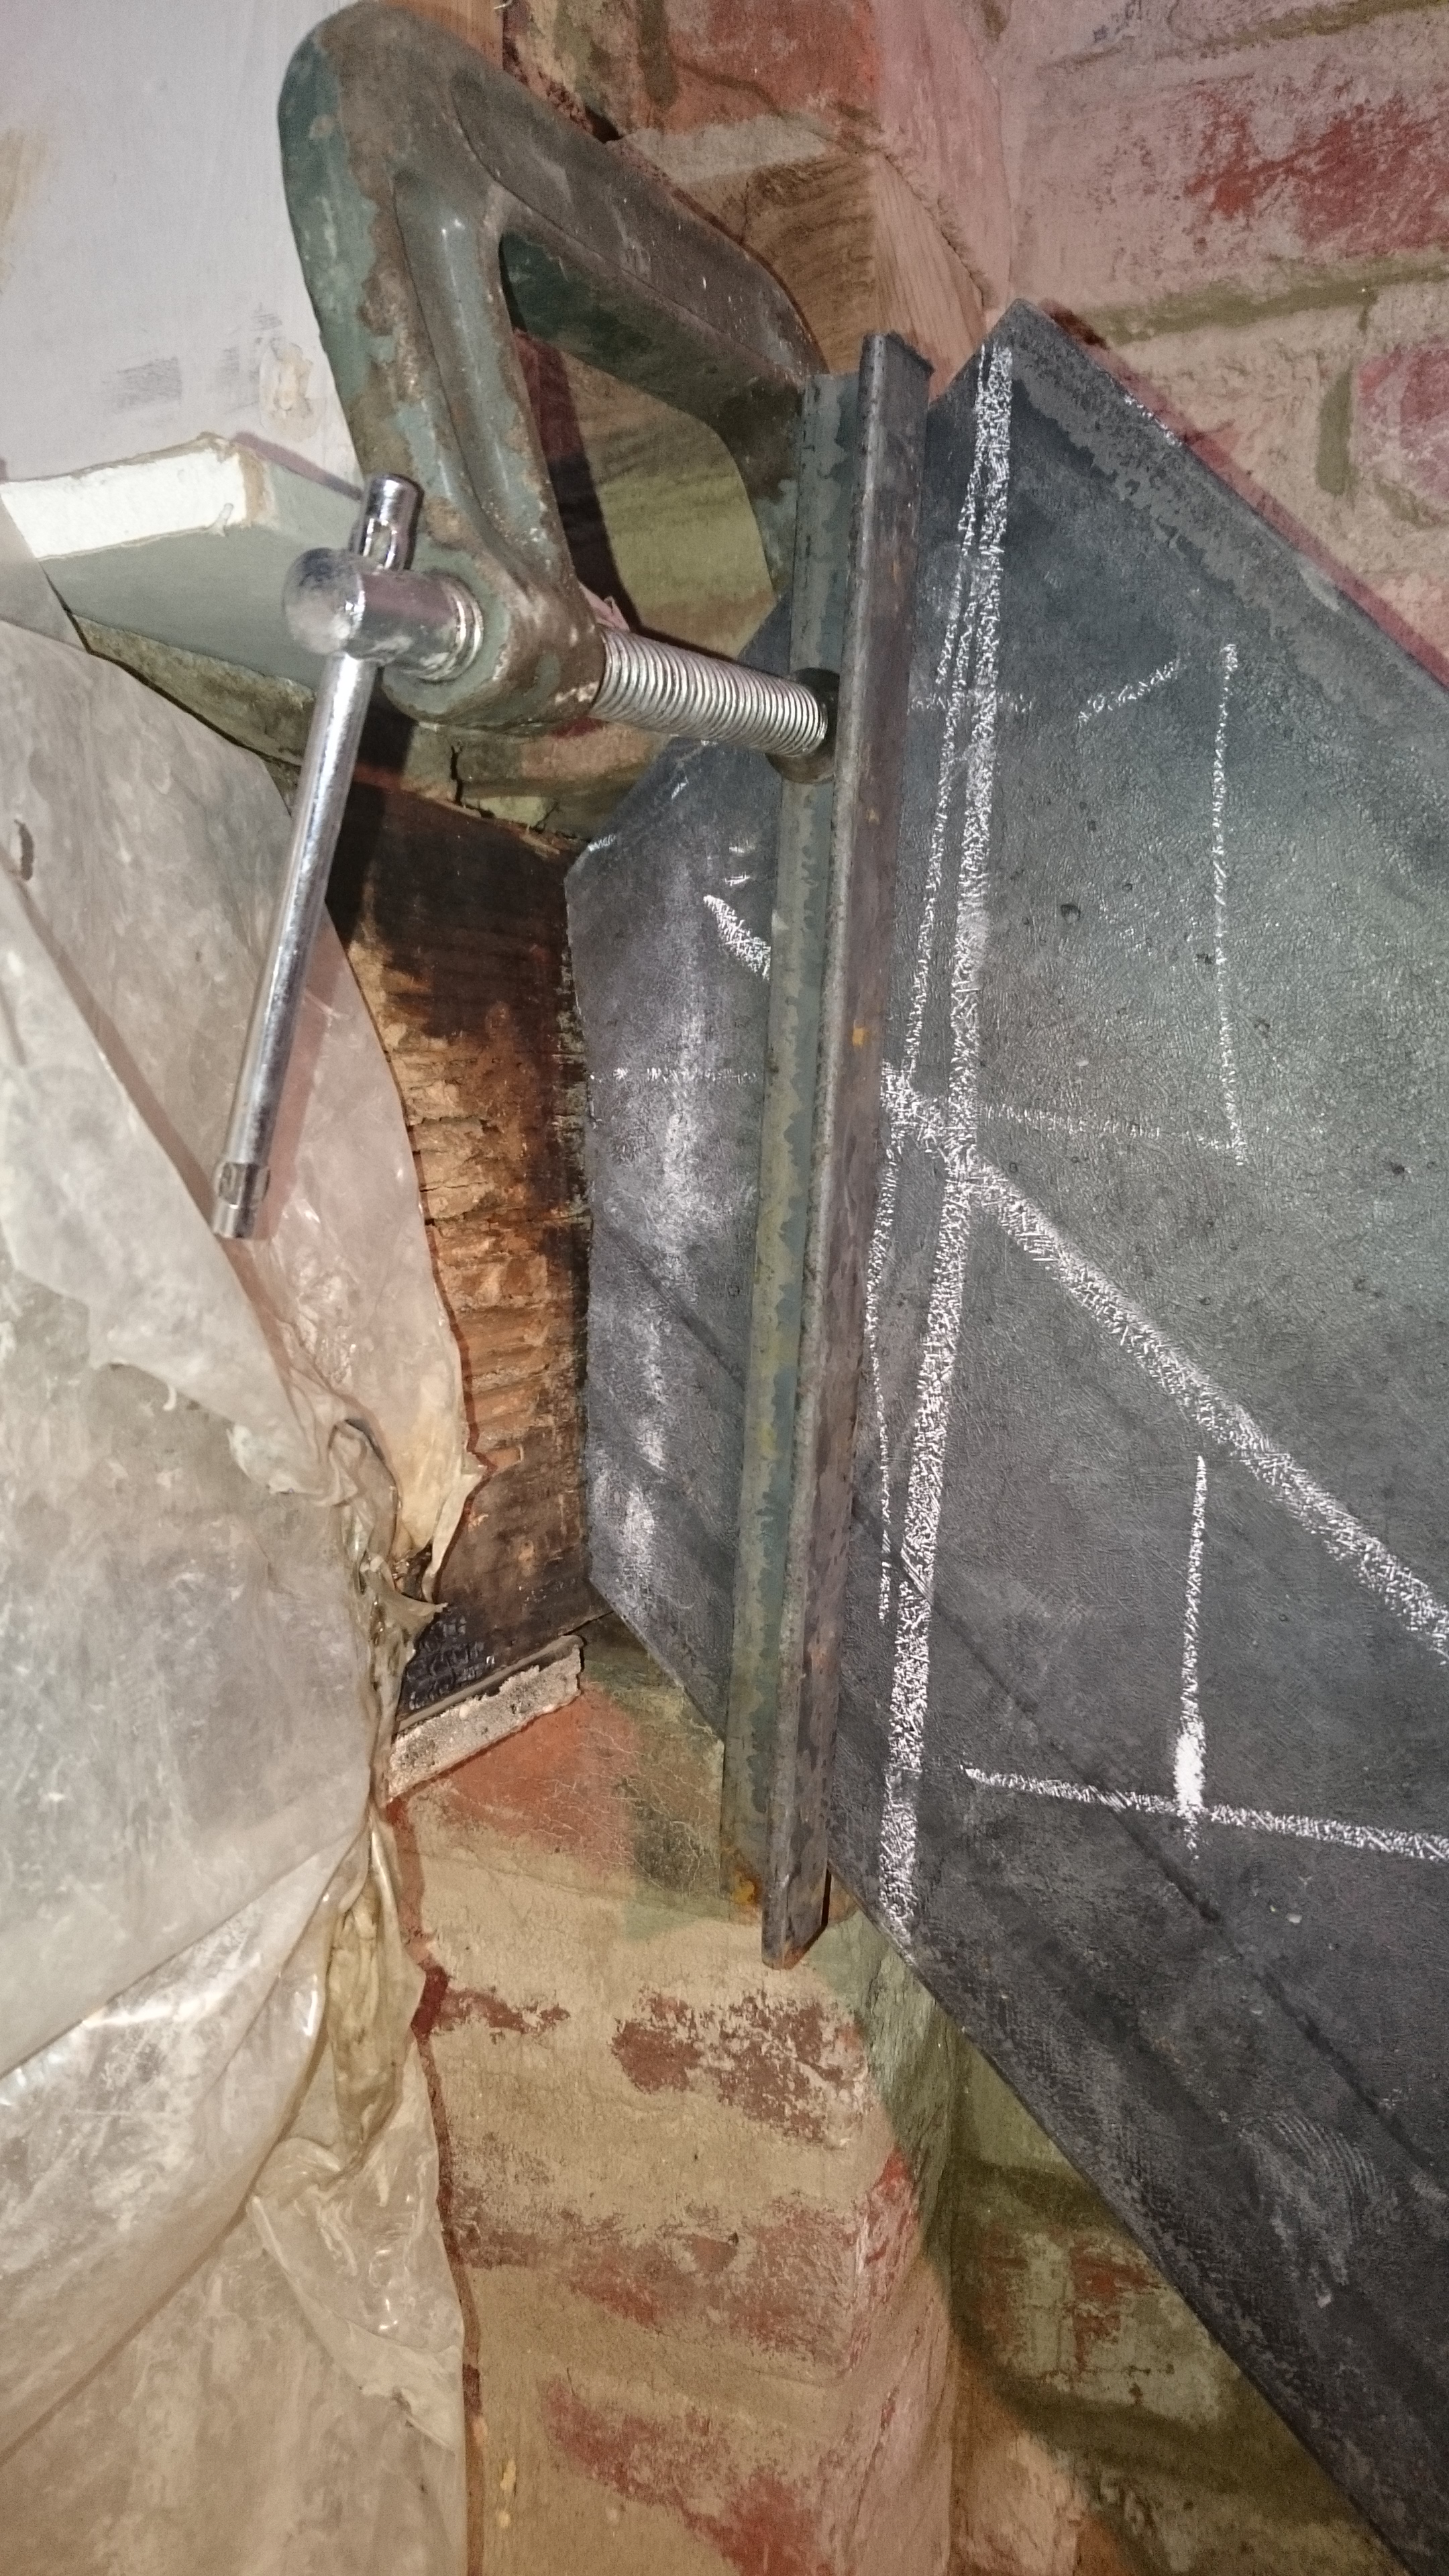
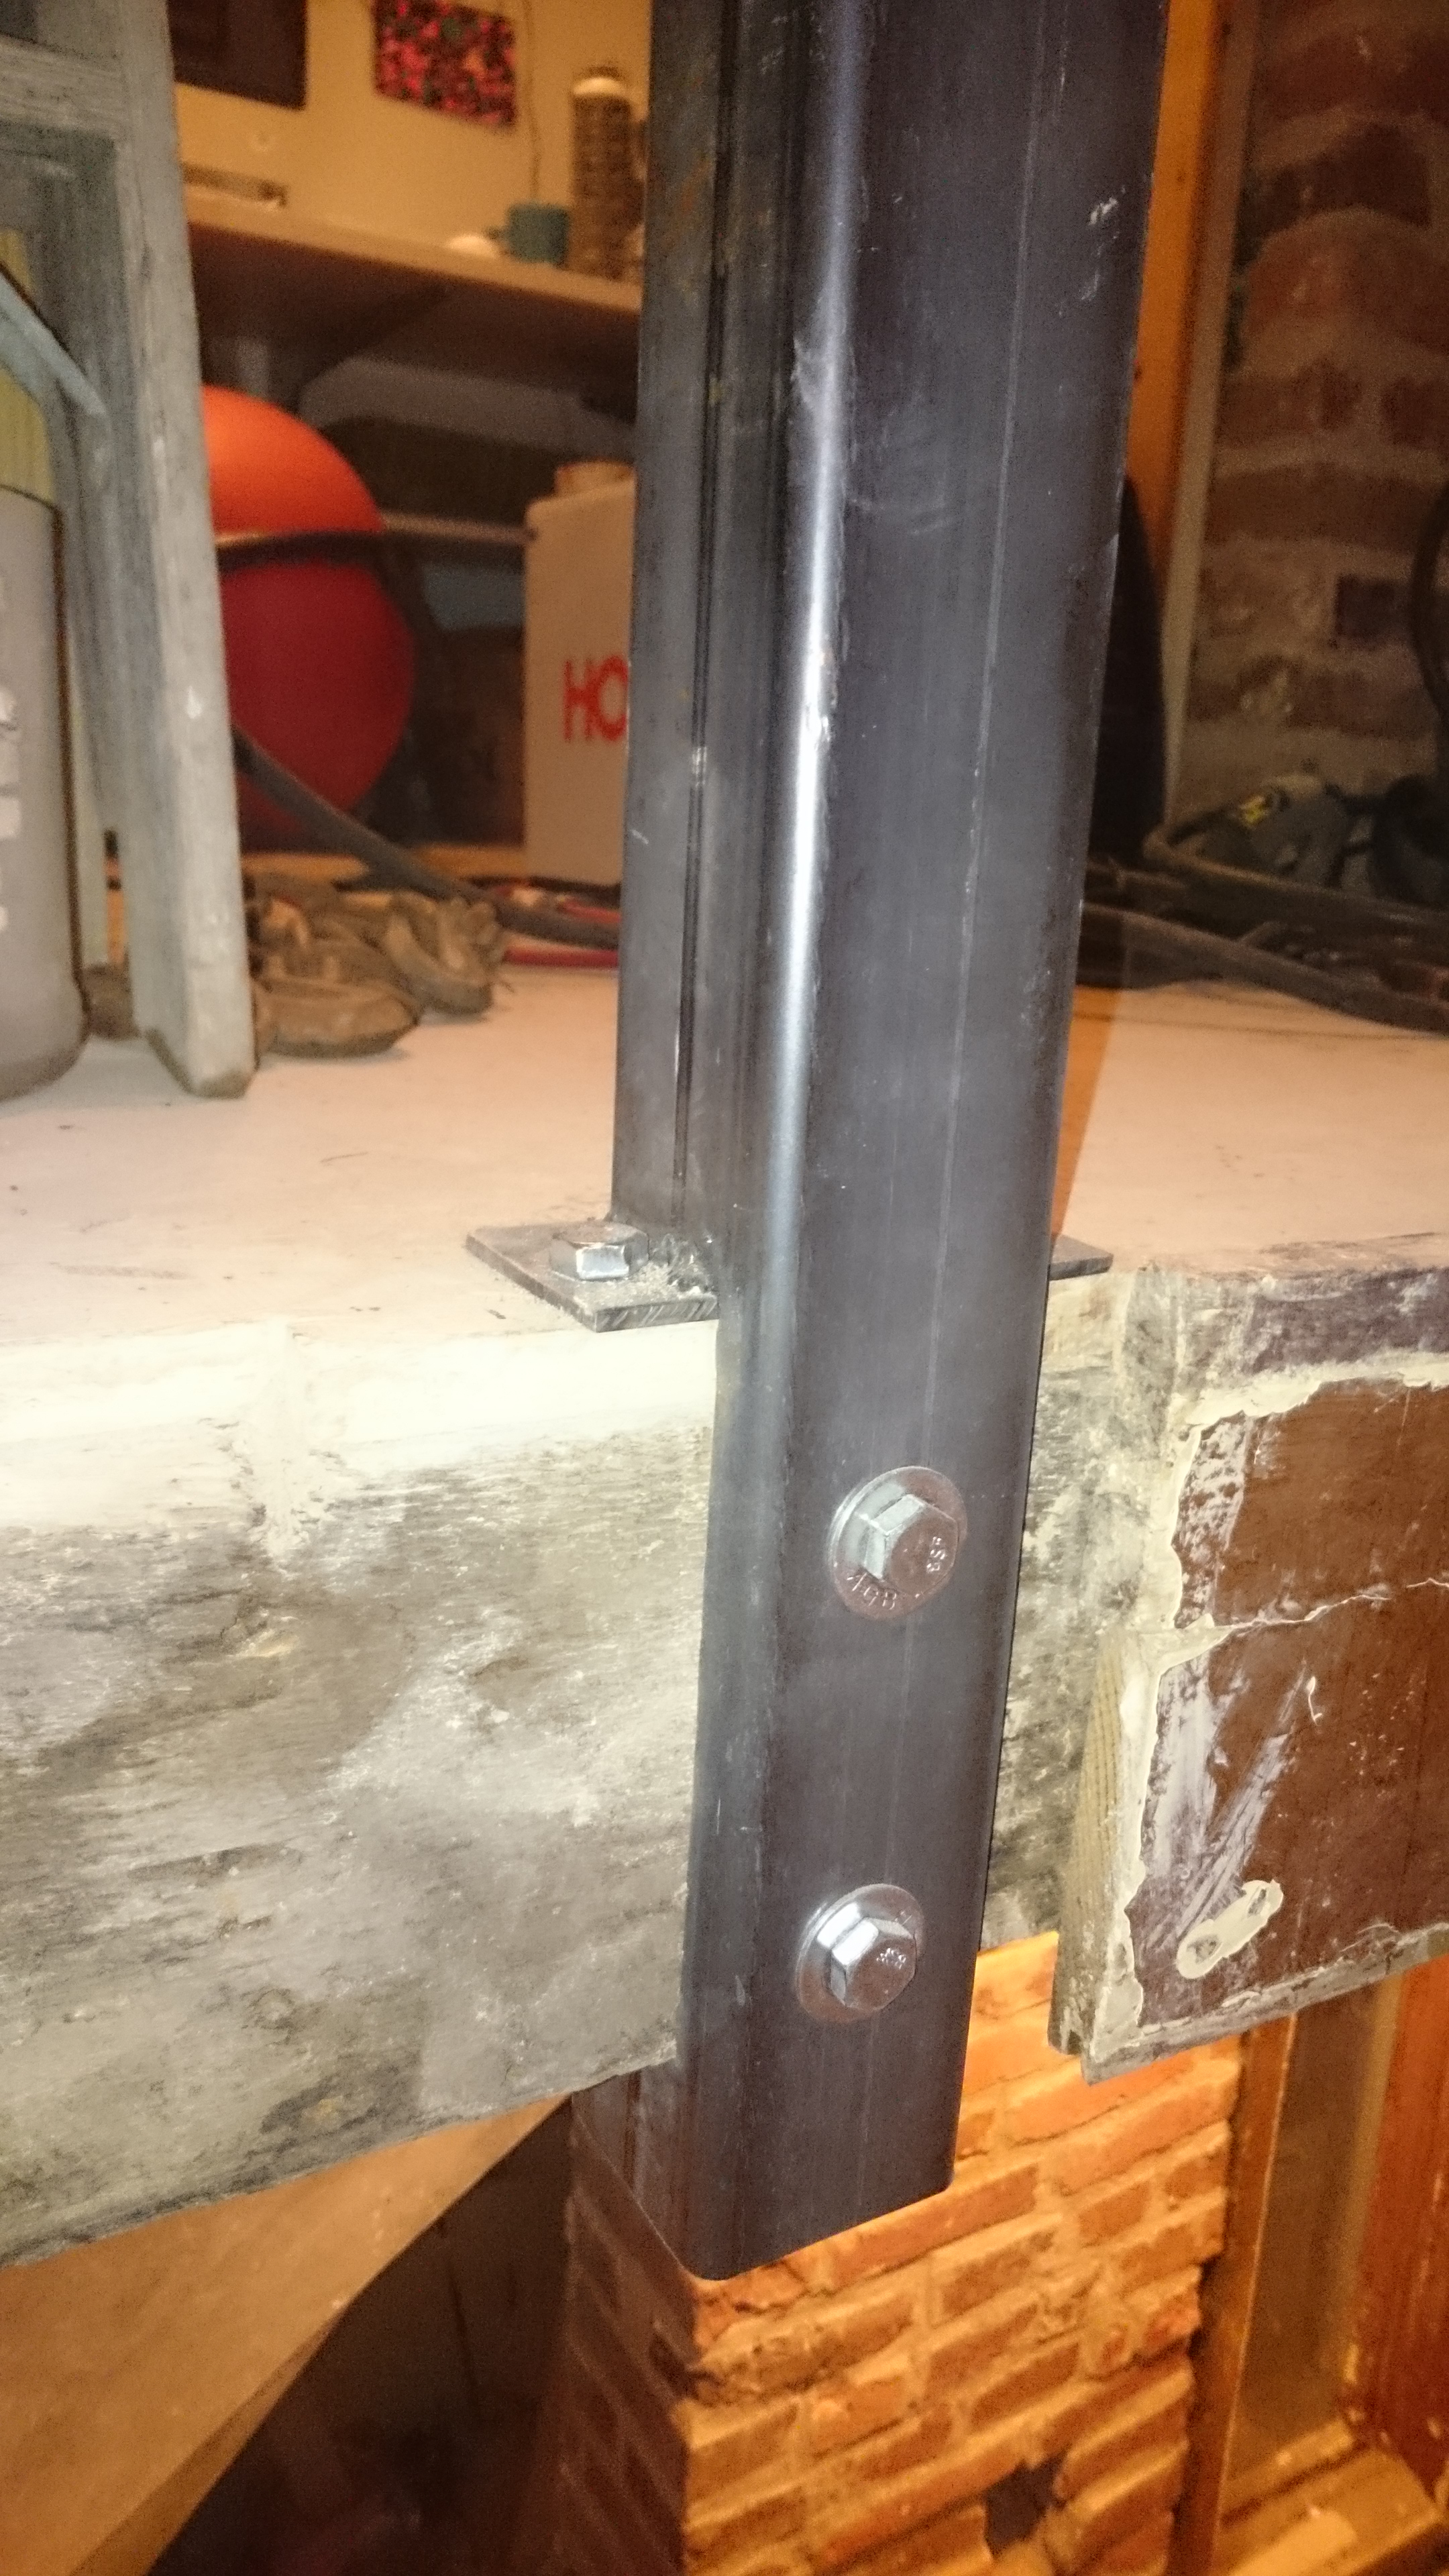
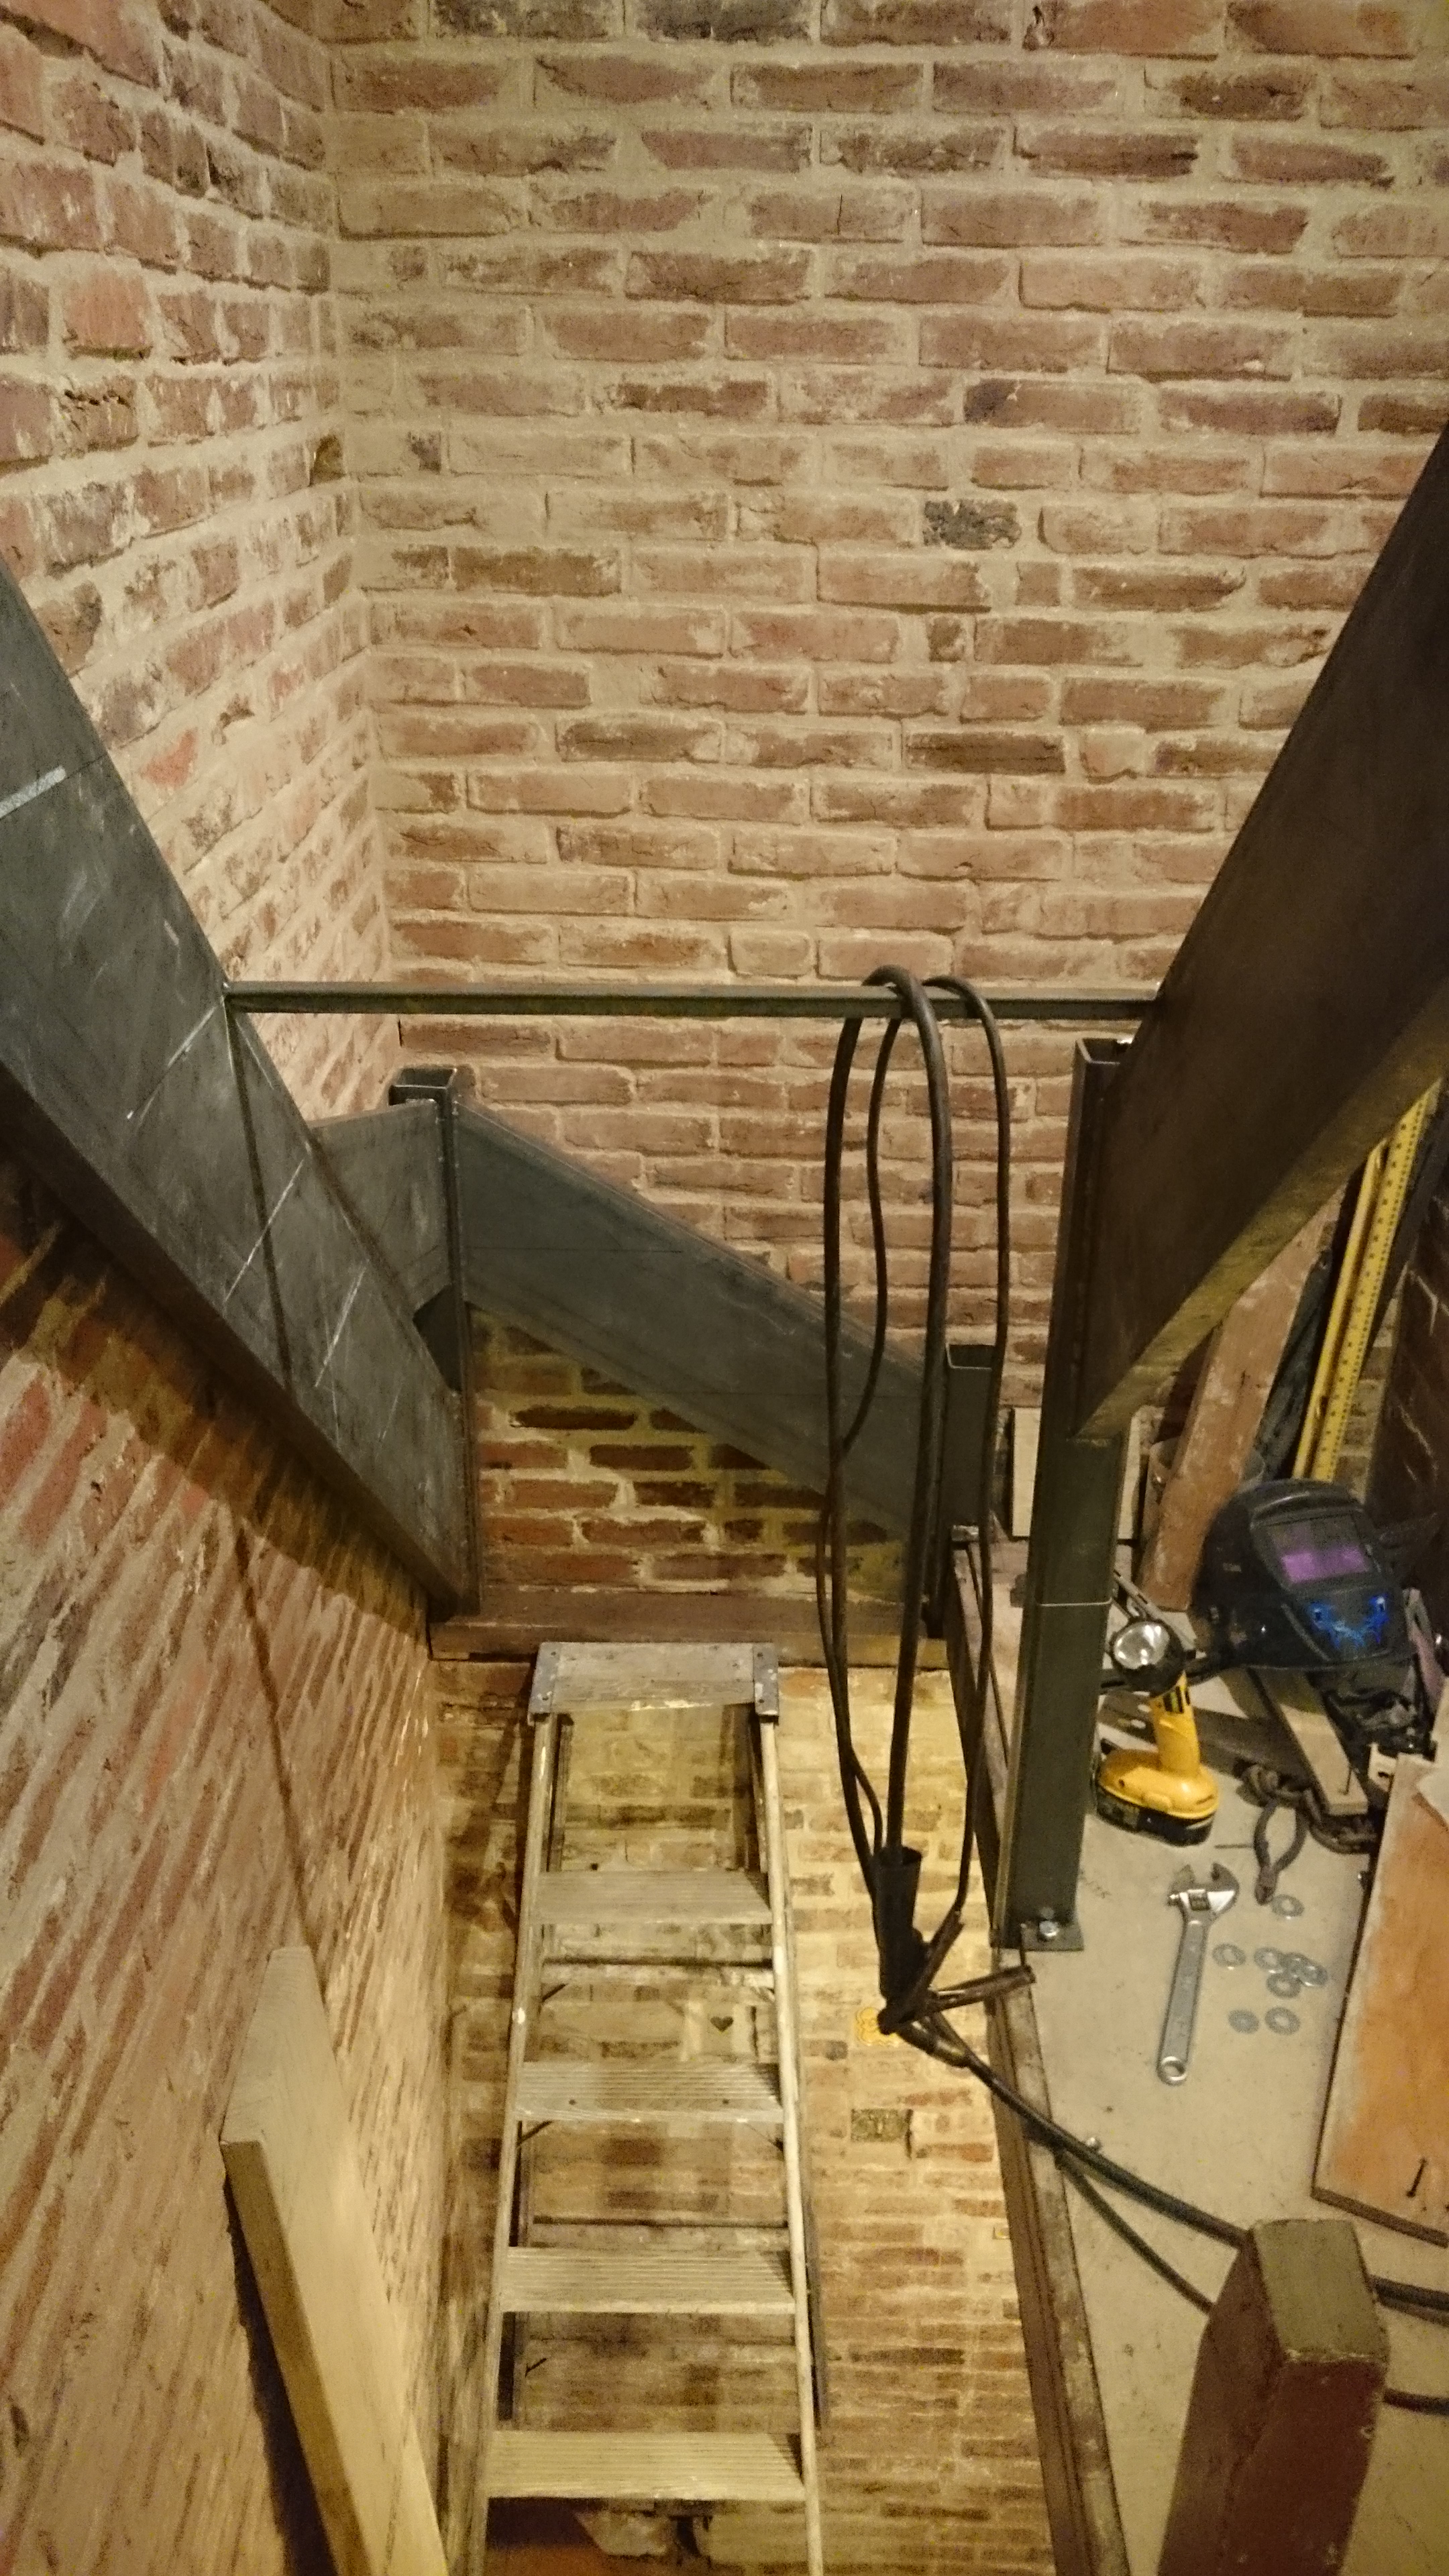
At the top we are attaching the stairs to a channel bulkhead bolted to the termite hole ridden joist. This help adds a little strength to the already reinforced joist, but mostly its just cosmetic. I cut the bolt holes with the plasma cutter which saved a bunch of time and probably a drill bit. The stringers attach to 3×3″ squares which will be used as pockets for newel posts.
The stair tread width should be 36″ for code, but being as we only have a 60″ wide area to fit the stairs, the hallway next to it, 3″ total stringers and a 3/4″ gap to the wall (aesthetic reasons), we’ve got to narrow them down to 28″. This is about the same as we had before. The treads will keep the stringers pretty solid, but just in case we’re welding in some 28″ angles to keep them from spreading. Also work great for bracing as we build.
Magnetic level has been super handy. Thanks Siri!
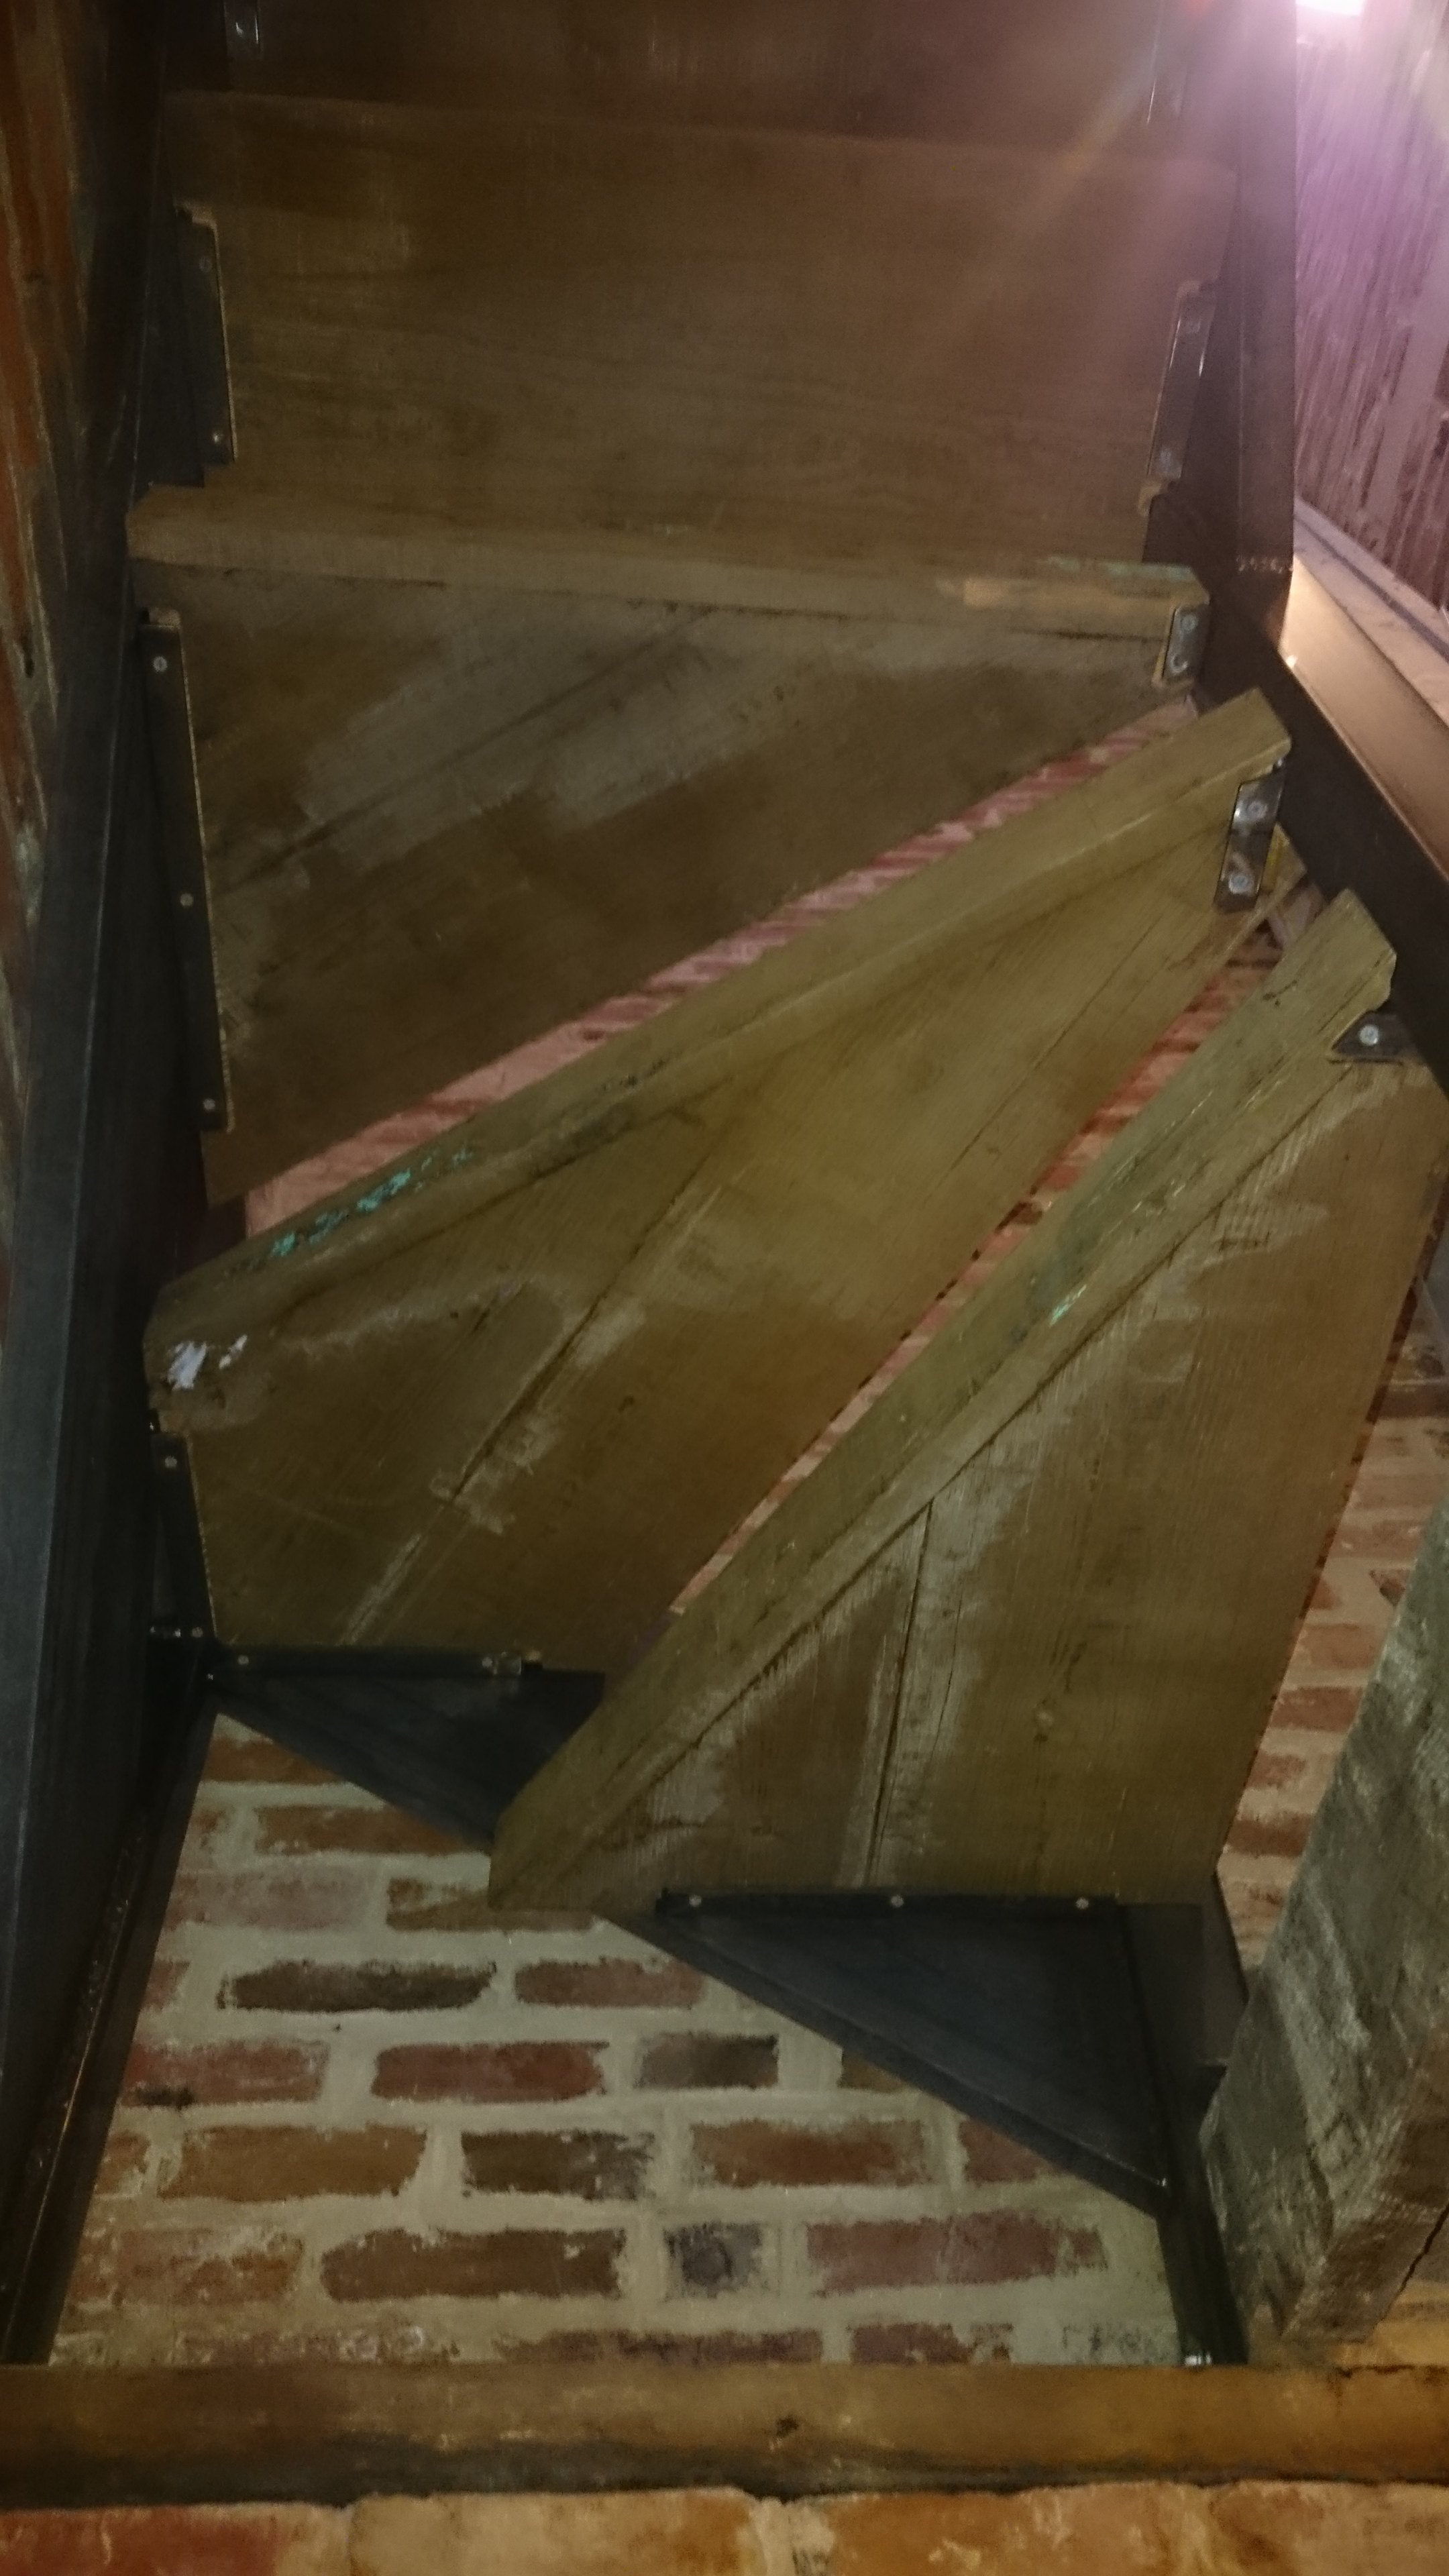
At the bottom of the stairs there is a 90 degree turn consisting of 3 stairs. Think of this as a mini spiral staircase. The center of this quarter of a spiral is a 3×3″ post. This also serves to hold up the left stringer. I wanted it in solid so I cut out all but 3/4″ from the post, through bolted it to the joist and lag bolted it from the top with a little bracket I cut from a scrap of channel. This is when the plasma cutter really started to shine. I have no idea how I’d have made this cut using other tools.
This post won’t be going anywhere.
For the left stringer, we could just copy the angle and placement of the right one. This let me pre cut the piece in the basement and lighten my load. We tacked it on up top and hinged it down until it’s angle lined up visually with the other. Made sure it was level and tacked it in to place. I wasn’t completely sure on the length though so I cut that in place once we figured out where the post needed to go.
Install post, level everything then weld.
This is how far we got all weekend. Doesn’t seem like much, but there was a whole lot of problem solving and learning that went into this first of two sets of stairs. I still need to cut 2 small pieces for the outside of the “spiral”. This section is a different angle than the straight section. After that we’re at a standstill on the stairs. I will need to weld on angles to mount the treads to, but until I plane down the wood, I won’t know what that thickness will be. Can’t paint them until I have the brackets welded on.
Update:
One last photo of the bottom which will support the outside of the quarter spiral (3 steps in 90 degrees).
Now ter iz no mor way to cumfy bed top. bed top is in gezt room. i slep ter. now i cannot getz ter. evryon iz takin abowt stayrs. iz tey te stuff to get to upstars? i think so. if i am rite, i smart!!!!!! i smart!!!!!!!!!!!!!! so i be smartest thing in houz!!!!!!!!!!!!!!!!!!!! but smartest thing shudnt be traped. but i iz traped!! tis is not fare!!!!!!!! so tell ownerz tis is not fare!!!! tell!!!!!!!!!!! becuz I HAZ HOUZ!!!!!!!!!!!!!!!!!!!!!